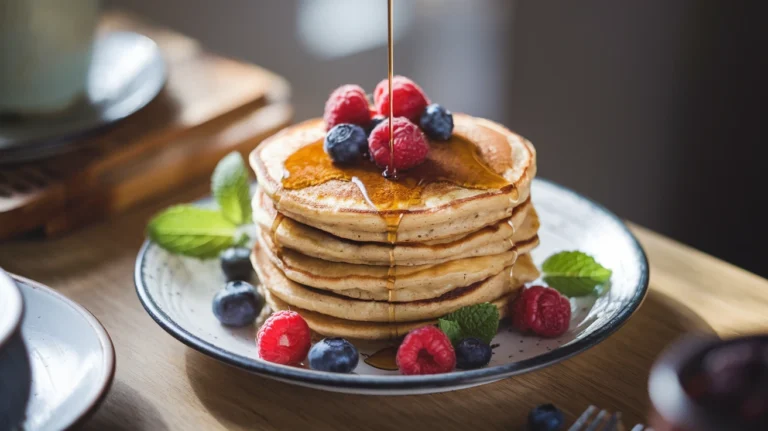
These tender, spiced apple cinnamon pancakes bring the cozy warmth of autumn to your breakfast table any time of year. With chunks of sweet apples and aromatic cinnamon swirled throughout fluffy buttermilk pancakes, this recipe creates the perfect balance of comfort and indulgence. Each bite delivers soft apple pieces and warm spice notes that make ordinary mornings feel special.
SERVES: 4 | PREP: 15 MIN | COOK: 20 MIN | TOTAL: 35 MIN
Ingredients
Dry Ingredients
| Ingredient | Amount |
|---|---|
| All-purpose flour | 2 cups |
| Granulated sugar | 3 tablespoons |
| Baking powder | 2 teaspoons |
| Ground cinnamon | 1½ teaspoons |
| Salt | ½ teaspoon |
| Nutmeg | ¼ teaspoon |
Wet Ingredients
| Ingredient | Amount |
|---|---|
| Buttermilk | 1¾ cups |
| Large eggs | 2 |
| Melted butter | 4 tablespoons |
| Vanilla extract | 1 teaspoon |
Apple Mixture
| Ingredient | Amount |
|---|---|
| Medium apples, diced | 2 (about 2 cups) |
| Brown sugar | 2 tablespoons |
| Ground cinnamon | ½ teaspoon |
| Butter for cooking | As needed |
Step-by-Step Instructions
Phase 1: Prepare the Apples (5 minutes)
Step 1: Wash and core the apples, leaving the skin on for extra nutrition and texture. Cut into small ¼-inch cubes for even distribution throughout your apple cinnamon pancakes.
Step 2: In a medium bowl, toss the diced apples with brown sugar and ½ teaspoon cinnamon. This pre-seasoning step ensures the apples release their natural juices and create pockets of concentrated flavor. Let sit while preparing the batter.
Phase 2: Mix the Batter (8 minutes)
Step 3: In a large mixing bowl, whisk together flour, granulated sugar, baking powder, 1½ teaspoons cinnamon, salt, and nutmeg. Important: Don’t skip the nutmeg—it enhances the apple flavor significantly.
Step 4: Create a well in the center of the dry ingredients. This prevents overmixing when you add the wet ingredients.
Step 5: In a separate bowl, whisk buttermilk and eggs until completely smooth. The buttermilk’s acidity will react with the baking powder for extra fluffy pancakes.
Step 6: Add melted butter and vanilla to the buttermilk mixture. Safety tip: Make sure the butter isn’t too hot, or it will scramble the eggs.
Step 7: Pour the wet ingredients into the well of dry ingredients. Using a wooden spoon or spatula, gently fold together until just combined. The batter should look lumpy—this is perfect for tender apple cinnamon pancakes.
Step 8: Fold in the seasoned apple pieces along with any accumulated juices. Don’t overmix; a few flour streaks are fine.
Phase 3: Cook the Pancakes (20 minutes)
Step 9: Preheat a large non-stick skillet or griddle over medium heat. Test readiness by sprinkling a few drops of water—they should sizzle and evaporate within 2-3 seconds.
Step 10: Add 1 teaspoon of butter to the pan and let it melt completely. Tilt the pan to coat evenly.
Step 11: Using a ¼-cup measuring cup, pour batter onto the heated surface. Leave 2 inches between each pancake for easy flipping.
Step 12: Cook for 2-3 minutes until the edges look set and bubbles form across the surface. Visual cue: The bubbles should pop and leave holes that don’t immediately fill back in.
Step 13: Carefully flip each pancake using a wide spatula. Cook for an additional 1-2 minutes until golden brown underneath. Temperature check: The internal temperature should reach 190°F.
Step 14: Transfer finished pancakes to a warm plate and cover with a clean kitchen towel to keep them soft and warm.
Step 15: Add fresh butter to the pan between batches to prevent sticking and maintain that golden color.
Step 16: Repeat the cooking process until all batter is used, adjusting heat as needed to prevent burning.
Chef’s Notes
Perfect Apple Selection: Choose firm apples like Honeycrisp, Granny Smith, or Gala. These varieties hold their shape during cooking and provide the ideal sweet-tart balance for apple cinnamon pancakes.
Buttermilk Substitute: No buttermilk? Add 1 tablespoon white vinegar to regular milk and let sit for 5 minutes. This creates the same tangy flavor and chemical reaction needed for fluffy texture.
Temperature Control: Keep your heat at medium throughout cooking. Too high heat browns the outside before the center cooks through, especially important with apple pieces that need time to warm.
Make-Ahead Tip: Mix the dry ingredients the night before and store in an airtight container. This saves time during busy mornings and ensures even distribution of spices.
Nutrition Information (Per Serving)
- Calories: 385
- Protein: 12g
- Carbohydrates: 58g
- Fat: 12g
- Fiber: 4g
- Sugar: 22g
Creative Variations
Caramel Apple Pancakes: Drizzle warm caramel sauce between layers and add chopped pecans for a dessert-like twist that rivals any restaurant version.
Maple Walnut Apple: Replace half the cinnamon with maple extract and fold in toasted walnuts. This combination pairs beautifully with the warm spices, similar to the creative flavors you’ll find in our green pistachio pudding pancakes.
Apple Pie Pancakes: Add a pinch of ginger and cardamom to the batter, then top with a crumb mixture of butter, brown sugar, and oats for authentic pie flavor.
Chocolate Chip Apple: Fold in ½ cup mini chocolate chips along with the apples. The combination creates an indulgent breakfast that kids absolutely love, much like our popular Oreo pancake mix recipe.
Storage & Reheating
Refrigerator Storage: Store leftover apple cinnamon pancakes in an airtight container for up to 3 days. Place parchment paper between layers to prevent sticking.
Freezer Method: Wrap individual pancakes in plastic wrap, then store in freezer bags for up to 2 months. This method prevents freezer burn and makes single-serving portions easy.
Reheating Instructions: For best results, reheat in a toaster or toaster oven until warmed through and slightly crispy on the outside. Microwave reheating works but creates a softer texture.
Pro Tip: Reheat frozen pancakes directly from the freezer—no thawing needed. Add 30 seconds to your normal reheating time.
Troubleshooting Guide
Dense, Heavy Pancakes: Overmixing develops gluten, creating tough texture. Mix only until ingredients are barely combined—lumps are your friend in pancake batter.
Apples Sink to Bottom: Toss diced apples in a tablespoon of flour before folding into batter. This light coating helps suspend them evenly throughout each apple cinnamon pancake.
Pancakes Fall Apart: Your batter may be too thin. Add 2-3 tablespoons of flour and gently fold in. The consistency should be thick but still pourable.
Burning on Outside, Raw Inside: Lower your heat to medium-low and cook longer on each side. Apple pieces need extra time to heat through completely.
Bland Flavor: Increase the cinnamon by ½ teaspoon and add a pinch of vanilla extract to the apple mixture. Fresh spices make a significant difference in taste.
Equipment Essentials
- Large non-stick skillet or griddle – Even heat distribution prevents hot spots
- ¼-cup measuring cup – Ensures uniform pancake size
- Wide spatula – Makes flipping easier without breaking
- Medium mixing bowls – Separate bowls prevent overmixing
- Whisk – Creates smooth, lump-free wet ingredients
- Sharp knife – Clean apple cuts cook evenly
Shopping List
Dairy Section
- Buttermilk (1¾ cups needed)
- Butter (½ cup total)
- Large eggs (2 needed)
Produce Section
- Fresh apples, medium size (2 needed)
Pantry/Baking Aisle
- All-purpose flour
- Granulated sugar
- Brown sugar
- Baking powder
- Ground cinnamon
- Nutmeg
- Salt
- Vanilla extract
Success Secrets
1. Room Temperature Ingredients: Allow eggs and buttermilk to come to room temperature 30 minutes before cooking. This creates smoother batter and more even cooking in your apple cinnamon pancakes.
2. Rest the Batter: Let the mixed batter sit for 5 minutes before cooking. This allows the flour to hydrate fully and creates incredibly tender results.
3. Consistent Heat: Maintain steady medium heat throughout cooking. Adjust temperature between batches if pancakes are browning too quickly or cooking too slowly.
4. Fresh Spice Power: Use recently purchased cinnamon and nutmeg for maximum flavor impact. Spices lose potency over time and can make your pancakes taste flat.
5. Apple Preparation: Cut apples into uniform pieces no larger than ¼-inch. This ensures they cook through completely and distribute evenly in every bite of your finished pancakes.