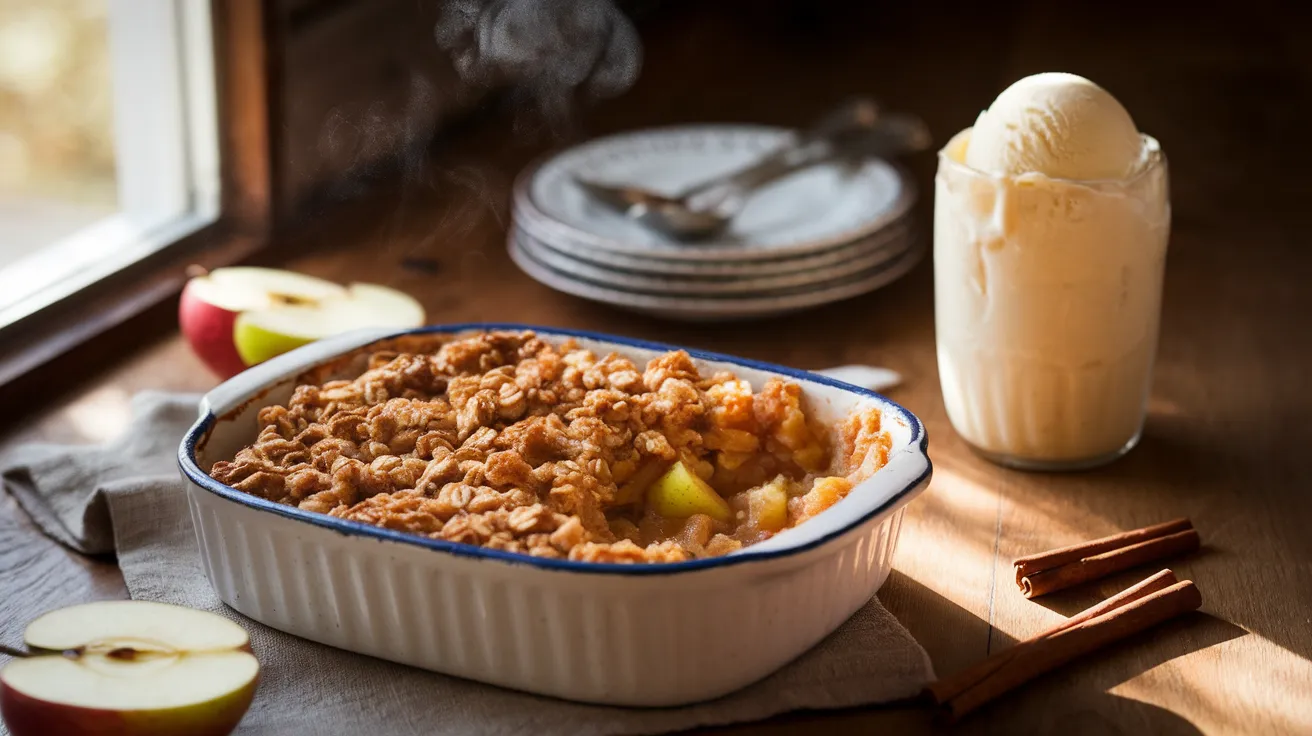
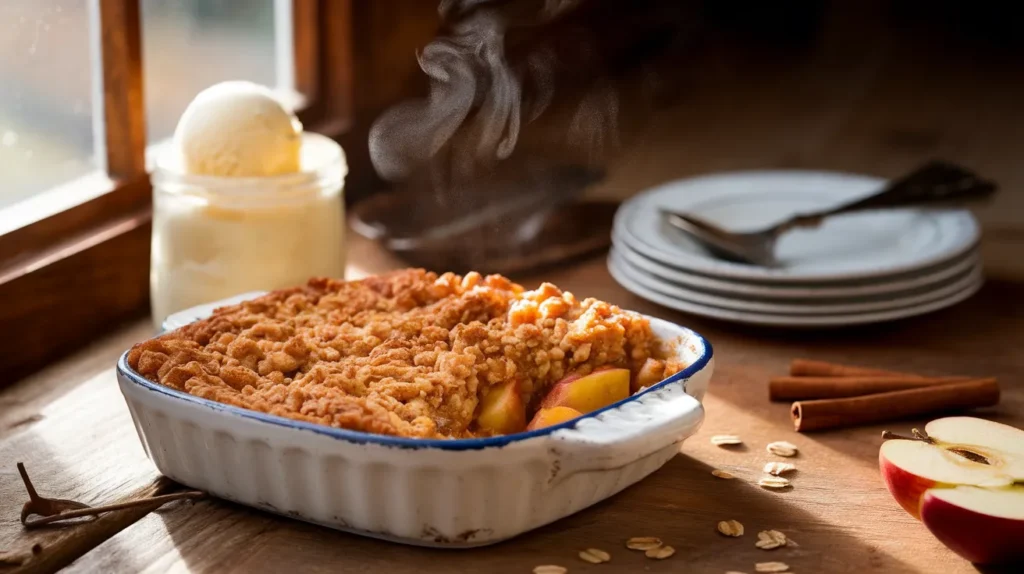
Nothing says comfort like a bubbling apple crisp fresh from the oven. This apple crisp recipe delivers tender, cinnamon-spiced apples beneath a golden, buttery topping that’s crispy on top and slightly chewy underneath. Perfect for beginner bakers, this foolproof dessert comes together in under an hour and fills your kitchen with the most incredible aroma. Whether you’re serving it for a casual weeknight treat or a holiday gathering, this apple crisp will become your go-to recipe.
SERVES: 4 | PREP: 20 MIN | COOK: 35 MIN | TOTAL: 55 MIN
Ingredients You’ll Need
For the Apple Filling:
| Ingredient | Amount |
|---|---|
| Granny Smith apples | 4 medium (about 1½ pounds) |
| Granulated sugar | 2 tablespoons |
| Ground cinnamon | 1 teaspoon |
| Lemon juice | 1 tablespoon |
| All-purpose flour | 1 tablespoon |
| Vanilla extract | ½ teaspoon |
For the Crisp Topping:
| Ingredient | Amount |
|---|---|
| Old-fashioned oats | ¾ cup |
| All-purpose flour | ½ cup |
| Brown sugar (packed) | ½ cup |
| Ground cinnamon | ½ teaspoon |
| Salt | ¼ teaspoon |
| Unsalted butter (cold) | 6 tablespoons |
Step-by-Step Instructions
Phase 1: Preparing Your Workspace (5 minutes)
Step 1: Preheat your oven to 375°F (190°C). Position the rack in the middle of your oven so heat circulates evenly around your dish. This middle position prevents the bottom from burning while ensuring the top gets golden and crispy.
Step 2: Grab an 8×8-inch baking dish and lightly coat it with butter or cooking spray. Run your fingers along the corners to make sure everything’s covered. This prevents sticking and makes cleanup much easier later.
Phase 2: Making the Apple Filling (10 minutes)
Step 3: Peel your apples using a vegetable peeler, working from top to bottom in smooth strokes. Don’t worry if you leave a few bits of skin—it adds texture and fiber. The reason we mostly peel them is that skins can become tough and chewy when baked.
Step 4: Cut each apple into quarters, then use a paring knife to remove the core from each piece. Slice each quarter into ¼-inch thick slices. Try to keep them uniform so they cook at the same rate. Thicker slices stay too firm while thinner ones turn mushy.
Step 5: Toss the apple slices into a large mixing bowl immediately after cutting. The moment apples are exposed to air, they start turning brown due to oxidation—that’s totally fine, but we’ll fix it in the next step.
Step 6: Add 2 tablespoons granulated sugar, 1 teaspoon cinnamon, 1 tablespoon lemon juice, 1 tablespoon flour, and ½ teaspoon vanilla extract to the bowl. The lemon juice not only prevents browning but also brightens the flavor and balances the sweetness. The flour helps thicken the juices that release during baking.
Step 7: Use your hands or a large spoon to toss everything together until every apple slice is coated. Make sure the flour doesn’t clump in one spot. You should see a light, even coating on all the apples with no dry pockets of flour remaining.
Step 8: Transfer the apple mixture to your prepared baking dish, spreading it into an even layer. Use a spatula to press down gently so there aren’t air pockets. An even layer means even cooking throughout.
Phase 3: Creating the Crisp Topping (5 minutes)
Step 9: In a separate medium bowl, combine ¾ cup oats, ½ cup flour, ½ cup packed brown sugar, ½ teaspoon cinnamon, and ¼ teaspoon salt. Whisk these dry ingredients together with a fork to break up any brown sugar lumps. This ensures every bite of topping has balanced sweetness and spice.
Step 10: Cut your cold butter into small cubes (about ½-inch pieces). Cold butter is crucial here—it creates those irresistible crispy pockets when it melts in the oven. If your butter’s too soft, pop it in the freezer for 5 minutes.
Step 11: Add the butter cubes to the dry mixture. Using your fingertips, rub the butter into the dry ingredients by pressing and smearing it between your thumb and fingers. You’re creating a crumbly texture with pea-sized pieces of butter throughout. This should take about 2-3 minutes of working. The mixture should look like wet sand that clumps when squeezed but falls apart when you open your hand.
Step 12: Scatter the topping evenly over the apples, making sure to cover the entire surface. Don’t press it down—just let it sit loosely on top. Leaving it loose allows steam to escape and creates more crispy bits. Some people make the mistake of packing it down, which creates a dense, cake-like texture instead of a crisp.
Phase 4: Baking and Finishing (35 minutes)
Step 13: Place the baking dish on a rimmed baking sheet before putting it in the oven. This catches any juices that might bubble over and saves you from a smoky kitchen and messy oven cleanup.
Step 14: Bake for 35-40 minutes until the topping turns deep golden brown and you see thick juices bubbling up around the edges. The apples should feel tender when you insert a knife—it should slide through with almost no resistance. If the top browns too quickly (before 30 minutes), loosely tent aluminum foil over the dish for the remaining time.
Step 15: Remove from the oven using oven mitts and place on a wire cooling rack. Let it cool for at least 15 minutes before serving. I know it’s tempting to dig in immediately, but this resting time allows the juices to thicken up properly. If you serve it too hot, it’ll be soupy instead of having that perfect saucy consistency.
Step 16: Serve warm in bowls, and if you’re feeling indulgent, add a scoop of vanilla ice cream or a dollop of whipped cream on top. The cold, creamy contrast against the warm apple crisp is absolutely perfect.
Chef’s Notes
Tip #1: The best apples for apple crisp are firm, tart varieties that hold their shape during baking. Granny Smith apples are my top choice because their tartness balances the sweet topping perfectly. You can also mix in Honeycrisp or Braeburn for a more complex flavor profile.
Tip #2: Don’t skip the lemon juice in your apple filling. It’s not just about preventing browning—the acidity cuts through the sweetness and makes the overall flavor more dynamic and interesting rather than one-dimensional.
Tip #3: The key to a truly crispy topping is keeping your butter cold and not overworking the mixture. If the butter gets too warm from your hands, the topping will be greasy instead of crispy. Work quickly or chill the mixture before adding to the apples.
Tip #4: For an extra-special touch, toast your oats in a dry skillet for 3-4 minutes before making the topping. This adds a nutty depth that takes your apple crisp to the next level.
Nutrition Information (Per Serving)
| Nutrient | Amount |
|---|---|
| Calories | 385 |
| Protein | 4g |
| Carbohydrates | 62g |
| Fat | 15g |
| Fiber | 5g |
| Sugar | 38g |
Delicious Variations to Try
1. Caramel Apple Crisp: Drizzle 3 tablespoons of caramel sauce over the apple layer before adding the topping. After baking, drizzle more caramel over individual servings for an extra-decadent treat that tastes like a caramel apple in dessert form.
2. Mixed Berry Apple Crisp: Reduce apples to 3 and add 1 cup mixed berries (blueberries, raspberries, or blackberries) to the filling. Increase the flour in the filling to 2 tablespoons since berries release more liquid. This creates a beautiful pink-red filling that’s stunning and delicious.
3. Nutty Apple Crisp: Add ⅓ cup chopped pecans or walnuts to your topping mixture for added crunch and richness. Toast the nuts first for even better flavor. If you enjoy texture contrasts, this variation is incredible and pairs beautifully with the techniques used in fried apple cobbler.
4. Spiced Chai Apple Crisp: Replace the cinnamon in both the filling and topping with a chai spice blend (1 teaspoon total of cinnamon, ginger, cardamom, and nutmeg mixed together). This warming spice combination makes your kitchen smell like a cozy café. For another spiced apple dessert, check out this apple crumble recipe.
Storage & Reheating Guide
Storing: Let your apple crisp cool completely to room temperature. Cover the baking dish tightly with plastic wrap or aluminum foil, or transfer to an airtight container. Store in the refrigerator for up to 5 days. The topping will soften slightly in the fridge, but reheating restores much of the crispness.
Freezing: This dessert freezes beautifully for up to 3 months. Wrap the cooled dish tightly in two layers of plastic wrap, then cover with aluminum foil. Label with the date. Thaw overnight in the refrigerator before reheating.
Reheating: For best results, reheat in a 350°F oven for 15-20 minutes until warmed through and the topping crisps up again. You can reheat individual portions in the microwave for 45-60 seconds, though the topping won’t be as crispy. For maximum crispness, finish microwaved portions under the broiler for 1-2 minutes, watching carefully to prevent burning.
Make-Ahead Tip: Prepare the apple filling and topping separately up to 24 hours in advance. Store the filling covered in the fridge and the topping in an airtight container at room temperature. Assemble and bake when you’re ready to serve.
Troubleshooting Common Problems
Problem #1: Soggy, Wet Filling Your apples released too much liquid, and it didn’t thicken properly. This usually happens when you skip the flour in the filling or use apples that are too ripe. Make sure you’re measuring the flour accurately and tossing it thoroughly with the apples. Next time, add an extra ½ tablespoon of flour if your apples seem particularly juicy.
Problem #2: Topping Won’t Get Crispy The butter was probably too warm when you mixed it in, or you packed the topping down too firmly. The butter needs to be cold (straight from the fridge) so it creates steam pockets as it melts. Also, resist the urge to press the topping—it should sit loosely on the apples. If your topping is already on and seems greasy, pop the whole dish in the freezer for 10 minutes before baking.
Problem #3: Apples Are Too Firm After Baking You either cut your apple slices too thick or didn’t bake long enough. Apple slices should be about ¼-inch thick—any thicker and they won’t soften properly in the baking time. If you notice this happening during baking, cover with foil and continue baking in 5-minute increments until a knife slides through easily.
Problem #4: Topping Burns Before Apples Cook Your oven might be running hot, or you placed the dish too close to the heating element. Always use an oven thermometer to verify your actual temperature. If browning too quickly, tent loosely with aluminum foil and reduce temperature to 350°F for the remaining baking time.
Problem #5: Bottom Is Sticking to the Pan You didn’t grease the baking dish thoroughly enough, or you tried to serve it too soon after baking. Make sure every corner and edge is greased before adding filling. Also, let the dish rest at least 15 minutes—this allows the juices to set up slightly, making it easier to scoop out clean portions.
Equipment Essentials
- 8×8-inch baking dish (glass or ceramic works best)
- Rimmed baking sheet (to catch drips)
- Large mixing bowl (for apples)
- Medium mixing bowl (for topping)
- Vegetable peeler
- Sharp knife and cutting board
- Measuring cups and spoons
- Fork or whisk
- Rubber spatula
- Wire cooling rack
Alternative Equipment: If you don’t have an 8×8-inch dish, use a 9-inch pie plate or a 2-quart baking dish. The depth might vary slightly, so watch the baking time—shallower dishes may cook 5-10 minutes faster.
Shopping List
Produce Section:
- 4 medium Granny Smith apples (about 1½ pounds)
- 1 lemon (for juice)
Baking Aisle:
- All-purpose flour
- Granulated sugar
- Brown sugar (light or dark)
- Old-fashioned rolled oats
- Ground cinnamon
- Vanilla extract
- Salt
Dairy Section:
- Unsalted butter (6 tablespoons)
- Vanilla ice cream (optional, for serving)
Success Secrets
1. Always taste your apples before using them. If they’re already quite sweet, reduce the sugar in the filling to 1 tablespoon. If they’re super tart, add an extra tablespoon. Adjusting based on your specific apples ensures perfect sweetness every time.
2. Cut your butter into the oat mixture until it resembles coarse crumbs with some pea-sized pieces remaining. This specific texture is what creates the perfect combination of crispy clusters and tender spots in your topping.
3. Don’t overfill your baking dish. The apples will release juice as they bake, and you need space for those bubbling juices. Fill no more than three-quarters full to prevent overflow.
4. Listen for the sizzle. When your apple crisp is properly done, you’ll hear a gentle bubbling sound from the juices. If it’s completely silent, it needs more time.
5. Serve this dessert warm, not hot. The 15-minute cooling period isn’t just about safety—it’s when the starches in the flour absorb excess liquid and create that perfect saucy consistency around the tender apples. Patience pays off here.
This apple crisp recipe proves that impressive desserts don’t require complicated techniques or fancy ingredients. With just a handful of pantry staples and fresh apples, you’ll create a dessert that tastes like you spent hours in the kitchen. The tender, spiced apples paired with the buttery, crispy topping never fail to impress.