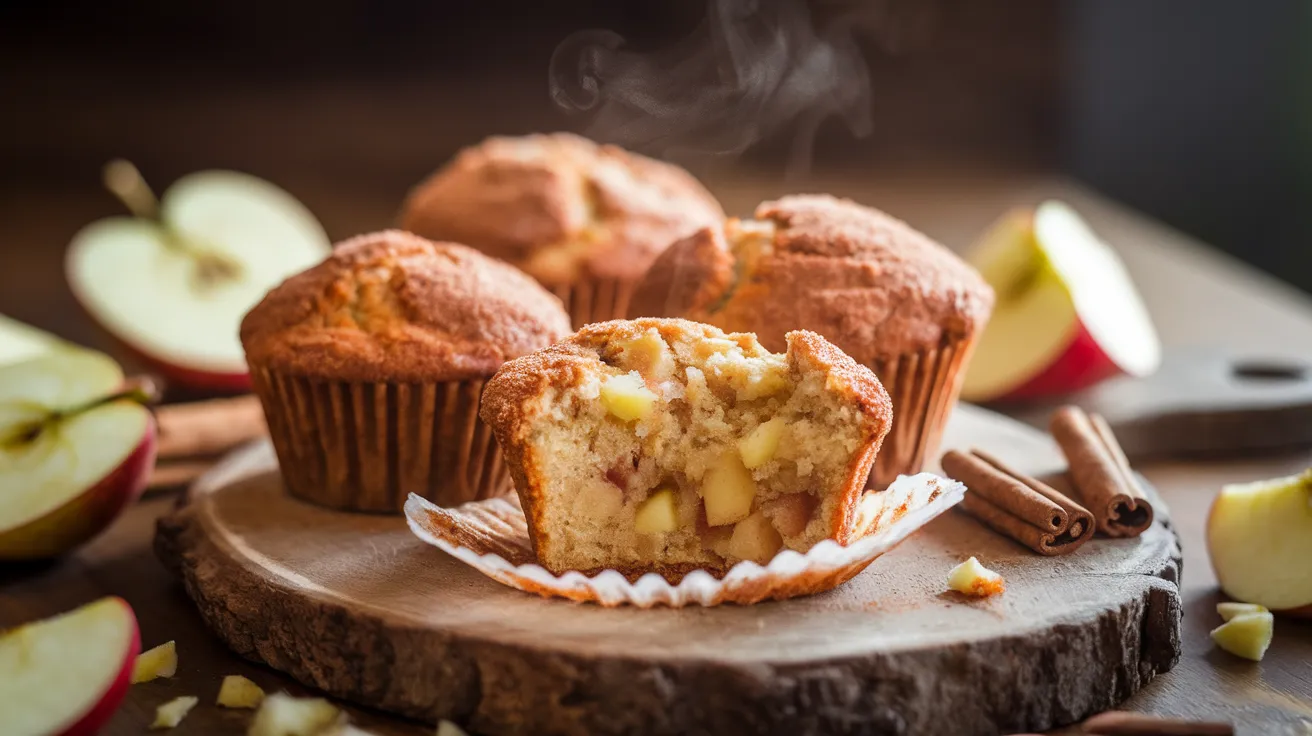
These tender apple muffins are loaded with fresh apple chunks and warm cinnamon, creating the perfect balance of sweet and spiced. Whether you’re meal prepping for busy mornings or treating your family to a weekend bake, these apple muffins deliver bakery-quality results right from your own kitchen.
SERVES: 4 | PREP: 15 MIN | COOK: 22 MIN | TOTAL: 37 MIN
Ingredients
Dry Ingredients
| Ingredient | Amount |
|---|---|
| All-purpose flour | 1½ cups |
| Baking powder | 2 teaspoons |
| Ground cinnamon | 1½ teaspoons |
| Salt | ¼ teaspoon |
| Nutmeg | ¼ teaspoon |
Wet Ingredients
| Ingredient | Amount |
|---|---|
| Granulated sugar | ½ cup |
| Large egg | 1 |
| Whole milk | ½ cup |
| Unsalted butter (melted) | ¼ cup |
| Vanilla extract | 1 teaspoon |
Mix-Ins
| Ingredient | Amount |
|---|---|
| Medium apples (diced) | 1½ cups |
| Light brown sugar | 2 tablespoons |
Topping
| Ingredient | Amount |
|---|---|
| Granulated sugar | 2 tablespoons |
| Ground cinnamon | ½ teaspoon |
Step-by-Step Instructions
Phase 1: Preparation (5 minutes)
Step 1: Set your oven to 375°F and position the rack in the center. This temperature creates the perfect environment for apple muffins to rise with domed tops without burning the bottoms. Starting with a preheated oven is crucial because the initial blast of heat activates the baking powder immediately.
Step 2: Line 8 muffin cups with paper liners or spray them generously with cooking spray. I prefer liners because they make cleanup easier and help the muffins release perfectly. If using spray, really coat those corners where batter tends to stick.
Step 3: Peel and dice your apples into ½-inch cubes, removing the cores completely. Use firm apples like Granny Smith or Honeycrisp that won’t turn mushy during baking. Smaller pieces distribute better throughout the batter, giving you apple in every bite. Pat them dry with a paper towel to remove excess moisture.
Step 4: Toss the diced apples with 2 tablespoons of brown sugar in a small bowl. This step draws out some moisture and creates little pockets of caramelized sweetness. Let them sit while you prepare the batter. The sugar also helps prevent the apples from sinking to the bottom.
Phase 2: Mixing the Batter (7 minutes)
Step 5: Combine flour, baking powder, cinnamon, salt, and nutmeg in a large mixing bowl. Whisk these dry ingredients together for at least 30 seconds. This distributes the leavening agents evenly so your apple muffins rise uniformly. Don’t skip this step or you’ll get uneven texture.
Step 6: In a separate medium bowl, whisk together the sugar and egg until the mixture becomes pale yellow and slightly thick. This takes about 1 minute of vigorous whisking. You’re incorporating air which helps create a lighter crumb. The mixture should form ribbons when you lift the whisk.
Step 7: Add the milk, melted butter, and vanilla to the egg mixture, whisking until completely smooth. Make sure your melted butter has cooled for 3-4 minutes so it doesn’t cook the egg. The mixture should look creamy and unified with no butter floating on top.
Step 8: Pour the wet ingredients into the dry ingredients all at once. Using a rubber spatula, fold the mixture together with about 12-15 gentle strokes. Stop as soon as you see the last streak of flour disappear. The batter will look lumpy and thick—that’s exactly what you want. Overmixing develops gluten and creates tough, dense muffins.
Step 9: Gently fold in the sugared apples and any juice from the bowl. Use a folding motion from the bottom of the bowl upward. Distribute the apples evenly but work quickly with just 6-8 folds. The batter should barely hold the fruit pieces together.
Phase 3: Filling and Topping (3 minutes)
Step 10: Use an ice cream scoop or large spoon to divide the batter evenly among 8 muffin cups. Fill each cup about ¾ full—they should have about ⅓ cup of batter each. This gives them room to rise without overflowing. If you’re looking for more apple-forward recipes, try this apple bread that uses similar techniques.
Step 11: Mix together the topping sugar and cinnamon in a small bowl. Use a spoon to sprinkle about ¾ teaspoon of this mixture over each unbaked muffin. Don’t be shy—a generous coating creates a beautiful crystallized crust.
Step 12: Gently tap the muffin pan on the counter twice to release any air bubbles. This prevents large holes from forming in your apple muffins and helps them bake more evenly.
Phase 4: Baking (22 minutes)
Step 13: Bake for 20-22 minutes, rotating the pan halfway through at the 11-minute mark. You’ll know they’re done when the tops spring back when lightly touched and a toothpick inserted in the center comes out with just a few moist crumbs. The tops should be golden brown with slightly darker edges.
Step 14: Remove from the oven and let the muffins cool in the pan for exactly 5 minutes. This resting period allows the structure to set. If you remove them too soon, they’ll fall apart. Too long, and they’ll stick to the pan.
Step 15: Transfer the muffins to a wire cooling rack. Use a butter knife to gently loosen the edges if needed. Let them cool for at least 10 more minutes before eating—this lets the interior finish setting and prevents steam burns.
Chef’s Notes
Moisture Balance: The key to perfect apple muffins is using the right apple-to-batter ratio. Too many apples make them soggy, too few and they’re just spiced muffins.
Flour Measuring: Spoon your flour into the measuring cup and level it off with a knife. Scooping directly from the bag packs it down and adds up to ¼ cup extra flour, making dry, tough muffins.
Room Temperature Matters: Let your egg and milk sit at room temperature for 20 minutes before starting. Cold ingredients don’t combine as smoothly and can cause the butter to solidify into little clumps.
The Toothpick Test: Insert it at a slight angle rather than straight down. Straight down might hit an apple piece and give you a false wet reading even when the muffin is fully baked.
Nutrition Information (Per Muffin)
Calories: 245
Protein: 4g
Carbohydrates: 38g
Fat: 9g
Fiber: 2g
Sugar: 20g
Creative Variations
Streusel-Topped Apple Muffins: Skip the cinnamon sugar topping and add a crumb topping instead. Mix ¼ cup flour, ¼ cup brown sugar, 2 tablespoons cold butter, and ½ teaspoon cinnamon until crumbly. Sprinkle over batter before baking for extra texture.
Apple Cinnamon Chip Muffins: Fold in ½ cup cinnamon chips along with the apples. They’ll melt slightly during baking, creating little pockets of concentrated cinnamon flavor. If you love cinnamon and apple combinations, these apple crumb bars offer another delicious option.
Whole Wheat Apple Muffins: Replace half the all-purpose flour with whole wheat flour for added nutrition. Add an extra tablespoon of milk to compensate for the whole wheat’s absorption. These have a slightly nuttier flavor and denser texture.
Caramel Apple Muffins: Drizzle cooled muffins with 2 tablespoons of caramel sauce mixed with 1 tablespoon of heavy cream. The sweet-tart combination takes these from breakfast to dessert territory.
Storage & Reheating
Room Temperature: Store in an airtight container for up to 3 days. Place a paper towel in the bottom of the container to absorb excess moisture and keep the tops from getting soggy.
Refrigeration: Apple muffins stay fresh in the fridge for up to 1 week. Let them come to room temperature for 10 minutes before eating, or warm for 15 seconds in the microwave.
Freezing: Wrap each muffin individually in plastic wrap, then place all wrapped muffins in a freezer bag. They’ll keep for up to 3 months. Thaw overnight in the fridge or microwave for 45 seconds from frozen.
Reheating: For that fresh-baked taste, wrap a muffin in a damp paper towel and microwave for 20-25 seconds. Or warm in a 300°F oven for 8-10 minutes until heated through.

Troubleshooting Common Problems
Problem 1: Muffins Are Dense and Heavy You overmixed the batter. Mix only until the last streak of flour disappears—about 12-15 strokes total. The batter should look lumpy, not smooth. Also check that your baking powder isn’t expired by adding ½ teaspoon to hot water; it should fizz vigorously.
Problem 2: Apples Sank to the Bottom Your batter was too thin or the apple pieces were too large. Make sure you’re measuring flour correctly (spoon and level), and cut apples no larger than ½-inch. Tossing them in brown sugar before adding helps them suspend better in the batter.
Problem 3: Tops Are Pale and Won’t Brown Your oven temperature is too low. Use an oven thermometer to verify it’s actually reaching 375°F. Many ovens run 25 degrees cooler than the dial indicates. Also, make sure you’re baking on the center rack, not the bottom.
Problem 4: Dry, Crumbly Texture You used too much flour or overbaked them. Remember to spoon and level your flour rather than scooping from the bag. Remove muffins from the oven as soon as a toothpick comes out with a few moist crumbs—not completely clean.
Problem 5: Muffins Stick to the Pan You didn’t grease well enough or left them in the pan too long. Use paper liners or spray every nook of the muffin cups. Remove muffins after exactly 5 minutes of cooling—any longer and the sugars caramelize and act like glue.
Equipment Essentials
- Standard 12-cup muffin tin (you’ll fill 8 cups)
- Paper muffin liners or cooking spray
- Two mixing bowls (one large, one medium)
- Whisk for combining ingredients
- Rubber spatula for folding
- Ice cream scoop or large spoon for portioning
- Wire cooling rack
- Measuring cups and spoons
- Sharp peeler and knife for apple prep
Shopping List
Baking Aisle:
- All-purpose flour
- Granulated sugar
- Light brown sugar
- Baking powder
- Vanilla extract
- Ground cinnamon
- Ground nutmeg
- Salt
Dairy Section:
- Whole milk
- Unsalted butter
- Large eggs
Produce Section:
- 2 medium apples (Granny Smith, Honeycrisp, or Fuji)
Extras:
- Paper muffin liners (if not using spray)
Success Secrets
1. Apple Selection Is Everything Choose firm, tart apples that hold their shape during baking. Granny Smith provides the best texture contrast, Honeycrisp adds natural sweetness, and Fuji offers a balanced flavor. Avoid Red Delicious or McIntosh—they turn to mush.
2. The Muffin Method Never cream butter and sugar together for muffins. The muffin method (mixing wet and dry separately, then combining briefly) creates that characteristic tender, slightly coarse crumb that makes apple muffins different from cupcakes.
3. Fill Strategically If you’re only making 8 muffins in a 12-cup pan, fill the empty cups halfway with water. This prevents the pan from warping and helps the filled muffins bake more evenly by maintaining consistent heat distribution.
4. The Two-Minute Window There’s a narrow window between underbaked and overbaked. Start checking at 20 minutes. When the tops spring back and show tiny cracks, they’re ready. One extra minute can mean the difference between moist and dry.
5. Cool Before Storing Let muffins cool completely (about 45 minutes) before storing them. Storing warm muffins creates condensation inside the container, turning your crispy cinnamon-sugar tops into a soggy mess within hours.
These apple muffins prove that bakery-quality results don’t require complicated techniques or hard-to-find ingredients. With just a few smart tricks and attention to timing, you’ll turn out perfectly domed, moist muffins studded with tender apple pieces every single time. The cinnamon-sugar crust adds that professional touch that makes them taste like they came from an expensive café, not your home kitchen.