Key Takeaways:
- Prep the cod properly – pat dry for the perfect blackening crust
- Perfect seasoning ratio – 2:1:1 paprika, thyme, and garlic for bold flavor
- Cast iron is crucial – get that restaurant-quality sear at home
- Watch your heat – medium-high heat creates the black crust without burning
Why Your Homemade Blackened Cod Fish Hasn’t Worked (Until Now)
Ever tried making blackened cod fish at home only to end up with a soggy mess? You’re not alone.
Many home cooks struggle with getting that perfect blackened crust that makes restaurant cod so mouthwatering. The difference isn’t just the ingredients – it’s the technique.
This blackened cod fish recipe solves all those problems. With a well-seasoned cast iron pan and the right spice blend, you’ll create a dish that’s crispy on the outside, tender inside, and packed with bold Cajun flavors. If you enjoy fish recipes with bold flavors, you might also like these Thai fish cakes which use a different but equally delicious seasoning approach. Let’s master this blackened cod fish classic!
Nutrition Comparison (Per Serving)
| Nutrient | Blackened Cod | Fried Cod | Baked Cod |
|---|---|---|---|
| Calories | 215 | 310 | 189 |
| Protein | 32g | 28g | 32g |
| Fat | 8g | 18g | 6g |
| Carbs | 3g | 12g | 1g |
| Sodium | 580mg | 750mg | 420mg |
What You’ll Need
Ingredients (Serves 4)
| Ingredient | Amount | Notes |
|---|---|---|
| Cod fillets | 4 (6oz each) | Fresh or thawed from frozen |
| Paprika | 2 tbsp | Sweet or smoked both work |
| Dried thyme | 1 tbsp | Fresh can work too (2 tbsp) |
| Garlic powder | 1 tbsp | Not garlic salt |
| Onion powder | 2 tsp | For depth of flavor |
| Cayenne pepper | 1/2 to 1 tsp | Adjust for spice level |
| Salt | 2 tsp | Kosher salt preferred |
| Black pepper | 1 tsp | Freshly ground |
| Butter | 3 tbsp | Unsalted |
| Vegetable oil | 2 tbsp | High smoke point required |
| Lemon wedges | 1 lemon | For serving |
Kitchen Tools
| Tool | Why It’s Important |
|---|---|
| Cast iron skillet | Creates the perfect crust |
| Paper towels | For patting fish dry |
| Measuring spoons | For accurate seasoning |
| Mixing bowl | For blackening spice mix |
| Fish spatula | For flipping without breaking |
| Instant-read thermometer | Optional but helpful |
Substitutions
- Fish options: Swap cod for mahi-mahi, pollock, or halibut. If you’re looking for another white fish option, check out these Ono fish recipes for inspiration.
- Butter alternative: Use ghee for a higher smoke point
- Spice adjustments: Double the cayenne for extra heat or omit for a milder version
- Oil options: Avocado oil works well as a substitute
Prep Time & Planning
- Prep time: 10 minutes
- Cook time: 8 minutes
- Total time: 18 minutes
- Serves: 4 people
Beginner-Friendly Blackened Cod Fish Step-by-Step Instructions
1. Prepare the Fish (10 minutes before cooking)
- Take the fish out of the refrigerator:
- Remove cod fillets from the refrigerator and place them on a plate
- Let them sit at room temperature for 10 minutes (set a timer!)
- Why this matters: Cold fish directly from the fridge can seize up and cook unevenly
- Beginner tip: If you forget this step, don’t worry – just expect to add 1-2 minutes to your cooking time
- Examine your fish fillets:
- Look at each piece of cod – they should have a clean, mild smell (not fishy)
- Good cod will be white or off-white, firm, and slightly translucent
- Warning sign: If your fish smells strongly fishy or has a slimy texture, it may not be fresh
- Pat the fish dry:
- Lay out 4-6 paper towels on your counter
- Place each fillet on the paper towels
- Press additional paper towels firmly on top of each fillet
- Apply gentle pressure to absorb moisture
- Repeat this process at least twice with fresh paper towels
- Critical beginner step: Your fish must be VERY dry for blackening to work
- Visual check: No visible moisture should remain on the surface
- Check for bones:
- Place each fillet on a clean plate
- Run your fingertips gently across the surface of each fillet
- Move slowly from one end to the other, feeling for any hard, pin-like projections
- If you find bones: Use clean tweezers or fish pliers to grasp the end of each bone and pull in the direction the bone is pointing
- Beginner tip: Work under good lighting so you can see any remaining bones
- Trim if needed:
- Look for any extremely thin edges on your fillets (under ¼ inch thick)
- Using a sharp knife, trim these ultra-thin sections off
- Why this matters: These thin sections will overcook and burn before the rest of your fish is done
2. Make the Blackening Seasoning (5 minutes)
- Gather your spices:
- Place all spice containers on your counter
- Check that you have each one before starting
- Pro tip: Arrange them in the order you’ll use them
- Measure precisely:
- Use proper measuring spoons (not regular spoons)
- For each spice, dip your measuring spoon into the container
- Level off the top with the back of a knife for accuracy
- Beginner tip: “Heaping” vs. “level” makes a big difference in flavor intensity
- Combine in a bowl:
- Use a small bowl that’s completely dry
- Add each spice one by one:
- 2 tablespoons paprika
- 1 tablespoon dried thyme
- 1 tablespoon garlic powder
- 2 teaspoons onion powder
- 1/2 to 1 teaspoon cayenne pepper (start with 1/2 if you’re sensitive to heat)
- 2 teaspoons salt
- 1 teaspoon black pepper
- Visual guide: Your mixture should be predominantly red from the paprika with visible specs of green thyme
- Mix thoroughly:
- Use a fork or small whisk (not your fingers)
- Stir for at least 30 seconds, pushing against the sides of the bowl
- Break up any small clumps with the back of the fork
- Proper mixing check: The color should be completely uniform with no streaks
- Transfer to a plate:
- Choose a flat plate with a slight rim
- Pour all of the seasoning onto the plate
- Use the back of a spoon to spread it into an even layer
- Why a plate? This makes it easier to press the fish into the seasoning
3. Season the Fish (5 minutes)
- Prepare your workspace:
- Set up your plates in this order: dried fish, small bowl of oil, seasoning plate, clean plate
- Have a small pastry brush or spoon ready for the oil
- Space management: Give yourself at least 2 feet of clear counter space
- Oil each fillet:
- Pour 1 tablespoon of vegetable oil into a small bowl
- Using a pastry brush or your fingers, apply a very thin layer of oil to both sides of each fillet
- Beginner mistake to avoid: Too much oil will make the seasoning soggy
- Visual check: Fish should look slightly glossy, not dripping
- Apply the seasoning:
- Pick up one fillet at a time, holding it by the ends
- Place one side down onto the seasoning plate
- Press gently but firmly for 3 seconds to adhere seasoning
- Lift and rotate to coat all sides
- Repeat with remaining fillets
- Coverage check: No white fish should be visible through the coating
- Remove excess seasoning:
- Hold each fillet about 2 inches above the seasoning plate
- Give it a gentle shake side to side (not up and down)
- Only loose seasoning should fall off
- Why this matters: Too much loose seasoning will burn in the pan
- Rest the seasoned fish:
- Place each seasoned fillet on a clean plate
- Allow to rest for 2-3 minutes while you heat the pan
- Beginner tip: This rest time helps the seasoning stick better to the fish
4. Heat the Pan (3 minutes)
- Choose the right pan:
- A 10-12 inch cast iron skillet is ideal
- If you don’t have cast iron, use the heaviest pan you own
- Why cast iron? It holds heat perfectly for creating the blackened crust
- Position your pan:
- Place your skillet on the largest burner of your stove
- Turn your vent hood fan to high (blackening creates smoke!)
- Safety tip: Open a window if possible for additional ventilation
- Preheat properly:
- Set heat to medium-high (not maximum)
- Allow pan to heat for 3 full minutes (set a timer!)
- Beginner test: After 3 minutes, sprinkle a few drops of water onto the pan
- Water should sizzle immediately and evaporate within 2-3 seconds
- Too cool? Wait another minute and test again
- Too hot? If water instantly disappears with a loud sizzle, reduce heat slightly
- Add fats:
- Add 2 tablespoons vegetable oil first
- Then add 3 tablespoons butter
- Visual cues: Butter will melt immediately and begin to foam
- Danger sign: If butter turns brown instantly, your pan is too hot – remove from heat for 30 seconds
- Distribute the fat:
- Hold the pan handle (with an oven mitt if needed)
- Tilt the pan in a circular motion to coat the entire cooking surface
- The oil-butter mixture should shimmer and coat the pan evenly
- Ready check: The fat should be hot but not smoking heavily
5. Cook the Fish (6-8 minutes total)
- Position the fish for cooking:
- Arrange your seasoned fillets on a plate near the stove
- Have a clean platter ready for the cooked fish
- Keep your fish spatula/turner close by
- Organization tip: Having everything within arm’s reach prevents burning while you search for tools
- Add fish to pan properly:
- Pick up one fillet at a time using your fish spatula
- Place it in the pan AWAY from you (to prevent oil splatter toward you)
- Start at the 10 o’clock position of the pan and work clockwise
- Leave at least 1 inch between fillets
- Important: The pan should sizzle loudly when fish touches it
- Beginner warning: Stand back slightly to avoid oil splatter
- First side cooking technique:
- Once all fillets are in, DO NOT TOUCH them for 3 minutes
- Watch the edges of the fillets – they will begin turning opaque
- You’ll see the blackening happening – the coating will darken significantly
- Common beginner mistake: Moving the fish too early prevents proper crust formation
- Visual timing cue: The cooked portion will creep up the side of the fillet to about ¼ of the thickness
- Check for flipping readiness:
- After 3 minutes, gently slide your fish spatula under one edge of a fillet
- If it lifts easily without sticking, it’s ready to flip
- If it sticks at all, wait another 30 seconds and try again
- Beginner tip: If it’s sticking, it’s not ready! Be patient
- Flipping technique:
- Slide your spatula completely under one fillet
- In one smooth motion, quickly flip the fillet away from you
- Detailed flip steps:
- Position spatula fully under fish
- Lift just high enough to clear the pan (about 1 inch)
- Turn your wrist to rotate the fish
- Lower immediately back into the hot oil
- Safety first: Flip away from your body to avoid splatter burns
- Second side cooking:
- Cook the second side for 3 minutes
- The second side may cook slightly faster than the first
- Optional step: Spoon some of the pan butter over the tops of the fillets twice during cooking
- Careful: Use a metal spoon and tilt the pan slightly to collect butter
- Check for doneness:
- After 3 minutes on the second side, check for doneness using one of these methods:
- Method 1 – Thermometer: Insert an instant-read thermometer into the thickest part (should read 145°F)
- Method 2 – Visual: Use the tip of a knife to peek into the center – it should be opaque, not translucent
- Method 3 – Flake test: Press with a fork – the fish should flake easily but still be moist
- Not done? Cook for additional 30-second intervals, checking after each
- Remove from heat:
- Turn off the heat source
- Use your fish spatula to remove each fillet
- Transfer to a clean serving platter
- Be gentle – the fish will be tender and can break easily
6. Rest and Serve (2 minutes)
- Rest the fish:
- Allow the fish to rest for 2 minutes on the serving platter
- Why this matters: Resting allows the juices to redistribute through the fish
- Beginner tip: Use this time to prepare your plates and sides
- Prepare serving elements:
- Cut a lemon into 4-6 wedges
- Arrange lemon wedges around the platter
- If desired, sprinkle some fresh chopped parsley over the fish
- Presentation tip: The contrast of bright lemon and green herbs against the blackened fish is striking
- Portion the fish:
- Use a clean fish spatula to transfer one fillet to each plate
- Move gently to keep the blackened crust intact
- Serving suggestion: Place each fillet on a bed of rice or alongside roasted vegetables
- Final touches:
- Place a lemon wedge on each plate
- Drizzle a small amount of melted butter from the pan over each fillet if desired
- Serve immediately while hot
- Instruction for guests: Squeeze fresh lemon over the fish just before eating

Troubleshooting Common Problems
Fish Falls Apart When Flipping
Problem: Cod is delicate and can break during cooking.
Solutions:
- Make sure the fish is fully cooked on first side before flipping (it should release easily)
- Use a proper fish spatula – the thin edge slides under more easily
- Consider slightly thicker fillets for beginners
- Emergency fix: If it breaks, gently press pieces back together in the pan – they’ll still taste great!
Seasoning Burns Too Quickly
Problem: Black turns to burnt before fish cooks through.
Solutions:
- Lower heat to medium
- Use fillets of even thickness (about 1-inch thick is ideal)
- If burning occurs, finish cooking in a 350°F oven
- Quick adjustment: If you notice it’s too hot, add 1 more tablespoon of butter to the pan to lower the temperature
Fish Is Undercooked Inside
Problem: Outside looks perfect but center is raw.
Solutions:
- Choose fillets of even thickness
- Let fish come to room temperature before cooking
- Use an instant-read thermometer (145°F is fully cooked)
- For very thick fillets, finish in a 350°F oven
- Rescue method: Cut the fillet in half to check – if undercooked, return to pan at lower heat
Too Much Smoke While Cooking
Problem: The blackening process is creating excessive smoke.
Solutions:
- Turn on vent hood to highest setting before you start
- Open windows if possible
- Use a slightly lower heat next time
- Quick fix: If smoke is overwhelming, remove pan from heat for 30 seconds
Variations & Substitutions for Blackened Cod Fish
Oven-Baked Blackened Cod Fish
- Preheat oven to 425°F
- Season fish as directed
- Heat an oven-safe skillet on stovetop for 2 minutes
- Add 1 tablespoon oil and sear fish for 1 minute per side
- Transfer skillet to oven and bake for 8-10 minutes until fish flakes easily
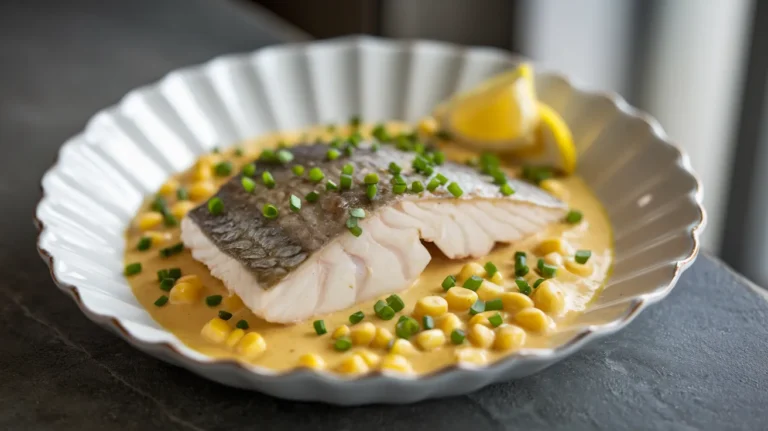
- For a complete meal, serve with a side of corn and fish maw soup for an impressive dinner combination
Dairy-Free Version
- Replace butter with olive oil or avocado oil
- Increase oil amount to 4 tablespoons total
- Follow recipe as directed
- Note: The flavor will be slightly different but still delicious
Mild Family-Friendly Version
- Omit cayenne pepper completely
- Reduce black pepper to 1/2 teaspoon
- Add 1 teaspoon brown sugar to the spice mix
- Kid-friendly tip: Serve with a side of plain yogurt for dipping
Storage & Reheating
Storage
- Refrigerator: Store leftover blackened cod in an airtight container for up to 2 days
- Storage tips: Place paper towel under and over the fish to absorb moisture
- Freezer: Not recommended – texture suffers significantly
Reheating
- Best method: Reheat in a 300°F oven for 10 minutes
- Place fish on a foil-lined baking sheet
- Add a few drops of water to the foil
- Cover loosely with another piece of foil
- Microwave option: 30-second bursts at 50% power with a damp paper towel over the fish
- Avoid: High heat which will dry out the fish
- Serving recommendation: Add a fresh squeeze of lemon after reheating
Safety Notes & Tips
Food Safety
- Fish should reach 145°F internal temperature
- Don’t leave raw fish at room temperature for more than 30 minutes
- Clean all surfaces that touched raw fish with hot soapy water
- Wash hands thoroughly before and after handling raw fish
- Cross-contamination warning: Use separate cutting boards for fish and other ingredients
Cooking Safety
- Cast iron gets extremely hot – use proper oven mitts
- Expect some smoke during cooking – turn on ventilation
- Be careful of hot oil spatters – use long-sleeved shirt or apron
- Keep a lid nearby to cover the pan in case of flare-ups
- Never leave the cooking fish unattended – the blackening process happens quickly
Pro Tips for Perfect Blackened Cod Fish
- Thickness matters: Look for fillets that are 1-inch thick for best results
- Avoid center cut: The belly portion is more forgiving for beginners
- Watch the heat: The goal is blackened, not burnt
- Let the crust form: Don’t move the fish too early
- Serve immediately: Blackened cod fish is best straight from the pan
- Make extra seasoning: Store in an airtight container for up to 3 months
- Try a test piece: If cooking for a crowd, start with a small piece to test your pan’s heat