Prep Time: 30 minutes | Cook Time: 2 hours | Total Time: 2 hours 30 minutes | Servings: 4
- Perfect for football season with rich, smoky flavors
- Can be made ahead and tastes even better the next day
- Easily customizable heat level to please everyone
- Simple enough for beginners but impressive enough for chili competitions
The Ultimate Boilermaker Tailgate Chili for Game Day
When the temperature drops and the big game is on, nothing satisfies a hungry crowd like a pot of Boilermaker Tailgate Chili. This championship-worthy recipe delivers bold flavors that will have everyone coming back for seconds.
The secret to this Boilermaker Tailgate Chili is the perfect balance of spices, three types of meat, and a slow simmer that marries all the flavors together. If you enjoy this recipe, you might also like our Sweet Chili Sauce as a spicy-sweet topping option. Whether you’re a chili novice or a seasoned pro, this foolproof recipe will become your go-to for game day gatherings.
Nutrition Information
| Nutrient | Amount per Serving |
|---|---|
| Calories | 520 |
| Protein | 42g |
| Carbohydrates | 28g |
| Fat | 26g |
| Fiber | 9g |
| Sodium | 890mg |
What You’ll Need
Ingredients
| Ingredient | Amount (for 4 servings) |
|---|---|
| Ground beef | 1 lb |
| Italian sausage | 1/2 lb |
| Bacon | 4 slices, diced |
| Yellow onion | 1 medium, diced |
| Green bell pepper | 1 medium, diced |
| Garlic | 4 cloves, minced |
| Beef broth | 2 cups |
| Diced tomatoes | 1 (14.5 oz) can |
| Tomato sauce | 1 (8 oz) can |
| Kidney beans | 1 (15 oz) can, drained |
| Black beans | 1 (15 oz) can, drained |
| Chili powder | 2 tablespoons |
| Cumin | 1 tablespoon |
| Oregano | 1 teaspoon |
| Salt | 1 teaspoon |
| Black pepper | 1/2 teaspoon |
| Cayenne pepper | 1/4 teaspoon (adjust to taste) |
| Brown sugar | 1 tablespoon |
Equipment
| Tool | Purpose |
|---|---|
| Large Dutch oven or heavy pot | Main cooking vessel |
| Wooden spoon | For stirring and breaking up meat |
| Measuring cups and spoons | For accurate measurements |
| Can opener | For opening canned ingredients |
| Cutting board | For prep work |
| Sharp knife | For chopping vegetables |
| Ladle | For serving |
| Colander | For draining beans |
| Timer | To track cooking times |
| Heat-resistant gloves | For handling hot pot |
Possible Substitutions
- Ground turkey can replace ground beef for a leaner option
- Vegetable broth works instead of beef broth for a milder flavor
- Pinto beans are a good substitute for kidney beans
- Brown sugar can be omitted if you prefer less sweetness
- Bell pepper color doesn’t matter – red, yellow, or orange work just as well
Step-by-Step Instructions
Preparation Phase (30 minutes)
- Read through the entire recipe first.
- This helps you understand the flow and timing of the recipe
- Check that you have all ingredients and equipment
- Note any substitutions you might need to make
- Prepare your workspace:
- Clear and clean your kitchen counter
- Set up a cutting board for vegetables and another for meat if possible
- Place a small bowl nearby for food scraps
- Have paper towels handy for quick cleanups
- Measure all spices and set aside:
- Use individual small bowls or a muffin tin to hold pre-measured spices
- Combine the chili powder (2 tablespoons), cumin (1 tablespoon), oregano (1 teaspoon), salt (1 teaspoon), black pepper (1/2 teaspoon), and cayenne pepper (1/4 teaspoon) in one bowl
- Keep brown sugar (1 tablespoon) separate as it’s added later
- Prepare the meat:
- Remove ground beef (1 lb) and Italian sausage (1/2 lb) from packaging and let sit at room temperature for 10 minutes (cold meat doesn’t brown as well)
- Cut bacon (4 slices) into small pieces about 1/2 inch wide using kitchen scissors or a sharp knife
- Prepare the vegetables:
- Peel the onion, cut it in half, and place the flat side down on the cutting board for stability
- Cut into thin slices, then rotate and cut across to create small, even dice (about 1/4 inch)
- For the bell pepper, cut off the top and remove the core and seeds
- Cut the pepper in half, then slice into strips and dice to the same size as the onion
- Peel garlic cloves by placing them under the flat side of a knife and pressing gently to crush slightly, making the skin easy to remove
- Mince the garlic by cutting into very fine pieces (about 1/8 inch or smaller)
- Keep all vegetables in separate piles or bowls
- Prepare the canned ingredients:
- Open all cans (diced tomatoes, tomato sauce, kidney beans, black beans)
- Pour beans into a colander and rinse under cold water to remove excess sodium and starch
- Let beans drain while you start cooking
- Keep tomato products in their cans until needed
- Position your Dutch oven on the stove:
- Make sure it’s centered on the burner
- Keep pot handles turned inward to prevent accidental bumping
- Have your wooden spoon and heat-resistant gloves nearby
Cooking Phase (2 hours)
- Cook the bacon:
- Place your Dutch oven on the stove over medium heat (not high, as bacon burns easily)
- Add the diced bacon to the cold pot (starting in a cold pot helps render fat more effectively)
- Cook for 5-7 minutes, stirring every minute with a wooden spoon
- The bacon is ready when it turns golden brown and crispy
- BEGINNER TIP: If bacon starts to burn, lower the heat immediately
- Brown the ground meats:
- Keep the heat at medium
- Add the ground beef and Italian sausage to the pot with the bacon and bacon fat
- Break the meat into smaller pieces using your wooden spoon (aim for 1-inch chunks initially)
- Let meat cook for 2 minutes untouched to develop browning
- Continue breaking meat into smaller pieces as it cooks
- Cook for 8-10 minutes total, until no pink remains
- BEGINNER TIP: If there’s more than 2 tablespoons of fat in the pot, you can spoon some out, but leave some for flavor. This browning technique is similar to what we use in our Barbecue Smoked Sausage Chili to develop deep flavor.
- Sauté the vegetables:
- Add the diced onions and bell peppers to the pot with the browned meat
- Stir to combine everything
- Cook for 5 minutes, stirring every minute
- You’ll know they’re ready when onions become translucent (see-through) but not brown
- Add the minced garlic and stir continuously for 30 seconds
- BEGINNER TIP: Garlic burns easily and becomes bitter, so watch it carefully and keep stirring
- Add the spice mixture:
- Add all the pre-measured spices (chili powder, cumin, oregano, salt, pepper, and cayenne)
- Stir continuously for 1 minute to coat the meat and vegetables
- The mixture will become very fragrant
- BEGINNER TIP: If the mixture looks too dry or starts sticking to the bottom, add 2 tablespoons of beef broth to loosen it
- Add the liquid and tomato ingredients:
- Pour in the beef broth (2 cups) and stir, scraping the bottom of the pot with the wooden spoon to release any stuck bits (this is called “deglazing” and adds flavor)
- Add the can of diced tomatoes with all their juice
- Add the tomato sauce
- Stir well to combine everything
- BEGINNER TIP: Pour liquids in slowly to avoid splashing
- Bring to a boil and reduce to simmer:
- Increase heat to medium-high
- Watch for bubbles forming around the edges, then across the surface
- Once the chili is bubbling steadily (boiling), reduce heat to low
- The surface should show gentle movement with occasional small bubbles (simmering)
- Cover the pot with its lid
- BEGINNER TIP: If the heat is too high, the chili can burn on the bottom, so err on the side of a lower heat
- First simmer period:
- Set a timer for 1 hour
- Stir the chili every 15 minutes to prevent sticking
- Check that it maintains a gentle simmer – adjust heat if needed
- After 1 hour, the liquid should have reduced slightly and flavors will be developing
- BEGINNER TIP: Place a wooden spoon under one edge of the lid if it’s bubbling too vigorously – this allows some steam to escape
- Add the beans and brown sugar:
- Add the drained kidney beans and black beans
- Add the brown sugar
- Stir gently to incorporate without mashing the beans
- BEGINNER TIP: Taste a tiny spoonful (let it cool first!) to check seasonings
- Second simmer period:
- Remove the lid
- Simmer uncovered for 30 more minutes
- Stir every 10 minutes to prevent sticking
- The chili will gradually thicken as moisture evaporates
- BEGINNER TIP: If the chili gets too thick, add 1/4 cup of beef broth or water
- Final seasoning adjustments:
- Turn off the heat
- Taste the chili carefully (it’s hot!)
- Adjust seasonings as needed:
- For more salt: add 1/4 teaspoon at a time, stir, and taste again
- For more heat: add additional cayenne 1/8 teaspoon at a time
- For more sweetness: add 1/2 teaspoon more brown sugar
- BEGINNER TIP: Write down any adjustments you make for future reference
Finishing Touches (10 minutes)
- Rest the chili:
- Remove the pot from the heat source completely
- Let the chili rest uncovered for 10 minutes
- This allows the flavors to settle and the chili to thicken slightly
- BEGINNER TIP: This is a good time to prepare any toppings and warm your serving bowls
- Prepare optional toppings:
- Shredded cheddar cheese (about 1 cup total)
- Sour cream (1/2 cup)
- Diced avocado (1 whole)
- Sliced green onions (2-3 onions)
- Chopped fresh cilantro (1/4 cup)
- Lime wedges (1 lime, cut into quarters)
- Crushed tortilla chips (1-2 cups)
- Serve the chili:
- Stir the chili one final time
- Ladle into bowls, filling each about 2/3 full to leave room for toppings
- Place toppings in small bowls with spoons so everyone can customize their own
- BEGINNER TIP: Warm bowls by filling them with hot water, then emptying and drying them just before serving

Troubleshooting Your Boilermaker Tailgate Chili
| Issue | Solution |
|---|---|
| Boilermaker Tailgate Chili is too thin | Simmer uncovered longer to reduce liquid, or stir in 1 tablespoon of cornmeal |
| Boilermaker Tailgate Chili is too thick | Add more beef broth, 1/4 cup at a time, stirring well after each addition |
| Too spicy | Add a dollop of sour cream, more brown sugar, or 1/4 cup of tomato sauce |
| Not spicy enough | Add more cayenne pepper (1/8 tsp at a time) or hot sauce (a few drops at a time) |
| Tastes too acidic | Add 1/2 teaspoon more brown sugar or 1/4 teaspoon baking soda |
| Beans are too firm | Continue cooking until they soften, or next time, add beans earlier in the cooking process |
| Burning on the bottom | Lower heat immediately, don’t scrape the burnt part, and transfer to a new pot if necessary |
| Meat is clumped together | Next time, break up meat more as it cooks, or break up clumps with two forks |
Variations & Substitutions
Vegetarian Version
Replace all meat with an extra can of beans and 1 cup of diced mushrooms. Add 1 tablespoon of smoked paprika for that smoky flavor you’d miss from the bacon.
Extra Spicy
Double the cayenne pepper and add 1 diced jalapeño with the bell pepper. You can also add a dash of hot sauce before serving.
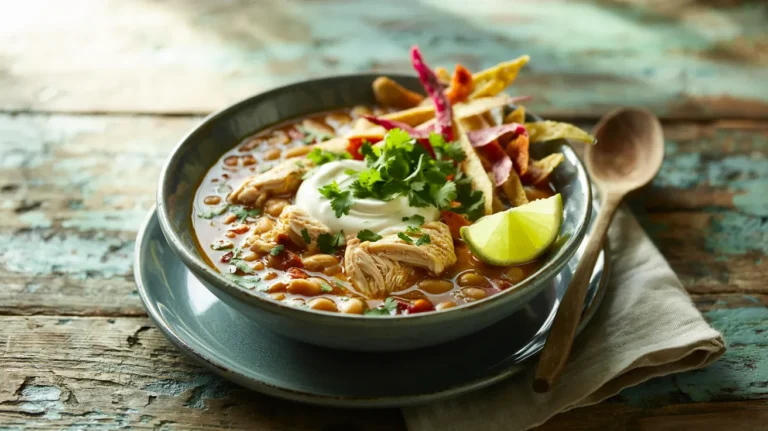
White Chicken Chili Variation
Substitute ground chicken for the beef and sausage, use white beans instead of kidney/black beans, and add 1 cup of corn. Use chicken broth instead of beef. For a similar but even more flavorful option, try our Green Chili Chicken Soup recipe.
Tex-Mex Style
Add 1 tablespoon of cocoa powder and 1/2 teaspoon of cinnamon with the spices. Top with crushed tortilla chips and lime wedges.
Storing & Reheating Your Boilermaker Tailgate Chili
Refrigeration
- Cool Boilermaker Tailgate Chili completely before storing (within 2 hours of cooking)
- Divide into airtight containers
- Refrigerate for up to 4 days
- BEGINNER TIP: Date your containers so you know how long they’ve been stored
Freezing
- Cool chili completely
- Portion into freezer-safe containers, leaving 1/2 inch space at the top for expansion
- Freeze for up to 3 months
- Label containers with contents and date
- BEGINNER TIP: Freeze individual portions for easy single servings
Reheating
Stovetop Method:
- Place chili in a pot over medium-low heat
- Add 2 tablespoons of water or broth per cup of chili
- Stir occasionally until bubbling and heated through (about 10 minutes)
- BEGINNER TIP: Cover the pot to heat more quickly, but stir often to prevent burning
Microwave Method:
- Place chili in a microwave-safe bowl
- Cover loosely with a microwave-safe lid or paper towel
- Heat on high for 1 minute
- Stir thoroughly
- Continue heating in 30-second intervals, stirring between each, until hot throughout
- BEGINNER TIP: Let stand for 1 minute before eating as temperature will continue to distribute
Slow Cooker Method:
- Place refrigerated chili in slow cooker
- Heat on low for 2-3 hours, stirring occasionally
- BEGINNER TIP: Perfect for game day! Turn on before the game starts for halftime serving
Safety Tips & Notes
- Cook ground meats to 160°F for food safety (use a food thermometer if you have one)
- Wash hands thoroughly after handling raw meat
- Use separate cutting boards for meat and vegetables
- Never leave chili at room temperature for more than 2 hours
- When reheating, ensure chili reaches 165°F throughout
- If your chili has been in the refrigerator for more than 4 days, discard it
- If frozen chili has been thawed, don’t refreeze it
Beginner Tips
- Don’t rush the cooking process – the slow simmer is essential for flavor development
- Taste as you go – but not with the same spoon you’re stirring with
- Have everything prepped before turning on the stove – the French call this “mise en place”
- Keep heat at medium or lower – high heat can burn your chili
- Write notes on what you liked or would change for next time
- Clean as you go – wash prep tools while the chili simmers
- Don’t be afraid to adjust – recipes are guidelines, not rules
- Use fresh spices – if your chili powder has been in the cabinet for years, it’s time for new spices
This Boilermaker Tailgate Chili Recipe will become your signature dish for cool weather gatherings. With its perfect balance of heat, savory flavors, and hearty texture, it’s sure to score points with everyone at your table!