Prep Time: 15 minutes | Cook Time: 25 minutes | Total Time: 40 minutes | Servings: 4
- Master this technique: This foolproof Braised Yellow Croaker Fish With Garlic creates tender, flaky results every time
- Secret 3-minute sear: Locks in moisture while creating perfectly crispy skin
- Family-approved: Even picky eaters love this mild, savory Braised Yellow Croaker dish
- Beginner-friendly: Simple steps, minimal ingredients, restaurant-worthy results
Why Braised Yellow Croaker Fish With Garlic Works (When Other Fish Recipes Fail)
Ever cooked fish only to watch it fall apart or turn dry and tasteless? You’re not alone.
Braised Yellow Croaker Fish With Garlic solves this common cooking frustration with a foolproof method.
This recipe combines a quick sear with gentle braising, allowing the fish to absorb the rich garlic sauce while staying perfectly tender. The yellow croaker’s naturally sweet flesh pairs beautifully with the savory garlic-ginger sauce.
I’ve tested dozens of fish recipes, and this Braised Yellow Croaker Fish With Garlic technique consistently delivers amazing results, even for beginners. Just follow my step-by-step instructions and you’ll create a dish worthy of your favorite seafood restaurant.
Nutrition Comparison
| Nutrient | Braised Yellow Croaker Fish With Garlic | Fried Yellow Croaker | Baked Yellow Croaker |
|---|---|---|---|
| Calories | 220 per serving | 350 per serving | 190 per serving |
| Protein | 28g | 25g | 27g |
| Fat | 12g | 22g | 9g |
| Carbs | 4g | 15g | 3g |
| Sodium | 580mg | 720mg | 550mg |
What You’ll Need
Ingredients List
| Ingredient | Amount | Notes |
|---|---|---|
| Yellow croaker fish | 4 (about 1 lb each) | Scaled and gutted |
| Garlic | 10 cloves | 6 minced, 4 sliced |
| Ginger | 2-inch piece | Julienned |
| Green onions | 6 stalks | White parts and green parts separated |
| Shaoxing wine | 3 tablespoons | Chinese cooking wine |
| Soy sauce | 3 tablespoons | Regular, not light or dark |
| Sugar | 1 tablespoon | White granulated |
| White pepper | 1/2 teaspoon | |
| Salt | 1 teaspoon | |
| Vegetable oil | 4 tablespoons | |
| Water | 1 1/2 cups | |
| Cornstarch | 1 tablespoon | Mixed with 2 tablespoons water |
| Sesame oil | 1 teaspoon | For finishing |
Equipment List
| Tool | Purpose |
|---|---|
| Large wok or skillet | Main cooking vessel |
| Sharp knife | For scoring fish and cutting ingredients |
| Cutting board | Prep surface |
| Measuring cups/spoons | Accurate measurements |
| Tongs | Handling fish safely |
| Small bowl | For sauce mixing |
| Plate/platter | Serving |
| Kitchen timer | Track cooking times |
| Paper towels | Drying fish |
Substitutions (If Needed)
- Yellow croaker: Sea bass or red snapper work well (if you enjoy these fish, you might also like my Beer Battered Fried Fish recipe for a different preparation method)
- Shaoxing wine: Dry sherry or rice wine vinegar mixed with water (2:1 ratio)
- Fresh ginger: 1/2 teaspoon ground ginger (less effective but usable)
- Cornstarch: All-purpose flour (use 2 tablespoons instead of 1)
Super-Detailed Step-by-Step Instructions for Beginners
Preparation Phase (15 minutes)
- Get your fish ready:
- Unwrap your 4 yellow croaker fish and check if they’re already cleaned. If not, ask the fishmonger to clean them for you.
- Place the fish in a colander and rinse them under cold running water, making sure to rinse both the outside and inside cavity.
- IMPORTANT BEGINNER TIP: Place the fish on a plate lined with several paper towels. Use additional paper towels to thoroughly pat the fish dry on all sides. Press gently but firmly. A dry fish is the secret to getting crispy skin and preventing sticking!
- Place the dried fish on a clean cutting board.
- Score the fish:
- Take a sharp knife (a paring knife works great for beginners).
- On one side of each fish, make 3 diagonal cuts from top to bottom. Each cut should be about 1/4-inch deep – that’s about the depth of the tip of your pinky finger.
- WHY THIS MATTERS: Scoring helps the fish cook evenly and allows the flavors to penetrate deeper.
- Turn the fish over carefully and repeat the scoring on the other side.
- BEGINNER TIP: If you’re nervous about cutting too deep, practice the motion in the air first to get comfortable.
- Season the fish:
- Sprinkle 1/4 teaspoon of salt over each fish (1 teaspoon total for all 4 fish).
- Sprinkle 1/8 teaspoon of white pepper over each fish (1/2 teaspoon total).
- Use your fingers to gently rub the seasonings into the cuts and all over the fish.
- BEGINNER TIP: Season both sides and don’t forget the cavity inside!
- Prepare the garlic (this is a key flavor component):
- Place 10 garlic cloves on your cutting board.
- Using the flat side of your knife, press down firmly on each clove to crush it slightly. This makes the skin easier to remove.
- Peel all the garlic cloves by removing the papery skin.
- Take 6 of the garlic cloves and mince them finely. To do this:
- First, slice each clove thinly lengthwise.
- Then, make several cuts across the slices to create a fine mince.
- Run your knife through the pile a few times until the pieces are uniformly small.
- Take the remaining 4 garlic cloves and slice them thinly into rounds.
- BEGINNER TIP: Keep the minced and sliced garlic in separate small piles.
- Prepare the ginger:
- Take your 2-inch piece of ginger and rinse it under cold water.
- Use the edge of a spoon to scrape off the skin – this works better than a peeler for ginger’s uneven surface.
- Cut the ginger into thin slices.
- Stack a few slices at a time and cut them into matchstick-sized strips (julienne).
- BEGINNER TIP: The thinner you cut the ginger, the better it will infuse into the dish.
- Prepare the green onions:
- Rinse 6 green onion stalks under cold water.
- Trim off the root end (the white bulb with tiny roots) and discard.
- Separate the white parts from the green parts:
- Cut the white and light green portions into 2-inch sections.
- Finely chop the dark green portions and set aside for garnish.
- BEGINNER TIP: The white parts have a stronger flavor and will be cooked; the green parts are milder and used as a finishing touch.
- Mix the sauce:
- Get a small bowl.
- Add 3 tablespoons of soy sauce to the bowl.
- Add 3 tablespoons of Shaoxing wine (or substitute).
- Add 1 tablespoon of sugar.
- Stir with a spoon until the sugar completely dissolves – this might take 30 seconds of stirring.
- BEGINNER TIP: Taste a tiny drop of the sauce – it should be balanced between salty, sweet, and savory.
- Make the cornstarch slurry:
- In a separate small bowl, add 1 tablespoon of cornstarch.
- Add 2 tablespoons of cold water (must be cold).
- Stir vigorously with a spoon until completely smooth with no lumps.
- BEGINNER TIP: If you still see lumps, press them against the side of the bowl with your spoon to break them up.
- Set this aside – you’ll use it right at the end of cooking.
Cooking Phase (25 minutes)
- Sear the fish (5 minutes):
- Place your wok or large skillet on the stove.
- Turn the heat to high.
- BEGINNER TIP: To test if your pan is hot enough, sprinkle a few drops of water into it – they should sizzle and evaporate immediately.
- Add 3 tablespoons of vegetable oil to the hot pan and tilt it so the oil coats the bottom.
- Using tongs, carefully place each fish in the pan. Start by placing them away from you to prevent oil splashing toward you.
- SAFETY TIP: Stand back slightly as the fish might cause oil to spatter.
- Allow the fish to cook, untouched, for 2-3 minutes until the bottom side is golden brown.
- HOW TO CHECK: Gently try to lift the edge of one fish with your tongs – if it releases easily, it’s ready to flip. If it sticks, give it 30 more seconds.
- Carefully flip each fish over to cook the other side for another 2-3 minutes.
- Once both sides are golden brown, remove the fish and place them on a clean plate. They won’t be fully cooked yet – that’s normal!
- Create the aromatic base (3 minutes):
- Using the same wok with the remaining oil (don’t clean it!), reduce the heat to medium.
- Add the minced garlic, sliced garlic, julienned ginger, and white parts of green onions to the pan.
- Using a wooden spoon or spatula, stir these aromatics constantly for 30 seconds.
- BEGINNER TIP: Keep everything moving to prevent burning. The garlic should become fragrant but not brown. If it starts to brown, immediately move to the next step.
- WHY THIS MATTERS: This step creates the foundation of flavor for your dish. The oil absorbs the flavors of these ingredients.
- Begin the braise (15 minutes):
- Pour your prepared sauce mixture (soy sauce, Shaoxing wine, and sugar) into the pan with the aromatics.
- CAREFUL: The liquid might sizzle when it hits the hot pan – this is normal.
- Add 1 1/2 cups of water to the pan.
- Increase the heat to high and bring the liquid to a gentle boil – you’ll see bubbles forming around the edges, then across the surface.
- Using your tongs, carefully return the fish to the wok, placing them side by side.
- Use a spoon to ladle some of the sauce over each fish.
- Once the liquid is boiling, reduce the heat to low.
- Cover the wok with a lid. If you don’t have a lid that fits, you can use aluminum foil, pressing it around the edges of the wok.
- Let the fish simmer gently for 12-15 minutes. Set a timer!
- BEGINNER TIP: Halfway through the cooking time (around 6-7 minutes), carefully open the lid and spoon some of the sauce over the fish again. This helps keep them moist and flavorful.
- HOW TO TELL IF FISH IS DONE: After 12-15 minutes, test the fish by gently inserting a fork into the thickest part. If it flakes easily and is opaque throughout, it’s done. If it’s still translucent or doesn’t flake, cook for 2-3 more minutes.
- Thicken the sauce (2 minutes):
- Once the fish is cooked through, carefully remove each fish using tongs and a spatula for support.
- Place them on your serving plate, arranging them neatly.
- Increase the heat under the remaining sauce to medium-high.
- Stir your cornstarch slurry again (it naturally settles) until it’s well mixed.
- While continuously stirring the sauce in the pan with one hand, slowly pour in the cornstarch slurry with your other hand.
- BEGINNER TIP: Pour the slurry in a thin stream while stirring, not all at once.
- Continue stirring constantly for 1-2 minutes until the sauce thickens.
- HOW TO TEST THICKNESS: Dip a spoon in the sauce, then run your finger across the back of the spoon. If it leaves a clear path that doesn’t immediately fill in, your sauce is perfectly thickened.
- Finishing touches:
- Turn off the heat under the sauce.
- Carefully pour or spoon the thickened sauce over the fish on the serving plate.
- Drizzle 1 teaspoon of sesame oil in a circular motion over the fish and sauce.
- Take your reserved chopped green onion parts and sprinkle them evenly over the top.
- BEGINNER TIP: If you have time, warm your serving plate beforehand by running it under hot water and drying it. This keeps your dish hotter longer at the table.
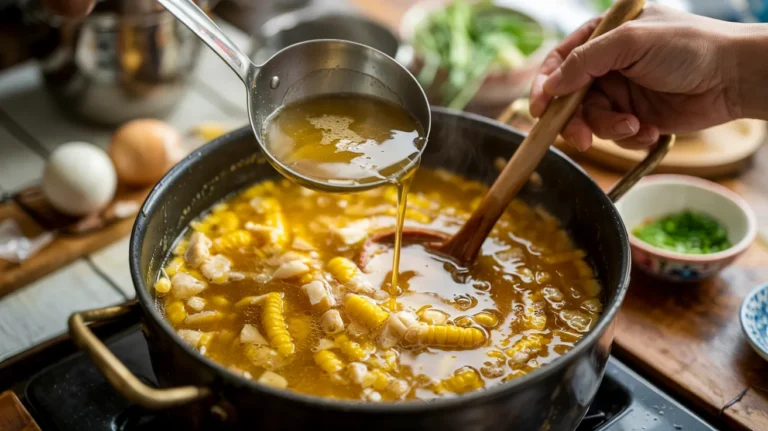
- Serve immediately with steamed rice on the side. For a complete Asian-inspired meal, you might want to try my Corn and Fish Maw Soup as a starter.

Troubleshooting Common Issues
Problem: Fish sticks to the pan
Solution: This usually happens when either the fish wasn’t dry enough or the pan wasn’t hot enough before adding the fish. Next time, pat the fish even more thoroughly with paper towels and make sure the oil is shimmering hot before adding the fish. Also, let the fish cook undisturbed until it naturally releases from the pan.
Problem: Fish breaks apart
Solution: Yellow croaker is delicate. Use a fish spatula and tongs together to support the fish when flipping and transferring. If it’s still breaking, you might be handling it too roughly or it could be overcooked. Try reducing cooking time slightly next time.
Problem: Sauce is too thin
Solution: If after adding the cornstarch slurry, your sauce is still thin, mix an additional 1/2 tablespoon cornstarch with 1 tablespoon cold water and add it to the sauce while continuing to stir. Remember, the sauce will thicken slightly more as it cools.
Problem: Garlic burns and tastes bitter
Solution: Garlic burns quickly, especially when minced. If this happens, unfortunately, you’ll need to start this step over as burned garlic will make the whole dish bitter. Next time, use lower heat and have your liquid ingredients ready to add immediately if the garlic starts to brown too quickly.
Problem: Sauce is too salty
Solution: Add 1/4 cup of water and 1/2 teaspoon of sugar to balance it out. Next time, you can reduce the soy sauce to 2 tablespoons.
Variations & Substitutions
Spicy Braised Yellow Croaker Fish
Add 2-3 dried red chilies or 1 tablespoon chili bean paste (doubanjiang) when stir-frying the aromatics. Remove the chilies before serving if you don’t want to bite into them accidentally.
Lighter Version
Skip the cornstarch thickening step and use only 1 tablespoon of oil total for a lighter sauce. The flavor will still be excellent, just with a thinner sauce. If you’re looking for other light fish recipes, you might enjoy learning how to make your own version of Long John Silver’s Fish Batter but with less oil.
Herb-Infused Braised Yellow Croaker
Add 1/4 cup chopped cilantro at the end for a fresh flavor boost. Cilantro pairs wonderfully with the garlic and ginger in this dish.
Citrus Yellow Croaker
Add the zest of half a lemon or orange to the sauce for a bright, citrusy note that complements the fish beautifully.
Storage & Reheating
Storage
- Refrigerator: Place cooled leftover fish and sauce in an airtight container, separating fish pieces with parchment paper to prevent sticking. Store for up to 2 days.
- Freezer: Not recommended for this dish – the texture of the fish will deteriorate significantly and become mushy when thawed.
Reheating
- Best method: Set up a steamer by placing a metal rack in a pot with 1 inch of water. Bring to a simmer, place fish on a heat-proof plate, cover, and steam for 5-7 minutes until just heated through.
- Alternative: Place fish in a microwave-safe dish, cover with a damp paper towel to maintain moisture, and microwave on 50% power in 30-second intervals until just warm (usually 1-2 minutes total).
- REHEATING TIP: The fish is delicate, so reheating it gently is key to preventing it from becoming tough or dry.
Safety Notes & Tips
Food Safety
- Fish should reach an internal temperature of 145°F (63°C) when fully cooked.
- Don’t leave cooked fish at room temperature for more than 2 hours.
- Always wash hands thoroughly with soap after handling raw fish.
- Use separate cutting boards for fish and other ingredients to prevent cross-contamination.
Cooking Tips
- Secret to success: Don’t rush the braising process – low and slow creates tender fish that absorbs the flavors beautifully.
- Flavor enhancer: Let fish marinate with salt and pepper for 10 minutes before cooking to season all the way through.
- Texture tip: Score the fish properly to allow sauce to penetrate into the flesh while cooking.
- Presentation boost: Serve on a pre-warmed plate with a rim to contain the delicious sauce.
- Beginner tip: If you’re nervous about flipping whole fish, you can cut them in half crosswise to make smaller pieces that are easier to manage.
Dietary Considerations
- This recipe is gluten-free if you use tamari instead of regular soy sauce.
- Low-carb friendly with only 4g carbs per serving.
- For lower sodium needs, reduce soy sauce to 2 tablespoons and increase water slightly.
- This dish is high in protein and contains healthy omega-3 fatty acids from the fish.