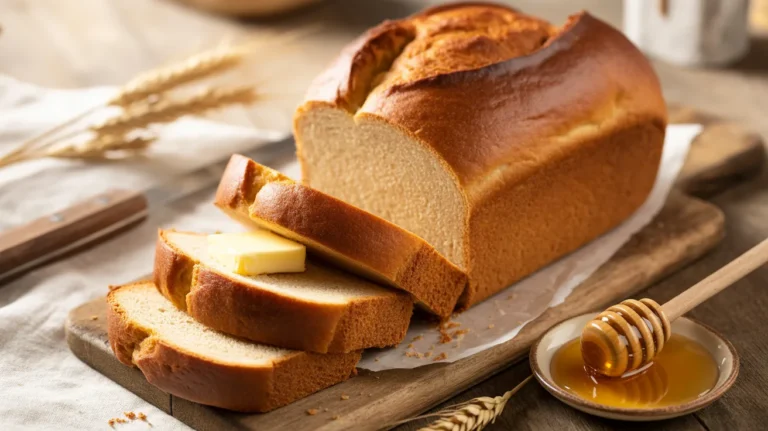
There’s nothing quite like homemade bread machine brioche fresh from your kitchen. This bread machine brioche recipe transforms simple ingredients into buttery, golden loaves with minimal effort—your machine does the heavy lifting while you enjoy that incredible bakery aroma filling your home.
SERVES: 4 | PREP: 15 MIN | COOK: 3 HRS 30 MIN | TOTAL: 3 HRS 45 MIN
Ingredients
Wet Ingredients
| Ingredient | Amount |
|---|---|
| Whole milk, warmed | ¾ cup |
| Large eggs | 3 |
| Unsalted butter, softened | 6 tablespoons |
| Honey | 2 tablespoons |
Dry Ingredients
| Ingredient | Amount |
|---|---|
| Bread flour | 3 cups |
| Granulated sugar | ¼ cup |
| Salt | 1 teaspoon |
| Active dry yeast | 2¼ teaspoons |
Optional Finishing
| Ingredient | Amount |
|---|---|
| Egg wash (1 egg + 1 tbsp water) | For brushing |
Step-by-Step Instructions
Phase 1: Preparing Your Ingredients (5 minutes)
Step 1: Warm your milk to about 100°F—it should feel slightly warm when you test it on your wrist. Cold milk will slow down the yeast, while too-hot milk will kill it. I learned this the hard way when my first batch didn’t rise properly.
Step 2: Cut your butter into small cubes and let it sit at room temperature for 10 minutes. Soft butter blends better with the dough, creating those tender layers brioche is famous for.
Step 3: Crack your eggs into a small bowl and whisk them lightly. This ensures they distribute evenly throughout the dough instead of creating egg pockets.
Phase 2: Loading the Bread Machine (5 minutes)
Step 4: Pour the warmed milk directly into your bread machine pan. Always add liquids first—this prevents dry ingredients from getting stuck in the corners where the paddle can’t reach them.
Step 5: Add your whisked eggs on top of the milk. The eggs should blend naturally with the milk without any stirring needed.
Step 6: Drop your softened butter cubes evenly around the pan. Spreading them out helps the machine mix everything uniformly during the kneading cycle.
Step 7: Drizzle the honey over the butter. Honey adds subtle sweetness and helps create that beautiful golden-brown crust.
Phase 3: Adding Dry Ingredients (3 minutes)
Step 8: Measure your bread flour carefully using the spoon-and-level method. Scooping directly from the bag packs too much flour into your cup, which makes dense, heavy brioche instead of light and airy.
Step 9: Pour the flour evenly over all the wet ingredients, making sure it covers them completely. This creates a barrier that keeps the yeast from activating too early.
Step 10: Sprinkle the sugar and salt over the flour layer. Keep them on opposite sides of the pan—salt can inhibit yeast activity if they touch directly before mixing begins.
Step 11: Create a small well in the center of the flour and add your yeast. The well protects the yeast from touching the salt or wet ingredients until the mixing cycle starts.
Phase 4: Machine Settings and Baking (3 hours 30 minutes)
Step 12: Select your machine’s “Sweet Bread” or “Brioche” setting if available. These cycles use gentler kneading and longer rising times perfect for enriched doughs. If you don’t have these options, use the basic white bread setting with a light crust.
Step 13: Choose a medium or light crust color. Brioche browns quickly because of the eggs, butter, and sugar, so a light setting prevents over-browning while keeping the inside perfectly soft.
Step 14: Press start and walk away. Your machine will knead for about 20 minutes, then let the dough rise twice before baking. You’ll hear different sounds as it switches between cycles—that’s completely normal.
Step 15: During the final 10 minutes of baking, check the crust color through your machine’s window. If it’s browning too fast, tent a piece of aluminum foil over the top of the pan (be careful—it’s hot!).
Phase 5: Finishing Touches (2 minutes)
Step 16: When the cycle completes, remove the pan immediately using oven mitts. Letting brioche sit in the pan creates steam that makes the bottom soggy.
Step 17: Turn the pan upside down and gently shake to release your loaf. If it sticks, run a plastic spatula around the edges—never use metal tools that could scratch your non-stick pan.
Step 18: Let the bread cool on a wire rack for at least 30 minutes before slicing. I know it’s tempting to cut into it right away, but hot brioche compresses when sliced and turns gummy. Trust me on this one.
Chef’s Notes
Butter Temperature Matters: Room-temperature butter incorporates smoothly, creating that signature tender crumb. Cold butter leaves lumps that create uneven texture.
The Yeast Well Technique: Creating that flour well for your yeast prevents premature activation. I started doing this after getting inconsistent rises, and it solved the problem completely.
Egg Quality Counts: Fresh eggs give you better rise and richer flavor. Your bread machine brioche deserves the good stuff.
Timing Your Bake: Start this recipe when you’ll be home for the full cycle. While the machine does the work, you want to remove the loaf promptly when it finishes.
Nutrition Information (Per Serving)
Calories: 385 | Protein: 12g | Carbohydrates: 52g | Fat: 14g | Fiber: 2g | Sugar: 9g | Sodium: 310mg
Delicious Variations
Chocolate Chip Brioche: Add ½ cup mini chocolate chips during the last 5 minutes of the kneading cycle. The machine will beep to remind you—listen for it!
Orange Zest Brioche: Mix 2 tablespoons of fresh orange zest into your dry ingredients. This creates a bright, citrusy flavor that’s perfect for breakfast.
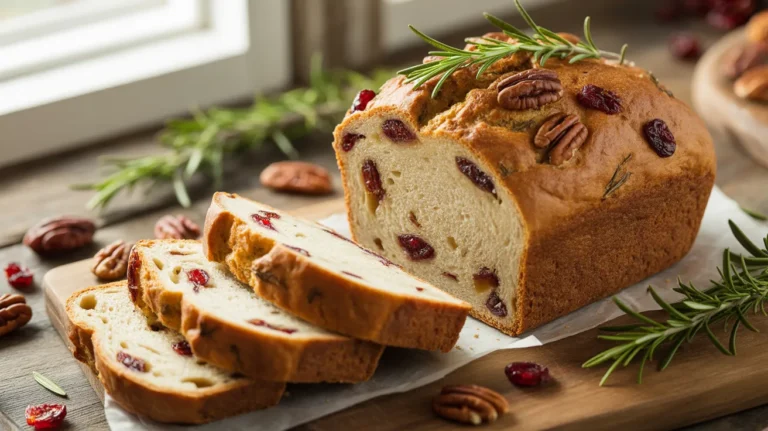
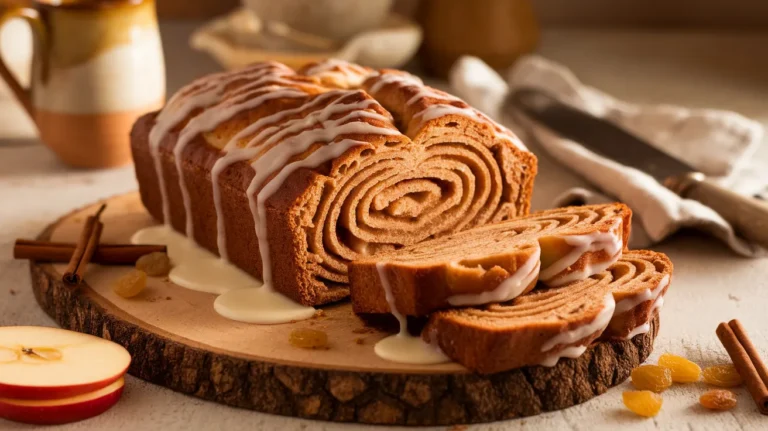
Cinnamon Swirl Version: After the first rise, pause your machine and roll out the dough. Spread it with cinnamon-sugar, roll it up, and return it to the pan. Similar to how I make my bread machine blueberry bread with fruit ribbons throughout.
Savory Herb Brioche: Replace the honey with 1 tablespoon olive oil and add 2 tablespoons of mixed dried herbs. This variation works beautifully alongside soups, much like my bread machine cheese bread complements hearty meals.
Storage & Reheating
Room Temperature: Store your cooled brioche in a plastic bag or airtight container for up to 3 days. The high butter content keeps it moist longer than regular bread.
Refrigerator: Brioche actually dries out faster in the fridge, so I don’t recommend it unless you’re in a very humid climate.
Freezer: Slice your loaf first, then wrap it tightly in plastic wrap and aluminum foil. Freeze for up to 3 months. Thaw individual slices at room temperature for 30 minutes.
Reheating: Toast slices in a dry skillet over medium heat for 1-2 minutes per side. This refreshes the crust and warms the interior without drying it out. Microwaving makes brioche rubbery—don’t do it.
Troubleshooting Common Problems
Dense, Heavy Loaf: Your milk was probably too cold, which slowed yeast activity. Always warm it to about 100°F—it should feel like bathwater when you test it.
Loaf Didn’t Rise: Check your yeast expiration date. Old yeast loses potency and won’t create the rise you need. Also make sure your salt didn’t touch the yeast directly in the pan.
Burnt Bottom Crust: Your machine runs hot. Next time, select the lightest crust setting available and check the bread 10 minutes before the cycle ends.
Paddle Stuck Inside: This happens when you don’t remove the bread immediately. The cooling bread contracts around the paddle shaft. Remove your loaf right away and the paddle will slide out easily.
Uneven Texture: You probably added flour directly from the bag instead of measuring properly. Always spoon flour into your measuring cup and level it off—this prevents packing.
Equipment Essentials

- Bread machine with sweet bread or brioche setting
- Measuring cups and spoons (accurate measurements are critical)
- Wire cooling rack (prevents soggy bottoms)
- Serrated bread knife (for clean slicing)
- Digital kitchen thermometer (for checking milk temperature)
- Oven mitts (that pan gets hot!)
- Plastic spatula (for releasing stuck loaves safely)
Shopping List by Store Section
Dairy Aisle
- Whole milk
- Unsalted butter
- Large eggs
Baking Aisle
- Bread flour
- Granulated sugar
- Active dry yeast
- Honey (or check condiment aisle)
Pantry Staples
- Salt
Success Secrets
1. Test Your Yeast First: If your yeast is older than 6 months, proof it in warm water with a pinch of sugar before adding it to your recipe. It should foam within 5 minutes.
2. Room Temperature Wins: All your ingredients should be at room temperature (except the milk, which should be warmed). This helps everything blend smoothly and rise consistently.
3. Don’t Overfill: Your dough will double in size during rising. Make sure your bread machine can handle a 2-pound loaf before starting.
4. Listen to Your Machine: Each bread machine has its own personality. After making this recipe once, you’ll know exactly how yours sounds and when to expect each cycle.
5. The Toothpick Test: If you’re unsure whether your brioche is fully baked, insert a toothpick through the top vent. It should come out clean with no raw dough clinging to it.
Your bread machine brioche will transform your breakfast table and make you the star of every brunch gathering. That golden crust and buttery interior taste like you spent all morning in the bakery, but you’ll know it only took 15 minutes of actual work!