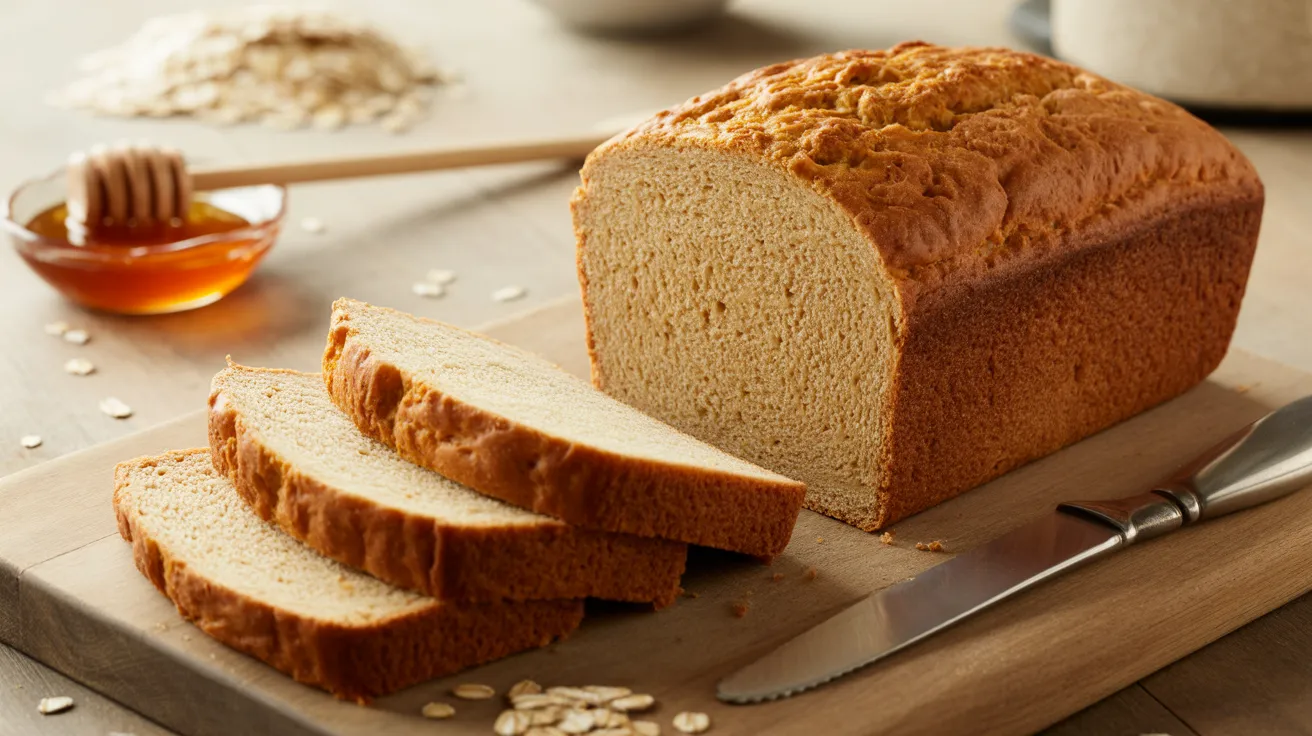
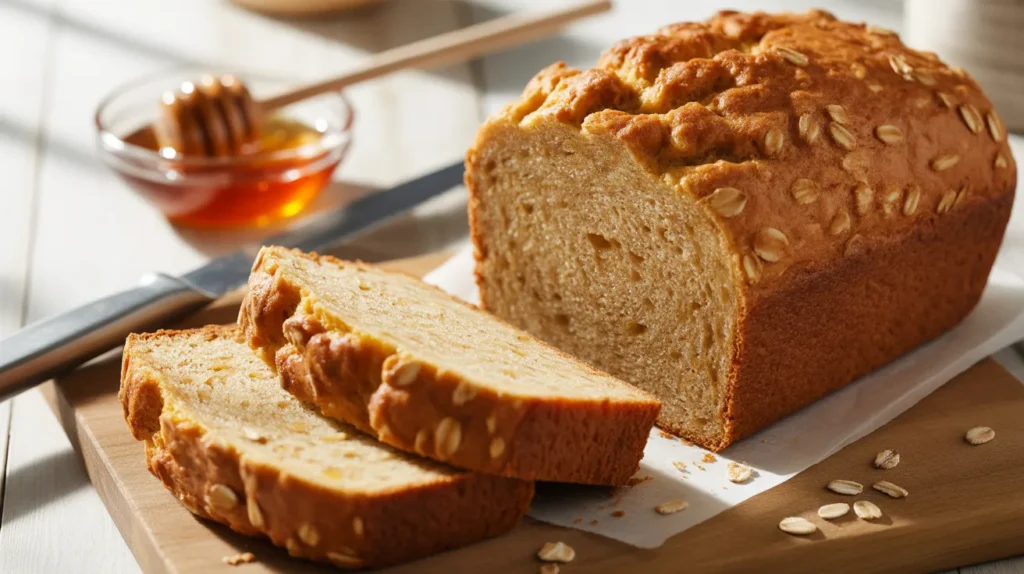
This bread machine oatmeal honey bread combines wholesome rolled oats with natural honey for a soft, slightly sweet loaf that’s perfect for sandwiches or morning toast. The bread machine does all the heavy lifting while you enjoy the aroma of freshly baked bread machine oatmeal honey bread filling your kitchen.
SERVES: 4 | PREP: 10 MIN | COOK: 3 HRS | TOTAL: 3 HRS 10 MIN
Ingredients
Wet Ingredients:
| Ingredient | Amount |
|---|---|
| Warm water | 1 cup |
| Honey | 3 tablespoons |
| Vegetable oil | 2 tablespoons |
| Large egg | 1 |
Dry Ingredients:
| Ingredient | Amount |
|---|---|
| Bread flour | 2¾ cups |
| Rolled oats | ½ cup |
| Nonfat dry milk powder | 3 tablespoons |
| Salt | 1¼ teaspoons |
| Active dry yeast | 2 teaspoons |
Step-by-Step Instructions
Phase 1: Preparing the Bread Pan (2 minutes)
Step 1: Remove the bread pan from your machine and make sure it’s completely clean and dry. Any residue from previous bakes can affect your new loaf’s texture and cause sticking.
Step 2: Insert the kneading paddle firmly into the bottom of the pan until it clicks into place. Give it a gentle twist to confirm it’s secure—a loose paddle won’t knead the dough properly.
Phase 2: Adding Wet Ingredients (3 minutes)
Step 3: Pour 1 cup of warm water (between 100-110°F) into the bread pan first. The water should feel warm to the touch but not hot—too hot will kill the yeast, too cold won’t activate it properly.
Step 4: Add 3 tablespoons of honey directly into the water. The honey will dissolve during mixing, but you can swirl the pan gently if you prefer to start the dissolving process.
Step 5: Pour in 2 tablespoons of vegetable oil around the edges of the pan. The oil keeps your bread moist and helps create a tender crumb.
Step 6: Crack 1 large egg into a small bowl first to check for shells, then add it to the liquid mixture. The egg adds richness and helps the bread rise higher.
Phase 3: Layering Dry Ingredients (4 minutes)
Step 7: Carefully measure 2¾ cups of bread flour using the spoon-and-level method—spoon flour into your measuring cup and level with a knife. Pour it evenly over the wet ingredients to create a complete barrier between the liquid and yeast.
Step 8: Sprinkle ½ cup of rolled oats over the flour layer. Use old-fashioned rolled oats, not instant or steel-cut—they provide the perfect chewy texture without making the bread too dense.
Step 9: Add 3 tablespoons of nonfat dry milk powder over the oats. This ingredient enriches the dough and helps create a beautiful golden crust.
Step 10: Measure 1¼ teaspoons of salt and sprinkle it on one side of the flour mixture. Keep it away from where you’ll add the yeast, as direct contact between salt and yeast can slow fermentation.
Phase 4: Adding Yeast & Starting the Machine (1 minute)
Step 11: Create a small well in the center of the flour using your finger, making sure you don’t reach the liquid below. Add 2 teaspoons of active dry yeast into this well. This positioning keeps the yeast dry until mixing begins.
Step 12: Carefully insert the bread pan into your machine, pushing down until it locks into position. Close the lid completely—leaving it open even slightly can affect rising and baking.
Step 13: Select the Basic/White Bread setting and choose your preferred crust color (medium works beautifully for this recipe). Press start and let the machine work its magic for the next 3 hours.
Phase 5: Finishing & Cooling (10 minutes active)
Step 14: When the machine beeps to signal completion, put on oven mitts and carefully remove the hot bread pan. The pan will be extremely hot—handle with care.
Step 15: Let the bread rest in the pan for 5 minutes to firm up slightly. This brief rest makes removing the loaf much easier and prevents tearing.
Step 16: Turn the pan upside down over a wire cooling rack and gently shake to release the loaf. If it sticks, use a silicone spatula to loosen the edges—never use metal tools that could scratch your pan’s coating.
Step 17: Remove the kneading paddle if it came out with the bread (this happens sometimes). Use the paddle removal tool that came with your machine, or wrap the paddle in a towel and gently twist it out.
Step 18: Allow the bread to cool on the rack for at least 30 minutes before slicing. Cutting into hot bread releases steam and creates a gummy texture—patience pays off here.
Chef’s Notes
Oat texture matters: Using old-fashioned rolled oats gives you the best structure in your bread machine oatmeal honey bread. Quick oats turn mushy, while steel-cut oats stay too hard and don’t incorporate well into the dough.
Honey sweetness level: Three tablespoons provides subtle sweetness without making the bread taste like dessert. You can reduce to 2 tablespoons for less sweetness, but don’t eliminate the honey completely—it helps keep the bread moist for days.
Water temperature is critical: Always check your water temperature with a thermometer if possible. Water that’s too hot (above 120°F) kills the yeast instantly, while water below 95°F won’t activate it properly.
Yeast freshness check: Before starting, proof your yeast by mixing it with a teaspoon of honey and warm water for 5 minutes. If it doesn’t foam and bubble, your yeast is dead and you’ll need fresh yeast for successful bread.
Nutrition Information (Per Serving)
Calories: 385
Protein: 12g
Carbohydrates: 68g
Fat: 9g
Fiber: 3g
Sugar: 13g
Sodium: 740mg
Delicious Variations
Cinnamon Raisin Oat Bread: Add 1½ teaspoons of ground cinnamon with the dry ingredients and ¾ cup of raisins when the machine beeps for add-ins. The cinnamon complements the honey beautifully, similar to how maple syrup adds warmth to bread machine maple oatmeal bread.
Whole Wheat Honey Oat: Replace 1 cup of bread flour with whole wheat flour for a heartier, nuttier loaf. Add an extra tablespoon of water to compensate for whole wheat’s higher absorption rate.
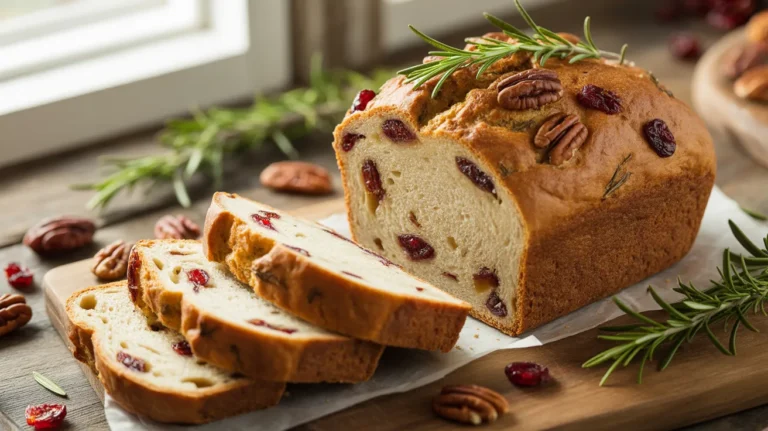
Cranberry Walnut Version: When the add-in beeps, toss in ½ cup of dried cranberries and ⅓ cup of chopped walnuts. The tart cranberries balance the honey’s sweetness perfectly.
Seeded Oat Bread: Mix 2 tablespoons each of sunflower seeds, flax seeds, and sesame seeds into the dry ingredients. This creates a rustic artisan-style loaf with extra nutrition and crunch, though it won’t rise quite as high as the original. For another unique bread machine creation, try bread machine pumpkin yeast bread for seasonal variety.
Storage & Reheating
Room Temperature Storage: Keep your cooled bread in an airtight container or resealable plastic bag at room temperature for up to 4 days. Slice only what you need to keep the remaining loaf fresher longer.
Refrigerator Storage: I don’t recommend refrigerating this bread—the cold temperature makes it go stale faster by crystallizing the starches. Room temperature storage actually keeps it softer.
Freezer Storage: Slice the completely cooled bread and wrap individual slices in plastic wrap, then store in a freezer bag for up to 3 months. Pull out slices as needed and toast directly from frozen.
Reheating Methods: Toast slices in a regular toaster for 2-3 minutes, or wrap the whole loaf in foil and warm in a 300°F oven for 10-15 minutes. For microwave reheating, wrap a slice in a damp paper towel and heat for 15-20 seconds.
Troubleshooting Common Problems
Problem: Bread collapses in the center
Your bread likely over-proofed because the water was too warm or you used too much yeast. Check your water temperature with a thermometer next time and measure yeast precisely—even ½ teaspoon extra causes problems. High humidity can also contribute to over-rising, so reduce yeast by ¼ teaspoon on humid days.
Problem: Loaf is too dense and heavy
This usually means your flour was packed too tightly when measuring, giving you too much flour for the liquid ratio. Always use the spoon-and-level method instead of scooping directly with the measuring cup. Old or inactive yeast also creates dense loaves, so check your yeast’s expiration date and proof it before using.
Problem: Bread doesn’t rise at all
Your yeast is either dead from old age or was killed by water that was too hot. Test your yeast by mixing it with warm water and a pinch of sugar—it should bubble within 5 minutes if it’s alive. Also, check that your salt didn’t touch the yeast directly before mixing started, as salt kills yeast on contact.
Problem: Crust is too thick or dark
Your bread machine’s “dark” crust setting might be too aggressive for this recipe, or your honey amount caramelized too much. Switch to the “light” or “medium” crust setting for thinner, lighter crusts. You can also reduce honey by 1 tablespoon to minimize browning.
Problem: Oats are crunchy and undercooked
You used steel-cut oats instead of rolled oats, or your oats were old and dried out. Only use old-fashioned rolled oats (also called regular oats) for bread—they soften perfectly during baking. Quick oats work in a pinch but create a gummier texture.
Equipment Essentials
- Bread machine (1.5 or 2-pound capacity)
- Liquid measuring cup (1-cup capacity)
- Dry measuring cups (full set)
- Measuring spoons
- Wire cooling rack
- Kitchen thermometer (for checking water temperature)
- Oven mitts
- Bread knife (serrated blade works best)
- Bread storage container or bags
Shopping List
Baking Aisle:
- Bread flour (check for “bread flour” specifically, not all-purpose)
- Active dry yeast (small jar or packets)
- Nonfat dry milk powder
- Rolled oats (old-fashioned, not quick or instant)
Condiments/Sweeteners Aisle:
- Honey (any variety works)
Oils & Vinegars Aisle:
- Vegetable oil (or canola oil)
Spices & Seasonings Aisle:
- Salt (table salt or sea salt)
Refrigerated Section:
- Large eggs
Success Secrets
1. Measure ingredients in order: Add liquids first, then dry ingredients, with yeast last. This layering technique keeps the yeast separated from liquids until mixing begins, preventing premature activation that throws off timing.
2. Check your machine’s yeast capacity: Some older bread machines have weaker motors that struggle with this dough’s density. If your bread consistently under-rises, reduce oats to ⅓ cup and increase bread flour by 2 tablespoons.
3. Use fresh, quality ingredients: Bread has so few ingredients that each one matters tremendously. Expired yeast, rancid oats, or old flour will ruin your loaf no matter how carefully you follow the recipe.
4. Don’t open the lid during rising: It’s tempting to peek, but opening the lid releases heat and humidity that the dough needs to rise properly. Trust the process and keep that lid closed until the machine beeps.
5. Let the bread cool completely: This is the hardest rule to follow because fresh bread smells amazing, but cutting into hot bread releases steam that should stay inside. That steam finishes cooking the interior crumb structure—without it, you’ll get a gummy, underdone center even though the outside looks perfect.
Your bread machine oatmeal honey bread will stay soft and delicious for days, making it perfect for weekly meal prep. The subtle honey sweetness makes every slice special, whether you’re using it for sandwiches, toast, or just eating it warm with butter.