Key Takeaways:
- Turn smoky beef brisket into a restaurant-worthy Brisket Pizza
- Simple 45-minute recipe perfect for weeknight dinners
- Serves exactly 4 people with generous portions
- Beginner-friendly instructions for perfect results every time
Why Brisket Pizza Will Be Your New Favorite
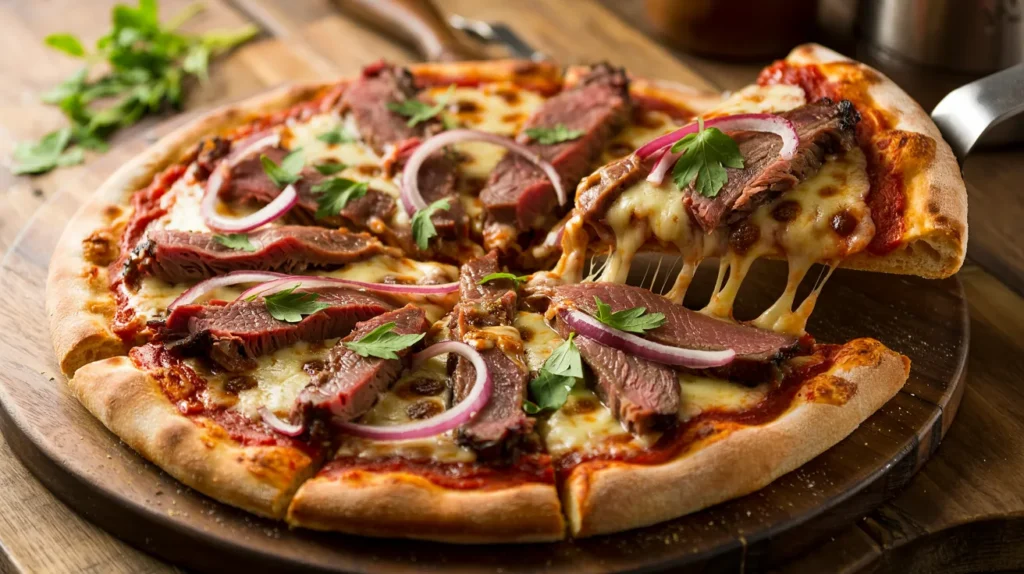
Got leftover brisket sitting in your fridge? I’ve discovered the ultimate way to give it new life. This Brisket Pizza combines tender, smoky meat with gooey cheese and a touch of BBQ sauce on a crispy crust. It’s the perfect balance of flavors that will have everyone asking for seconds.
The best part? You’ll have this Brisket Pizza ready in just 45 minutes. The rich flavors of the beef brisket shine through while melting into perfect harmony with the cheese and sauce. Trust me – this pizza will become your go-to recipe whenever you have leftover brisket.
Prep Time: 20 minutes
Cook Time: 25 minutes
Total Time: 45 minutes
Servings: 4 people
Nutrition Facts for Brisket Pizza
| Nutrient | Amount per Serving |
|---|---|
| Calories | 520 |
| Protein | 28g |
| Fat | 24g |
| Carbs | 48g |
| Fiber | 3g |
| Sugar | 8g |
| Sodium | 980mg |
Note: Nutrition values may vary based on exact ingredients used
What You’ll Need for Perfect Brisket Pizza
Kitchen Tools
| Tool | Purpose |
|---|---|
| Pizza stone or pan | Baking surface for crispy crust |
| Pizza peel | Transferring pizza to and from oven |
| Large mixing bowl | Preparing and resting dough |
| Cutting board | Chopping ingredients safely |
| Sharp knife | Cutting brisket into bite-sized pieces |
| Pastry brush | Applying oil evenly to crust |
| Rolling pin | Shaping dough to desired thickness |
| Measuring cups/spoons | Ensuring correct proportions |
Ingredients for Brisket Pizza
| Ingredient | Amount | Purpose |
|---|---|---|
| Pizza dough | 1 pound | Base of the pizza |
| Olive oil | 2 tablespoons | Crust coating for flavor and crispness |
| Pizza sauce | 1 cup | Base sauce for flavor foundation |
| BBQ sauce | 1/2 cup | Enhances brisket flavor |
| Leftover beef brisket | 2 cups, chopped | Star topping of the pizza |
| Fresh mozzarella | 2 cups, shredded | Primary cheese for melt and stretch |
| Smoked cheddar | 1 cup, shredded | Adds depth and smoky notes |
| Red onion | 1 medium, thinly sliced | Provides sweet-sharp contrast |
| Fresh parsley | 1/4 cup, chopped | Fresh finish and color |
Optional Substitutions
- Store-bought pizza dough OR homemade dough from my other pizza recipes
- Regular cheddar instead of smoked cheddar
- Sweet white onion instead of red onion
- Traditional pizza sauce instead of BBQ sauce
Detailed Step-by-Step Brisket Pizza Instructions
Preparation Phase (20 minutes)
- Oven and Stone Preparation (5 minutes)
- Remove any racks above the middle position in your oven
- Place pizza stone on middle rack of your oven
- Set temperature to exactly 450°F (232°C)
- Let stone heat for at least 30 minutes before cooking
- BEGINNER TIP: The stone needs time to absorb heat evenly – don’t rush this step!
- SAFETY NOTE: Keep oven mitts nearby for later use
- Dough Preparation (5 minutes)
- Remove dough from refrigerator packaging
- Lightly oil a large mixing bowl with 1 teaspoon olive oil
- Place dough ball in bowl and roll it around to coat with oil
- Cover bowl with a clean kitchen towel or plastic wrap
- Let sit at room temperature for 30 minutes
- TEST FOR READINESS: Gently poke dough with finger – it should slowly spring back
- BEGINNER TIP: Cold dough is difficult to stretch and tears easily
- Ingredient Prep While Dough Rests (10 minutes)
- Place leftover brisket on cutting board
- Using sharp knife, chop brisket into 1/2-inch cubes (about the size of a dice)
- Place chopped brisket in a mixing bowl
- Add 1/4 cup BBQ sauce to brisket
- Stir gently with spoon to coat all pieces evenly
- Peel and halve the red onion
- Slice onion into thin rings (about 1/8-inch thick)
- Shred both kinds of cheese if not pre-shredded
- Wash parsley, pat dry, remove stems, and chop leaves finely
- PRO TIP: Arrange all prepped ingredients in small bowls in order of use
Assembly Steps (15 minutes)
- Prepare Work Surface (2 minutes)
- Choose a clean, flat countertop with enough space
- Measure about 1/4 cup flour
- Sprinkle flour in a circle about 16 inches wide
- Use your palm to spread flour evenly
- Keep extra 1/4 cup flour in a small bowl nearby for adjustments
- BEGINNER WARNING: Too little flour will make dough stick; too much will make it tough
- VISUAL CUE: Surface should look like a light dusting of snow
- Shape the Dough Step-by-Step (8 minutes)
- Remove dough from bowl and place in center of floured surface
- Dust your hands lightly with flour to prevent sticking
- Press down with flat palms in center of dough
- Work hands outward in circular motion, flattening dough
- Leave outer edge (about 1 inch) slightly thicker for crust
- Once dough is about 10 inches wide, try this technique:
- Lift dough with both hands at edge
- Let gravity help stretch dough as you rotate it
- Move hands around edge, stretching gently as you go
- Continue until dough reaches approximately 14-inch diameter
- BEGINNER TIP: If dough tears, pinch it closed and dust with small amount of flour
- PATIENCE NOTE: If dough keeps shrinking back, let it rest 5 minutes and try again
- GOAL CHECK: Dough should be thinner in center, slightly thicker at edges
- Transfer Dough to Peel (2 minutes)
- Grab your pizza peel
- Sprinkle it generously with cornmeal (about 2 tablespoons)
- Spread cornmeal evenly across surface
- Gently fold your stretched dough in half
- Lift carefully using both hands
- Place folded edge in center of peel
- Carefully unfold dough onto peel
- Adjust shape if needed by gently pulling edges
- TEST MOVEMENT: Shake peel gently forward and back
- Dough should slide freely on cornmeal
- If it sticks, carefully lift edges and add more cornmeal underneath
- BEGINNER WARNING: Don’t skip the movement test! Stuck pizza is very difficult to rescue
- Add Toppings in Proper Order (3 minutes)
- Pour 1 tablespoon olive oil into small bowl
- Using pastry brush, coat entire outer edge of dough with oil
- Using back of large spoon, spread 1 cup pizza sauce in spiral motion
- Start from center and move outward, leaving 1-inch border
- SAUCE TIP: Thin, even layer works better than thick pools
- Sprinkle exactly 1 cup mozzarella evenly over sauce
- Distribute BBQ-coated brisket pieces evenly across surface
- BEGINNER TIP: Avoid piling meat in center – spread it out
- Place onion rings evenly across pizza
- Add remaining 1 cup mozzarella
- Finish with 1 cup smoked cheddar, focusing on covering the meat
- FINAL CHECK: Shake peel again to ensure pizza still slides
- BEGINNER WARNING: Adding too many toppings makes pizza soggy and difficult to cook
Baking Your Brisket Pizza (20-25 minutes)
- Transfer to Hot Stone (1 minute)
- Open oven door fully
- Position yourself directly in front of oven
- Hold peel with both hands
- Place front edge of peel at back of stone at approximately 30-degree angle
- Use quick forward-backward jerking motion to slide pizza onto stone
- Close oven door quickly to maintain temperature
- SAFETY NOTE: Keep face and arms away from rush of hot air
- BEGINNER TIP: Practice the sliding motion on the counter before doing it with hot oven
- IF PIZZA FOLDS: Don’t panic! Quickly use tongs to unfold and rearrange
- Baking Stages and Visual Cues
- First 5 minutes:
- Crust begins to rise
- Edges start to firm up
- DO NOT open oven door during this time
- At 10 minutes:
- Quickly check progress
- Edges should be starting to brown
- Cheese should be melting but not browned
- At 15 minutes:
- Check again
- Crust should be golden
- Use peel to carefully lift edge and check bottom for browning
- At 20 minutes: Look for these signs of readiness:
- Crust is evenly golden brown around edges
- Cheese is fully melted with some light browning
- Visible bubbling across the surface
- Bottom crust shows brown spots when checked
- Edges are puffed and browned
- BEGINNER TIP: Every oven is different, so visual cues matter more than exact timing
- TOO FAST: If top is browning too quickly, place a sheet of foil loosely over top
- TOO SLOW: If not browning enough, move pizza up one rack position
- First 5 minutes:
Finishing Your Brisket Pizza (5-10 minutes)
- Removing Pizza Safely (1 minute)
- Put on oven mitts
- Open oven door fully
- Slide peel under pizza carefully, getting all the way to the back
- Use one smooth motion to lift and slide pizza onto peel
- Transfer immediately to cutting board
- BEGINNER WARNING: Don’t rush this step – better to take time than drop your pizza
- FIRST TIMER TIP: If having trouble with peel, you can use two spatulas to help
- Resting Period (3-5 minutes)
- Let Brisket Pizza rest untouched for 3-5 minutes
- This allows cheese to set slightly
- Prevents toppings from sliding off when cut
- Allows heat to distribute evenly
- WHY THIS MATTERS: Just like with meat, resting improves texture and flavor
- TIME CHECK: Use this time to clear counter and prepare plates
- Final Touches Before Serving (1 minute)
- Sprinkle fresh parsley evenly over entire pizza
- Optional: Add extra drizzle of BBQ sauce in zigzag pattern
- Use pizza cutter or sharp chef’s knife to cut into 8 equal slices
- Cut with firm pressure, using rocking motion for knife
- Transfer to serving plates immediately
- PRESENTATION TIP: For fancy serving, add a light drizzle of olive oil and a few cracks of fresh black pepper
Troubleshooting Your Brisket Pizza
| Problem | Solution |
|---|---|
| Sticky dough | Add more flour to your work surface, one tablespoon at a time |
| Dough tears easily | Let it rest 5-10 minutes to relax gluten before trying again |
| Cheese too brown before crust is done | Lower oven rack position and cover pizza with foil |
| Soggy center | Pre-cook wet toppings, use less sauce, or cook pizza longer at slightly lower temp |
| Pizza won’t slide off peel | Use more cornmeal under the dough and shake peel frequently during topping |
| Burnt bottom, raw top | Stone too hot; move pizza to upper rack and reduce oven temp by 25°F |
| Undercooked bottom | Extend baking time by 3-5 minutes or move stone to lower rack position |
| Toppings slide off when slicing | Let pizza rest longer before cutting (5-7 minutes) |
Brisket Pizza Variations & Substitutions
Love this basic Brisket Pizza recipe but want to mix it up? Try these tasty variations:
- BBQ Brisket Pizza: For a twist similar to my popular Taco Pizza with Pizza Crust, replace pizza sauce entirely with BBQ sauce
- White Brisket Pizza: Skip tomato sauce and use garlic olive oil base with ricotta dollops
- Spicy Brisket Pizza: Add sliced jalapeños and hot honey drizzle
- Meat Lover’s Brisket Pizza: Add crumbled bacon and pepperoni alongside the brisket
- Smoky Deluxe Brisket Pizza: Use all smoked cheeses and add smoked paprika to the crust
Dietary Modifications for Brisket Pizza
- Gluten-Free: Use certified gluten-free pizza dough
- Dairy-Free: Substitute plant-based cheese alternatives
- Lower Carb: Use cauliflower or thin crust option
- Lower Sodium: Use low-sodium BBQ sauce and reduce cheese quantity by 25%
Storage & Reheating Your Brisket Pizza
| Storage Method | Duration | Instructions |
|---|---|---|
| Refrigerator | 3-4 days | Store in airtight container or wrap tightly in plastic wrap |
| Freezer | Up to 1 month | Wrap individual slices in plastic, then foil, then place in freezer bag |
Best Ways to Reheat Brisket Pizza
- Oven Method (Best for Crispy Crust)
- Preheat oven to 350°F
- Place slices on baking sheet
- Heat for 10 minutes until cheese re-melts
- EXTRA STEP: Spritz crust with water for improved texture
- Skillet Method (Quick and Effective)
- Heat non-stick skillet over medium-low heat
- Add pizza slice, crust down
- Cover with lid to create steam
- Heat 3-5 minutes until cheese is melty and bottom is crisp
- PRO HACK: Add 3 drops of water to pan before covering for steam
- Microwave Method (Fastest Option)
- Place slice on microwave-safe plate
- Add small cup of water in microwave alongside plate
- Heat 30-45 seconds at 70% power
- NOTE: Crust will be softer with this method
- FIX: Crisp up in dry skillet for 1 minute after microwaving
Safety Notes & Pro Tips for Brisket Pizza Success
Safety First
- Always use oven mitts when handling hot equipment
- Keep face and arms away from oven when opening – steam can cause burns
- Use caution when sliding pizza – stone is extremely hot (can exceed 450°F)
- Keep children and pets away from oven during the baking process
- Never touch the pizza stone with bare hands, even after oven is off (stays hot for hours)
- Allow stone to cool completely in oven before removing
Pro Tips for Perfect Brisket Pizza Every Time
- Room temperature dough stretches easier and produces better texture
- Pat brisket dry with paper towels before adding BBQ sauce coating
- For best flavor, slightly warm leftover brisket before adding to pizza
- Don’t overload with toppings – less is more for properly cooked pizza
- Preheat stone for at least 30 minutes for optimal crispness
- For extra smoky flavor, add a tiny drop of liquid smoke to BBQ sauce
- Shred your own cheese rather than using pre-shredded for better melting
- For best flavor, try this recipe with my Chicken Gyro Pizza spice blend on the crust
- If stone isn’t available, use a heavy-duty baking sheet turned upside down
Common Brisket Pizza Mistakes to Avoid
- Cold Dough Disaster: Always bring to room temperature for at least 30 minutes
- Sauce Swamp: Don’t overload with sauce – thin layer is best
- Pale, Soft Crust: Happens when oven isn’t hot enough – preheat properly!
- Cheese Overload: Creates soggy, undercooked center – use right amount
- Rushed Baking: Don’t remove before fully cooked – look for visual cues
- Meat Mountain: Too much brisket prevents proper cooking – spread evenly
- Cutting Too Soon: Wait for cheese to set to avoid topping avalanche
This Brisket Pizza recipe transforms ordinary leftovers into an extraordinary meal. The combination of smoky brisket, melted cheese, and tangy sauce creates a pizza experience unlike any other. With these detailed instructions, even beginners can achieve restaurant-quality results at home!