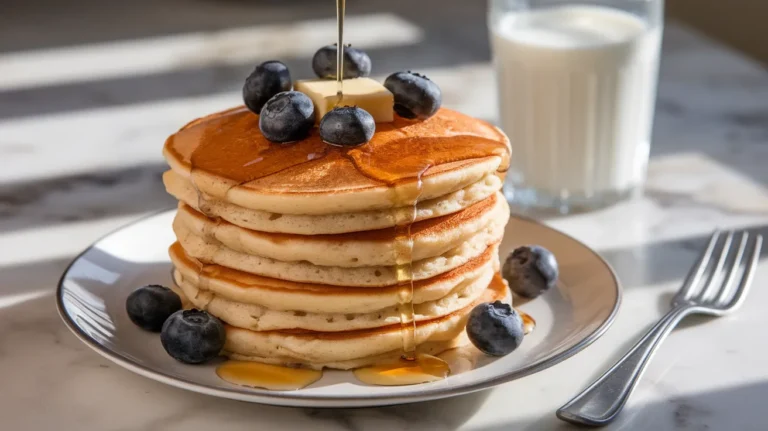
- Super fluffy texture that stays light even after stacking
- Ready in just 25 minutes for those busy weekend mornings
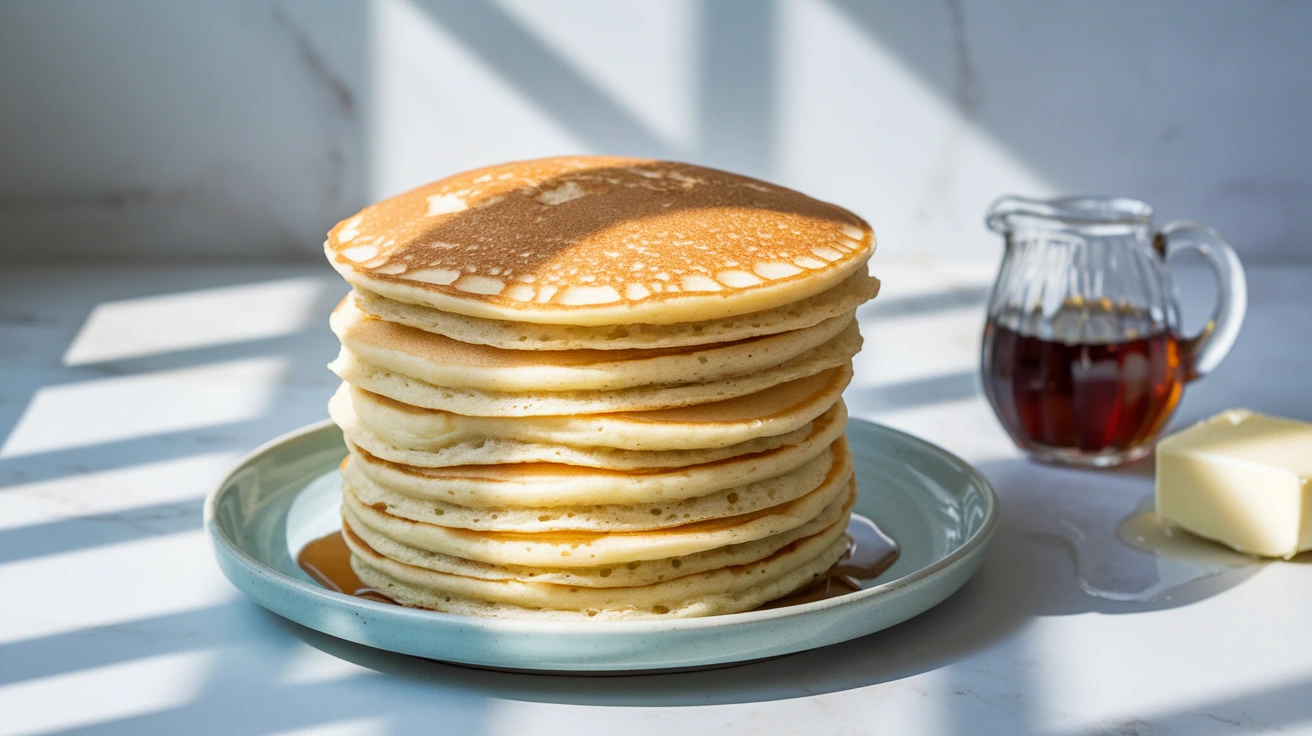
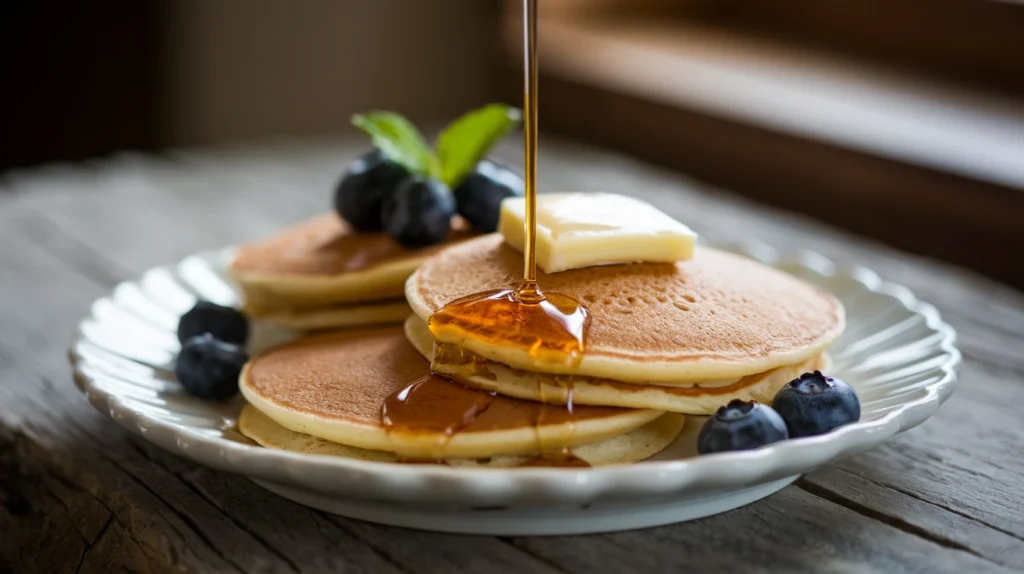
- Perfectly golden-brown exterior with a tender, custard-like center
- Freezer-friendly for quick weekday breakfasts
The Secret to Perfect Morning Pancakes
We’ve all been there—standing over a griddle watching pancakes turn dense and chewy instead of light and fluffy. It’s frustrating when your weekend breakfast dream turns into a disappointing reality.
That’s where this foolproof buttermilk pancakes recipe comes in. The combination of real buttermilk, proper mixing technique, and the right temperature control creates pancakes that rise beautifully and stay tender. These pancakes aren’t just good—they’re the kind that make people ask for your secret. (If you’re short on buttermilk, you might want to try Bisquick pancakes for an equally delicious alternative.)
Nutrition Information
| Nutrient | Amount Per Serving |
|---|---|
| Calories | 310 |
| Total Fat | 12g |
| Saturated Fat | 7g |
| Cholesterol | 75mg |
| Sodium | 580mg |
| Total Carbohydrates | 42g |
| Dietary Fiber | 1g |
| Sugars | 12g |
| Protein | 8g |
Serving size: 3 pancakes (4-inch diameter)
Equipment & Ingredients
Ingredients You’ll Need
| Ingredient | Amount | Notes |
|---|---|---|
| All-purpose flour | 2 cups | Unbleached preferred |
| Granulated sugar | 3 tablespoons | |
| Baking powder | 1½ teaspoons | Check for freshness |
| Baking soda | 1 teaspoon | |
| Salt | ½ teaspoon | |
| Buttermilk | 2 cups | Room temperature |
| Large eggs | 2 | Room temperature |
| Unsalted butter | 3 tablespoons | Melted, plus more for cooking |
| Pure vanilla extract | 1 teaspoon | |
| Vegetable oil | 1 tablespoon | For cooking (optional) |
| Maple syrup | For serving | Real maple syrup recommended |
| Fresh berries | For serving | Optional |
Kitchen Tools
| Tool | Purpose |
|---|---|
| Large mixing bowl | For dry ingredients |
| Medium mixing bowl | For wet ingredients |
| Whisk | For mixing |
| Measuring cups and spoons | For precise measurements |
| ¼ cup measuring cup | For portioning batter |
| Griddle or large nonstick skillet | For cooking pancakes |
| Spatula | For flipping |
| Kitchen thermometer | Optional but helpful |
| Warming plate or oven | For keeping pancakes warm |
Substitution Options
- No buttermilk? Mix 2 cups whole milk with 2 tablespoons lemon juice or white vinegar and let sit for 5 minutes
- Dairy-free? Use almond milk + 2 tablespoons vinegar and plant-based butter
- Gluten-free? Substitute a 1:1 gluten-free flour blend
- Whole wheat option: Replace half the all-purpose flour with whole wheat flour
Prep, Cook, and Total Time
- Prep Time: 10 minutes
- Cook Time: 15 minutes
- Total Time: 25 minutes
- Servings: 4 (makes approximately 12 pancakes)
Super-Detailed Step-by-Step Instructions for Beginners
Preparation Phase (Before You Start Cooking)
- Take out your refrigerated ingredients
- Remove eggs and buttermilk from the refrigerator 30 minutes before starting
- This allows them to reach room temperature, which helps them mix more evenly
- If you’re short on time: Place eggs in a bowl of warm (not hot) water for 5 minutes and warm buttermilk in the microwave for just 10 seconds
- Set up your workspace
- Clear your countertop of any clutter
- Position your stove or electric griddle near an outlet if needed
- Place a cooling rack or large plate nearby for finished pancakes
- Have a timer or phone ready for timing the cooking process
- Beginner tip: Having everything organized before you start makes cooking much less stressful!
- Preheat your cooking surface (if using electric griddle)
- If using an electric griddle, plug it in and set to 350°F
- Allow at least 5 minutes for it to fully preheat
- If using a stovetop skillet: Wait to heat it until your batter is ready
- Safety note: Keep children and pets away from hot cooking surfaces
- Gather and measure all ingredients
- Place all ingredients on your counter
- Using measuring cups and spoons, measure each ingredient precisely:
- 2 cups all-purpose flour (spoon flour into measuring cup, then level with knife)
- 3 tablespoons granulated sugar (level with straight edge)
- 1½ teaspoons baking powder (check expiration date!)
- 1 teaspoon baking soda (make sure it’s fresh)
- ½ teaspoon salt
- 2 cups buttermilk
- 2 large eggs
- 3 tablespoons unsalted butter (for melting)
- 1 teaspoon vanilla extract
- Visual guide: 2 cups of flour should look like a small mountain in your measuring cup
- Beginner tip: Measuring ingredients before mixing (called “mise en place”) prevents mistakes
- Melt the butter properly
- Cut 3 tablespoons of butter into smaller pieces
- Place in a microwave-safe bowl
- Microwave for 20 seconds
- Check if completely melted – if not, continue in 10-second intervals
- Set aside to cool for 3-5 minutes while you prepare other ingredients
- Why this matters: If butter is too hot when added to eggs, it can cook them and ruin your batter
Mixing the Batter (The Critical Phase)
- Combine all dry ingredients thoroughly
- Place your large bowl on the counter
- Add measured flour, sugar, baking powder, baking soda, and salt
- Using your whisk, mix with a circular motion for at least 30-45 seconds
- Continue until all ingredients are evenly distributed – no streaks of one ingredient should be visible
- What it should look like: A uniform, pale mixture with no visible lumps of baking powder or soda
- Beginner tip: Whisking dry ingredients distributes the leavening agents evenly, which ensures uniform rising
- Whisk the wet ingredients completely
- Crack each egg into your medium bowl one at a time
- Crack eggs on a flat surface, not the edge of the bowl
- Open the shell with your thumbs, letting the egg fall into the bowl
- Check for any shell fragments and remove them if necessary
- Add the 2 cups of buttermilk
- Add 1 teaspoon vanilla extract
- Add the cooled melted butter
- Whisk together for 30-45 seconds until completely combined and slightly frothy
- Visual check: The mixture should be a pale yellow color with no streaks of egg white visible
- Warning sign: If your melted butter immediately solidifies when added, your buttermilk was too cold
- Crack each egg into your medium bowl one at a time
- Combine wet and dry ingredients properly (most important step!)
- Using your spatula or wooden spoon, make a well (a large depression) in the center of your dry ingredients
- Pour all of the wet ingredient mixture into this well
- Using your spatula, gently fold ingredients together with a scooping motion from the bottom up
- Count your strokes – mix only 10-12 times maximum
- Stop mixing when flour is just incorporated – there should still be visible lumps
- What it should look like: A thick, somewhat lumpy batter with no large pockets of dry flour
- The most common mistake: Overmixing develops gluten and makes pancakes tough and flat
- Visual guide: Your batter should be thick enough to pour slowly but not so thick it doesn’t spread at all
- Consistency test: Lift your spatula – batter should fall in a thick ribbon, not in drops or a fast stream
- Rest your batter – don’t skip this step!
- Once mixed, set the batter aside for 5 minutes
- This allows the flour to fully hydrate and the leavening agents to start working
- Use this time to prepare your cooking area and heat your skillet if using stovetop
- Why this matters: Resting makes pancakes fluffier and reduces the number of large air bubbles
Cooking Your Pancakes (The Fun Part!)
- Prepare your cooking surface perfectly
- For stovetop skillet: Place over medium heat for 3-4 minutes
- Temperature test: Sprinkle a few drops of water on the surface
- If water sizzles gently and dances, the temperature is perfect
- If water disappears instantly with loud sizzle, too hot – reduce heat
- If water sits without sizzling, too cool – increase heat slightly
- Add 1 teaspoon butter or oil and swirl to coat surface evenly
- Use a paper towel to wipe excess, leaving just a thin coating
- Why temperature matters: Too hot burns outsides before insides cook; too cool makes pancakes soggy
- Pour your first pancake (the test pancake)
- Stir batter gently once (just 1-2 strokes) before beginning
- Using a ¼ cup measuring cup, scoop batter
- Hold the cup about 1 inch above the surface
- Pour batter in one spot (don’t spread with the cup)
- Let it naturally spread into a circle about 4 inches in diameter
- First pancake reality check: The first pancake often doesn’t turn out perfect – this is normal and helps you adjust temperature!
- Spacing tip: Leave at least 2 inches between pancakes for easy flipping
- Watch for the exact moment to flip
- Set a timer for 2 minutes as a general guide
- Watch for these specific visual cues:
- Surface begins to form small bubbles around the edges (about 1 minute)
- Bubbles spread toward the center and become more numerous (about 1.5-2 minutes)
- Several bubbles pop and leave small holes that don’t fill in with batter
- Edges begin to look set and slightly dry
- Underside is golden brown (peek with spatula if needed)
- Visual guide for doneness: You should see at least 10-15 open bubbles that don’t close up
- Timing varies: Exact time depends on your stove and pan – trust visual cues over exact timing
- Beginner mistake: Flipping too early results in messy pancakes that are hard to flip
- Master the perfect flip technique
- Slide a thin, wide spatula completely under the pancake from one side
- Lift it slightly to ensure it’s not sticking
- In one confident, quick motion, flip the pancake completely over
- If you hesitate mid-flip, the pancake might fold – be decisive!
- Practice tip: Start with smaller pancakes until you’re comfortable with flipping
- If it folds: Quickly unfold with spatula while still soft – it’ll still taste good!
- Cook the second side properly
- The second side cooks faster – about 1-1.5 minutes
- Don’t press down on the pancake with your spatula (this deflates it)
- Look for these signs that the second side is done:
- Edges look fully set
- When you peek under the edge, it’s golden brown
- Pancake feels slightly firm (not soft) when gently pressed in center
- Why it’s faster: The second side has already been warmed from the heat coming through the pancake
- Manage multiple pancakes like a pro
- Remove finished pancake to your prepared plate or warming oven (200°F)
- If using oven warming, place pancakes in single layer initially
- Add another small amount of butter or oil to pan if needed
- Stir batter very gently (1-2 strokes) before scooping the next batch
- Repeat pouring process, making 2-3 pancakes at a time depending on pan size
- Temperature adjustment: If pancakes are browning too quickly, lower heat slightly
- Butter tip: Wipe out pan with paper towel if butter starts to brown too much between batches
- Know exactly when your pancakes are done cooking
- Perfect pancakes should be:
- Golden brown on both sides
- Risen to about ½-inch thickness
- Slightly firm to touch in the center (not squishy or wet)
- Dry at the edges with no wet batter visible
- If unsure, you can:
- Touch the center gently – it should spring back slightly
- Insert a toothpick in the center – it should come out clean or with a few moist crumbs
- Visual clue: When you stack them, they should not deflate significantly
- Perfect pancakes should be:
Serving Your Perfect Pancakes
- Prepare for serving while cooking the final batch
- Warm serving plates in microwave for 15 seconds if desired
- Heat maple syrup:
- Pour syrup in microwave-safe container
- Microwave for 15-20 seconds (watch carefully to prevent boiling)
- Or warm in small saucepan on low heat for 2-3 minutes
- Prepare any toppings:
- Slice fresh fruit
- Cut a few tablespoons of butter into small pats
- Portion out any other toppings like chocolate chips or nuts
- Why warm syrup matters: Cold syrup cools pancakes quickly and doesn’t spread as nicely
- Plate your masterpiece
- Place 3 pancakes per person on each warmed plate
- Top each stack with:
- A small pat of butter on top (it should start melting immediately)
- 2-3 tablespoons of warm maple syrup poured from the center outward
- Any additional toppings arranged decoratively
- Presentation tip: For a magazine-worthy look, dust with powdered sugar using a small sieve
- Serve immediately: Pancakes are at their best right after cooking
Troubleshooting Common Issues
Pancakes Aren’t Fluffy
- Problem: Overmixed batter
- Solution: Count your mixing strokes next time – stop at 10-12 maximum
- How to identify: Pancakes are flat and have a tough, chewy texture
Pancakes Are Burning on Outside, Raw Inside
- Problem: Heat too high
- Solution: Reduce heat to medium-low and give them more time to cook through
- How to identify: Dark or black exterior but gooey or wet center
Batter Is Too Thick
- Problem: Too much flour or not enough liquid
- Solution: Add buttermilk, 1 tablespoon at a time, until batter reaches pourable consistency
- How to identify: Batter doesn’t spread when poured and stays mounded
Batter Is Too Thin
- Problem: Not enough flour or too much liquid
- Solution: Add flour, 1 tablespoon at a time, until batter thickens
- How to identify: Pancakes spread too much, are very thin, and don’t rise
Pancakes Stick to the Pan
- Problem: Pan not hot enough or not enough butter/oil
- Solution: Ensure pan is fully heated before adding batter and add a thin layer of butter or oil
- How to identify: Pancakes tear when you try to flip them
Leavening Agents Not Working
- Problem: Old baking powder or baking soda
- Solution: Replace with fresh products – they lose potency over time
- How to identify: Pancakes don’t rise at all despite proper mixing
- Test your baking powder: Put a teaspoon in hot water – it should fizz vigorously
Variations & Substitutions
Flavor Additions
- Blueberry Pancakes:
- Gently fold 1 cup fresh blueberries into batter after mixing
- Or sprinkle 10-12 berries directly onto each pancake after pouring (prevents purple streaking)
- Banana Pancakes:
- Add ½ cup mashed ripe banana (about 1 medium banana) to wet ingredients
- Reduce buttermilk by 2 tablespoons to maintain proper consistency
- For a complete banana pancake experience, check out my dedicated banana pancakes recipe with extra tips
- Chocolate Chip Pancakes:
- Sprinkle 1 tablespoon mini chocolate chips onto each pancake right after pouring batter
- Allow chips to sink slightly before flipping
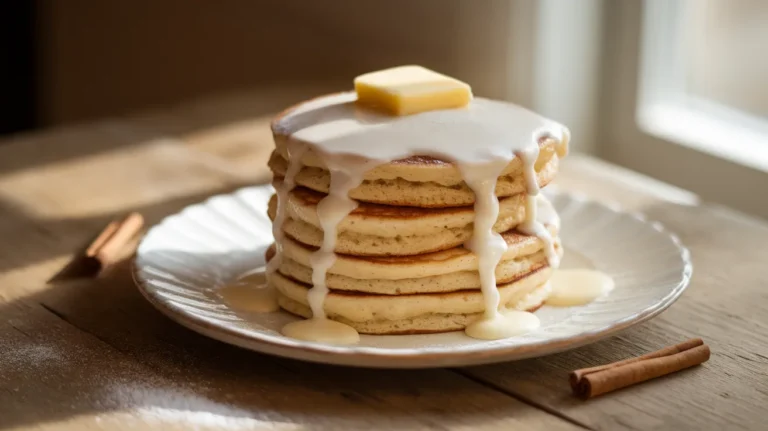
- Cinnamon Spice:
- Add 1 teaspoon cinnamon and ¼ teaspoon nutmeg to dry ingredients
- Pairs wonderfully with sliced apples on top
Dietary Adaptations
- Lower Sugar:
- Reduce sugar to 1 tablespoon without affecting texture
- Consider adding ¼ teaspoon extra vanilla for flavor
- Egg-Free:
- Replace eggs with ½ cup unsweetened applesauce
- Add ¼ teaspoon extra baking powder to help with rising
- Higher Protein:
- Add ¼ cup unflavored protein powder to dry ingredients
- Increase buttermilk by 2-3 tablespoons to maintain consistency
Storage & Reheating
Refrigerator Storage
- Step 1: Cool pancakes completely on wire rack (about 20 minutes)
- Step 2: Stack with parchment or wax paper between each pancake to prevent sticking
- Step 3: Place in airtight container or zip-top bag
- Step 4: Refrigerate for up to 3 days
- Reheating options:
- Microwave: 20-30 seconds for a stack of 3 pancakes
- Toaster: Toast on lowest setting for a slightly crisp exterior
- Skillet: 30 seconds per side over medium-low heat
Freezer Storage
- Step 1: Cool pancakes completely on wire rack
- Step 2: Flash freeze by placing in single layer on parchment-lined baking sheet
- Step 3: Freeze for 30-60 minutes until firm
- Step 4: Transfer to freezer bag or container with parchment between layers
- Step 5: Label with date and freeze for up to 2 months
- Reheating from frozen:
- Microwave: 45-60 seconds for a stack of 3 pancakes
- Toaster: Toast on medium setting, may need 2 cycles
- Oven: Wrap in foil and heat at 350°F for 10 minutes
Safety Notes & Tips
Food Safety
- Check ingredient freshness:
- Eggs should have no cracks and be within expiration date
- Buttermilk should not smell sour beyond its normal tangy smell
- Flour should not have any insects or clumps
- Proper handling:
- Wash hands before and after handling raw eggs
- Don’t taste raw batter due to uncooked eggs (risk of salmonella)
- Refrigerate leftover pancakes within 2 hours of cooking
Cooking Safety
- Heat management:
- Keep pan handles turned inward on stove to prevent accidental bumping
- Use oven mitts when handling hot pans or griddles
- Keep a fire extinguisher accessible (just in case)
- Child safety:
- Keep children at least 3 feet away from hot cooking surfaces
- Designate a “safety zone” in the kitchen where kids can watch safely
- Never leave hot cooking equipment unattended
- Burn prevention:
- Test surface temperature before adding batter
- Use caution when flipping to avoid splatters
- Keep a clean, damp towel nearby for immediate spill cleanup
Pro Tips for Perfect Pancakes Every Time
Looking for more breakfast inspiration? Check out my collection of creative pancake ideas and toppings to take your pancake game to the next level!
- For extra height and fluffiness:
- Separate egg whites and yolks
- Add yolks to wet ingredients
- Whip whites until soft peaks form
- Fold whites in very gently after combining wet and dry ingredients
- For consistent size:
- Use the same measuring cup for every pancake
- Pour from the same height each time
- Look for the batter to spread to about 4 inches for standard pancakes
- For easy serving:
- Pre-warm plates in a 170°F oven
- Pour syrup in a small pitcher for better control
- Serve pancakes as they’re ready or keep warm covered with foil
- For perfect texture:
- Don’t press down on pancakes while cooking—this deflates them
- Rest your batter for 5 minutes before cooking
- Be patient with the first pancake—consider it your “test pancake”
Happy pancake making!