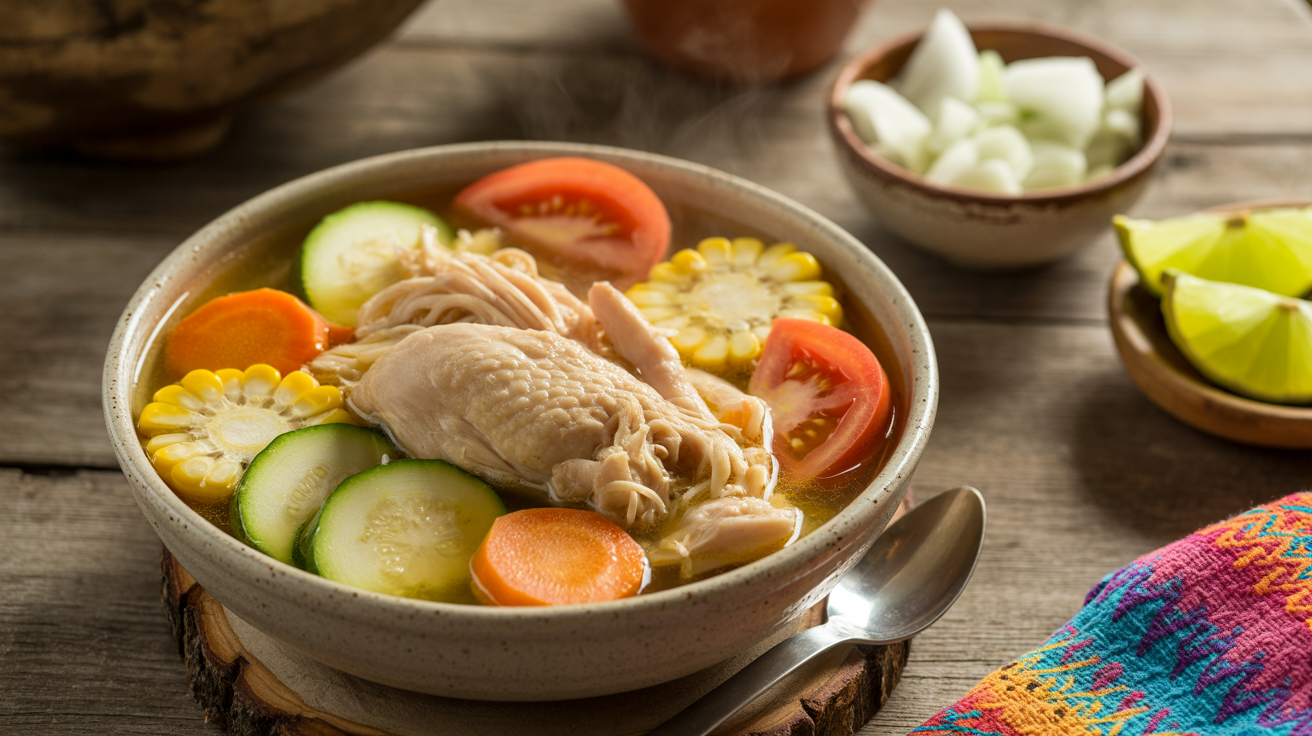
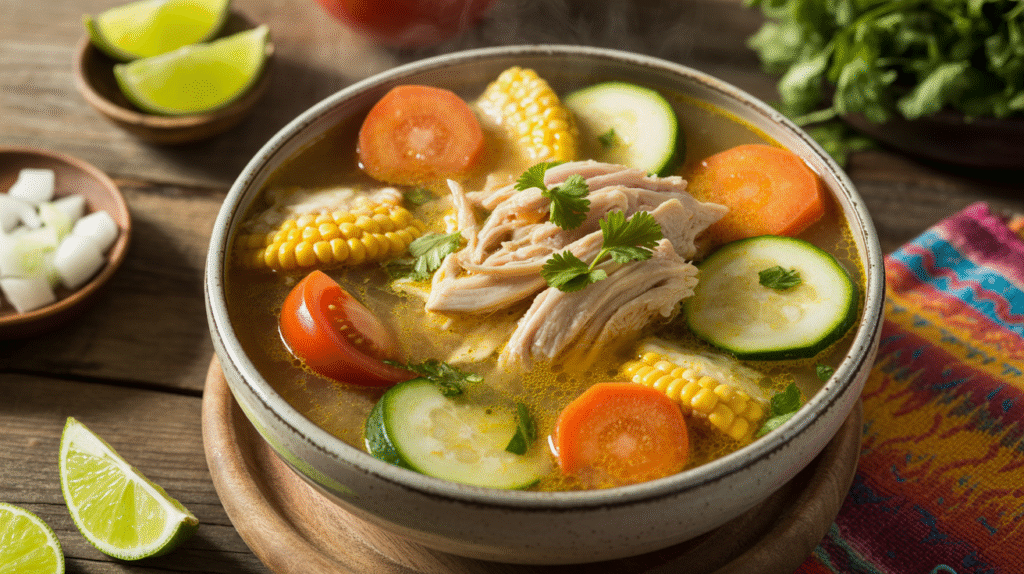
This authentic caldo de pollo recipe creates a deeply flavorful Mexican chicken soup that’s perfect for beginners. With tender chicken, fresh vegetables, and a crystal-clear broth, this traditional caldo de pollo delivers comfort in every spoonful. This hearty soup serves four people and comes together in just 45 minutes using simple techniques that anyone can master.
SERVES: 4 | PREP: 20 MIN | COOK: 25 MIN | TOTAL: 45 MIN
Ingredients for Authentic Caldo de Pollo
Protein & Base
| Ingredient | Amount |
|---|---|
| Chicken thighs (bone-in, skin-on) | 2 lbs |
| Water | 8 cups |
| White onion (quartered) | 1 medium |
| Garlic cloves (smashed) | 4 cloves |
| Bay leaves | 2 leaves |
| Salt | 2 tsp |
Vegetables
| Ingredient | Amount |
|---|---|
| Carrots (sliced thick) | 2 large |
| Celery stalks (chopped) | 2 stalks |
| Zucchini (thick rounds) | 1 medium |
| Corn on the cob (cut in rounds) | 2 ears |
| Roma tomatoes (quartered) | 2 medium |
Fresh Herbs & Garnish
| Ingredient | Amount |
|---|---|
| Fresh cilantro (chopped) | 1/2 cup |
| White onion (finely diced) | 1/4 cup |
| Lime wedges | 1 lime |
| Jalapeños (sliced) | 1-2 peppers |
Detailed Step-by-Step Caldo de Pollo Instructions
Phase 1: Creating the Perfect Broth Foundation (15 minutes)
Step 1: Prepare Your Workspace Set up your largest stockpot on the stove. Fill it with 8 cups of cold water – cold water is crucial here because it helps extract maximum flavor and nutrients from the chicken bones as it slowly heats up. If you use hot water, the proteins will seize immediately and won’t release their flavors properly.
Step 2: Add the Chicken Properly Gently place your 2 pounds of bone-in, skin-on chicken thighs into the cold water. Make sure they’re completely submerged. The bone-in thighs are essential for authentic caldo de pollo because the bones contain gelatin that creates a rich, silky broth. Boneless chicken simply won’t give you the same depth of flavor.
Step 3: Build Your Flavor Base Add the quartered onion (don’t worry about peeling it perfectly – some skin adds color), 4 smashed garlic cloves (use the flat side of your knife to crush them, which releases more flavor than chopping), 2 bay leaves, and 2 teaspoons of salt. The salt helps extract flavors from all ingredients while they cook.
Step 4: Master the Heat Control Turn your burner to high heat and bring the pot to a rolling boil. You’ll see large bubbles breaking the surface vigorously. This should take about 8-10 minutes depending on your stove. Watch carefully because this timing is important for your caldo de pollo.
Step 5: The Critical Temperature Reduction The moment you see that rolling boil, immediately reduce heat to low-medium until you achieve a gentle simmer. You should see just small bubbles occasionally breaking the surface – not the aggressive bubbling of a boil. This gentle simmer is the secret to clear, beautiful broth.
Step 6: Skim for Crystal-Clear Broth Within the first 5 minutes of simmering, you’ll notice gray foam and impurities rising to the surface. Use a ladle or large spoon to carefully skim these away. This step makes the difference between cloudy soup and restaurant-quality clear caldo de pollo. Don’t skip this!
Step 7: Patient Simmering Let the chicken simmer gently for 15 minutes total. Set a timer because overcooking will make the meat tough. The chicken is done when it easily pulls apart with a fork and reaches an internal temperature of 165°F on a meat thermometer.
Phase 2: Preparing Perfect Chicken (8 minutes)
Step 8: Safe Chicken Removal Using long-handled tongs, carefully lift each chicken thigh from the hot broth and place them on a large cutting board. Be careful – they’re very hot and may fall apart. If a piece breaks off, don’t worry – just fish it out of the broth.
Step 9: Essential Cooling Time Let the chicken cool for 5-8 minutes until you can handle it comfortably. This cooling time also allows the meat to reabsorb some of its juices, keeping it moist for your caldo de pollo.
Step 10: Professional Broth Straining While the chicken cools, strain your broth through a fine-mesh strainer into a clean pot or large bowl. Discard all the solids – the onion, garlic, and bay leaves have given their flavor to the broth. This strained broth is the foundation of exceptional caldo de pollo.
Step 11: Expert Chicken Shredding Once cooled, remove and discard the skin (it’s done its job flavoring the broth). Pull the meat away from the bones using your hands or two forks. Shred into bite-sized pieces – not too small or they’ll disappear in the soup, not too large or they’ll be hard to eat with a spoon.
Phase 3: Vegetable Mastery (12 minutes)
Step 12: Reheating Your Broth Base Return your strained broth to the pot and bring it back to a gentle boil over medium-high heat. Taste it now – it should be flavorful and well-seasoned. If it tastes weak, add 1/2 teaspoon more salt and let it dissolve.
Step 13: First Vegetables – The Slow Cookers Add your thick-sliced carrots and chopped celery first because they take the longest to cook. Cut carrots into 1/2-inch thick diagonal slices and celery into 1/2-inch pieces. These vegetables should be tender but still have a slight bite after cooking.
Step 14: Timing the First Cook Simmer for exactly 5 minutes. Test doneness by piercing a carrot piece with a fork – it should go through with slight resistance. If it’s still very hard, give it another minute. Proper timing is crucial for perfect caldo de pollo.
Step 15: Second Wave Vegetables Add your corn rounds and zucchini slices. Cut corn into 1-inch thick rounds (don’t remove from cob) and zucchini into 1/2-inch thick rounds. These cook much faster than root vegetables, so timing is critical.
Step 16: Quick Cook for Tender Vegetables Simmer for 3-4 minutes only. The zucchini should be tender but not mushy, and the corn should be bright yellow and easily pierced. Overcooked vegetables will fall apart and make your caldo de pollo cloudy.
Step 17: Final Vegetable Addition Add your quartered Roma tomatoes in the very last minute. They only need to warm through – about 60 seconds. The tomatoes should hold their shape and add bright color to your finished caldo de pollo.
Phase 4: Final Assembly and Serving (3 minutes)
Step 18: Reuniting the Chicken Gently stir the shredded chicken back into the pot. Be careful not to break up the vegetables. The chicken just needs to warm through for 1-2 minutes – it’s already cooked, so don’t overdo it.
Step 19: Final Seasoning Check Taste your caldo de pollo carefully. The broth should be well-seasoned but not salty. Add salt gradually, 1/4 teaspoon at a time, if needed. Remember, you can always add more salt, but you can’t take it out.
Step 20: Fresh Herb Finish Remove the pot from heat and stir in half of your chopped fresh cilantro (save the rest for garnish). The residual heat will wilt the cilantro perfectly and release its fresh flavor throughout your caldo de pollo.
Step 21: Professional Presentation Ladle into warm bowls, making sure each serving gets a good mix of chicken, vegetables, and broth. Garnish with remaining cilantro, diced raw onion, lime wedges, and sliced jalapeños on the side so each person can customize their bowl.
Chef’s Notes for Perfect Caldo de Pollo
Chicken Selection: Always use bone-in, skin-on thighs for authentic caldo de pollo. The bones create rich gelatin while the skin adds essential flavor. Breast meat will result in a thin, less flavorful broth.
Temperature Control: The difference between cloudy and clear caldo de pollo is heat control. Never let it boil vigorously after the initial heating – gentle simmering preserves the broth’s clarity.
Vegetable Timing: This is where beginners often struggle. Add vegetables in order of cooking time, and test for doneness frequently. Mushy vegetables ruin the texture of good caldo de pollo.
Make-Ahead Strategy: Caldo de pollo actually improves overnight as flavors meld. Store broth and solids separately if possible to maintain vegetable texture when reheating.
Nutrition Information (Per Serving)
- Calories: 285
- Protein: 28g
- Carbohydrates: 18g
- Fat: 12g
- Fiber: 4g
- Sodium: 890mg
Creative Caldo de Pollo Variations
Caldo de Pollo Verde: Transform your basic recipe by adding poblano peppers, tomatillos, and extra cilantro for a green version. This variation pairs beautifully with the healing properties found in this anti-inflammatory chicken soup approach.
Hearty Rice Addition: Stir cooked white rice into your finished caldo de pollo during the final minutes for a more substantial meal that rivals the comfort of this chicken sopas recipe.
Spicy Caldo de Pollo: Include whole jalapeños during the initial simmering process, plus chipotle peppers in adobo sauce for smoky heat that transforms the entire dish.
Vegetable-Heavy Version: Double all vegetables and add seasonal options like chayote, green beans, or cabbage for a more substantial soup that’s still authentically caldo de pollo.
Storage & Reheating Your Caldo de Pollo
Refrigeration Guidelines: Store your caldo de pollo in the refrigerator for up to 4 days in airtight containers. The flavors actually continue developing during storage, making day-two soup even better.
Freezing Instructions: Freeze caldo de pollo for up to 3 months. For best results, freeze the broth and chicken separately from the vegetables to maintain proper textures.
Proper Reheating Method: Warm gently over medium heat, stirring occasionally to prevent sticking. Add fresh cilantro and a squeeze of lime juice just before serving to brighten all the flavors.
Smart Portioning: Freeze individual serving containers of caldo de pollo for quick weeknight meals when you need comfort food fast.
Troubleshooting Common Caldo de Pollo Problems
Cloudy Broth Issue: This happens from boiling too vigorously or not skimming properly. Always maintain a gentle simmer and remove foam diligently during the first 15 minutes of cooking your caldo de pollo.
Bland Flavor Problem: Season the broth adequately during cooking, not just at the end. Salt helps extract flavors from chicken and vegetables throughout the cooking process.
Mushy Vegetable Disaster: Add vegetables in proper stages based on cooking times. Zucchini and tomatoes need only minutes, while carrots need longer. Timing is everything in caldo de pollo.
Greasy Soup Surface: Chill your caldo de pollo overnight and remove the solidified fat layer with a spoon, or use a fat separator while the soup is still warm.
Dry, Tough Chicken: Don’t overcook the initial chicken, and only warm the shredded meat through at the end. Overcooked chicken ruins the texture of caldo de pollo.
Essential Equipment for Caldo de Pollo
- Large stockpot (6-8 quart capacity)
- Fine-mesh strainer
- Sharp chef’s knife
- Large cutting board
- Ladle for skimming foam
- Instant-read meat thermometer
- Long-handled tongs
- Timer
Organized Shopping List for Caldo de Pollo
Meat Counter
- 2 lbs bone-in, skin-on chicken thighs
Produce Section
- 1 large white onion
- 1 head fresh garlic
- 2 large carrots
- 2 celery stalks
- 1 medium zucchini
- 2 ears fresh corn
- 2 Roma tomatoes
- 1 bunch fresh cilantro
- 1-2 fresh jalapeños
- 1 fresh lime
Pantry Staples
- Bay leaves
- Salt
Five Success Secrets for Perfect Caldo de Pollo
1. Always start with cold water when building your caldo de pollo base – this technique extracts maximum flavor from chicken bones and creates the richest possible broth foundation.
2. Maintain gentle heat throughout the entire cooking process. Aggressive boiling creates cloudy, greasy broth instead of the crystal-clear soup that defines excellent caldo de pollo.
3. Season your broth early in the cooking process and taste frequently. Well-seasoned cooking liquid ensures every component of your caldo de pollo absorbs proper flavor.
4. Master vegetable timing by adding ingredients in stages based on their cooking requirements. This prevents some ingredients from turning to mush while others remain undercooked.
5. Always finish your caldo de pollo with fresh herbs and lime juice just before serving. These bright, fresh flavors wake up the entire bowl and transform good soup into memorable caldo de pollo.