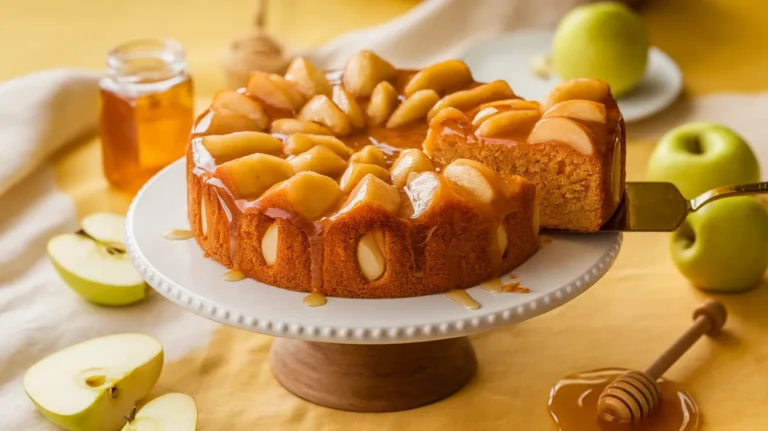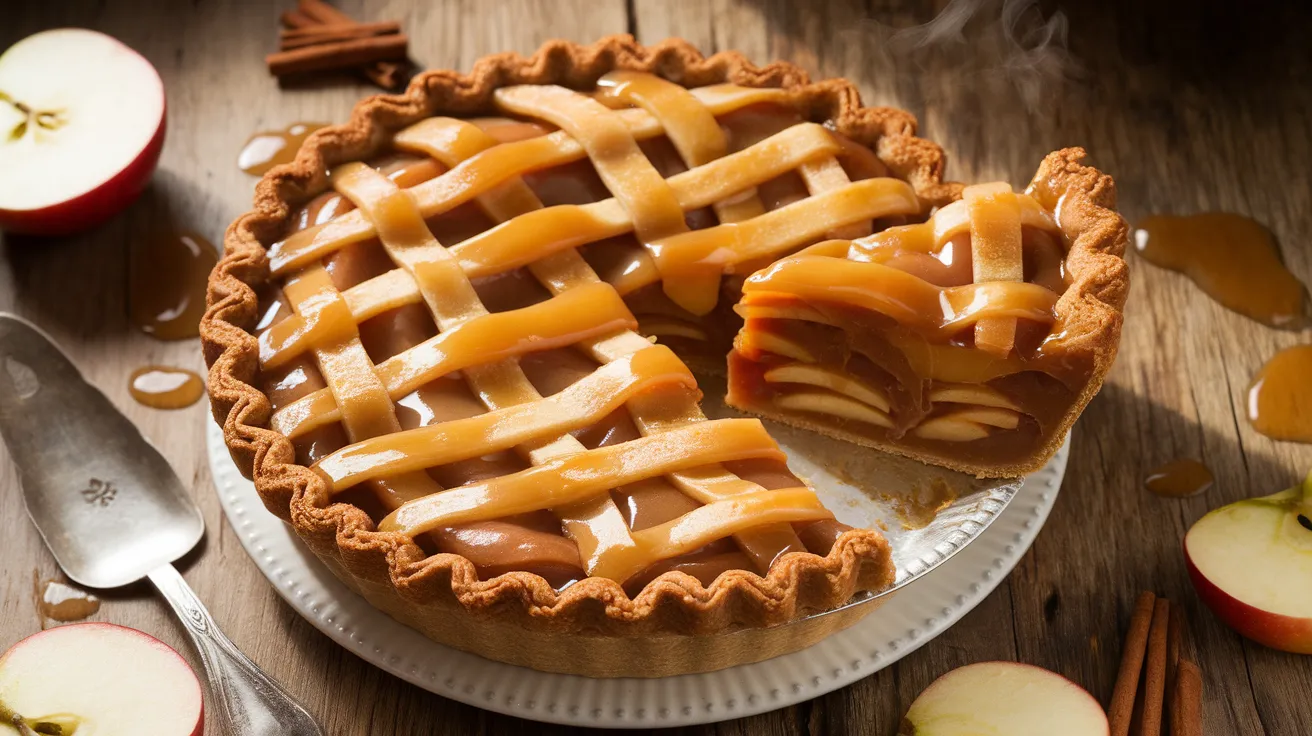
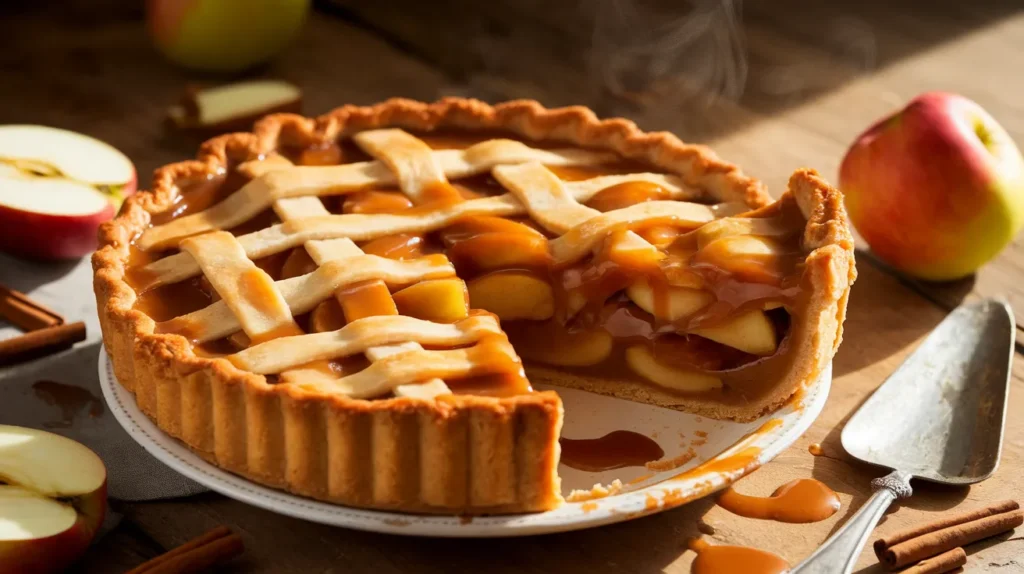
This caramel apple pie takes everything you love about classic apple pie and drowns it in buttery caramel sauce. Sweet, tart apples meet gooey caramel in a flaky crust that’ll have everyone begging for seconds. Trust me, once you master this caramel apple pie, you’ll never go back to plain.
SERVES: 4 | PREP: 30 MIN | COOK: 55 MIN | TOTAL: 85 MIN
What You’ll Need
For the Crust
| Ingredient | Amount |
|---|---|
| All-purpose flour | 2½ cups |
| Cold unsalted butter, cubed | 1 cup (2 sticks) |
| Granulated sugar | 2 tablespoons |
| Salt | 1 teaspoon |
| Ice water | 6-8 tablespoons |
For the Apple Filling
| Ingredient | Amount |
|---|---|
| Granny Smith apples, peeled and sliced | 4 large |
| Honeycrisp apples, peeled and sliced | 2 large |
| Light brown sugar | ½ cup |
| Ground cinnamon | 2 teaspoons |
| Ground nutmeg | ½ teaspoon |
| Salt | ¼ teaspoon |
| Cornstarch | 3 tablespoons |
| Lemon juice | 2 tablespoons |
For the Caramel Layer
| Ingredient | Amount |
|---|---|
| Granulated sugar | 1 cup |
| Heavy cream | ⅔ cup |
| Unsalted butter | 4 tablespoons |
| Vanilla extract | 1 teaspoon |
| Sea salt | ¼ teaspoon |
For Assembly
| Ingredient | Amount |
|---|---|
| Egg (beaten) | 1 |
| Coarse sugar for topping | 2 tablespoons |
How to Make This Beauty Step-by-Step
Phase 1: Making the Perfect Crust (20 minutes)
Step 1: Mix your dry ingredients in a large bowl. Combine 2½ cups flour, 2 tablespoons sugar, and 1 teaspoon salt. Whisk them together so the salt distributes evenly—this prevents salty pockets in your crust.
Step 2: Cut in the cold butter using a pastry cutter or two forks. Work quickly so the butter stays cold. You want pea-sized chunks of butter visible in the flour—these create those flaky layers when they melt during baking. The mixture should look like coarse sand with butter pebbles throughout.
Step 3: Drizzle in 6 tablespoons ice water, one tablespoon at a time. Toss with a fork after each addition. The dough should start clumping together but still look shaggy. If it’s too dry and won’t hold together when squeezed, add the remaining 2 tablespoons water.
Step 4: Turn the dough onto your counter and gather it into a ball. Divide into two portions—one slightly larger (for the bottom crust) and one smaller (for the top). Flatten each into a disk about 1 inch thick. Wrap tightly in plastic wrap.
Step 5: Refrigerate both disks for at least 30 minutes. This rest time lets the gluten relax (preventing shrinkage) and keeps the butter cold (ensuring flakiness). You can make this up to 2 days ahead.
Phase 2: Creating the Caramel Sauce (15 minutes)
Step 6: Heat 1 cup sugar in a heavy-bottomed saucepan over medium heat. Don’t stir at first—just let it melt. Swirl the pan occasionally to help it melt evenly. The sugar will clump and look weird before it melts—this is normal. Keep going until it turns deep amber, like an old penny. This takes about 8-10 minutes.
WARNING: Watch carefully now. The difference between perfect caramel and burnt sugar is about 30 seconds.
Step 7: Remove from heat and carefully whisk in ⅔ cup heavy cream. It will bubble violently and steam—stand back! Keep whisking until smooth. The mixture will seize up at first, then smooth out.
Step 8: Stir in 4 tablespoons butter, 1 teaspoon vanilla, and ¼ teaspoon sea salt. Keep stirring until the butter melts completely. Let cool to room temperature—about 20 minutes. The caramel will thicken as it cools.
Phase 3: Preparing the Apple Filling (10 minutes)
Step 9: Peel and slice your apples into ¼-inch thick slices. I use a mix of tart Granny Smith and sweet Honeycrisp for the best flavor balance. You want about 8 cups of sliced apples total.
PRO TIP: Slice them evenly so they cook at the same rate. If you have some thick chunks and some thin slices, the thin ones turn to mush while the thick ones stay crunchy.
Step 10: Toss the apples in a large bowl with ½ cup brown sugar, 2 teaspoons cinnamon, ½ teaspoon nutmeg, ¼ teaspoon salt, 3 tablespoons cornstarch, and 2 tablespoons lemon juice. Mix until every slice is coated. The cornstarch absorbs the juice the apples release, preventing a soggy bottom crust. The lemon juice keeps the apples from browning and adds brightness.
Phase 4: Assembly (15 minutes)
Step 11: Preheat your oven to 425°F. Roll out the larger dough disk on a floured surface into a 12-inch circle, about ⅛-inch thick. Transfer to a 9-inch pie pan by rolling it loosely around your rolling pin, then unrolling it over the pan. Press gently into the bottom and up the sides. Trim any excess hanging more than 1 inch beyond the rim.
Step 12: Pour half of your cooled caramel sauce into the bottom of the crust. Spread it evenly with a spoon—this creates a caramel layer that soaks into the bottom apples.
Step 13: Pile in the apple mixture, mounding it slightly in the center. Apples shrink a lot during baking, so don’t be afraid to really pile them high. Drizzle ¼ cup more caramel over the top of the apples, saving the rest for serving.
Step 14: Roll out the second dough disk into an 11-inch circle. You can either lay it whole over the top (cutting slits for steam) or cut it into 1-inch strips for a lattice pattern. I prefer the lattice because it lets more moisture escape and looks stunning.
Step 15: If making a lattice: Lay half the strips vertically across the pie, spacing them 1 inch apart. Fold back every other strip halfway. Lay a horizontal strip across the center. Unfold the vertical strips back over it. Now fold back the strips you didn’t fold before, lay down another horizontal strip, and unfold. Repeat until you’ve woven all strips. Trim edges and crimp them with the bottom crust.
Step 16: Brush the entire top crust with beaten egg. This creates that gorgeous golden-brown shine. Sprinkle with 2 tablespoons coarse sugar for sparkle and crunch.
Phase 5: Baking to Perfection (55 minutes)
Step 17: Place the pie on a baking sheet (to catch drips). Bake at 425°F for 20 minutes. The high heat jump-starts the crust’s flakiness.
Step 18: Reduce temperature to 375°F and bake for 35-45 minutes more. You’ll know it’s done when the crust is deep golden brown and you can see the filling bubbling through the vents or lattice. If the edges brown too quickly, tent them with foil strips.
Step 19: Cool on a wire rack for at least 3 hours before slicing. I know this is torture, but hot pie filling is liquid. It needs time to set up so slices hold their shape.
Step 20: Serve warm (reheat individual slices for 15 seconds in the microwave) with the remaining caramel sauce drizzled on top. A scoop of vanilla ice cream doesn’t hurt either.
Chef’s Notes
Caramel Consistency: If your caramel seems too thin, don’t panic. It thickens dramatically as it cools. If it gets too thick to drizzle, warm it gently in 10-second microwave bursts, stirring between each.
Apple Variety Matters: The combination of tart and sweet apples creates complexity. Using only one type makes your caramel apple pie one-dimensional. If you loved experimenting with different apple varieties in apple bread, you’ll appreciate this technique here too.
Make-Ahead Magic: Assemble the entire pie (don’t brush with egg yet), wrap tightly in plastic, and freeze for up to 3 months. Bake from frozen, adding 15-20 minutes to the bake time. Brush with egg right before baking.
Blind Baking Alternative: Some bakers pre-bake (blind bake) the bottom crust for 10 minutes to prevent sogginess. I skip this because the caramel layer protects the crust, but if you’re prone to soggy bottoms, try it.
Nutrition Facts (Per Serving)
Calories: 685 | Protein: 6g | Carbohydrates: 92g | Fat: 34g | Fiber: 5g | Sugar: 54g | Sodium: 420mg
Make It Your Own: Variations
Bourbon Caramel Apple Pie: Add 2 tablespoons bourbon to your caramel after it’s done cooking. The alcohol mostly cooks off in the oven, leaving a rich, oaky depth.
Salted Caramel Pecan: Sprinkle ½ cup chopped pecans over the caramel layer before adding apples. Increase the sea salt in the caramel to ½ teaspoon for that sweet-salty punch.
Streusel-Topped Version: Skip the top crust entirely. Mix 1 cup flour, ½ cup brown sugar, ½ cup cold butter, and 1 teaspoon cinnamon into crumbles. Sprinkle over the apples and caramel. Bakes in the same time.
Classic Comparison: If you’re curious about the difference between this and a traditional version, check out this classic apple pie recipe. The caramel addition here adds about 150 calories per slice but takes the flavor to another level.
Storage & Reheating
Room Temperature: Cover loosely with foil and keep for 2 days. The crust stays crispest this way.
Refrigerator: Wrap tightly and store for up to 5 days. The crust will soften slightly, but the flavor improves as the caramel soaks into the apples.
Freezer: Wrap in plastic wrap, then aluminum foil. Freeze for up to 4 months. Thaw overnight in the fridge before reheating.
Reheating: Place slices on a baking sheet in a 350°F oven for 15-20 minutes. This re-crisps the crust better than microwaving. For the whole pie, cover with foil and bake at 325°F for 30-35 minutes.
Troubleshooting Common Problems
Problem 1: Soggy Bottom Crust Your crust is swimming in liquid and didn’t crisp up. This happens when apples release too much moisture. Solution: Make sure you use enough cornstarch (the full 3 tablespoons). Also, don’t skip the resting time after baking—the filling needs to cool and thicken. Place your pie on the lowest oven rack next time so the bottom gets direct heat.
Problem 2: Caramel Crystallized Your caramel turned grainy and gritty instead of smooth. Solution: Don’t stir the sugar while it’s melting—just swirl the pan. Even a tiny sugar crystal on your spoon can trigger crystallization. If it happens, start over. Prevention is easier than fixing it.
Problem 3: Burnt Crust Edges The edges are dark brown or burnt while the center is still pale. Solution: Cover the edges with aluminum foil strips or a pie shield after the first 30 minutes of baking. You can also reduce your oven temperature by 25°F if your oven runs hot.
Problem 4: Runny Filling When you slice into it, liquid pools on the plate. Solution: You didn’t let it cool long enough. The filling needs at least 3 hours to set properly. Also check that you used cornstarch (not flour) as the thickener—cornstarch creates a clearer, firmer gel.
Problem 5: Tough, Chewy Crust The crust is dense instead of flaky and tender. Solution: You overworked the dough or used warm butter. Keep everything cold, handle the dough as little as possible, and make sure you see visible butter chunks before adding water. Also, don’t add too much water—it develops gluten, making the crust tough.
Equipment Essentials
- 9-inch pie pan (glass or metal both work)
- Heavy-bottomed saucepan for caramel (prevents hot spots)
- Pastry cutter or two forks
- Rolling pin
- Large mixing bowl
- Whisk
- Sharp knife or apple peeler
- Baking sheet (to catch drips)
- Pastry brush for egg wash
- Wire cooling rack
- Instant-read thermometer (optional, for checking caramel temp: 350°F is perfect)
Shopping List by Store Section
Produce:
- 4 large Granny Smith apples
- 2 large Honeycrisp apples
- 1 lemon (for juice)
Dairy:
- 3 sticks unsalted butter
- 1 pint heavy cream
- 1 egg
Baking Aisle:
- All-purpose flour
- Granulated sugar (2 cups total)
- Light brown sugar
- Cornstarch
- Ground cinnamon
- Ground nutmeg
- Vanilla extract
- Coarse decorating sugar
Other:
- Sea salt
Success Secrets from a Pastry Chef
1. Temperature Control is Everything Keep your butter and water ice-cold for the crust. Warm ingredients create tough, dense pastry instead of flaky layers. I actually freeze my butter for 15 minutes before cutting it in.
2. Don’t Fear Dark Caramel Most home cooks pull their caramel off the heat too early, resulting in a sweet but one-dimensional sauce. Let it get properly amber—almost the color of iced tea. That’s where the complex, slightly bitter notes develop that balance the sweetness.
3. Pile Those Apples High Your beautifully mounded filling will shrink by almost 30% during baking. What looks like too many apples raw becomes a perfect amount when cooked. Don’t be shy.
4. The Crust Tells You When It’s Done Forget the timer. Watch for a deep golden color on the crust and visible bubbling in the filling. If the crust is pale, the bottom is definitely undercooked, no matter what the clock says.
5. Patience Pays Off This pie tastes good warm, but it tastes phenomenal the next day after the flavors have married and the caramel has soaked into the apples overnight. Make it a day ahead for company if you can.
This caramel apple pie recipe turns a classic dessert into something extraordinary. The gooey caramel layer creates pockets of sweetness throughout, while the tart apples keep everything balanced. Yes, it takes some time, but every minute is worth it when you see faces light up at that first bite.