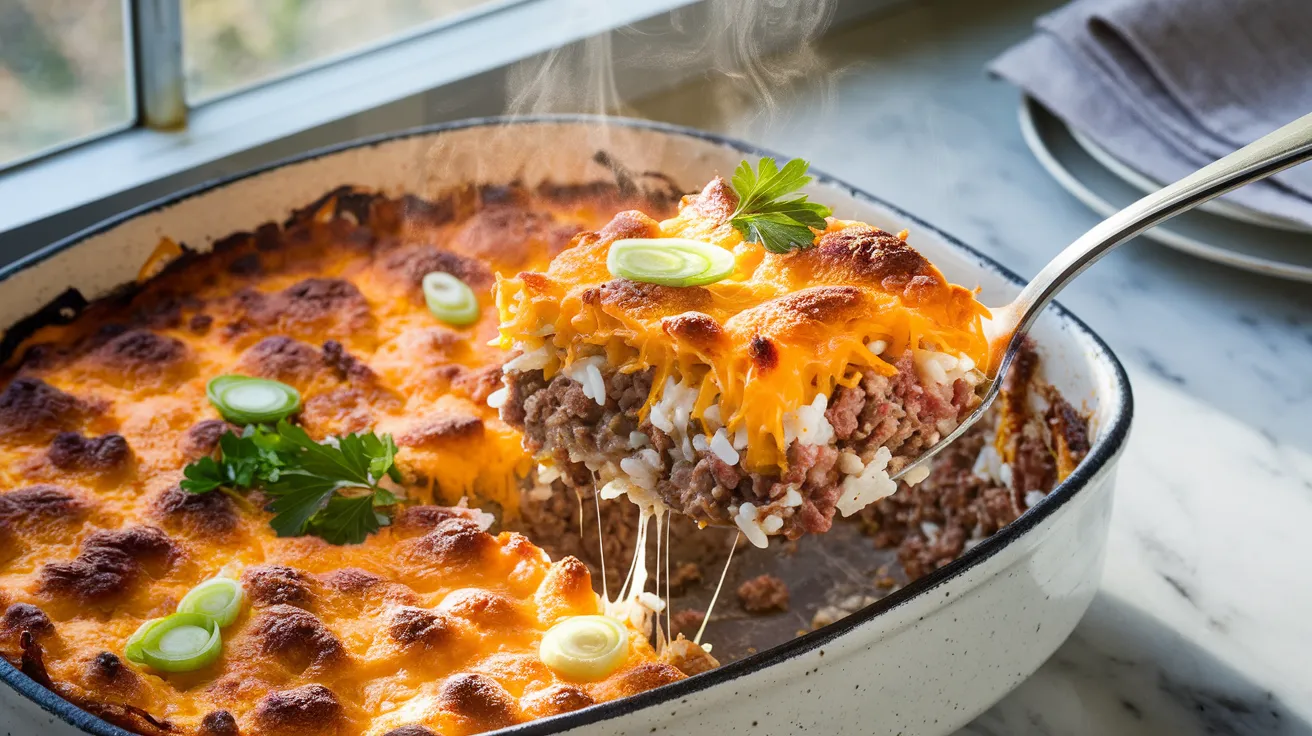
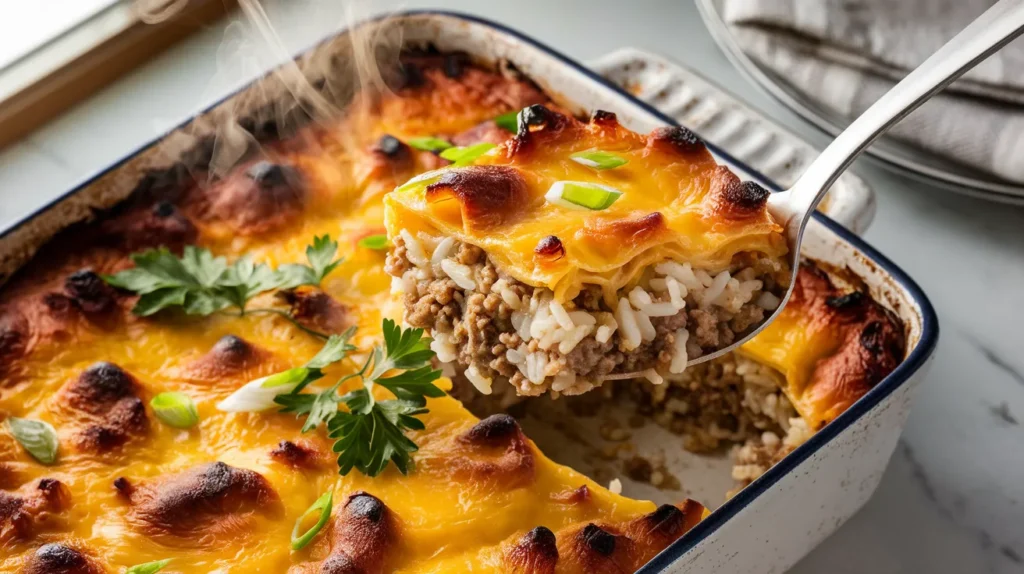
This cheddar-crusted ground beef and rice casserole transforms simple pantry staples into a bubbling, golden-topped masterpiece that feeds four hungry people without breaking a sweat. With seasoned beef layered over fluffy rice and crowned with a thick blanket of melted sharp cheddar, this one-dish wonder delivers maximum comfort with minimal cleanup—perfect for those nights when you need dinner on the table fast.
SERVES: 4 | PREP: 15 MIN | COOK: 45 MIN | TOTAL: 60 MIN
What Makes This Cheddar-Crusted Ground Beef and Rice Casserole Different
Most casseroles turn mushy or dry. This one doesn’t.
The secret? Cooking your rice separately to perfect tenderness before it ever hits the casserole dish. You’re building layers of flavor—not throwing everything together and hoping for the best.
The cheddar crust forms during the final broil, creating a crispy, golden cap that shatters under your fork. Underneath, the beef stays juicy because you’re not overcooking it twice.
This beats those soupy casseroles where everything blends into one bland mush.
Ingredients for Your Ground Beef and Rice Casserole
Protein & Base
| Ingredient | Amount |
|---|---|
| Ground beef (85% lean) | 1½ pounds |
| Long-grain white rice (uncooked) | 1 cup |
| Beef broth (low-sodium) | 2 cups |
| Yellow onion (diced) | 1 medium |
| Garlic cloves (minced) | 4 cloves |
Dairy & Cheese
| Ingredient | Amount |
|---|---|
| Sharp cheddar cheese (shredded) | 3 cups |
| Sour cream (full-fat) | ½ cup |
| Unsalted butter | 3 tablespoons |
| Whole milk | ¾ cup |
Seasonings & Flavor
| Ingredient | Amount |
|---|---|
| Tomato paste | 3 tablespoons |
| Worcestershire sauce | 2 tablespoons |
| Paprika (smoked) | 2 teaspoons |
| Garlic powder | 1 teaspoon |
| Onion powder | 1 teaspoon |
| Salt | 1½ teaspoons |
| Black pepper (freshly ground) | ¾ teaspoon |
| Dried thyme | ½ teaspoon |
Finishing Touches
| Ingredient | Amount |
|---|---|
| Fresh parsley (chopped) | ¼ cup |
| Green onions (sliced) | 3 stalks |
Step-by-Step Instructions for Perfect Cheddar-Crusted Casserole
Phase 1: Rice Foundation (15 minutes)
Step 1: Rinse your 1 cup of rice under cold water in a fine-mesh strainer for 30 seconds. You’re washing away excess starch that makes rice gummy. Keep rinsing until the water runs clear instead of cloudy.
Step 2: Bring 2 cups of beef broth to a rolling boil in a medium saucepan over high heat. The broth infuses your rice with savory flavor from the start—way better than plain water.
Step 3: Add the rinsed rice to the boiling broth and stir once. Immediately reduce heat to low and cover with a tight-fitting lid. Don’t peek for 18 minutes. Steam needs to stay trapped inside.
Step 4: After 18 minutes, turn off the heat but keep the lid on for 5 more minutes. This resting period lets the rice finish cooking in its own steam without getting mushy. Fluff with a fork when done.
Why this matters: Pre-cooking rice guarantees every grain is tender. Raw rice in casseroles often stays crunchy or turns to mush.
Phase 2: Building the Beef Layer (12 minutes)
Step 5: Preheat your oven to 375°F (190°C). Position the rack in the middle slot so heat circulates evenly around your casserole.
Step 6: Heat a large skillet over medium-high heat for 2 minutes. Add 1½ pounds of ground beef and break it into chunks with a wooden spoon. Let it sit undisturbed for 3 minutes—you want golden-brown spots forming on the bottom. This is called the Maillard reaction, and it creates deep, meaty flavor.
Step 7: Break up the beef into smaller pieces and continue cooking for 4-5 minutes until no pink remains. You’ll see clear juices instead of red. Tilt the pan and use a spoon to remove all but 2 tablespoons of fat. Too much grease makes your casserole oily.
Step 8: Push the beef to the sides of your skillet, creating an empty space in the center. Add 3 tablespoons of butter to this space. When it melts and starts bubbling (about 30 seconds), add your diced onion.
Step 9: Cook the onion in the butter for 3 minutes, stirring frequently. The onion should turn translucent and soft. Mix it into the beef now. Add 4 minced garlic cloves and cook for 1 minute until fragrant. If garlic goes in too early, it burns and tastes bitter.
Step 10: Stir in 3 tablespoons of tomato paste, coating all the meat. Cook for 2 minutes without stirring. The paste will darken and caramelize on the pan bottom—that’s concentrated tomato flavor developing.
Phase 3: Seasoning and Assembly (8 minutes)
Step 11: Add 2 tablespoons Worcestershire sauce, 2 teaspoons smoked paprika, 1 teaspoon garlic powder, 1 teaspoon onion powder, 1½ teaspoons salt, ¾ teaspoon black pepper, and ½ teaspoon dried thyme. Stir everything for 1 minute. You’ll smell the spices toasting—that means they’re releasing essential oils.
Step 12: Reduce heat to low and stir in ½ cup sour cream until completely mixed. The sour cream adds tang and makes the beef mixture creamy. Turn off the heat.
Step 13: Grab a 9×13-inch baking dish and coat it with cooking spray or butter. Spread your cooked rice evenly across the bottom. Press it down gently with the back of a spoon to create a compact layer.
Step 14: Pour ¾ cup of whole milk evenly over the rice. This keeps the bottom layer moist during baking. Now spread your beef mixture on top of the rice, creating an even layer that covers every bit of rice.
Common mistake: Uneven layers mean some bites are all rice, others all beef. Take 30 extra seconds to spread properly.
Phase 4: Creating the Cheddar Crust (20 minutes)
Step 15: Sprinkle 2 cups of shredded sharp cheddar evenly over the beef layer. Press it down gently so it makes contact with the beef—this helps it melt into the meat instead of sitting on top.
Step 16: Cover the dish tightly with aluminum foil. Bake for 25 minutes. The foil traps steam, which melts the cheese and keeps everything moist. You’ll know it’s ready when you see bubbling around the edges.
Step 17: Remove the foil carefully—steam will rush out. Sprinkle the remaining 1 cup of cheddar cheese over the top in an even layer. This is your crust layer.
Step 18: Switch your oven to BROIL on HIGH. Move the rack to the top position, about 6 inches from the heating element. Broil for 3-5 minutes, watching constantly through the oven window. The cheese should turn golden-brown with darker spots. If it’s browning too fast in one area, rotate the dish.
Safety tip: Never walk away during broiling. Cheese goes from perfect to burnt in 30 seconds.
Step 19: Remove the cheddar-crusted ground beef and rice casserole from the oven and let it rest for 10 minutes before serving. This resting time lets the layers set so your portions hold together instead of falling apart.
Step 20: Garnish with chopped fresh parsley and sliced green onions right before serving. The bright green color contrasts beautifully with the golden crust.
Chef’s Notes for Next-Level Casserole Success
Cheese selection matters. Sharp cheddar creates the best crust because its lower moisture content browns beautifully under the broiler. Pre-shredded cheese contains anti-caking agents that prevent smooth melting. Shred a block yourself for superior results in your cheddar-crusted ground beef and rice casserole.
Rice texture control. If you prefer softer rice throughout, add an extra ¼ cup of milk in Step 14. For firmer, separate grains, use jasmine rice instead of long-grain white and reduce the milk to ½ cup.
Beef fat ratio. The 85% lean recommendation is intentional. Leaner beef (90% or higher) dries out during the double cooking process. Fattier beef (80% lean) releases too much grease, making your casserole swim in oil.
Broiler alternatives. No broiler? Increase oven temperature to 425°F and bake uncovered for the final 8-10 minutes. The crust won’t be quite as crispy, but you’ll still get good browning and melted cheese perfection.
Nutrition Information (Per Serving)
Calories: 685 | Protein: 42g | Carbohydrates: 48g | Fat: 35g | Saturated Fat: 19g | Fiber: 2g | Sugar: 4g | Sodium: 890mg | Calcium: 485mg
Creative Variations Worth Trying
Mexican-Style Transformation: Swap the thyme for cumin and add a 4-ounce can of diced green chiles to the beef mixture. Replace sharp cheddar with a pepper jack and cheddar blend. Top with fresh cilantro, diced tomatoes, and a dollop of sour cream. This variation pairs perfectly with the bold flavors you’d find in dishes like beef queso mac and cheese.
Italian Upgrade: Use Italian sausage instead of ground beef and add ½ teaspoon of red pepper flakes. Mix ½ cup of marinara sauce into the meat. Replace half the cheddar with mozzarella and add a sprinkle of Parmesan on top before broiling. Finish with fresh basil.
Veggie-Loaded Version: Add 1 cup each of diced bell peppers, mushrooms, and zucchini to the onions in Step 9. Cook until softened before adding garlic. This adds nutrition and stretches the recipe to serve 6 people.
Breakfast Casserole Twist: Replace the rice with diced hash browns. Add 4 scrambled eggs mixed into the beef layer. Top with a blend of cheddar and Monterey Jack. Serve with hot sauce. If you love creamy, comforting pasta dishes, you might also enjoy trying creamy ground beef bow tie pasta for another satisfying meal.
Storage & Reheating Your Casserole
Refrigeration: Cool the casserole completely before covering with plastic wrap or transferring to an airtight container. Store for up to 4 days in the fridge.
Freezing: Wrap individual portions in plastic wrap, then aluminum foil. Freeze for up to 3 months. Label with the date so you remember when you made it.
Reheating from fridge: Cover a portion with foil and bake at 350°F for 15-20 minutes until heated through. Remove foil for the last 5 minutes to re-crisp the cheese crust. Microwave works in a pinch (2-3 minutes on high), but the crust won’t stay crispy.
Reheating from frozen: Thaw overnight in the fridge first, then follow the refrigerator reheating method. Trying to reheat from frozen leads to cold centers and overcooked edges.
Pro tip: Add a tablespoon of milk or broth before reheating to restore moisture. The rice dries out slightly during storage.
Troubleshooting Common Casserole Problems
Problem 1: Watery casserole Your beef released too much fat, or you didn’t drain it properly in Step 7. Next time, drain all but 2 tablespoons of grease and make sure you’re using 85% lean beef, not 73%. Also ensure your rice is completely cooked and has absorbed all its liquid before adding to the dish.
Problem 2: Burnt cheese top with raw middle Your oven rack was too close to the broiler. Keep the casserole 6-8 inches from the heating element and watch it carefully. If your middle isn’t cooked through before broiling, you didn’t bake it long enough in Step 16. Look for bubbling at the edges as your indicator.
Problem 3: Dry, hard rice layer You didn’t add enough milk in Step 14, or your rice was overcooked before assembly. The milk should pool slightly around the rice edges. If you live in a dry climate, increase milk to 1 cup.
Problem 4: Cheese won’t brown Your cheese has too much moisture. Avoid pre-shredded cheese with cellulose coating. Also, make sure the top layer isn’t too thick—a ¼-inch layer browns best. If using a milder cheese, it won’t brown as well as sharp cheddar.
Problem 5: Beef layer tastes bland You underseasoned or didn’t toast the tomato paste properly in Step 10. The paste must darken and stick slightly to the pan—this concentrates flavors. Also taste your beef mixture before assembling and adjust salt levels. Remember, cheese adds saltiness too, so don’t oversalt the beef.
Equipment Essentials You’ll Need
- 9×13-inch baking dish (glass or ceramic works best for even heating)
- Large skillet (12-inch minimum for browning beef properly)
- Medium saucepan with lid (for cooking rice)
- Fine-mesh strainer (for rinsing rice)
- Wooden spoon or spatula (for breaking up beef)
- Box grater (if shredding cheese from a block)
- Aluminum foil (for covering during initial bake)
- Measuring cups and spoons
- Sharp knife and cutting board (for onions, garlic, herbs)
Optional but helpful: Meat thermometer (beef should reach 160°F), oven-safe mitts for handling hot dishes, kitchen timer so you don’t forget about the broiler.
Shopping List Organized by Store Section
Meat Department:
- 1½ pounds ground beef (85% lean)
Dairy Section:
- 3 cups sharp cheddar cheese (or 12 ounces block)
- ½ cup sour cream
- 3 tablespoons unsalted butter
- ¾ cup whole milk
Produce:
- 1 medium yellow onion
- 1 head of garlic (need 4 cloves)
- Fresh parsley (1 bunch)
- 3 green onions
Pantry/Dry Goods:
- 1 cup long-grain white rice
- 2 cups beef broth (low-sodium)
- 3 tablespoons tomato paste
- 2 tablespoons Worcestershire sauce
Spice Aisle:
- Smoked paprika
- Garlic powder
- Onion powder
- Salt
- Black pepper
- Dried thyme
Success Secrets From Professional Kitchens
1. Room temperature ingredients work better. Take your sour cream and butter out of the fridge 20 minutes before cooking. Cold dairy doesn’t incorporate smoothly into hot beef, causing separation and graininess.
2. Don’t skip the rice rinsing. Those 30 seconds of rinsing remove enough starch to prevent your rice from clumping into one solid mass. You want distinct grains in your cheddar-crusted ground beef and rice casserole, not rice pudding.
3. The 10-minute rest is non-negotiable. Cutting into your casserole immediately causes all the layers to slide apart and the cheese to run everywhere. Resting lets the proteins and starches firm up so you get clean, beautiful portions.
4. Season in layers, not all at once. You added salt to the beef, there’s sodium in the broth that cooked your rice, and the cheese brings even more salt. This layered seasoning creates depth instead of one-note saltiness.
5. Visual cues beat timers. Ovens vary wildly in actual temperature. Instead of blindly following times, look for bubbling edges in Step 16 and golden-brown spots during broiling. Your eyes are more accurate than your clock.
This cheddar-crusted ground beef and rice casserole proves that comfort food doesn’t mean complicated food. You’re using straightforward techniques—browning, layering, broiling—to create something that tastes like you spent hours in the kitchen. The crispy cheese crust alone will have people asking for your secret.
Make this on Sunday and you’ve got lunches sorted for half the week. Or serve it straight from the oven with a simple side salad, and watch four people clean their plates without a single complaint.