Key Takeaways:
- Create a rich, creamy Cheesy Chicken Pasta in under 30 minutes
- Perfect one-pot meal that serves exactly 4 people
- Easily customizable with vegetables or different cheeses
- Simple enough for beginners with detailed step-by-step instructions
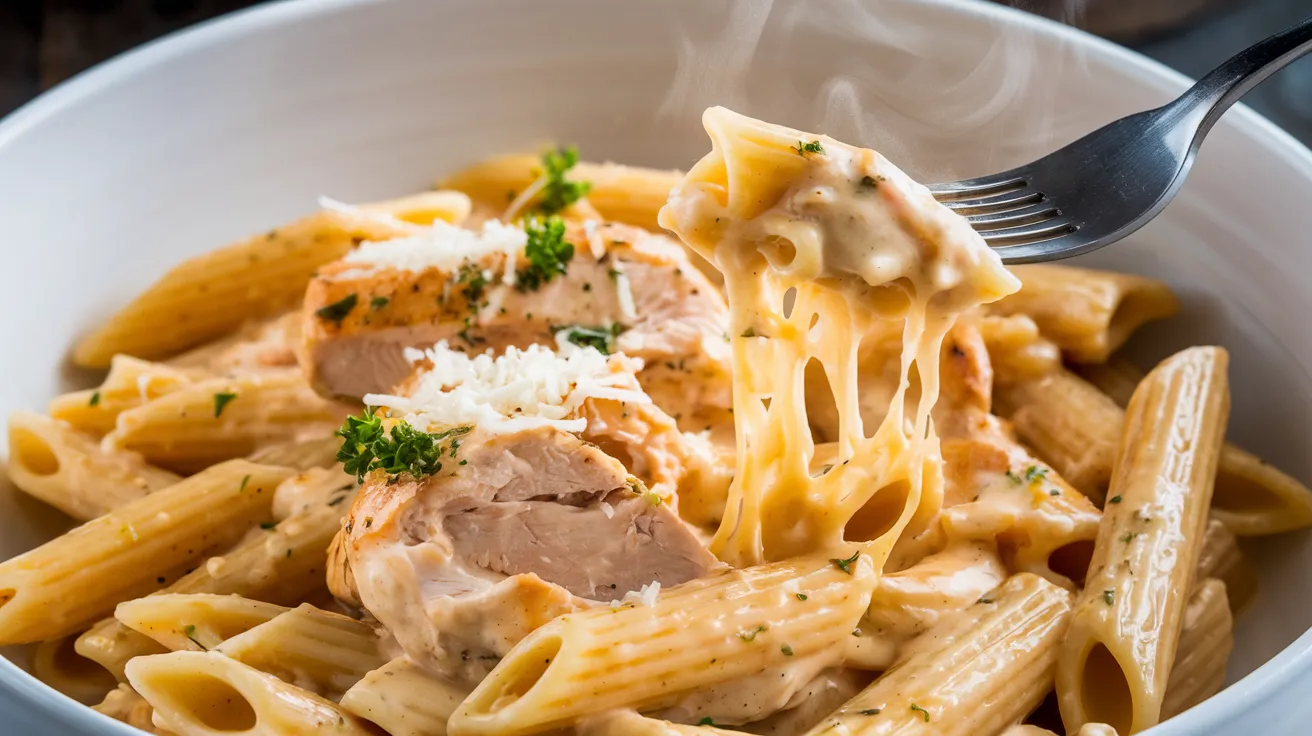
Why This Cheesy Chicken Pasta Recipe Will Save Your Weeknights
Ever stood in your kitchen at 6 PM, hungry and tired, with no idea what to cook? I’ve been there too. That’s why this Cheesy Chicken Pasta has become my go-to dinner hero. It combines tender chicken, al dente pasta, and a velvety cheese sauce in one pot, making dinner both delicious and simple.
This recipe serves 4 people generously, requires minimal prep, and delivers maximum flavor. The beauty of this Cheesy Chicken Pasta is that it uses basic ingredients that transform into something special when combined. Whether you’re cooking for family or meal prepping for the week, this cheesy chicken pasta hits all the right notes without requiring chef-level skills.
If you enjoy creamy pasta dishes, you might also love my Boursin Chicken Pasta for a more gourmet twist on a weeknight favorite.
Nutrition Information
| Nutrient | Amount per Serving |
|---|---|
| Calories | 520 |
| Protein | 32g |
| Carbohydrates | 48g |
| Fat | 22g |
| Fiber | 2g |
| Sodium | 620mg |
| Calcium | 320mg |
Equipment & Ingredients
Kitchen Tools Needed
| Tool | Purpose |
|---|---|
| Large pot or Dutch oven | For cooking pasta and sauce |
| Sharp knife | For cutting chicken |
| Cutting board | For prep work |
| Measuring cups and spoons | For accurate measurements |
| Wooden spoon | For stirring |
| Cheese grater | For freshly grating cheese |
Ingredients List (Serves 4)
| Ingredient | Amount | Notes |
|---|---|---|
| Boneless, skinless chicken breasts | 1.5 pounds | Cut into 1-inch pieces |
| Penne pasta | 12 ounces | About 4 cups dry |
| Cheddar cheese | 2 cups | Freshly grated works best |
| Heavy cream | 1 cup | Room temperature |
| Chicken broth | 3 cups | Low sodium recommended |
| Garlic | 3 cloves | Minced |
| Olive oil | 2 tablespoons | For cooking chicken |
| Salt | 1 teaspoon | To taste |
| Black pepper | 1/2 teaspoon | Freshly ground |
| Italian seasoning | 1 teaspoon | Optional |
| Red pepper flakes | 1/4 teaspoon | Optional, for heat |
Substitution Options
- Pasta: Any medium-sized pasta works (rotini, farfalle, shells)
- Cheese: Substitute with mozzarella, Monterey Jack, or a mix of cheeses
- Chicken: Turkey or rotisserie chicken can replace fresh chicken
- Heavy cream: Half-and-half or whole milk (for a lighter version)
- Chicken broth: Vegetable broth works as a non-poultry option
Detailed Beginner-Friendly Instructions
Prep Time: 10 minutes
Cook Time: 20 minutes
Total Time: 30 minutes
Preparation Phase
- Setting up your kitchen workspace
- Clear your counter of any clutter to give yourself enough working space
- Wash your hands thoroughly with soap and water for at least 20 seconds
- Take out all ingredients from the refrigerator and pantry
- Place all ingredients on the counter so they’re easily accessible
- Take your heavy cream out of the refrigerator 30 minutes before cooking to bring it to room temperature (this prevents curdling when added to the hot pasta)
- Find all the tools you’ll need and place them within reach
- Preparing the chicken (SAFETY ALERT: Raw chicken handling)
- Place your cutting board on the counter
- Take the chicken out of its packaging
- Wash your hands immediately after touching the raw chicken packaging
- Hold chicken breasts under cold running water to rinse (optional)
- Place chicken on cutting board and pat dry thoroughly with paper towels
- Starting at the thicker end of each breast, carefully cut across the width to create 1-inch strips
- Then cut each strip into 1-inch cubes (try to make them all roughly the same size so they cook evenly)
- Put the cut chicken in a clean bowl
- Sprinkle with 1/2 teaspoon salt and 1/4 teaspoon pepper, then gently toss with clean hands or a spoon to coat all pieces
- Wash your hands thoroughly again after handling raw chicken
- Clean any surfaces that came in contact with raw chicken using hot, soapy water or a disinfectant
- Preparing remaining ingredients
- For the garlic:
- Separate 3 cloves from the head of garlic
- Place one clove on the cutting board and place the flat side of your knife on top
- Carefully press down with the palm of your hand to crush the clove slightly
- Peel away and discard the papery skin
- Repeat with remaining cloves
- Finely chop the peeled garlic (the smaller the pieces, the more flavor will infuse)
- Set aside in a small bowl
- For the cheese:
- Place your cheese grater on a plate or bowl to catch the shredded cheese
- Hold the cold block of cheddar and run it down the grater using the medium-sized holes
- Grate until you have 2 cups (measure using a measuring cup)
- Set aside the grated cheese at room temperature while you prepare other ingredients
- For the liquids:
- Measure 3 cups of chicken broth using a measuring cup
- Measure 1 cup of heavy cream in a separate measuring cup
- Have both ready next to the stove
- For the garlic:
Cooking Phase
- Cooking the chicken
- Place your large pot or Dutch oven on the stove
- Turn the heat to medium-high
- Add 2 tablespoons of olive oil to the pot
- Wait about 1 minute for the oil to heat up (you’ll know it’s ready when it shimmers slightly but doesn’t smoke)
- Carefully add the seasoned chicken pieces to the hot oil in a single layer (if your pot is small, do this in two batches to avoid overcrowding)
- Let the chicken cook undisturbed for 2 minutes until the bottom side turns golden brown
- Using a wooden spoon or tongs, flip the pieces and cook for another 2-3 minutes
- Check that chicken is no longer pink inside by cutting one piece open (or use a meat thermometer to check that it’s reached 165°F)
- Once fully cooked, transfer all chicken pieces to a clean plate using a slotted spoon
- Cover the plate loosely with foil to keep chicken warm
- Leave all the flavorful chicken bits and oil in the pot – don’t clean it out!
- Creating the pasta base
- Using the same pot with the chicken drippings, keep heat at medium
- Add the minced garlic to the pot
- Stir constantly for exactly 30 seconds until fragrant (be careful not to burn the garlic as it will taste bitter)
- Immediately pour in the 3 cups of chicken broth to stop the garlic from browning further
- Add 1 teaspoon of Italian seasoning if using
- Using your wooden spoon, scrape the bottom of the pot to loosen any browned bits from cooking the chicken (these add flavor)
- Increase heat to high and bring the broth to a full, rolling boil (you’ll see large bubbles continuously breaking at the surface)
- Cooking the pasta properly
- Once the broth is boiling, add the 12 ounces of penne pasta
- Stir immediately with a wooden spoon to prevent the pasta from sticking together
- Once the liquid returns to a boil, reduce heat to medium
- Set a timer for 8 minutes (check your pasta package, but typically penne takes 9-11 minutes – we’re aiming for al dente, which is slightly firm)
- Stir the pasta every 2 minutes during cooking to ensure even cooking
- About halfway through cooking, test a piece by carefully removing it with a spoon, letting it cool slightly, and taking a bite
- Pasta should be cooking, but still quite firm at this point
- Continue cooking until the timer goes off
- Test another piece of pasta – it should be tender but still have a slight firmness in the center (al dente)
- If needed, cook for 1-2 more minutes, but be careful not to overcook
- Do not drain the pasta! The starchy liquid is key to creating a creamy sauce
- Note that the liquid should be somewhat reduced but still visible in the pot
- Creating the creamy cheese sauce (IMPORTANT step)
- Once pasta is al dente, reduce heat to low (this is crucial to prevent the cheese from curdling)
- Wait about 30 seconds for the bubbling to subside
- Pour in the 1 cup of room temperature heavy cream slowly while stirring
- Stir continuously for 1-2 minutes until the cream is well incorporated and slightly thickened
- Add the cooked chicken pieces back to the pot, including any juices that collected on the plate
- Stir gently to combine everything
- Now comes the most important part – adding the cheese:
- Take the pot off the heat completely
- Add 1/2 cup of the grated cheddar cheese
- Stir constantly in a figure-eight motion until completely melted
- Continue adding cheese in 1/2 cup increments, stirring thoroughly between each addition
- Be patient! Adding cheese slowly and stirring constantly prevents clumping
- After all cheese is added, check the sauce consistency by lifting the spoon:
- The sauce should coat the back of the spoon and slowly drip off
- If too thick, add 1-2 tablespoons of milk or broth while stirring
- If too thin, return to low heat for 1-2 minutes while stirring
- Final seasoning adjustments
- Return pot to lowest heat setting
- Taste the sauce carefully (it will be hot!)
- Add remaining salt and pepper if needed, starting with 1/4 teaspoon salt and a pinch of pepper
- For heat lovers, add up to 1/4 teaspoon red pepper flakes
- Stir thoroughly to distribute all seasonings evenly
- Take another taste and adjust if necessary
- Remember that the cheese already contains salt, so add extra salt sparingly
Serving Phase
- Allowing the pasta to rest
- Turn off the heat completely
- Remove the pot from the burner
- Let the Cheesy Chicken Pasta stand uncovered for 2-3 minutes
- This resting period is crucial as it allows the sauce to thicken naturally
- The pasta will also continue to absorb flavors
- After resting, gently stir once more to recombine everything before serving
- Portioning and serving properly
- Get out 4 pasta bowls or plates
- Using a large serving spoon and tongs together, lift and divide the pasta into equal portions
- Aim for about 1 1/2 cups per serving
- Make sure each portion gets an equal amount of chicken
- If desired, garnish each portion with:
- A sprinkle of extra grated cheese
- A pinch of chopped fresh parsley
- A very light dusting of black pepper
- Serve immediately while hot
- If you’re serving with a side salad or garlic bread, have these ready before dishing up the pasta
Troubleshooting Common Issues
Cheese Sauce is Clumpy
- Problem: Cheese didn’t melt smoothly and formed small lumps
- Solution:
- Always remove the pot from heat before adding cheese
- Make sure cheese is at room temperature and added gradually
- Use freshly grated cheese instead of pre-shredded (pre-shredded contains anti-caking agents that prevent smooth melting)
- If you already have clumps, try whisking vigorously while adding a splash of warm milk
Pasta is Too Hard or Too Soft
- Problem: Pasta texture isn’t right
- Solution:
- For too hard pasta: Add 1/4 cup more broth and cook 1-2 minutes longer, testing frequently
- For too soft pasta: Next time, reduce cooking time by 1-2 minutes and test pasta more frequently
- Remember that pasta will continue cooking slightly in the hot sauce even after removing from heat
Sauce is Too Thin
- Problem: Sauce isn’t thick enough to coat the pasta well
- Solution:
- Let the dish sit for 5 minutes off heat – the sauce naturally thickens as it cools
- If still too thin, mix 1 tablespoon cornstarch with 1 tablespoon cold water in a separate bowl
- Return pasta to low heat and slowly stir in the cornstarch mixture
- Cook for 1-2 minutes, stirring constantly until thickened
Chicken is Dry
- Problem: Chicken pieces are tough or overcooked
- Solution:
- Make sure to remove chicken from heat as soon as it reaches 165°F or is no longer pink inside
- Add chicken back to the pasta only at the very end of cooking
- For already dry chicken, adding a little extra cream or broth can help rehydrate it
- Next time, consider cutting chicken into slightly larger pieces, which are less likely to overcook
Variations & Substitutions
Vegetable Additions
- Add 1 cup of frozen peas during the last 3 minutes of cooking
- Mix in 2 cups of baby spinach just before serving
- Stir in 1 cup of roasted red peppers or sun-dried tomatoes
Protein Swaps
- Use rotisserie chicken (2 cups shredded) to save time
- Substitute 1 pound of cooked Italian sausage for chicken
- Make it vegetarian with 2 cups of roasted vegetables and no meat
Flavor Boosters
- Add 2 tablespoons of pesto for an Italian twist
- Mix in 1/4 cup of crumbled bacon for a smoky flavor
- Use smoked paprika (1/2 teaspoon) for depth
If you’re looking for a cold pasta option for summer gatherings, check out my Chipotle Pasta Salad for a spicy twist on pasta.
Storage & Reheating
Refrigerator Storage
- How:
- Allow pasta to cool completely but no longer than 2 hours at room temperature
- Transfer to airtight containers with secure lids
- Label container with date prepared
- Duration: Keeps for 3-4 days in refrigerator (40°F or below)
- Note: Sauce will thicken considerably in refrigerator – this is normal
Freezer Storage
- How:
- Divide into meal-sized portions in freezer-safe containers
- Leave 1/2 inch space at top for expansion
- Label with date and contents
- Cool completely before freezing
- Duration: Good for up to 2 months
- Note: Cream-based sauces may separate when frozen and thawed, but can be reconstituted with gentle heating and stirring
Reheating Instructions
- Microwave Method:
- Place single portion in microwave-safe dish
- Add 1 tablespoon of milk or water per cup of pasta and stir gently
- Cover with microwave-safe lid or paper towel (leaving slight vent)
- Heat on 70% power (medium-high) for 1 minute
- Remove and stir thoroughly
- Continue heating in 30-second intervals, stirring between each, until heated through (165°F)
- Let stand 1 minute before eating (temperature continues to equalize)
- Stovetop Method:
- Place pasta in saucepan of appropriate size
- Add 1-2 tablespoons milk, cream, or water per cup of pasta
- Set heat to medium-low
- Cover with lid and heat for 2 minutes
- Remove lid and stir thoroughly
- Continue heating uncovered, stirring frequently to prevent sticking (about 5-7 minutes total)
- If sauce separates, add a splash of cream and whisk vigorously until recombined
- Heat until internal temperature reaches 165°F
Safety Notes & Tips
Food Safety
- Always wash hands before and after handling raw chicken
- Use separate cutting boards for meat and other ingredients
- Chicken must reach 165°F internal temperature (use a meat thermometer if you have one)
- Refrigerate leftovers within 2 hours of cooking (1 hour if room temperature is above 90°F)
- Do not leave dairy-based sauce at room temperature for extended periods
- Always reheat leftovers to 165°F before eating
Cooking Tips for Beginners
- Cut chicken pieces uniformly for even cooking
- Room-temperature cream and cheese blend more smoothly and are less likely to curdle
- If you don’t have a cheese grater, you can cut cheese into very small cubes instead
- Stirring pasta frequently prevents it from sticking to the bottom of the pot
- Testing pasta as you cook is the only reliable way to check doneness
- If you’re concerned about salt content, start with less and add more to taste
Make-Ahead Options
- Prep chicken and grate cheese a day ahead (store separately in refrigerator)
- For parties, make entire dish, transfer to oven-safe baking dish, top with extra cheese, and reheat in 350°F oven for 20 minutes
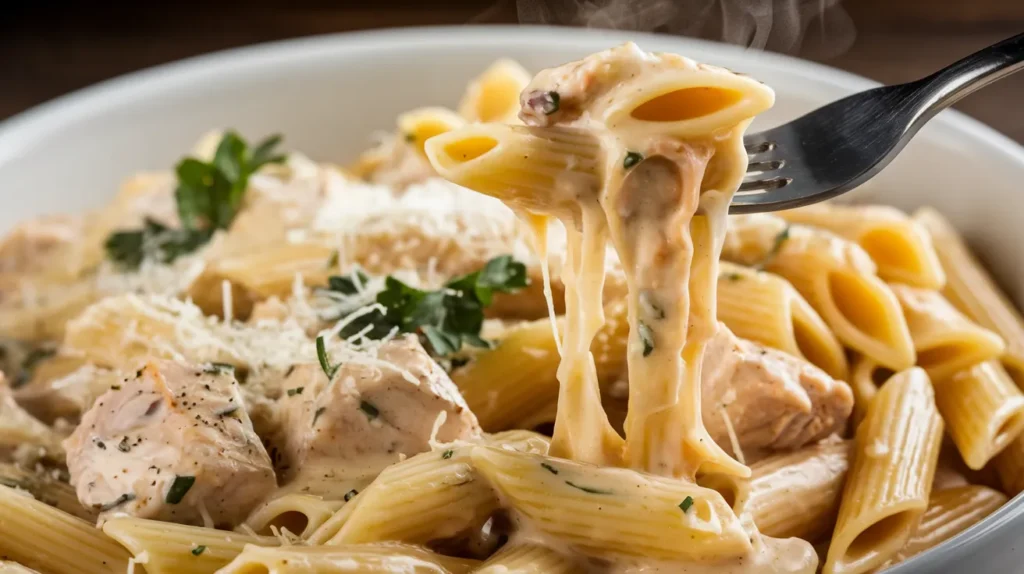
Final Thoughts
This Cheesy Chicken Pasta proves that comfort food doesn’t need to be complicated. With just a handful of ingredients and one pot, you can create a satisfying meal that the whole family will love. The creamy cheese sauce coats each piece of pasta and chicken perfectly, creating a dish that feels indulgent yet comes together quickly.
Make this recipe your own by trying different cheese combinations or adding your favorite vegetables. The fundamentals stay the same: tender chicken, perfectly cooked pasta, and a rich, creamy sauce that brings it all together.
Tip: For the creamiest result, don’t rush the cheese-melting process. Low heat and constant stirring are your friends!