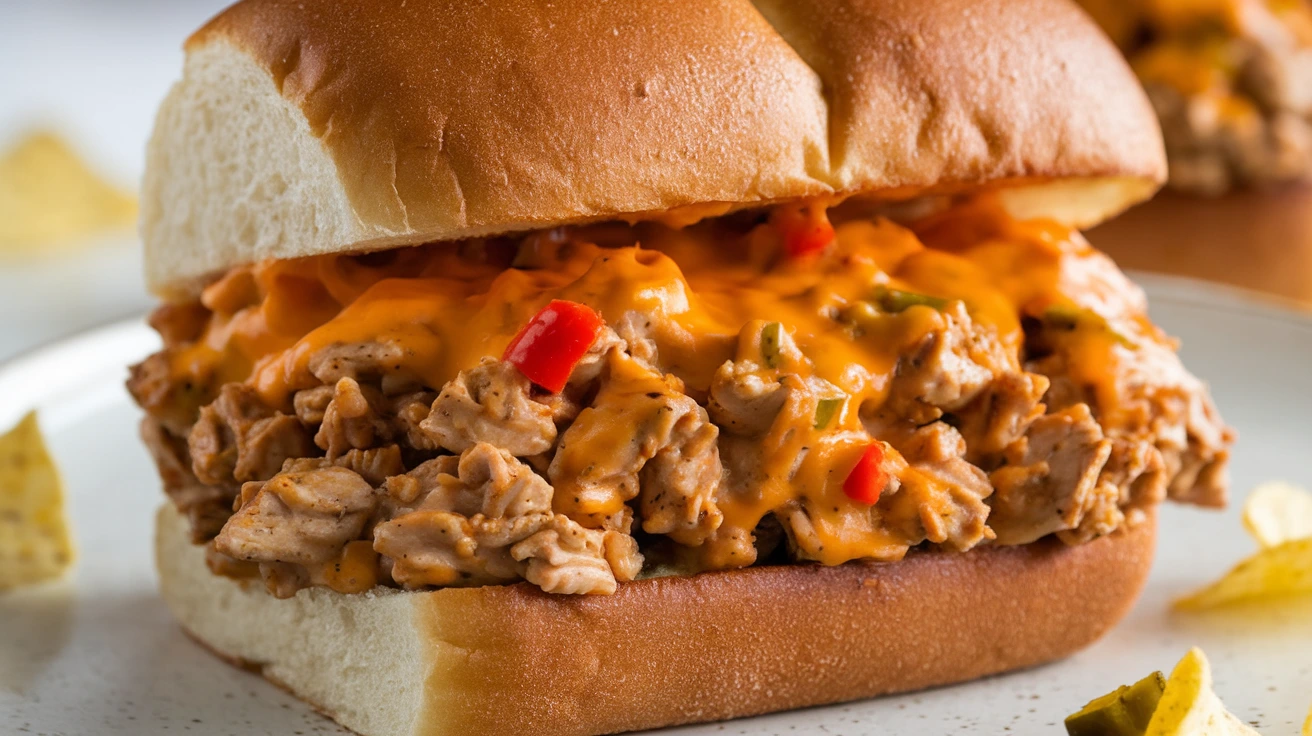
These Cheesy Chicken Sloppy Joe Recipes deliver everything you love about the classic sandwich with a healthier twist. Ground chicken creates a lighter protein base while melted cheddar cheese adds that gooey comfort we all crave in Cheesy Chicken Sloppy Joe Recipes. Perfect for busy weeknights when you need dinner on the table fast.
SERVES: 4 | PREP: 10 MIN | COOK: 20 MIN | TOTAL: 30 MIN
Ingredients for Cheesy Chicken Sloppy Joe Recipes
Main Mixture
| Ingredient | Amount | Notes |
|---|---|---|
| Ground chicken | 1 pound | 93% lean works best |
| Olive oil | 1 tablespoon | For cooking |
| Yellow onion | 1 medium | Finely diced |
| Green bell pepper | 1 medium | Diced small |
| Fresh garlic | 3 cloves | Minced fine |
| Ketchup | 1 cup | Standard tomato ketchup |
| Tomato paste | 2 tablespoons | Adds depth |
| Worcestershire sauce | 1 tablespoon | For umami flavor |
| Chili powder | 1 teaspoon | Mild heat |
| Garlic powder | 1 teaspoon | Extra garlic punch |
| Salt | ¾ teaspoon | Divided |
| Black pepper | ½ teaspoon | Freshly ground |
| Cheddar cheese | 1 cup | Shredded sharp |
For Serving
| Item | Amount | Purpose |
|---|---|---|
| Hamburger buns | 4 buns | Lightly toasted |
| Extra cheese | ½ cup | Optional topping |
| Dill pickles | 8 slices | Optional garnish |
Step-by-Step Instructions for Cheesy Chicken Sloppy Joe Recipes
Phase 1: Prep Work (10 Minutes Total)
Step 1: Set Up Your Cooking Station
Clear your counter space and gather all equipment. Wash your hands with soap and warm water for at least 20 seconds.
Place your cutting board on a stable, dry surface. This prevents slipping while you chop vegetables.
Step 2: Prepare the Onion
Cut off both ends of the onion with a sharp knife. Peel away the papery outer skin and discard.
Slice the onion in half from root to stem. Place each half flat-side down on your cutting board for stability.
Make horizontal cuts toward the root (but not through it). Then make vertical cuts from top to bottom, spacing them about ¼ inch apart.
Finally, slice across these cuts to create small, evenly-diced pieces. You want pieces about the size of a corn kernel. Small pieces cook faster and blend better with the sauce.
Step 3: Dice the Bell Pepper
Rinse the bell pepper under cold water. Place it stem-side up on your cutting board.
Cut around the stem in a square pattern, removing the entire top. Stand the pepper upright and slice down one side.
Open the pepper flat and scrape out all white membranes and seeds with your knife. These parts taste bitter, so remove them completely.
Cut the pepper into strips ¼ inch wide, then turn and cut across to make small dice. Match the size of your onion pieces for even cooking.
Step 4: Mince the Garlic
Separate three cloves from the garlic bulb. Press each clove firmly with the flat side of your knife to loosen the skin.
Peel off the papery skin completely. Place the flat side of your knife on each clove and press down firmly to crush it slightly.
Rock your knife back and forth across the garlic, moving it in different directions. Keep chopping until the pieces are very small—almost paste-like. This releases maximum flavor into your Cheesy Chicken Sloppy Joe Recipes.
Step 5: Measure All Sauce Ingredients
Get out 1 cup of ketchup and place it in a small bowl for easy pouring. Measure 2 tablespoons of tomato paste—use the back of a spoon to pack it level in the measuring spoon.
Pour 1 tablespoon of Worcestershire sauce into a separate small container. Measure 1 teaspoon each of chili powder and garlic powder into another small bowl.
Having everything measured and ready (what chefs call “mise en place”) makes the actual cooking much smoother. You won’t scramble to find ingredients while your chicken is cooking.
Step 6: Prep the Cheese and Chicken
If your cheddar isn’t pre-shredded, grate 1 cup using the large holes of a box grater. Pre-shredded cheese has anti-caking agents that affect melting, so fresh is better when possible.
Remove your ground chicken from its package and place it on a plate. Let it sit at room temperature for about 5 minutes while you finish other prep—this helps it cook more evenly.
Phase 2: Cooking the Base (8 Minutes)
Step 7: Heat Your Pan Properly
Place your large skillet on the stove over medium heat. Let it warm for about 1 minute before adding any oil.
Add 1 tablespoon of olive oil and swirl it around to coat the bottom. Wait until you see the oil shimmer slightly—this takes about 30-45 seconds. If the oil starts smoking, your pan is too hot. Remove it from the heat for a minute.
A properly heated pan prevents sticking and helps vegetables cook evenly instead of steaming.
Step 8: Cook the Vegetables
Add your diced onion and bell pepper to the hot oil. You should hear a gentle sizzle—that’s perfect.
Sprinkle ¼ teaspoon salt over the vegetables. Salt draws out moisture and helps them soften faster.
Stir with a wooden spoon every 45-60 seconds. The onion will turn from white to translucent (you can see through it). The bell pepper softens and its color brightens.
This takes 5-6 minutes total. Don’t rush by turning up the heat—slow cooking develops sweeter flavor.
Step 9: Add the Garlic
Push your vegetables to the edges of the pan, creating a small well in the center. Add your minced garlic to this center spot.
Stir the garlic constantly for 30-45 seconds. You’ll smell an amazing aroma when it’s ready. Garlic burns quickly and tastes bitter when overcooked, so watch it carefully.
Mix the garlic throughout the vegetables once it’s fragrant.
Phase 3: Cooking the Chicken (8 Minutes)
Step 10: Brown the Ground Chicken
Add the full pound of ground chicken to your pan. It will look pale and clumpy at first—that’s normal.
Immediately break it into smaller pieces using the edge of your wooden spoon. Press down and scrape across the pan to create crumbles about the size of peas.
Keep stirring and breaking up chunks for the first 2-3 minutes. You want small, uniform pieces that will absorb the sauce better.
Step 11: Cook Until No Pink Remains
Keep the chicken moving in the pan, stirring every minute or so. Watch for the color change from pale pink to light brown.
The chicken releases moisture as it cooks, creating liquid in your pan. This is normal—keep cooking and it will evaporate.
After 6-7 minutes, all pink should be gone. Break open a larger piece to check the inside—it should be completely white or light brown. Ground chicken must reach 165°F for safety.
If liquid remains in your pan, increase heat slightly and cook for another minute to evaporate it. For more chicken cooking tips, check out my air fryer chicken bites recipe which uses similar techniques.
Phase 4: Building the Sauce (5 Minutes)
Step 12: Add All Sauce Components
Pour in your 1 cup of ketchup—it should coat the chicken mixture. Add the 2 tablespoons of tomato paste and stir it in completely. Tomato paste is concentrated, so it needs good mixing.
Drizzle in 1 tablespoon of Worcestershire sauce. This adds a savory, slightly tangy depth you can’t get from other ingredients.
Sprinkle in your measured spices: 1 teaspoon chili powder, 1 teaspoon garlic powder, ½ teaspoon black pepper, and ½ teaspoon salt.
Stir everything continuously for 30-45 seconds until the sauce is uniform in color with no streaks of white chicken or red sauce.
Step 13: Simmer the Mixture
Turn your heat down to medium-low. The mixture should bubble gently around the edges—not a rolling boil.
Let it simmer for 3-4 minutes, stirring every minute. This allows flavors to blend and the sauce to thicken slightly.
You’ll notice the mixture becomes less watery and coats a spoon when you lift it. If it seems too thick, add 1-2 tablespoons of water. If too thin, simmer for another 2 minutes uncovered.
Phase 5: Finishing and Serving (2 Minutes)
Step 14: Melt in the Cheese
Remove your pan from the heat completely. This prevents the cheese from separating or becoming grainy.
Sprinkle 1 cup of shredded cheddar evenly over the mixture. Let it sit for 15-20 seconds to start softening.
Stir gently until the cheese melts completely and creates a creamy, cohesive sauce. The mixture should look glossy and pull together.
Let the mixture rest for 1-2 minutes. This brief wait allows it to thicken just enough to stay on your buns without dripping everywhere.
Step 15: Toast the Buns
While the mixture rests, split your hamburger buns. Place them cut-side down in a dry skillet over medium heat.
Toast for 1-2 minutes until golden brown with visible grill marks. Toasted buns hold up better against the saucy filling and add a pleasant crunch.
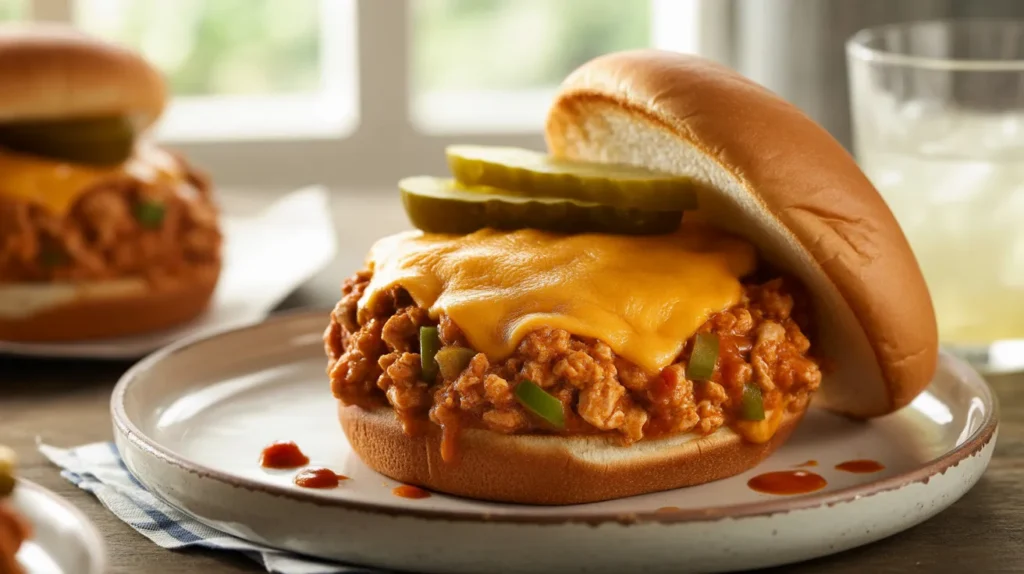
Step 16: Assemble Your Cheesy Chicken Sloppy Joes
Place each toasted bun on a plate, cut sides facing up. Use a large spoon or measuring cup to scoop about ½ cup of the chicken mixture onto each bottom bun.
Pile it slightly higher in the center—it naturally spreads to the edges. Top with extra shredded cheese if desired (the residual heat melts it slightly).
Add 2 pickle slices to each sandwich if using. Place the top bun at a slight angle—this makes eating easier and looks better.
Serve immediately while hot. If you enjoy chicken-based recipes, you’ll find these Cheesy Chicken Sloppy Joe Recipes just as satisfying as my popular chicken tenders and fries but with a saucier twist!
Chef’s Notes for Perfect Cheesy Chicken Sloppy Joe Recipes
1. Choose Your Ground Chicken Wisely
Look for 93% lean ground chicken at the store. This ratio gives you enough fat for flavor without excessive grease. Ground chicken breast alone can be dry, while ground dark meat works well if you prefer richer taste.
2. Control Your Heat
Medium heat is your friend here. Too high and your vegetables char before softening. Too low and everything steams instead of browning. If you notice sticking, add a splash of water rather than more oil.
3. Fresh Cheese Melts Better
Block cheese you shred yourself melts smoother than pre-shredded. Pre-shredded varieties contain cellulose (an anti-caking agent) that can make the sauce grainy. When making Cheesy Chicken Sloppy Joe Recipes, this small detail creates noticeably creamier results.
4. Adjust Consistency as Needed
Your sauce should coat the back of a spoon but still be saucy. Weather, pan size, and heat level all affect thickness. Keep chicken broth handy to thin, or simmer longer to thicken.
Nutrition Information (Per Serving)
| Nutrient | Amount |
|---|---|
| Calories | 425 |
| Protein | 32g |
| Carbohydrates | 38g |
| Fat | 15g |
| Saturated Fat | 6g |
| Fiber | 3g |
| Sodium | 890mg |
| Sugar | 12g |
Nutrition calculated for one sandwich with bun. Values are approximate.
Variations to Try
1. Turkey Sloppy Joes
Swap ground chicken for ground turkey using the same measurements. Turkey has a slightly different flavor profile—a bit earthier. Cook it exactly the same way.
2. Spicy Pepper Jack Version
Replace cheddar with pepper jack cheese for a spicy kick. Add 1 diced jalapeño with the bell pepper (remove seeds for less heat). Increase chili powder to 2 teaspoons.
3. Mushroom-Loaded Sloppy Joes
Add 8 ounces sliced button mushrooms with your onions and peppers. They add meaty texture and umami flavor. Cook the mushrooms until they release their moisture and brown slightly—this takes an extra 3-4 minutes.
4. Low-Carb Lettuce Wrap Style
Skip the buns entirely. Serve your mixture in large butter lettuce leaves or on a bed of shredded cabbage. This cuts carbs significantly while keeping all the flavor.
Storage & Reheating Guide
Refrigerator Storage
Let your Cheesy Chicken Sloppy Joe mixture cool to room temperature (no more than 30 minutes sitting out). Transfer to an airtight container.
Store in the fridge for up to 3 days. The mixture actually tastes better the next day as flavors meld.
Freezer Storage
Cool the mixture completely before freezing. Portion into freezer-safe containers or heavy-duty freezer bags.
Press out excess air and label with the date. Freeze for up to 2 months.
Reheating Methods
Stovetop (Best): Place mixture in a pan over medium-low heat. Add 2-3 tablespoons of chicken broth or water. Stir frequently for 5-7 minutes until heated through.
Microwave: Transfer to a microwave-safe bowl. Cover loosely. Heat on 50% power for 2-3 minutes, stirring every minute. Add a splash of water if it looks dry.
Pro Tips
Store the mixture and buns separately—assembled sandwiches get soggy. Toast fresh buns just before serving for the best texture.
Troubleshooting Common Problems
Problem 1: Mixture Too Watery
Your sauce should be thick enough to stay on the bun without dripping excessively. If it’s too runny:
Return the pan to medium heat and simmer uncovered for 3-5 minutes. Stir occasionally to prevent sticking. The liquid evaporates and the sauce thickens naturally. If you’re in a rush, mix 1 tablespoon cornstarch with 2 tablespoons cold water. Stir this slurry into your mixture and cook for 1 minute—it thickens immediately.
Problem 2: Mixture Too Thick or Dry
Sometimes your sauce gets too thick, especially if you simmer too long. This makes it pasty and hard to spread.
Add 2-3 tablespoons of chicken broth, water, or even tomato sauce. Stir well and heat through for 1 minute. The liquid loosens everything up. Start with less liquid—you can always add more.
Problem 3: Cheese Is Grainy or Separated
When cheese overheats, the proteins tighten and squeeze out fat, creating a grainy texture instead of smooth creaminess.
Always remove your pan from heat before adding cheese. Stir gently but thoroughly. If your cheese has already separated, add 1-2 tablespoons of heavy cream and stir vigorously off-heat. This emulsifies the fat back into the sauce. Next time, use freshly shredded cheese and lower temperatures.
Problem 4: Chicken Is Rubbery or Tough
Ground chicken should be tender and crumbly. Rubbery texture means overcooking or compacting.
Don’t press down hard on the chicken while it cooks—this squeezes out moisture. Break it into small pieces early, then leave it alone mostly. Cook just until no pink remains. If it’s already overcooked, there’s no fix, but adding extra sauce helps mask the texture.
Problem 5: Flavors Taste Flat or Bland
Good Cheesy Chicken Sloppy Joe Recipes need balanced seasoning. Flat flavor usually means not enough salt or acid.
Taste your mixture before serving. Add ¼ teaspoon salt at a time until flavors pop. If it needs brightness, add 1 teaspoon of apple cider vinegar or a squeeze of lemon juice. The acid balances the richness. A dash of hot sauce also helps if you need both heat and tang.
Equipment Essentials
Must-Have Tools
- Large skillet (12-inch diameter with sides at least 2 inches high)
- Wooden spoon (won’t scratch your pan and feels comfortable for constant stirring)
- Sharp chef’s knife (8-inch blade is most versatile)
- Cutting board (medium to large size)
- Measuring cups (dry and liquid)
- Measuring spoons (set including ½, 1 teaspoon and 1 tablespoon)
- Can opener (for tomato paste if using canned)
- Box grater (for shredding cheese)
Nice-to-Have Items
- Garlic press (saves chopping time)
- Kitchen timer (keeps you on track)
- Spatula (for scraping pan)
- Small prep bowls (for organizing ingredients)
Pan Selection Tips
Nonstick skillets work great for beginners—easy cleanup and less sticking. Cast iron develops excellent flavor over time but requires more attention. Stainless steel gives the best browning if you know how to prevent sticking.
Whatever pan you choose, make sure it’s large enough. A crowded pan steams food instead of browning it.
Shopping List by Store Section
Produce Department
- Yellow onion (1 medium)
- Green bell pepper (1 medium)
- Fresh garlic (1 bulb—you need 3 cloves)
- Dill pickles (if using, 1 jar)
Meat Department
- Ground chicken (1 pound, 93% lean preferred)
Dairy Section
- Sharp cheddar cheese (8 ounces for 1 cup shredded, or buy pre-shredded)
Condiment Aisle
- Ketchup (need 1 cup, standard 20-ounce bottle has enough)
- Worcestershire sauce (1 small bottle)
Canned Goods Aisle
- Tomato paste (1 small can—6 ounce size)
Spice Aisle
- Chili powder (if not in your pantry)
- Garlic powder (if not in your pantry)
Baking/Oil Section
- Olive oil (if not in your pantry)
Bread Aisle
- Hamburger buns (1 package of 4-8 buns)
Pantry Staples to Check at Home
- Salt
- Black pepper
Success Secrets for Amazing Results
1. Let Your Ingredients Come to Room Temperature
Take your ground chicken out of the fridge 10-15 minutes before cooking. Cold meat drops your pan temperature dramatically when added, causing uneven cooking and more liquid release. Room temperature chicken browns better and cooks more evenly throughout.
2. Toast Your Buns Properly
The difference between soggy and satisfying sandwiches often comes down to the bun. Toast them cut-side down in a dry skillet until you see golden-brown spots. This creates a barrier that prevents sauce from soaking through immediately. Your sandwich stays structurally sound from first bite to last.
3. Master the Two-Stage Salt Technique
Add salt twice during cooking—first when sweating vegetables (¼ teaspoon) and again with the final seasonings (½ teaspoon). Salting vegetables early draws out moisture and concentrates flavors. The second addition seasons the meat and sauce. This layered approach creates depth you can’t achieve by adding all salt at once.
4. Use the Wooden Spoon Test for Consistency
Dip a wooden spoon into your mixture and lift it out. The sauce should coat the back of the spoon and slowly drip off in a thick stream—not water-thin, but not glue-thick either. If you can draw a line through the coating with your finger and it stays separated for 2-3 seconds, you’ve hit the perfect consistency for Cheesy Chicken Sloppy Joe Recipes.
5. Rest Before Serving
After removing from heat and stirring in cheese, let your mixture sit for 2 full minutes before assembling sandwiches. This resting period allows the sauce to thicken slightly and flavors to marry. The mixture firms up just enough to pile high on buns without immediately sliding off. Patience here makes a real difference in presentation and eating experience.
These Cheesy Chicken Sloppy Joe Recipes deliver comfort food satisfaction with less guilt than the original. The ground chicken keeps things light while melted cheddar provides all the richness you crave. Make this tonight and watch your family ask for seconds!