- Perfect for weeknight dinners – ready in just 30 minutes from start to finish
- Kid-friendly meal that doesn’t skimp on flavor for adults
- Customizable Cheesy Garlic Chicken Wraps with easy substitutions for dietary needs
- Make-ahead friendly – prep components in advance for even faster assembly
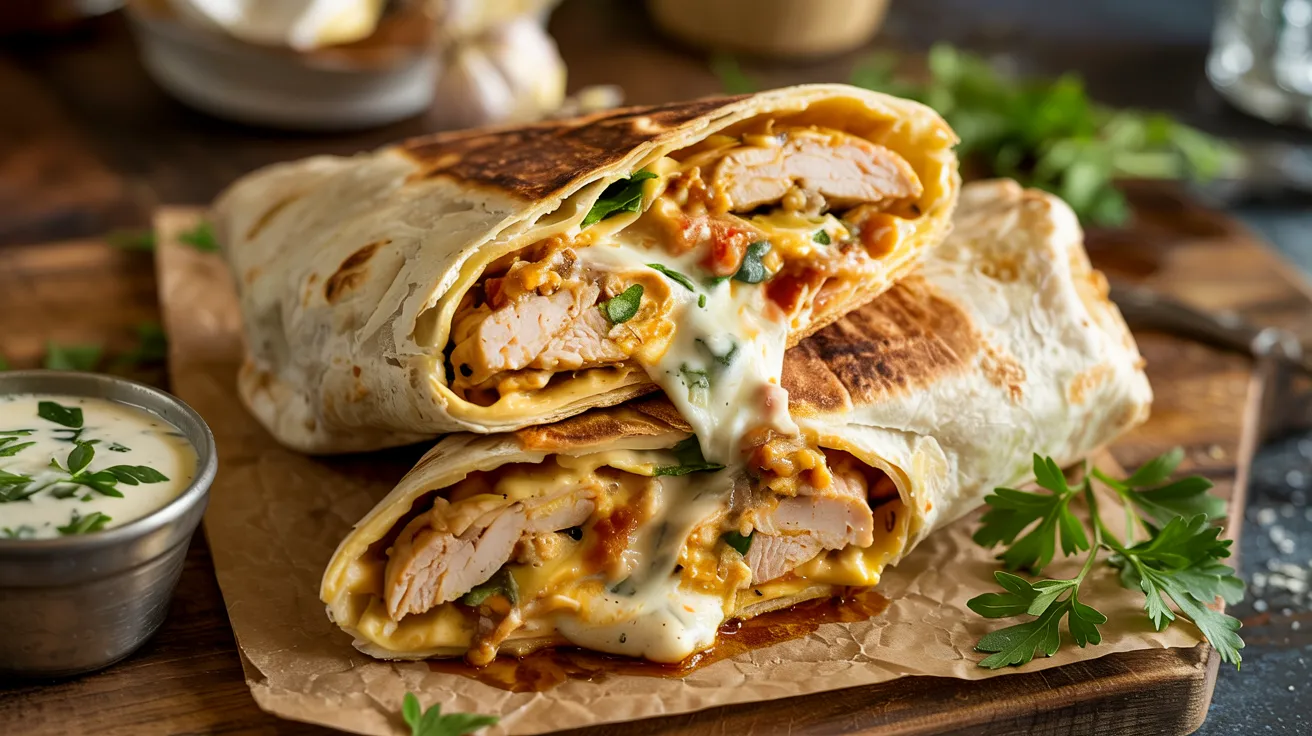
The Easiest Cheesy Garlic Chicken Wraps You’ll Ever Make
Tired of the same boring weeknight meals? These Cheesy Garlic Chicken Wraps are about to become your new go-to dinner.
The combination of juicy chicken, melty cheese, and garlic-infused goodness wrapped in a warm tortilla is impossible to resist. If you enjoy flavorful chicken dishes like our Chicken Nanban, you’ll love these wraps. Best of all, these Cheesy Garlic Chicken Wraps are designed for beginners who want big flavor without the fuss.
These Cheesy Garlic Chicken Wraps come together in just 30 minutes but taste like you spent hours in the kitchen. With simple ingredients and clear instructions, you’ll nail this recipe on your first try.
Let’s get cooking!
Nutrition Facts for Cheesy Garlic Chicken Wraps
| Nutrient | Amount Per Serving |
|---|---|
| Calories | 420 |
| Protein | 28g |
| Carbohydrates | 32g |
| Fat | 18g |
| Fiber | 4g |
| Sodium | 680mg |
| Sugar | 3g |
What You’ll Need for Your Cheesy Garlic Chicken Wraps
Ingredients (Serves 4)
| Ingredient | Amount |
|---|---|
| Boneless chicken breasts | 1 pound (about 2 medium breasts) |
| Large flour tortillas | 4 (10-inch) |
| Shredded mozzarella cheese | 2 cups |
| Shredded cheddar cheese | 1 cup |
| Garlic cloves | 4, minced |
| Butter | 2 tablespoons |
| Olive oil | 1 tablespoon |
| Italian seasoning | 1 teaspoon |
| Salt | ½ teaspoon |
| Black pepper | ¼ teaspoon |
| Fresh parsley | 2 tablespoons, chopped (optional) |
Kitchen Tools
| Tool | Purpose |
|---|---|
| Large skillet | For cooking chicken |
| Cutting board | For prep work |
| Sharp knife | For cutting chicken |
| Cheese grater | If using block cheese |
| Measuring spoons | For accurate seasoning |
| Tongs | For flipping wraps |
| Aluminum foil | For wrapping (optional) |
Possible Substitutions
- Tortillas: Use whole wheat, gluten-free, or spinach tortillas
- Cheese: Swap for dairy-free alternatives if needed
- Chicken: Turkey, rotisserie chicken, or plant-based chicken alternatives work well
- Butter: Use olive oil or plant-based butter for dairy-free version
Prep Time, Cook Time & Total Time for Cheesy Garlic Chicken Wraps
- Prep Time: 10 minutes
- Cook Time: 20 minutes
- Total Time: 30 minutes
Detailed Step-by-Step Instructions for Beginners
Preparation Phase
- Get organized before starting your Cheesy Garlic Chicken Wraps
- Wash your hands thoroughly with soap and water for at least 20 seconds
- Clear your counter space completely so you have room to work
- Read through the entire recipe once before beginning
- Take out all ingredients from the refrigerator and pantry
- Arrange all your cooking tools within easy reach
- Preheat your skillet (if using electric stove) on low while prepping
- Prepare the chicken (the star of your Cheesy Garlic Chicken Wraps)
- Place your cutting board on a stable surface
- Unwrap chicken breasts and place them on the cutting board
- Hold the chicken steady with one hand (using your non-dominant hand)
- With your knife in your dominant hand, slice against the grain into ½-inch strips
- TIP: Look for the lines in the chicken and cut perpendicular to them
- Make sure all strips are roughly the same size for even cooking
- Using paper towels, gently pat each chicken strip dry (this removes excess moisture)
- Sprinkle ¼ teaspoon salt and ¼ teaspoon pepper evenly over all chicken pieces
- Using clean hands, toss the chicken to ensure even seasoning coverage
- Wash hands immediately after handling raw chicken
- Prepare the remaining ingredients
- For the garlic:
- Place each garlic clove on the cutting board
- Place the flat side of your knife on the clove and press down firmly with your palm to crush it
- Remove the papery skin completely
- Mince the garlic by chopping it into very small pieces (about the size of grains of rice)
- Transfer minced garlic to a small bowl and set aside
- For the cheese:
- If using block cheese, grate both cheeses using the large holes of your grater
- Combine both cheeses in a medium bowl and mix with clean hands or a spoon
- Set aside at room temperature for better melting
- If using fresh parsley:
- Rinse parsley thoroughly under cold water
- Pat dry with paper towels or use a salad spinner
- Remove leaves from stems
- Gather leaves into a small pile and chop finely
- Set aside in a small bowl
- For the garlic:
Cooking Phase for Perfect Cheesy Garlic Chicken Wraps
- Cook the chicken properly and safely
- Place your large skillet on the stove over medium-high heat
- Add 1 tablespoon olive oil to the skillet
- Wait approximately 1-2 minutes for the oil to heat up
- To test if oil is hot enough: add a tiny piece of chicken – it should sizzle immediately
- Using tongs or clean hands, carefully add chicken strips to the hot oil in a single layer
- CAUTION: Stand back slightly as oil may splatter
- TIP: Work in batches if necessary – overcrowding will steam the chicken instead of browning it
- Let chicken cook untouched for 3 minutes on first side
- Using tongs, flip each piece and cook for another 2-3 minutes
- Check for doneness by cutting into the thickest piece – meat should be completely white with no pink
- If using a meat thermometer, chicken is done at 165°F
- Remove chicken from skillet and place on a clean plate
- TIP: Cover with foil to keep warm if desired
- Create the flavorful garlic butter base
- Using the same skillet (no need to clean it), reduce heat to medium
- Add 2 tablespoons butter to the skillet
- As butter melts, use a wooden spoon to scrape up any browned bits from cooking the chicken
- Once butter is completely melted (but before it browns), add all the minced garlic
- Stir constantly for 30-60 seconds until garlic becomes fragrant
- CAUTION: Watch carefully! Garlic burns quickly and will taste bitter
- TIP: If garlic starts to brown too quickly, remove pan from heat temporarily
- Add 1 teaspoon Italian seasoning and remaining ¼ teaspoon salt
- Stir to combine everything evenly
- Reduce heat to low or remove from heat if garlic is cooking too quickly
- Combine chicken with garlic butter
- Return chicken pieces to the skillet with the garlic butter
- Using tongs or a wooden spoon, gently toss the chicken to coat each piece thoroughly
- Allow mixture to cook for 1-2 minutes on low heat, stirring occasionally
- Make sure every piece of chicken is coated with the garlic butter mixture
- Once fully coated, remove skillet from heat
- Let mixture cool for 1-2 minutes before assembly (this prevents tortillas from becoming soggy)
Assembly & Cooking of Your Cheesy Garlic Chicken Wraps
- Prepare your tortillas properly
- Place tortillas on a microwave-safe plate
- Stack them with a slightly damp (not wet) paper towel between each tortilla
- Cover the stack with another damp paper towel
- Microwave on high for 20-30 seconds until warm and flexible
- TIP: Cold tortillas will crack when folded; too hot will be difficult to handle
- Remove from microwave and keep covered until ready to use
- Alternative warming method: Heat each tortilla in a dry skillet for 10-15 seconds per side
- Assemble your Cheesy Garlic Chicken Wraps like a pro
- Clear a clean workspace and place a warm tortilla flat on the surface
- Position the tortilla so the bottom edge is closest to you
- Spoon approximately ¼ of the chicken mixture (about ½ cup) in a line across the center of the tortilla
- TIP: Leave at least 2 inches empty on each side for folding
- Sprinkle about ¾ cup of the cheese blend evenly over the chicken
- TIP: Reserve a small pinch of cheese for the outside of each wrap if desired
- To fold (the most important part):
- Fold the bottom edge up and over the filling
- Fold in both sides toward the center
- Continue rolling from the bottom until the wrap is completely closed
- Place seam-side down to keep it from unrolling
- Repeat with remaining tortillas and filling
- Toast your Cheesy Garlic Chicken Wraps for the perfect finish
- Wipe out the skillet with a paper towel (careful, it may still be hot)
- Return clean skillet to stove over medium heat
- When skillet is hot, place wraps seam-side down in the skillet
- TIP: Work with 1-2 wraps at a time, depending on skillet size
- Press down gently with a spatula to ensure good contact with the pan
- Cook for 1-2 minutes until golden brown and crispy on the bottom
- Carefully flip using a wide spatula and cook the other side for 1-2 minutes
- The wrap is ready when both sides are golden and crispy, and cheese inside is melted
- If edges begin to open, press them back together with your spatula
- Remove from skillet and let rest for 1 minute before cutting
Finishing Touches for Your Cheesy Garlic Chicken Wraps
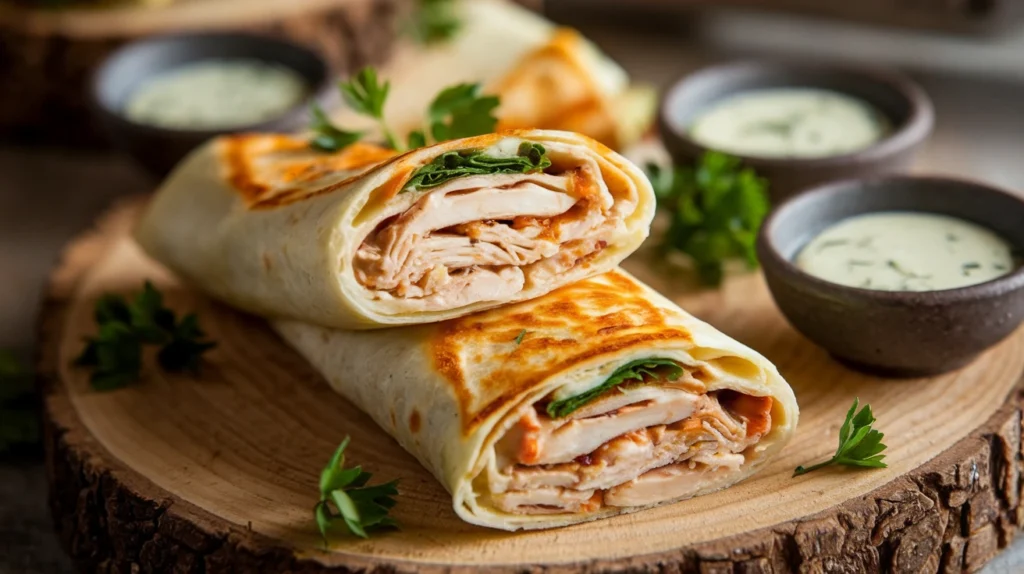
- Serve your Cheesy Garlic Chicken Wraps perfectly
- Transfer finished wraps to a cutting board
- Using a sharp knife, cut each wrap diagonally to create two triangular halves
- TIP: For cleaner cuts, let wraps rest for 1-2 minutes before cutting
- Arrange cut wraps on plates with the cut side facing up to show the delicious filling
- Sprinkle with freshly chopped parsley if using
- Serve immediately while still hot and the cheese is perfectly melty
- Optional: Provide small bowls of sour cream, salsa, or guacamole for dipping
Troubleshooting Tips for Cheesy Garlic Chicken Wraps
- Problem: Tortilla breaks when folding
- Solution: Tortilla might be too cold or dry. Try warming it longer or using a slightly dampened paper towel in the microwave. Make sure tortillas are fresh – older tortillas tend to crack more easily.
- Problem: Chicken is dry
- Solution: Likely overcooked. Next time, cook just until no longer pink (165°F internal temperature). Remember that chicken will continue cooking slightly after removing from heat.
- Problem: Filling falls out while eating
- Solution: You may have overfilled the wrap. Use less filling or double-wrap with a second tortilla. Also, make sure to fold in the sides before rolling up.
- Problem: Garlic tastes burnt and bitter
- Solution: Heat was too high or garlic was cooked too long. Cook garlic on medium-low heat just until fragrant (30-60 seconds). If garlic starts to brown too quickly, immediately remove the pan from heat.
- Problem: Wrap doesn’t stay closed
- Solution: Secure with toothpicks temporarily or return seam-side down to the skillet to “seal” it with the heat. Also try placing less filling and positioning it away from the edges.
- Problem: Cheese isn’t fully melted
- Solution: Allow wraps to cook a bit longer on lower heat to give cheese time to melt. Pre-warming the cheese to room temperature also helps it melt more evenly.
Variations & Substitutions for Cheesy Garlic Chicken Wraps
Spicy Cheesy Garlic Chicken Wraps
Add ¼ teaspoon cayenne pepper to the chicken seasoning or include 1-2 tablespoons of diced jalapeños in the filling. If you love spicy food, you might also enjoy our Black Pepper Chicken recipe for another flavorful option.
Mediterranean Cheesy Garlic Chicken Wraps
Swap mozzarella for feta cheese, add 2 tablespoons chopped olives, and replace Italian seasoning with 1 teaspoon dried oregano and 1 teaspoon lemon zest.
Vegetarian Garlic Cheese Wraps
Replace chicken with 3 cups total of sautéed vegetables:
- 1 cup sliced mushrooms
- 1 cup diced zucchini
- 1 cup sliced bell peppers Cook vegetables in the same way as the chicken until tender but not mushy.
Low-Carb Cheesy Garlic Chicken Lettuce Wraps
Use large romaine or butter lettuce leaves instead of tortillas. You’ll need about 8-12 leaves depending on their size. Layer 2-3 leaves for each wrap to provide enough structure.
Storage & Reheating Instructions for Cheesy Garlic Chicken Wraps
Storage Options
- Refrigerator Storage:
- Allow wraps to cool completely
- Wrap each one individually in aluminum foil or parchment paper
- Place wrapped wraps in an airtight container
- Store in refrigerator for up to 3 days
- Freezer Storage:
- Wrap each cooled wrap individually in plastic wrap
- Then wrap again in aluminum foil (double-wrapping prevents freezer burn)
- Label with date and contents
- Freeze for up to 1 month
- For best quality, consume within 2 weeks
Reheating Methods for Best Results
- Microwave Method:
- Remove foil (if used)
- Wrap each wrap in a damp paper towel
- Place on microwave-safe plate
- Heat on 70% power for 1 minute
- Check temperature and heat for additional 30-second intervals until warmed through
- Let stand for 30 seconds before eating
- Oven Method (Best for Crispy Texture):
- Preheat oven to 350°F
- Keep wrap in foil or place on baking sheet
- Bake for 10-15 minutes until heated through
- For crispier exterior, unwrap for the last 5 minutes of heating
- Skillet Method (Quickest for Crispy Results):
- Cut wrap in half for easier handling
- Heat dry non-stick skillet over medium heat
- Place wrap in skillet and cover with lid
- Heat for 2-3 minutes per side
- Watch carefully to prevent burning
Safety Notes & Tips for Cheesy Garlic Chicken Wraps
Food Safety Guidelines
- Chicken must reach internal temperature of 165°F to be safe
- Use a meat thermometer when possible for accurate temperature reading
- Never place cooked chicken back on the same plate that held raw chicken
- Do not leave assembled wraps at room temperature for more than 2 hours
- Always wash hands thoroughly after handling raw chicken
- Use separate cutting boards for meat and vegetables
- Clean all surfaces that come into contact with raw chicken using hot, soapy water
Kitchen Safety Tips
- Be careful of hot oil splatter when cooking chicken
- Use oven mitts or pot holders when handling hot skillets
- Keep pan handles turned inward on the stove to prevent accidental bumping
- Keep a fire extinguisher accessible in your kitchen
- Keep children at a safe distance from hot cooking surfaces
- Never leave cooking food unattended
- Turn off all appliances when finished cooking
Pro Tips For Perfect Cheesy Garlic Chicken Wraps
- Better Cheese Tip: Grate your own cheese instead of using pre-shredded bags. Pre-shredded cheese contains anti-caking agents that prevent proper melting.
- Make-Ahead Option: Cook chicken mixture up to 2 days ahead and refrigerate in an airtight container. Reheat before assembly for a super-quick meal.
- Serving Suggestion: For a complete meal, serve your Cheesy Garlic Chicken Wraps with a simple side salad dressed with lemon juice and olive oil.
- Flavor Boost: Add 1 tablespoon of ranch seasoning to the chicken for extra tang and depth of flavor.
- For a Mexican-inspired twist that uses similar techniques, check out our delicious Chicken Fajita Recipe.
- Tortilla Tip: Slightly larger tortillas (12-inch) make wrapping easier for beginners.
- Dipping Options: These wraps pair wonderfully with Asian-inspired sauces as well – try the sweet and tangy sauce from our Chicken Nanban recipe for a fusion twist.
- Cheese Distribution: Sprinkle some cheese first, then add chicken, then more cheese on top for the best cheese-pull experience.
Kid-Friendly Modifications for Cheesy Garlic Chicken Wraps
- Reduce garlic to 2 cloves for milder flavor that kids will enjoy
- Use only mild cheddar cheese if kids don’t like complex cheese flavors
- Cut finished wraps into small pinwheels (1-inch thick) for fun, dippable portions
- Serve with kid-friendly dipping sauces like ranch or honey mustard
- Let kids customize their own wraps with a “build-your-own” Cheesy Garlic Chicken Wraps bar