Discover how to make tender, juicy chicken breasts air fryer style that come out perfectly seasoned every single time. This foolproof method transforms plain chicken into a flavorful weeknight dinner with minimal effort and maximum results. Master the art of chicken breasts air fryer cooking with our tested technique that guarantees moist, never-dry meat with a golden exterior.
SERVES: 4 | PREP: 5 MIN | COOK: 12 MIN | TOTAL: 17 MIN
Why Air Fryer Chicken Breasts Work So Well
The air fryer creates restaurant-quality chicken at home without any oil splattering or oven preheating. Hot air circulates around the meat at 375°F, cooking it evenly while creating that beautiful golden crust.
You’ll save time and energy compared to traditional oven baking. Plus, cleanup takes literally 30 seconds.
Ingredients You’ll Need
Main Ingredients
| Ingredient | Amount | Notes |
|---|---|---|
| Boneless, skinless chicken breasts | 4 pieces (6-7 oz each) | Uniform thickness preferred |
| Olive oil | 2 tablespoons | Or avocado oil |
| Paprika | 2 teaspoons | Sweet or smoked |
| Garlic powder | 1½ teaspoons | Not garlic salt |
| Onion powder | 1 teaspoon | Adds depth |
| Dried oregano | 1 teaspoon | Italian or regular |
| Salt | 1½ teaspoons | Kosher or sea salt |
| Black pepper | ½ teaspoon | Freshly ground |
| Optional: Lemon wedges | 4 pieces | For serving |
Step-by-Step Instructions
Phase 1: Preparation (5 Minutes)
Step 1: Remove the chicken breasts from refrigerator packaging and pat them completely dry using paper towels. This step is crucial because moisture prevents browning and creates steam instead of that crispy exterior we want. Press firmly to absorb all surface moisture.
Step 2: Place chicken breasts on a clean cutting board. If any pieces are significantly thicker on one end (more than 1 inch thick), use a meat mallet or rolling pin to gently pound the thicker portion until the breast is uniformly about ¾ inch thick throughout. This ensures even cooking and prevents the thin end from drying out while the thick end finishes cooking.
Step 3: In a small mixing bowl, combine the paprika, garlic powder, onion powder, dried oregano, salt, and black pepper. Stir with a spoon until completely blended into a uniform reddish-brown mixture. This seasoning blend adds layers of flavor without overwhelming the chicken.
Step 4: Drizzle 1 tablespoon of olive oil over all four chicken breasts, then use your hands to rub it evenly across both sides of each piece. The oil helps the seasoning stick and promotes browning. Make sure every surface gets coated—this creates a barrier that locks in moisture.
Step 5: Sprinkle the seasoning mixture generously over both sides of each chicken breast. Use approximately ¼ of the mixture per breast. Press the seasonings gently into the meat with your fingertips so they adhere properly and don’t fall off during cooking.
Phase 2: Air Frying (12 Minutes)
Step 6: Preheat your air fryer to 375°F for 3-4 minutes. This preheating step ensures the chicken starts cooking immediately when placed inside, creating that golden crust while keeping the inside juicy. Don’t skip this—it makes a noticeable difference.
Step 7: Lightly brush or spray the air fryer basket with the remaining tablespoon of olive oil. This prevents sticking and makes cleanup easier. You can also use cooking spray if preferred.
Step 8: Arrange the seasoned chicken breasts in a single layer in the air fryer basket, leaving at least ½ inch of space between each piece. Important: Don’t overlap or stack them. Air needs to circulate completely around each breast for even cooking. If your air fryer is small, cook in two batches rather than crowding.
Step 9: Close the air fryer and cook for 6 minutes without opening the basket. The chicken will start developing its golden-brown color on the bottom side. Resist the urge to peek—opening releases heat and extends cooking time.
Step 10: After 6 minutes, open the air fryer and use tongs to carefully flip each chicken breast over. You should see a beautiful golden-brown crust on the cooked side. If the color looks pale, your air fryer might need an extra minute before flipping next time.
Step 11: Close the air fryer again and cook for an additional 6 minutes. The chicken breasts are cooking through completely now, and the second side is developing that same gorgeous color.
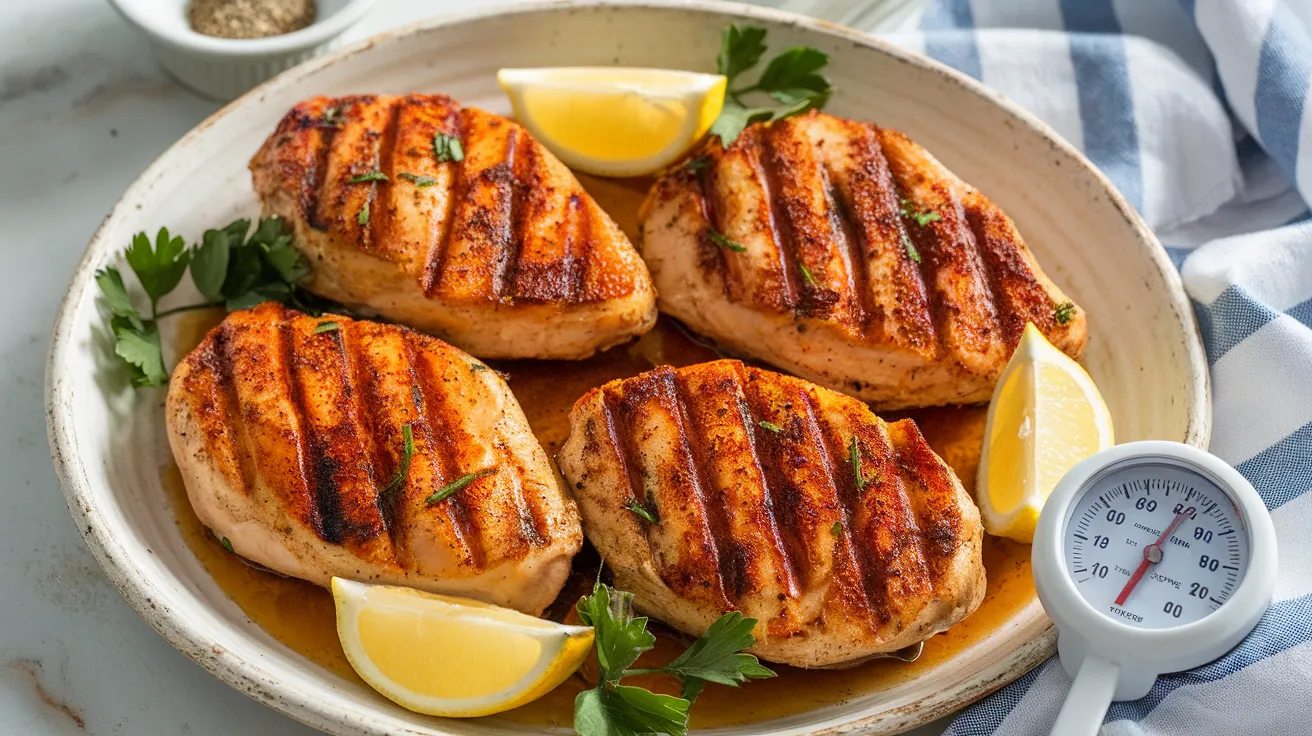
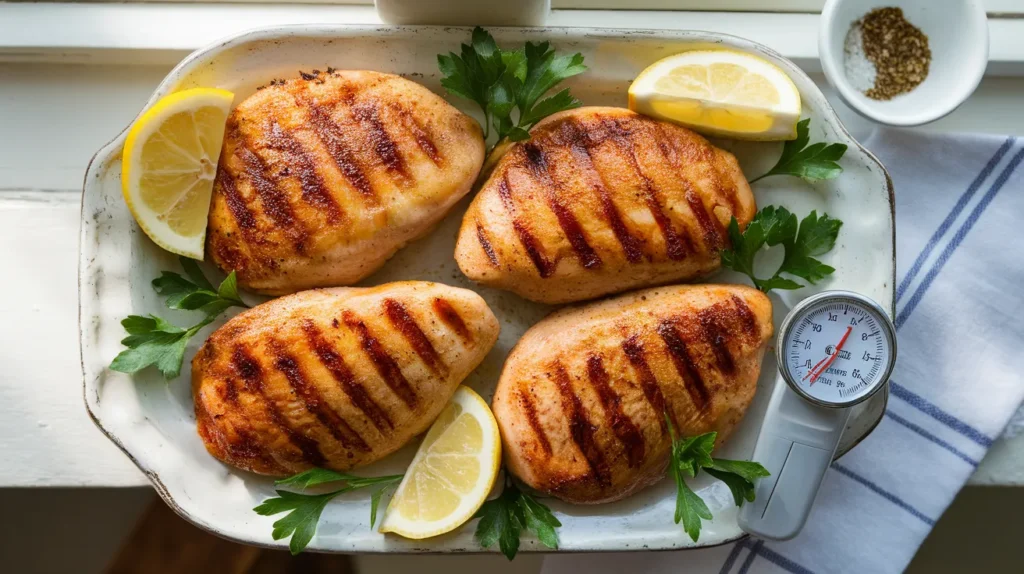
Step 12: Check the internal temperature by inserting an instant-read thermometer into the thickest part of the largest chicken breast. You’re looking for 165°F exactly. If it reads 160-164°F, close the air fryer and cook for 1-2 more minutes, then check again. Never guess—undercooked chicken is unsafe, and overcooked chicken becomes dry.
Phase 3: Resting (5 Minutes)
Step 13: Once the chicken reaches 165°F, immediately remove all pieces from the air fryer basket using tongs. Place them on a clean plate or cutting board.
Step 14: Tent the chicken loosely with aluminum foil and let it rest for 5 full minutes before cutting. During this rest period, the juices redistribute throughout the meat instead of running out onto your cutting board. This rest time is what makes the difference between dry chicken and juicy chicken.
Step 15: After resting, slice against the grain if desired, or serve whole. Squeeze fresh lemon juice over the top if using. The chicken breasts air fryer method produces meat that’s tender enough to cut with a fork.
Chef’s Notes
Temperature Matters: Always use a meat thermometer. Chicken breasts air fryer cooking times can vary by 2-3 minutes depending on your specific air fryer model and the exact thickness of your chicken. The thermometer never lies.
Seasoning Alternatives: This basic seasoning blend works for everything from chicken with white sauce to simple weeknight dinners. Feel free to swap the spices for Cajun seasoning, Italian herbs, or even curry powder.
Marinating Option: For even more flavor, marinate the chicken in the oil and seasonings for 30 minutes to 2 hours before cooking. The chicken breasts air fryer method works beautifully with pre-marinated meat.
Batch Cooking: Make extra chicken breasts for meal prep. They stay fresh in the refrigerator for 4 days and work perfectly in salads, wraps, and grain bowls throughout the week.
Nutrition Facts (Per Serving)
- Calories: 245
- Protein: 42g
- Carbohydrates: 2g
- Fat: 7g
- Saturated Fat: 1g
- Fiber: 0g
- Sodium: 920mg
Creative Variations
Parmesan Crusted Version
Add ½ cup grated Parmesan cheese to the seasoning mixture and press it firmly onto the oiled chicken. The cheese creates an extra-crispy crust that rivals any restaurant version.
Buffalo Style
Toss the cooked chicken breasts air fryer style in ⅓ cup buffalo sauce immediately after cooking. Serve with ranch dressing and celery sticks for a game-day favorite.
Mediterranean Twist
Replace the seasoning blend with za’atar, add lemon zest before cooking, and serve with tzatziki sauce. This pairs beautifully with the flavors in Indian chicken tikka masala for a fusion dinner.
Honey Mustard Glazed
Mix 3 tablespoons honey with 2 tablespoons Dijon mustard and brush over the chicken during the last 2 minutes of cooking. The glaze caramelizes slightly and adds sweet-tangy flavor.
Storage & Reheating
Refrigerator Storage: Place cooled chicken breasts in an airtight container with a paper towel on the bottom to absorb moisture. They’ll stay fresh for 4 days.
Freezer Storage: Wrap each chicken breast individually in plastic wrap, then place all wrapped pieces in a freezer bag. Freeze for up to 3 months. Write the date on the bag.
Reheating from Fridge: Place chicken in the air fryer at 350°F for 3-4 minutes until warmed through. Add a teaspoon of water to the basket to prevent drying.
Reheating from Frozen: Thaw overnight in the refrigerator first, then reheat as directed above. Don’t cook from frozen—it won’t heat evenly.
Troubleshooting Common Problems
Problem 1: Dry Chicken Solution: You overcooked past 165°F. Next time, check temperature at 10 minutes, especially if your chicken breasts are on the smaller side (under 6 oz each). The carryover cooking during resting adds 3-5 degrees.
Problem 2: Pale, Not Golden Solution: Your chicken was too wet when it went into the air fryer. Pat it aggressively dry next time, and make sure you’re using enough oil to coat all surfaces. Also verify your air fryer actually preheated to 375°F.
Problem 3: Uneven Cooking Solution: The breasts were different thicknesses. Always pound to uniform thickness, or separate larger and smaller pieces and cook them in different batches with adjusted times.
Problem 4: Sticking to Basket Solution: You didn’t oil the basket enough. Next time, use more oil or cooking spray on the basket itself. Let the chicken cook for the full 6 minutes before flipping—trying to flip too early causes sticking.
Problem 5: Smoking Air Fryer Solution: Either your air fryer basket had old grease buildup, or oil dripped to the bottom during cooking. Clean your air fryer basket thoroughly before cooking, and don’t use more than 2 tablespoons of oil total.
Equipment Essentials
- Air fryer (3.5 quart minimum capacity)
- Instant-read meat thermometer (digital preferred)
- Meat mallet or rolling pin
- Small mixing bowl
- Tongs (silicone-tipped won’t scratch basket)
- Paper towels
- Measuring spoons
- Cutting board
- Aluminum foil
Shopping List
Meat Counter
- 4 boneless, skinless chicken breasts (6-7 oz each)
Produce Section
- 1 lemon (optional)
Spice Aisle
- Paprika
- Garlic powder
- Onion powder
- Dried oregano
- Kosher salt
- Black pepper
Oil/Condiments
- Olive oil or avocado oil
Success Secrets
1. Uniform Thickness is Everything Spend the extra minute pounding chicken to even thickness. This single step prevents more cooking failures than any other technique. Aim for ¾ inch throughout.
2. Don’t Skip the Rest Those 5 minutes of resting time allow the temperature to equalize and juices to redistribute. Cutting immediately causes all the moisture to run out onto your plate instead of staying in the meat.
3. Invest in a Good Thermometer The $15-20 you spend on an instant-read thermometer will save you from years of dried-out chicken. Temperature is the only reliable way to know when chicken breasts air fryer cooking is complete.
4. Write Down Your Times Every air fryer cooks slightly differently. Once you nail the perfect timing for your specific model, write it down. My air fryer takes exactly 11 minutes for 6-ounce breasts at 375°F.
5. Clean Your Basket A clean air fryer basket prevents smoking, sticking, and off-flavors. Wash it with hot soapy water after every use, and deep-clean with baking soda paste monthly.