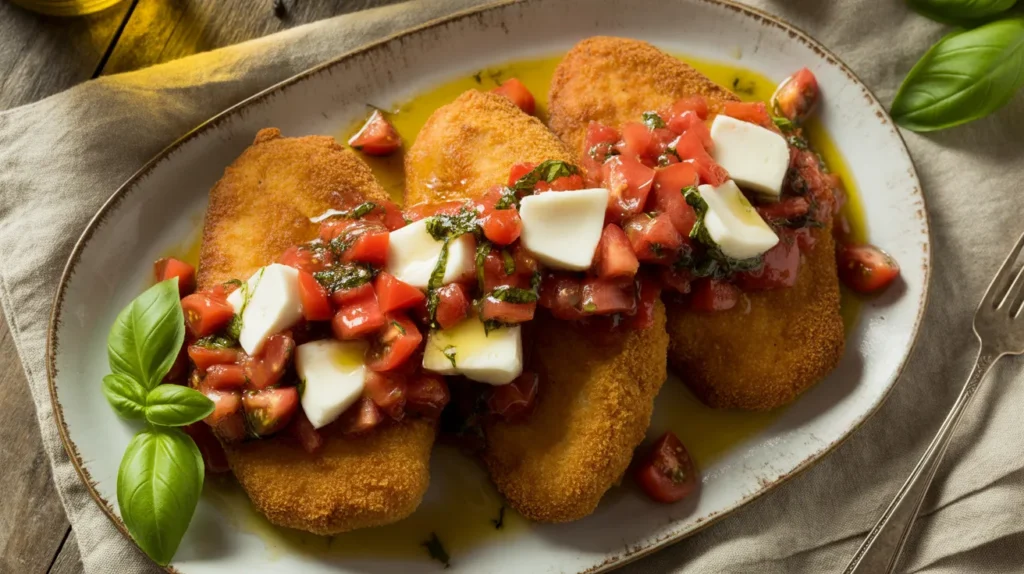
These Chicken Bruschetta Cutlets transform ordinary chicken breasts into restaurant-worthy Italian magic—crispy, golden cutlets topped with vibrant tomato bruschetta that’s bursting with fresh basil and garlic. Perfect for weeknight dinners when you want something special without the stress, these chicken bruschetta cutlets deliver incredible flavor in under 40 minutes.
SERVES: 4 | PREP: 15 MIN | COOK: 20 MIN | TOTAL: 35 MIN
What Makes These Chicken Bruschetta Cutlets Special
Listen, I’ve made these cutlets at least fifty times, and they never disappoint. The secret? Pounding the chicken thin so it cooks fast and stays juicy, then letting that fresh tomato topping do all the heavy lifting flavor-wise.
You get crispy edges, tender meat, and a burst of summer freshness in every bite.
No complicated techniques here—just smart layering of textures and flavors that make people think you spent hours cooking.
Ingredients You’ll Need
For the Chicken
| Ingredient | Amount |
|---|---|
| Boneless, skinless chicken breasts | 2 large (about 1.5 lbs) |
| All-purpose flour | ¾ cup |
| Large eggs | 2 |
| Italian breadcrumbs | 1½ cups |
| Grated Parmesan cheese | ½ cup |
| Garlic powder | 1 tsp |
| Salt | 1 tsp |
| Black pepper | ½ tsp |
| Olive oil for frying | ⅓ cup |
For the Bruschetta Topping
| Ingredient | Amount |
|---|---|
| Roma tomatoes, diced small | 4 medium |
| Fresh basil leaves, chopped | ¼ cup packed |
| Garlic cloves, minced | 3 |
| Extra virgin olive oil | 3 tbsp |
| Balsamic vinegar | 1 tbsp |
| Salt | ½ tsp |
| Black pepper | ¼ tsp |
| Fresh mozzarella, diced (optional) | ½ cup |
Step-by-Step Instructions
Phase 1: Prep the Chicken (5 minutes)
Step 1: Place one chicken breast on your cutting board and put your palm flat on top. Slice horizontally through the middle to create two thin cutlets. Repeat with the second breast—you’ll end up with four pieces total.
This horizontal cut is crucial because it creates cutlets that cook evenly and stay tender.
Step 2: Grab a meat mallet or the bottom of a heavy pan. Place each cutlet between two sheets of plastic wrap and pound to about ½-inch thickness. Don’t go too thin or they’ll dry out during cooking.
Aim for even thickness across the whole piece so everything cooks at the same rate.
Step 3: Pat the cutlets completely dry with paper towels. This step prevents soggy breading and helps your coating stick properly.
Moisture is the enemy of crispy coating—don’t skip this!
Phase 2: Make the Bruschetta Topping (5 minutes)
Step 4: Dice your Roma tomatoes into small ¼-inch cubes. The smaller you cut them, the better they’ll stick to the chicken later.
Roma tomatoes work best because they’re meatier with fewer seeds and less juice.
Step 5: In a medium bowl, combine the diced tomatoes, chopped basil, minced garlic, extra virgin olive oil, balsamic vinegar, salt, and pepper. Stir gently to combine.
Let this mixture sit at room temperature while you cook the chicken. The flavors will marry together and the salt will draw out just enough tomato juice to create a light sauce.
If you’re using mozzarella, don’t add it yet—wait until the very end so it doesn’t get watery.
Phase 3: Set Up Your Breading Station (3 minutes)
Step 6: Line up three shallow bowls or plates. In the first, add the flour. In the second, beat the two eggs with a fork until smooth. In the third, mix together the breadcrumbs, Parmesan, garlic powder, salt, and pepper.
This assembly-line setup makes breading fast and keeps your hands from getting completely coated.
Step 7: Position your breading station in order: flour, egg, breadcrumb mixture. Have a clean plate ready at the end for your breaded cutlets.
Pro tip: Use one hand for wet ingredients (egg) and one for dry (flour and breadcrumbs) to keep things less messy.
Phase 4: Bread the Cutlets (5 minutes)
Step 8: Take one cutlet and coat it completely in flour, shaking off the excess. Make sure you get the edges too.
The flour creates a dry surface that helps the egg stick.
Step 9: Dip the floured cutlet into the beaten egg, letting the excess drip back into the bowl. Coat both sides completely.
Step 10: Press the cutlet firmly into the breadcrumb mixture, coating both sides generously. Press down with your palm to really pack on those breadcrumbs—the more that stick now, the crispier your chicken will be.
Place the breaded cutlet on your waiting plate and repeat with the remaining three pieces.
Phase 5: Pan-Fry the Chicken (12-15 minutes)
Step 11: Heat the olive oil in a large skillet over medium-high heat for about 2 minutes. Test if it’s ready by dropping in a breadcrumb—it should sizzle immediately.
If the oil’s not hot enough, your breading will absorb oil and get greasy instead of crispy.
Step 12: Carefully place two cutlets in the hot oil without crowding the pan. They should sizzle loudly when they hit the oil.
Don’t move them around! Let them sit undisturbed so the breading can form that golden crust.
Step 13: Cook for 5-6 minutes on the first side without touching them. You’ll see the edges start to turn golden brown about halfway up the side of the cutlet—that’s your visual cue.
Step 14: Flip the cutlets gently using tongs and cook for another 4-5 minutes on the second side. The chicken should be golden brown and reach an internal temperature of 165°F.
Insert a meat thermometer into the thickest part to check—better safe than sorry with chicken.
Step 15: Transfer the cooked cutlets to a paper towel-lined plate. Repeat the frying process with the remaining two cutlets, adding a bit more oil to the pan if needed.
Phase 6: Assemble and Serve (2 minutes)
Step 16: Place the chicken bruschetta cutlets on your serving platter. While they’re still hot, spoon the fresh bruschetta topping generously over each piece.
The heat from the chicken will slightly warm the tomatoes and release their aroma—it’s perfect.
Step 17: If you’re using fresh mozzarella, scatter the diced cheese over the warm cutlets now. The residual heat will soften it slightly without completely melting it.
Serve immediately while the chicken is still crispy and hot.
The contrast between hot, crispy chicken and cool, fresh bruschetta is what makes this dish incredible.
Chef’s Notes
Timing is everything. Don’t make your bruschetta topping more than 30 minutes ahead or it’ll get watery and lose its fresh punch.
Temperature control matters. If your oil gets too hot, the breading burns before the chicken cooks through. Medium-high heat gives you that perfect golden crust.
Pound evenly. When you’re flattening your chicken bruschetta cutlets, pay attention to thickness consistency—thick spots stay raw while thin areas overcook.
Fresh basil is non-negotiable. Dried basil in the topping just doesn’t cut it for this recipe. The fresh herb makes the whole dish pop.
Nutrition Information (Per Serving)
Calories: 485 | Protein: 42g | Carbohydrates: 34g | Fat: 19g
Delicious Variations to Try
Balsamic Glaze Drizzle: After topping with bruschetta, drizzle with thick balsamic reduction for an extra punch of sweet-tangy flavor that makes these cutlets feel even fancier.
Spicy Kick: Add ½ teaspoon of red pepper flakes to your bruschetta mixture and a pinch of cayenne to the breadcrumb coating for cutlets with some heat.
Caprese Style: Skip the traditional bruschetta and top with sliced fresh mozzarella and tomatoes, then pop under the broiler for 1-2 minutes until the cheese melts—similar to how Chicken Valdostana uses melted cheese for richness.
Lemon Herb: Add lemon zest to your breadcrumb mixture and squeeze fresh lemon juice over the finished dish for a bright, summery twist that pairs beautifully with the tomatoes.
Storage & Reheating
Refrigerator: Store leftover chicken bruschetta cutlets in an airtight container for up to 3 days. Keep the bruschetta topping separate if possible—it stays fresher that way.
Freezing the breaded cutlets: Freeze uncooked breaded cutlets on a baking sheet until solid, then transfer to a freezer bag for up to 3 months. Fry from frozen, adding 2-3 extra minutes per side.
Reheating for crispiness: Your oven is your friend here. Reheat at 375°F on a wire rack set over a baking sheet for 10-12 minutes. The wire rack lets air circulate underneath so the breading stays crispy instead of getting soggy.
Don’t microwave. Seriously, just don’t. The breading turns into a sad, rubbery mess.
Troubleshooting Common Problems
Problem: Breading falls off during cooking
The chicken was probably too wet when you breaded it, or you didn’t press the breadcrumbs on firmly enough. Always pat the cutlets bone-dry with paper towels before flouring, and really press that breadcrumb coating into the meat. Let the breaded cutlets rest for 5 minutes before frying—this helps the coating adhere better.
Problem: Chicken is dry and overcooked
You either pounded the cutlets too thin or cooked them too long. Aim for ½-inch thickness and watch that internal temperature like a hawk—pull them off at exactly 165°F. Carryover cooking will finish the job while they rest.
Problem: Breading is pale and soft, not crispy
Your oil wasn’t hot enough. Wait until a breadcrumb dropped in the oil sizzles vigorously before adding chicken. Also, don’t overcrowd the pan—this drops the oil temperature and steams the cutlets instead of frying them.
Problem: Bruschetta topping is watery and sliding off
Roma tomatoes weren’t diced small enough, or they sat too long after mixing. Dice them into tiny ¼-inch pieces and make the topping no more than 20 minutes before serving. You can also lightly salt the diced tomatoes and let them drain in a colander for 10 minutes before mixing with other ingredients.
Problem: Chicken is raw in the middle but burnt outside
Your oil was too hot, causing the outside to cook faster than the inside. Reduce heat to medium and pound the cutlets to an even ½-inch thickness so they cook uniformly.
Equipment Essentials
- Meat mallet or heavy pan (for pounding chicken)
- Plastic wrap (to keep chicken from sticking while pounding)
- Three shallow bowls or plates (for breading station)
- Large skillet (at least 12-inch for frying)
- Meat thermometer (to check doneness accurately)
- Tongs (for flipping cutlets safely)
- Paper towels (for draining fried chicken)
- Sharp knife (for dicing tomatoes and slicing chicken)
- Cutting board
- Mixing bowl (for bruschetta topping)
Shopping List (Organized by Store Section)
Meat Counter:
- 2 large boneless, skinless chicken breasts (about 1.5 lbs)
Produce:
- 4 medium Roma tomatoes
- 1 bunch fresh basil
- 1 head garlic
- Fresh mozzarella (optional, ½ lb)
Pantry/Baking Aisle:
- All-purpose flour
- Italian breadcrumbs
- Olive oil (regular for frying)
- Extra virgin olive oil (for bruschetta)
Dairy:
- Large eggs (2)
- Grated Parmesan cheese
Condiments:
- Balsamic vinegar
Spices:
- Garlic powder
- Salt
- Black pepper
Success Secrets from the Kitchen
1. The pound-and-pray method doesn’t work. Take your time pounding the chicken to an even thickness. Run your hand over it—if you feel thick spots, keep pounding. Even thickness means even cooking, which means juicy chicken every single time.
2. Cold chicken breads better. If your cutlets are sitting at room temperature, pop them back in the fridge for 10 minutes before breading. The cold surface helps the coating stick and creates better contrast when it hits the hot oil.
3. Season every layer. Don’t just season the breadcrumbs—season the flour too with salt and pepper. Each layer of seasoning builds flavor depth. If you’re wondering about other Italian-style chicken dishes with great seasoning, Chicken Romano uses a similar layering technique.
4. Make extra bruschetta. Seriously, double the topping recipe. You’ll want to pile it high on the chicken, plus you’ll have extra to serve with crusty bread while everyone’s waiting for dinner.
5. Serve hot or don’t serve at all. These chicken bruschetta cutlets are absolute magic when the chicken is hot and crispy against the cool, fresh topping. The contrast is what makes the dish sing. Prepare everything in advance, but fry the chicken right before serving—it’s worth the last-minute cooking.
Pro tip: If you’ve got leftover bruschetta topping, toss it with hot pasta and a splash of pasta water for an instant sauce tomorrow night. You’re welcome.