If you’ve been searching for a chicken cacciatore cutlet variation that brings together the rustic Italian flavors of hunter-style chicken with the irresistible crunch of breaded cutlets, you’ve just hit the jackpot. This chicken cacciatore cutlet variation transforms the traditional braise into a quick weeknight winner—crispy, saucy, and ready in under an hour.
SERVES: 4 | PREP: 20 MIN | COOK: 35 MIN | TOTAL: 55 MIN
Ingredients
For the Cutlets
| Ingredient | Amount |
|---|---|
| Chicken breast cutlets | 4 pieces (about 1.5 lbs total) |
| All-purpose flour | 1 cup |
| Large eggs | 2, beaten |
| Italian breadcrumbs | 1½ cups |
| Parmesan cheese, grated | ½ cup |
| Garlic powder | 1 teaspoon |
| Salt | 1 teaspoon |
| Black pepper | ½ teaspoon |
| Olive oil for frying | ½ cup |
For the Cacciatore Sauce
| Ingredient | Amount |
|---|---|
| Bell peppers (red & yellow), sliced | 2 peppers |
| Yellow onion, thinly sliced | 1 large |
| Mushrooms, sliced | 8 oz |
| Garlic cloves, minced | 4 cloves |
| Crushed tomatoes | 28 oz can |
| Dry white wine | ½ cup |
| Fresh oregano, chopped | 2 tablespoons |
| Fresh basil, torn | ¼ cup |
| Red pepper flakes | ½ teaspoon |
| Extra virgin olive oil | 3 tablespoons |
Step-by-Step Instructions
Phase 1: Preparing the Cutlets (15 minutes)
Step 1: Place chicken cutlets between two sheets of plastic wrap and gently pound them to an even ¼-inch thickness using a meat mallet. This ensures they cook evenly and creates maximum surface area for that golden crust.
Step 2: Set up your breading station with three shallow dishes—one with flour seasoned with a pinch of salt, one with beaten eggs, and one with breadcrumbs mixed with Parmesan, garlic powder, salt, and pepper. Line them up in order because you’ll be moving quickly.
Step 3: Pat each cutlet completely dry with paper towels. Moisture is the enemy of crispy coating, so don’t skip this step.
Step 4: Dredge the first cutlet in flour, shaking off excess. The flour creates a dry surface that helps the egg stick.
Step 5: Dip the floured cutlet into beaten eggs, letting excess drip back into the bowl. Make sure it’s completely coated.
Step 6: Press the cutlet firmly into the breadcrumb mixture, coating both sides thoroughly. Really press down—you want those crumbs to adhere. Set aside on a clean plate and repeat with remaining cutlets.
Phase 2: Frying the Cutlets (12 minutes)
Step 7: Heat ½ cup olive oil in a large skillet over medium-high heat until it shimmers—about 350°F if you’re using a thermometer. Test with a breadcrumb; it should sizzle immediately.
Step 8: Carefully place two cutlets in the hot oil without crowding the pan. Crowding drops the temperature and makes them greasy instead of crispy.
Step 9: Fry for 4-5 minutes without moving them. You’ll see the edges turning golden brown—that’s your cue that a crust is forming.
Step 10: Flip gently using tongs and cook another 3-4 minutes until the second side is equally golden and the internal temperature reaches 165°F. The cutlets should be firm to the touch.
Step 11: Transfer to a wire rack set over a baking sheet, not paper towels. A rack keeps the bottom crispy while the second batch cooks. Repeat with remaining cutlets.
Phase 3: Building the Cacciatore Sauce (20 minutes)
Step 12: In the same skillet (don’t clean it—that browned residue is flavor!), reduce heat to medium and add 3 tablespoons olive oil.
Step 13: Add sliced onions and cook for 5 minutes, stirring occasionally until they soften and turn translucent. The residual heat from the cutlets will help them caramelize faster.
Step 14: Toss in bell peppers and mushrooms, cooking for 6-7 minutes until the peppers soften and mushrooms release their moisture. Season with a pinch of salt to draw out liquid faster.
Step 15: Add minced garlic and red pepper flakes, stirring constantly for 30 seconds. Garlic burns quickly, so watch it carefully—you want it fragrant, not brown.
Step 16: Pour in white wine, scraping up all those delicious browned bits from the bottom of the pan with a wooden spoon. This deglazing step adds incredible depth to your sauce.
Step 17: Let the wine simmer for 2 minutes until reduced by half. You’ll smell the alcohol cooking off—that’s exactly what you want.
Step 18: Stir in crushed tomatoes, oregano, and half the basil. Bring to a gentle simmer, reduce heat to low, and cook for 8-10 minutes until the sauce thickens slightly. Taste and adjust salt.
Phase 4: Final Assembly (3 minutes)
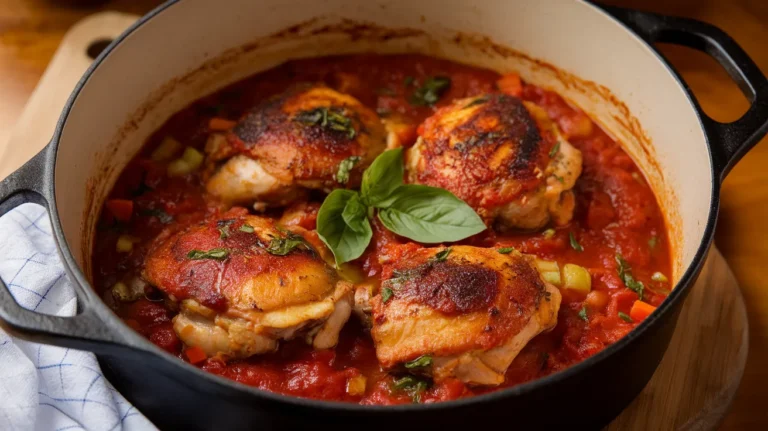
Step 19: Nestle the crispy cutlets into the sauce, spooning some sauce over the tops while keeping the coating partially exposed. You want the bottom to absorb flavor while the top stays crispy.
Step 20: Simmer together for 2-3 minutes just to marry the flavors. Don’t cook too long or the breading will get soggy. Garnish with remaining fresh basil before serving.
Chef’s Notes
Cutlet Thickness Matters: Pounding to an even ¼-inch ensures the chicken cooks through before the coating burns. Thicker pieces require lower heat and longer cooking, which can make the crust greasy.
Wine Selection: A dry white like Pinot Grigio or Sauvignon Blanc works best for this chicken cacciatore cutlet variation. Avoid sweet wines that can make the sauce cloying.
Make-Ahead Breading: Bread the cutlets up to 4 hours ahead and refrigerate uncovered. The coating actually adheres better when it air-dries slightly.
Sauce Consistency: If your sauce seems thin, simmer it an extra 5 minutes uncovered. If it’s too thick, splash in some chicken broth or pasta water.
Nutrition Facts (Per Serving)
Calories: 585 | Protein: 45g | Carbohydrates: 48g | Fat: 22g | Fiber: 5g | Sodium: 890mg
Creative Variations
Mediterranean Twist: Replace bell peppers with roasted red peppers and add kalamata olives and capers to the sauce. The briny flavors complement the crispy cutlets beautifully—similar to how chicken pizzaiola uses bold Italian flavors.
Spicy Diavola Version: Double the red pepper flakes and add diced calabrian chiles to the sauce. Finish with a drizzle of hot honey over the cutlets for sweet heat.
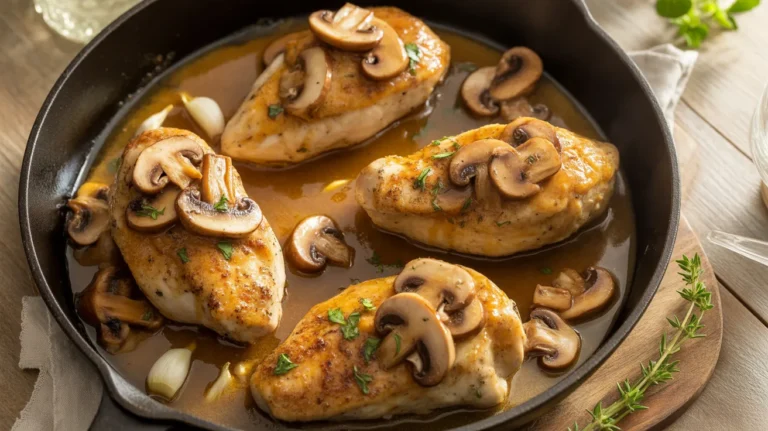
Mushroom Lovers: Skip the peppers and use a mix of cremini, shiitake, and oyster mushrooms instead. The earthy depth creates a richer, more complex sauce.
Cheese-Crusted Upgrade: After breading, press a thin slice of provolone or mozzarella onto each cutlet before frying, then top with sauce—like a deconstructed version of chicken sorrentino but with cacciatore flavors.
Storage & Reheating
Refrigerator: Store cutlets and sauce separately in airtight containers for up to 3 days. The coating stays crispier when not sitting in sauce.
Freezing: Freeze uncooked breaded cutlets on a baking sheet until solid, then transfer to freezer bags for up to 2 months. Fry directly from frozen, adding 3-4 minutes to cooking time. Don’t freeze the sauce with peppers—they get mushy.
Reheating: Place cutlets on a wire rack over a baking sheet and reheat at 375°F for 8-10 minutes. Warm sauce separately on the stovetop, then combine just before serving. Microwaving makes the coating rubbery.

Troubleshooting Common Problems
Problem: Coating Falls Off During Frying Press breadcrumbs firmly into the egg-coated cutlets and let them rest 5 minutes before frying. The coating needs time to set. Make sure your oil is hot enough—test with a breadcrumb first.
Problem: Cutlets Are Greasy Instead of Crispy Your oil temperature dropped too low. Fry only 2 cutlets at a time and let oil reheat between batches. Use a thermometer to maintain 350°F.
Problem: Chicken Is Dry You overcooked the cutlets. Thin cutlets cook fast—usually 8-9 minutes total. Use an instant-read thermometer and pull them at exactly 165°F.
Problem: Sauce Is Watery Your mushrooms released too much liquid. Cook them longer before adding tomatoes to evaporate excess moisture, or simmer the finished sauce uncovered to reduce it.
Problem: Breading Burns Before Chicken Cooks Your oil is too hot. Reduce heat to medium and cook slightly longer. The oil should bubble gently around the cutlets, not aggressively.
Equipment Essentials
- Meat mallet for pounding cutlets
- Three shallow dishes for breading station
- Large skillet (12-inch minimum)
- Wire rack and baking sheet for draining
- Kitchen thermometer for oil and chicken
- Tongs for flipping cutlets safely
- Wooden spoon for deglazing
Shopping List
Meat Counter
- Chicken breast cutlets (1.5 lbs)
Produce Section
- Bell peppers (2)
- Yellow onion (1 large)
- Mushrooms (8 oz)
- Fresh garlic (1 bulb)
- Fresh oregano (1 bunch)
- Fresh basil (1 bunch)
Pantry Aisle
- All-purpose flour
- Italian breadcrumbs
- Crushed tomatoes (28 oz can)
- Olive oil
- Red pepper flakes
Dairy Section
- Large eggs
- Parmesan cheese
Wine & Spirits
- Dry white wine
Success Secrets
1. Temperature Control Is Everything: Keep oil at a steady 350°F for perfectly golden, non-greasy cutlets. Too hot and they burn; too cool and they absorb oil.
2. Rest Before Serving: Let cutlets rest 3 minutes after frying. This allows juices to redistribute and the coating to set, preventing sogginess.
3. Don’t Skip the Wine: The acidity brightens the tomatoes and balances the richness of fried chicken. It’s not optional—it’s essential to authentic cacciatore flavor.
4. Fresh Herbs at the End: Add half the basil during cooking for background flavor, then save the rest for garnish. Fresh herbs added at the end provide a bright, aromatic punch.
5. Serve Immediately: This chicken cacciatore cutlet variation is best enjoyed within 30 minutes of cooking when the contrast between crispy coating and rich sauce is at its peak. Plate individual portions with sauce spooned around—not over—the cutlets to maintain texture.
This recipe proves you don’t need hours of braising to enjoy authentic cacciatore flavors. The crispy cutlets soak up just enough sauce to stay flavorful while keeping that satisfying crunch that makes every bite exciting.