Stop struggling with boring dumplings and master these authentic Chicken Momos that will blow your family away!
Key Takeaways:
- Create juicy Chicken Momos with our foolproof 3-step method
- Perfect for beginners – includes fixes for common mistakes
- Ready in just 45 minutes from start to finish
- Makes exactly 24 momos (perfect for 4 people)
Why These Chicken Momos Will Change Your Dinner Game
Ever tried making dumplings at home only to end up with a soggy, torn mess? You’re not alone. Many home cooks struggle with getting the Chicken Momos just right.
But here’s the good news: this Chicken Momos recipe changes everything. With my step-by-step method, you’ll create dumplings so good your family will think you ordered takeout. These Nepali-style Chicken Momos are juicy, perfectly seasoned, and surprisingly simple to make.
If you enjoy Asian-inspired chicken dishes, you might also like my teriyaki chicken pineapple bowls for another quick weeknight option!
Prep Time: 30 minutes
Cook Time: 15 minutes
Total Time: 45 minutes
Servings: 4 (6 momos per person)
Nutrition Comparison of Homemade Chicken Momos
| Nutrient | Homemade Chicken Momos | Restaurant Chicken Momos |
|---|---|---|
| Calories | 240 per serving | 380 per serving |
| Fat | 9g | 18g |
| Protein | 24g | 22g |
| Carbs | 18g | 24g |
| Sodium | 520mg | 890mg |
Chicken Momos Ingredients
| Ingredient | Amount | Notes |
|---|---|---|
| Ground chicken | 1 pound | Thigh meat works best |
| Cabbage | 1 cup, finely chopped | Green or Napa |
| Green onions | 4 stalks, thinly sliced | Use white and green parts |
| Garlic | 4 cloves, minced | Fresh, not jarred |
| Ginger | 1 tablespoon, grated | Peel first |
| Green chilies (optional) | 2, finely chopped | Remove seeds for less heat |
| Salt | 1 teaspoon | Table or sea salt |
| Black pepper | ½ teaspoon | Freshly ground if possible |
| Oil | 1 tablespoon | Any neutral oil |
| Momo wrappers | 24 pieces | Store-bought |
Equipment Needed for Chicken Momos
| Tool | Purpose |
|---|---|
| Steamer basket | For cooking the momos |
| Large mixing bowl | For preparing the filling |
| Sharp knife | For chopping vegetables |
| Cutting board | Use separate ones for meat and vegetables |
| Food processor (optional) | Can speed up vegetable chopping |
| Clean kitchen towel | To keep wrappers from drying out |
| Rolling pin | If making homemade wrappers |
| Small bowl for water | Used for sealing edges |
| Measuring spoons | For precise seasoning |
| Timer | To prevent overcooking |
Super Detailed Chicken Momos Step-by-Step Instructions
1. Kitchen Preparation (5 minutes)
- Clear Your Workspace:
- Remove everything from your counter – you need a clean 2-foot minimum workspace
- Wipe down with hot, soapy water and dry completely
- Place a clean kitchen towel or cutting board as your base
- Personal Prep:
- Wash hands thoroughly with soap for 20 seconds
- Pull back long hair and secure
- Put on an apron to protect clothing from meat juices and flour
- Ingredient Organization:
- Place all ingredients on one side of workspace
- Group ingredients by step: filling ingredients together, wrappers separate
- Fill a small bowl with cool water (for sealing wrappers)
- Keep a clean, damp cloth nearby to cover wrappers
- Equipment Setup:
- Check that your steamer fits your pot and has enough water
- Prepare your mixing bowl for the Chicken Momos filling
- Have measuring spoons accessible
- Set timer or phone nearby for timing
2. Vegetable Preparation for Chicken Momos (10 minutes)
- Cabbage Preparation (3 minutes):
- Place cabbage on cutting board with flat side down
- Cut in half from top through core
- Lay flat side down and cut out triangular core at bottom
- Slice into very thin strips (1/8 inch or thinner)
- Turn and cut across strips to make tiny pieces
- BEGINNER TIP: Pieces should be rice-grain sized – too large and they’ll tear the wrappers
- Measure exactly 1 cup packed (not loosely filled)
- Green Onion Preparation (2 minutes):
- Rinse 4 green onions under cold water
- Pat dry with paper towel
- Cut off and discard root ends (white hairy part)
- Trim off any wilted green tips
- Align onions side by side on cutting board
- Using a rocking motion with knife, slice thinly (1/8 inch)
- BEGINNER TIP: Don’t crush the onions – use a sharp knife
- Garlic Preparation (2 minutes):
- Place 4 garlic cloves on cutting board
- Place flat side of knife on clove
- Gently press with heel of hand to crush slightly
- Peel off skin and discard
- Mince garlic into tiny pieces
- ALTERNATIVE: Use garlic press if available
- Ginger Preparation (2 minutes):
- Take a 1-inch piece of fresh ginger
- Use edge of spoon to scrape off peel (works better than knife)
- Grate using small holes of box grater
- BEGINNER TIP: Freeze ginger for 10 minutes before grating for easier handling
- Measure exactly 1 tablespoon
- Chili Preparation (if using) (1 minute):
- Rinse 2 green chilies
- Cut off stems
- Slice in half lengthwise
- For milder heat, scrape out seeds with spoon
- Chop very finely
- SAFETY TIP: Wash hands immediately after – don’t touch face or eyes
3. Making the Chicken Momos Filling (15 minutes)
- Preparing the Meat (3 minutes):
- Remove ground chicken from packaging
- Place in large mixing bowl
- Break up any large chunks using a fork
- Create a well in center for vegetables
- BEGINNER TIP: Cold meat is harder to mix – let sit at room temperature for 10 minutes
- Combining All Ingredients (5 minutes):
- Add all prepared vegetables to the well in chicken
- Sprinkle salt and pepper evenly across surface
- Drizzle oil around edge of bowl
- BEGINNER TIP: Don’t dump everything in one spot – distribute ingredients
- Mixing Technique (7 minutes):
- Option 1: Put on disposable food-safe gloves
- Option 2: Wash hands thoroughly before handling
- Use hands to gently squeeze and fold ingredients together
- Scoop from bottom, fold over top, and press gently
- Continue for 3-4 minutes until completely combined
- VISUAL CUE: No streaks of pure chicken should remain
- TEXTURE CHECK: Should feel like soft cookie dough – not too wet, not too dry
- BEGINNER TIP: Don’t overmix or the filling will become tough
- Resting the Filling (Optional but Recommended):
- Cover bowl with plastic wrap
- Refrigerate for 10-15 minutes
- This makes the filling firmer and easier to handle
- USE THIS TIME: Set up your folding station while waiting
If you’re looking for another simple chicken recipe with a different flavor profile, my Indonesian chicken pounded with green sambal offers a spicy alternative!
4. Chicken Momos Folding Station Setup (5 minutes)
- Cleaning Your Space (1 minute):
- Clear away vegetable scraps
- Wipe down counter with clean, damp cloth
- Dry completely
- SAFETY TIP: Never use the same surfaces for raw chicken and folding without thorough cleaning
- Organizing Materials (2 minutes):
- Left side: Place bowl with Chicken Momos filling
- Center: Clean work surface for folding
- Right side: Stack of wrappers and small bowl of water
- Place lined steamer nearby
- BEGINNER TIP: Organize in order of workflow to prevent cross-contamination
- Wrapper Preparation (2 minutes):
- Keep wrappers in original packaging until ready to use
- Place stack on plate and cover with slightly damp (not wet) kitchen towel
- CRITICAL TIP: Only take one wrapper at a time – others dry out quickly
- If making multiple batches, keep remaining wrappers in sealed bag in refrigerator
5. Folding Chicken Momos (20-25 minutes)
- Basic Half-Moon Fold (Easiest for Beginners):
- Take one wrapper, place on clean, dry surface
- Keep remaining wrappers covered
- Measure exactly 1 tablespoon filling using measuring spoon
- Place in center of wrapper
- Leave ½-inch border completely clear around edges
- BEGINNER TIP: Start with less filling until you get comfortable
- Sealing Steps (Most Important Part):
- Dip finger in water bowl
- Run wet finger completely around edge of wrapper
- COMMON MISTAKE: Skipping spots will cause leaks
- Fold wrapper in half to make half-moon shape
- Press center points together first
- Work outward in both directions
- Press firmly to remove any air pockets
- VISUAL CHECK: Edges should be completely sealed with no filling peeking out
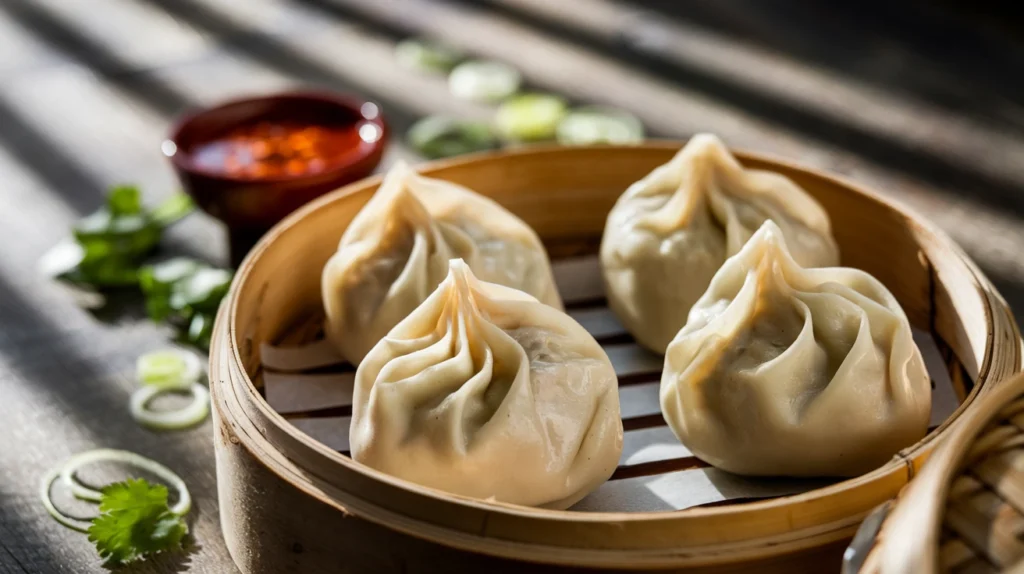
- Pleated Fold (Traditional Chicken Momos Style):
- Hold wrapper in left hand (if right-handed)
- Place filling in center
- Wet entire edge with finger
- Start from one side
- Make first pleat by folding edge back toward center
- Pinch to seal
- Continue making small pleats (about ¼ inch each)
- Work around edge until you’ve made 5-6 pleats
- Pinch final seam firmly
- BEGINNER TIP: Practice pleating with empty wrappers first
- Handling Finished Momos:
- Place each finished Chicken Momo in steamer basket
- Leave at least 1 inch between each
- CRITICAL: Don’t let them touch each other or they’ll stick
- Cover completed momos with damp cloth if not steaming immediately
- BEGINNER TIP: Work in batches of 6-8 momos at a time
6. Steaming Chicken Momos (15 minutes)
- Preparing the Steamer (5 minutes):
- Fill pot with 2 inches water (not touching bottom of steamer)
- Cut parchment paper to fit steamer basket
- Poke 10-15 small holes in paper with fork or toothpick
- Place paper in steamer basket
- Lightly brush paper with oil or cooking spray
- PURPOSE: This prevents sticking without affecting flavor
- Heating Water (3 minutes):
- Place pot with water on stove
- Turn heat to high
- Cover with lid until water boils
- Reduce heat to medium-high once boiling
- VISUAL CUE: Should be steady boil, not violent rolling boil
- Loading the Steamer (2 minutes):
- Remove lid from pot
- Carefully place momos on parchment paper
- Leave at least 1 inch between each
- CAPACITY CHECK: Better to steam in batches than overcrowd
- Steaming Process (12-15 minutes):
- Place loaded steamer over boiling water
- Cover with tight-fitting lid
- Set timer for 12 minutes
- Don’t open lid during cooking (releases necessary steam)
- After 12 minutes, carefully remove one momo
- Cut in half to check doneness
- Chicken should be completely cooked with no pink
- DONENESS CHECK: Internal temperature should reach 165°F
- If needed, steam for additional 2-3 minutes
7. Serving Chicken Momos (5 minutes)
- Safe Removal:
- Turn off heat
- Lift lid away from your face (steam can burn)
- Let steam dissipate for 30 seconds
- Use spatula to carefully remove momos
- Place on serving plate
- Allow to cool 2-3 minutes before eating
- SAFETY TIP: Inside filling will be extremely hot
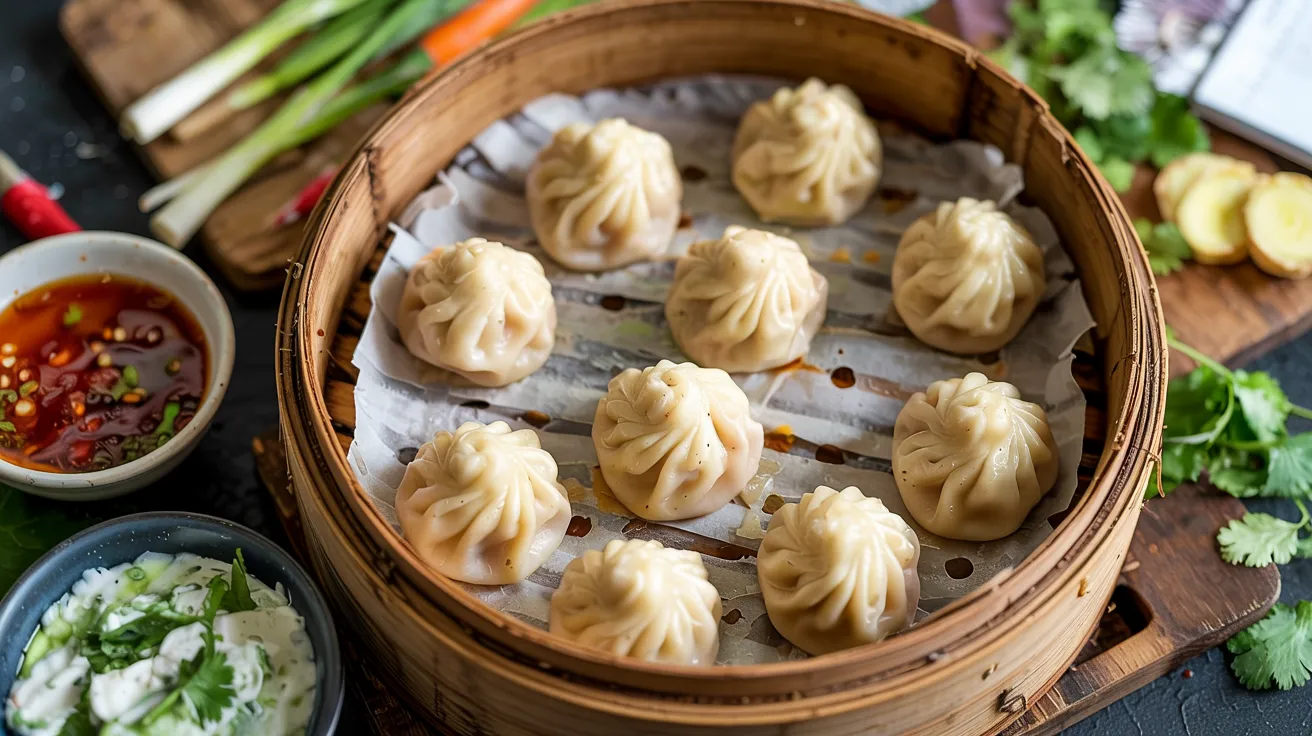
- Serving Suggestions:
- Arrange 6 Chicken Momos per person
- Serve with small bowls of dipping sauce
- Garnish with sliced green onions or cilantro
- PAIRING TIP: Simple soy-vinegar dipping sauce complements the flavor
For a simpler chicken option that kids typically love, check out my chicken tenders and fries recipe – perfect for less adventurous eaters!
Chicken Momos Troubleshooting Guide
| Problem | Solution |
|---|---|
| Filling too wet | Add 2 tablespoons breadcrumbs or 1 tablespoon cornstarch |
| Wrappers tearing | Use less filling or double-wrap problem areas |
| Momos not sealing | Apply more water to edges and press firmly |
| Sticking to steamer | Use parchment paper with holes or lightly oil steamer |
| Momos look soggy | Steam for 2-3 minutes longer with lid slightly ajar |
| Filling tastes bland | Add extra salt, pepper, or 1 teaspoon soy sauce |
| Filling falling out | Let filling rest longer in refrigerator to firm up |
| Wrappers drying out | Keep covered with damp towel at all times |
| Pleats won’t stay | Practice on empty wrappers first to build muscle memory |
Chicken Momos Variations & Substitutions
Want to mix things up? Try these tasty alternatives to the classic Chicken Momos recipe:
- Spicy Chicken Momos: Add 1 teaspoon chili paste to filling
- Extra Juicy Chicken Momos: Mix in 2 tablespoons oil
- Gluten-Free Chicken Momos: Use rice paper wrappers instead
- Low-Fat Chicken Momos: Substitute ground chicken breast for thigh meat
- Vegetable Momos: Replace chicken with finely chopped mushrooms
- Tandoori Style Chicken Momos: Add 1 tablespoon tandoori masala to the filling
- Chicken and Pork Momos: Use half chicken, half ground pork
- Cheesy Chicken Momos: Add 2 tablespoons cream cheese to the filling
Storing and Reheating Chicken Momos
| Storage Method | Duration | Notes |
|---|---|---|
| Room Temperature | 2 hours max | Not recommended for longer |
| Refrigerator | Up to 2 days | In airtight container |
| Freezer (uncooked) | Up to 3 months | Freeze on tray first, then bag |
| Freezer (cooked) | Up to 1 month | Will lose some texture |
Reheating Instructions:
- From Refrigerated:
- Steam for 5-7 minutes, or
- Microwave with damp paper towel for 1 minute
- From Frozen (Uncooked):
- Do not thaw
- Steam for 15-18 minutes
- From Frozen (Cooked):
- Steam for 8-10 minutes, or
- Microwave with damp paper towel for 2 minutes
Chicken Momos Safety Notes & Expert Tips
- Food Safety:
- Always wash hands before and after handling raw chicken
- Use separate cutting boards for meat and vegetables
- Check internal temperature reaches 165°F (74°C)
- Never leave cooked Chicken Momos at room temperature over 2 hours
- Pro Tips:
- Chill filling for 30 minutes for easier handling
- Work in small batches to prevent wrappers from drying
- Keep a damp cloth over prepared momos
- Let steam escape before opening steamer
- For extra flavor, add 1 teaspoon sesame oil to filling
- Dietary Notes:
- Contains gluten (wrappers)
- Contains poultry
- Can be made dairy-free
- Not suitable for vegetarians (see variations for alternatives)