Key Takeaways:
- Master authentic Chicken Nanban in just 45 minutes
- Learn the perfect double-fry technique for extra crunch
- Create restaurant-quality results with simple ingredients
- Serve a complete meal for 4 people with minimal fuss
Why Chicken Nanban Is a Game-Changer
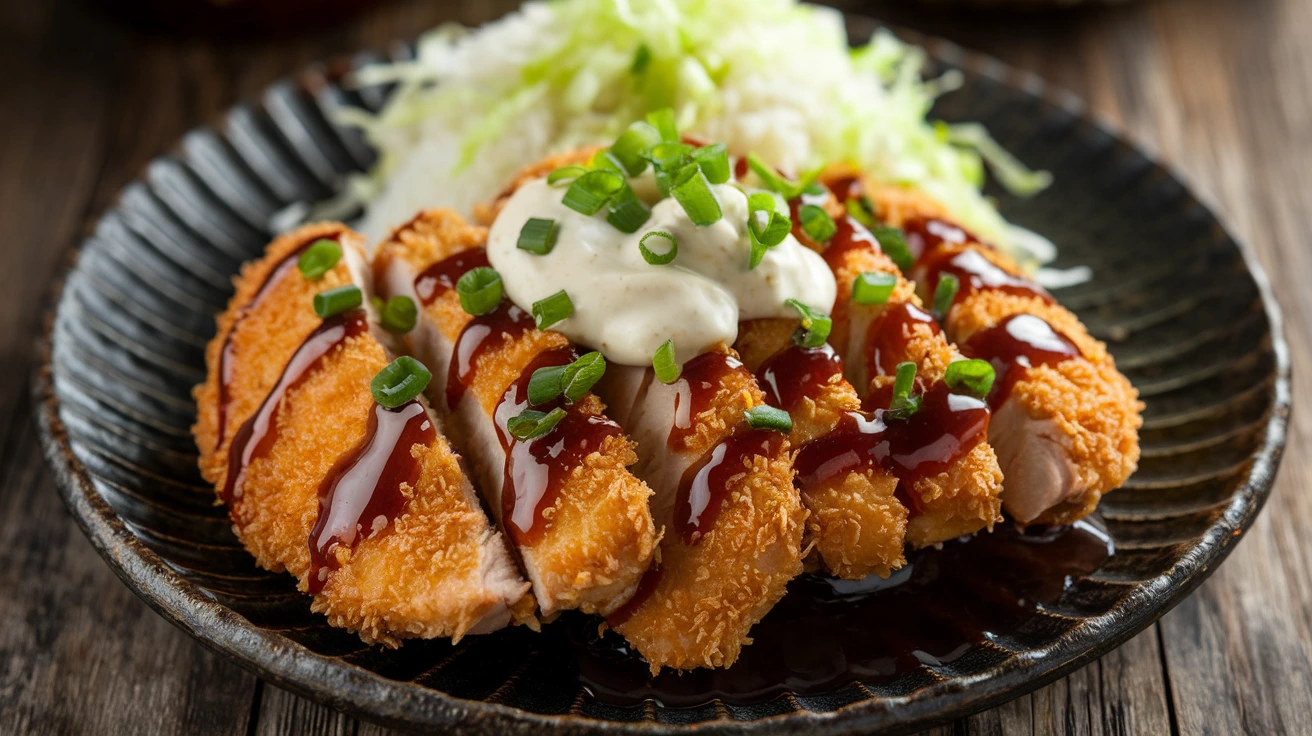
Ever tried making Japanese fried chicken at home only to end up with soggy, flavorless results? My Chicken Nanban recipe solves this common problem with a foolproof method. This classic Japanese dish features crispy fried chicken soaked in tangy sauce and topped with creamy tartar sauce – it’s the perfect balance of flavors and textures.
What makes Chicken Nanban special is the contrast between the crunchy coating and the sweet-sour sauce. The double-frying technique ensures your chicken stays crispy even after it’s dipped in the tangy nanban sauce. It’s similar to my fried chicken recipe but with a Japanese twist that makes it truly unique.
Nutrition Facts for Chicken Nanban (Per Serving)
| Nutrient | Amount | % Daily Value |
|---|---|---|
| Calories | 520 | 26% |
| Protein | 35g | 70% |
| Fat | 28g | 43% |
| Carbs | 32g | 11% |
| Fiber | 1g | 4% |
| Sugar | 8g | 16% |
| Sodium | 780mg | 32% |
Prep Time: 20 minutes
Cook Time: 25 minutes
Total Time: 45 minutes
Servings: 4 people
Equipment Needed for Chicken Nanban
| Essential Tools | Optional Tools |
|---|---|
| Large deep pot or fryer | Kitchen timer |
| Cooking thermometer | Wire rack |
| 3 medium bowls | Splatter guard |
| Whisk | Meat mallet |
| Paper towels | Slotted spoon |
| Tongs | – |
| Cutting board | – |
| Sharp knife | – |
Chicken Nanban Ingredients
| For the Chicken | For the Nanban Sauce | For the Tartar Sauce |
|---|---|---|
| 4 chicken breasts (6 oz each) | 1/2 cup rice vinegar | 1 cup Japanese mayonnaise |
| 1 cup all-purpose flour | 1/4 cup soy sauce | 2 hard-boiled eggs, chopped |
| 2 large eggs | 2 tbsp sugar | 1/4 cup onion, minced |
| 1 cup potato starch | 1 red chili, sliced (optional) | 2 tbsp pickles, minced |
| 4 cups vegetable oil | – | 1 tbsp capers (optional) |
| 1 tsp salt | – | – |
| 1/2 tsp black pepper | – | – |
Detailed Step-by-Step Chicken Nanban Instructions
1. Initial Preparation (20 minutes)
Setting Up Your Kitchen for Success
- Clear your counter space completely
- Wash hands thoroughly with soap and water
- Line up all ingredients in order of use
- Place cutting board on stable, non-slip surface
- Keep roll of paper towels within arm’s reach
- Set up thermometer clipped to pot edge
- Prepare a “clean hand/dirty hand” system to avoid cross-contamination
Making Hard-Boiled Eggs for Tartar Sauce
- Place 2 eggs in small pot with cold water (1 inch above eggs)
- Bring water to rolling boil over high heat
- Immediately turn off heat once boiling
- Cover pot with tight-fitting lid
- Set timer for exactly 10 minutes
- Fill bowl with ice and water while waiting
- When timer rings, transfer eggs to ice bath using slotted spoon
- Allow to cool completely (about 5 minutes)
- Gently tap eggs on counter to crack shells all over
- Peel under running water to help remove shell
- Set aside on plate for later use
Preparing the Chicken for Chicken Nanban
- Remove chicken from refrigerator 15 minutes before starting
- Unwrap chicken breasts and place on clean cutting board
- Pat each piece completely dry with paper towels (very important!)
- Place first chicken breast on board with smooth side up
- Place non-dominant hand flat on top of breast
- Hold sharp knife parallel to cutting board with dominant hand
- Carefully insert knife into thickest side of breast
- Slice horizontally through middle without cutting all the way through
- Open like a book to create one even piece
- Cover with plastic wrap or parchment paper
- Using flat side of meat mallet or rolling pin:
- Start from center and work outward
- Use gentle, even pressure (not too hard!)
- Pound to even 1/2-inch thickness throughout
- Repeat with all chicken pieces
- Season both sides with:
- 1/4 teaspoon salt per breast (sprinkle evenly)
- Pinch of black pepper per breast
- Let chicken rest at room temperature 15 minutes (this helps it cook evenly)
2. Sauce Preparation for Chicken Nanban (10 minutes)
Making the Nanban Sauce
- Find a clean, small mixing bowl
- Measure ingredients precisely:
- Use liquid measuring cup for vinegar and soy sauce
- Use measuring spoons for sugar
- Pour 1/2 cup rice vinegar into bowl
- Add 1/4 cup soy sauce to same bowl
- Add 2 tablespoons sugar
- Whisk continuously for 30 seconds until sugar completely dissolves
- If using chili:
- Remove seeds for less heat (optional)
- Slice very thinly
- Add to sauce mixture
- Cover bowl with plastic wrap
- Set aside at room temperature (not refrigerator)
Creating the Tartar Sauce
- Place hard-boiled eggs on cutting board
- Chop eggs into very small pieces (about 1/4 inch or smaller)
- Transfer chopped eggs to medium bowl
- Peel onion and cut in half
- Finely mince 1/4 cup onion (about 1/4 of a medium onion)
- Place minced onion in small bowl of cold water for 1 minute (reduces harshness)
- Drain and pat dry with paper towel
- Finely chop pickles into tiny pieces
- In clean bowl, combine:
- 1 cup Japanese mayonnaise (Kewpie preferred)
- All chopped eggs
- All drained minced onion
- All chopped pickles
- Capers (if using)
- Mix gently with spoon until well combined
- Cover with plastic wrap
- Refrigerate until ready to serve (keeps sauce cold and safe)
3. Frying Setup for Chicken Nanban (10 minutes)
Preparing the Oil
- Choose a heavy-bottomed, high-sided pot (at least 5-quart capacity)
- Pour 4 cups vegetable oil into pot (should be 2-3 inches deep)
- Clip candy/deep-fry thermometer to side of pot
- Make sure bulb doesn’t touch bottom of pot
- Ensure you can read temperature easily
- Turn heat to medium
- Heat oil to exactly 350°F (this will take 5-10 minutes)
- Watch temperature carefully:
- Too low = greasy chicken
- Too high = burnt exterior, raw interior
Setting Up Your Breading Station
- Arrange workspace from left to right (for right-handed cooks; reverse if left-handed)
- Place 3 wide, shallow bowls in a row:
- Bowl 1: Add 1 cup all-purpose flour
- Bowl 2: Crack 2 eggs and beat with fork until smooth
- Bowl 3: Add 1 cup potato starch
- Season flour in Bowl 1 with:
- 1/2 teaspoon salt
- 1/4 teaspoon black pepper
- Mix with fork
- Place clean plate at end of breading station
- Put wire rack over layer of paper towels nearby
- Have tongs, thermometer, and timer within reach
- Clear path between breading station and stove
4. First Frying Phase for Chicken Nanban (12-15 minutes)
Coating the Chicken
- Double-check oil temperature (must be 350°F)
- Take first chicken piece with dry hand
- Place in flour bowl
- Use dry hand to flip and press flour into all surfaces
- Lift and shake gently to remove excess flour
- Move to egg bowl
- Use wet hand to coat completely with egg
- Let excess egg drip off for 3 seconds
- Place in potato starch bowl
- Use dry hand to coat completely
- Press gently to adhere coating
- Make sure all wet spots are covered
- Shake very gently to remove excess
- Place on clean plate
- Repeat with all chicken pieces
First Fry
- Check oil temperature again (adjust heat if needed)
- Use tongs to carefully pick up first piece of chicken
- Lower into oil halfway, then pause for 2 seconds
- Lower completely into oil
- Add only 1-2 pieces at a time (don’t overcrowd!)
- Cook for 4-5 minutes until golden brown
- Use tongs to flip halfway through
- Remove when coating is light golden brown
- Place on wire rack over paper towels
- Insert instant-read thermometer into thickest part
- Temperature must read 165°F minimum
- If not, return to oil briefly
- Repeat with remaining pieces
- Allow oil to return to 350°F between batches
5. Second Frying Phase for the Perfect Chicken Nanban (5-6 minutes)
- Increase oil temperature to exactly 375°F
- Wait until thermometer shows correct temperature
- Return first batch of chicken to oil
- Fry for exactly 1-2 minutes until deep golden brown
- Watch carefully to prevent burning
- Remove to fresh paper towels or clean wire rack
- Repeat with remaining chicken
- This second fry is what makes Chicken Nanban extra crispy!
6. Sauce Application for Chicken Nanban (5 minutes)
- Let chicken rest for 2 minutes after final fry
- Stir nanban sauce gently with spoon
- Working with one piece at a time:
- Hold chicken with tongs
- Dip completely in nanban sauce
- Count slowly to 5 for proper soaking
- Lift and let excess drip back into bowl
- Place on serving plate
- Repeat with all chicken pieces
- Pour any extra sauce into small serving bowl
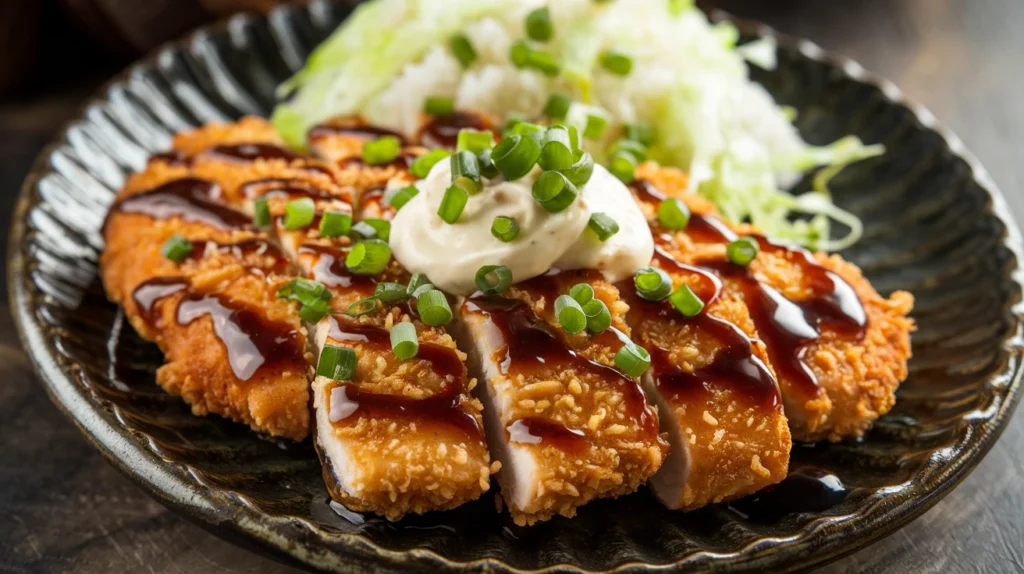
7. Final Assembly of Your Chicken Nanban (5 minutes)
- Remove tartar sauce from refrigerator
- Stir gently to recombine
- For each piece of chicken:
- Spoon 2-3 tablespoons tartar sauce on top
- Spread slightly with back of spoon
- Garnish with sliced chilies (if using)
- Serve immediately with:
- Hot steamed white rice
- Fresh sliced cucumbers or cabbage
- Lemon wedges for extra tanginess
- For complete meal, add miso soup on the side
Troubleshooting Chicken Nanban Problems
| Problem | Cause | Solution |
|---|---|---|
| Coating falls off | Chicken too wet | Pat completely dry before coating |
| Chicken too dark | Oil too hot | Lower temperature to 350°F |
| Chicken too pale | Oil too cool | Increase to 350°F minimum |
| Greasy chicken | Not hot enough | Maintain correct oil temperature |
| Thick sauce | Too concentrated | Add 1-2 tbsp water |
| Raw interior | Chicken too thick | Pound to even thickness |
| Soggy coating | Too much sauce | Brief dip only, drain well |
| Burnt exterior | Second fry too long | Limit to 1-2 minutes only |
Variations & Substitutions for Chicken Nanban
Looking to change things up? The basic Chicken Nanban recipe is flexible. Try these variations:
- Protein Switch: Use boneless chicken thighs for juicier results
- Spice Level: Add more chilies for extra heat
- Lighter Version: Skip second fry for less oil
- Gluten-Free: Replace flour with rice flour or cornstarch
- Dairy-Free Tartar: Use plant-based mayo
- Extra Crunch: Add 1/4 cup panko to final coating
If you enjoy this recipe, you might also like my chicken fajita recipe for another quick weeknight option!
Storage & Reheating Chicken Nanban
| Storage Method | Maximum Time | Notes |
|---|---|---|
| Refrigerator (chicken) | 2 days | Store sauce separately |
| Refrigerator (sauce) | 5 days | Keep in airtight container |
| Freezer | Not recommended | Affects texture |
Best Reheating Method for Chicken Nanban:
- Preheat oven to 375°F
- Place chicken on wire rack over baking sheet
- Heat 10-12 minutes until crisp and hot
- Warm sauce separately in microwave (10-15 seconds)
- Apply sauce after reheating
Warning: Don’t microwave (makes coating soggy)
Safety Notes & Tips for Chicken Nanban
- Oil Safety: Never leave hot oil unattended
- Temperature Check: Chicken must reach 165°F internally
- Fire Safety: Keep extinguisher nearby
- Cooling: Let oil cool completely before disposing
- Hand Safety: Designate “wet” and “dry” hands during breading
- Splatter Protection: Use splatter guard during frying
- Burn Prevention: Keep handles turned inward on stove
Pro Tips for Perfect Chicken Nanban
- Double-frying creates maximum crispiness
- Rest chicken 2 minutes before cutting
- Make extra sauce for dipping
- Pat chicken completely dry before coating
- Cut against the grain for tender bites
- Use potato starch for authentic Japanese crispiness
- Keep tartar sauce cold until serving
Dietary Notes: This Chicken Nanban recipe contains gluten, eggs, and soy. For gluten-free option, substitute wheat flour with rice flour.
Common Mistakes to Avoid with Chicken Nanban:
- Skipping the double-fry technique
- Not letting oil reach proper temperature
- Using too much sauce (makes coating soggy)
- Overcrowding the frying pot
- Rushing the process (patience ensures better results)