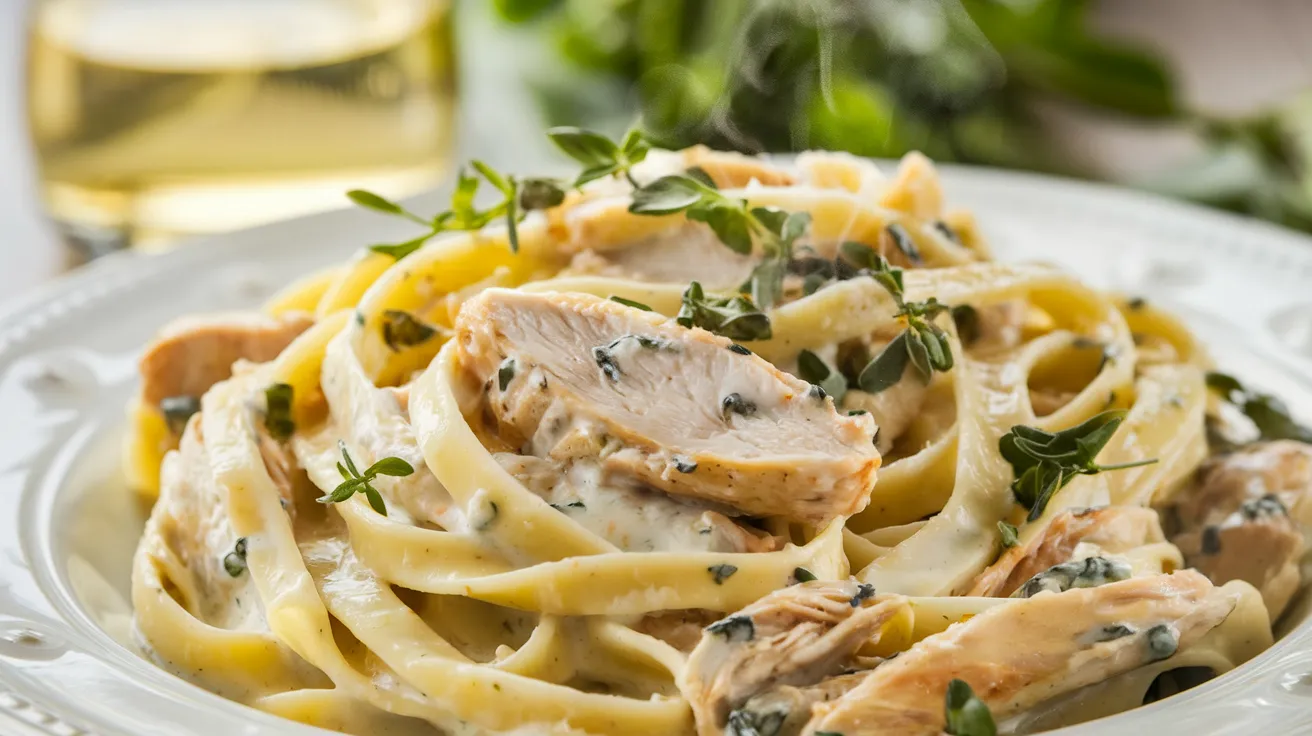
Prep Time: 15 minutes | Cook Time: 25 minutes | Total Time: 40 minutes | Serves: 4 people
Key Takeaways:
- This rich, creamy Chicken Pasta Gorgonzola comes together in just 40 minutes
- Perfect balance of tangy cheese, tender chicken, and al dente pasta
- Customize with your choice of pasta shape and protein options
- Make-ahead friendly – tastes even better the next day!
Introduction
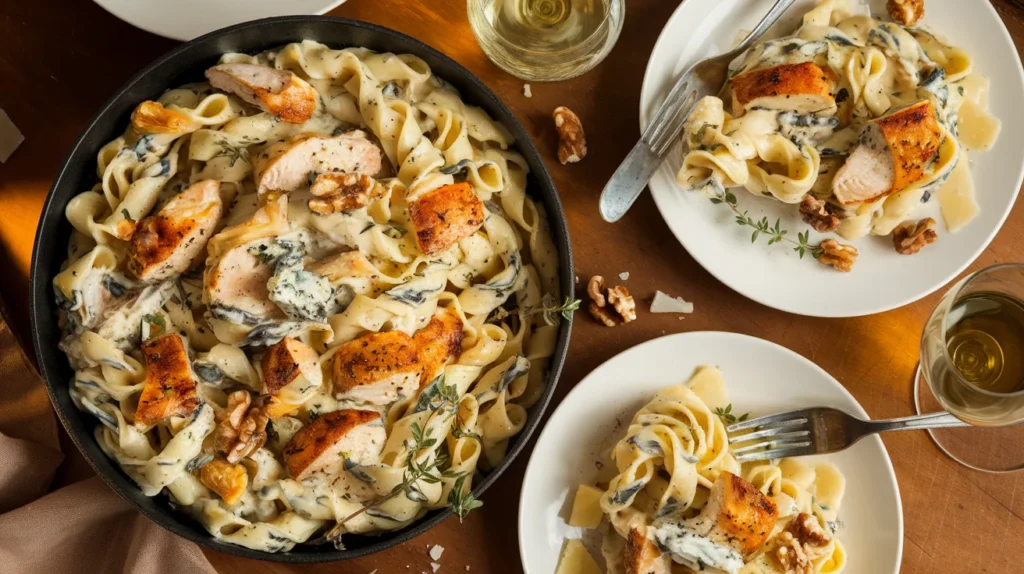
Ever stared at your pantry wondering how to turn ordinary ingredients into something extraordinary? This Chicken Pasta Gorgonzola recipe is your answer.
Rich, creamy, and packed with flavor, this dish transforms simple chicken and pasta into a restaurant-worthy meal. The secret? Gorgonzola cheese that melts into a velvety sauce coating every bite. If you love cheesy pasta dishes, this Chicken Pasta Gorgonzola is a more sophisticated cousin to my popular cheesy chicken pasta recipe.
This Chicken Pasta Gorgonzola recipe strikes the perfect balance between fancy and approachable. It’s impressive enough for guests but simple enough for a weeknight dinner. Let’s get cooking!
Nutrition Comparison
| Nutrient | Amount Per Serving | % Daily Value |
|---|---|---|
| Calories | 650 | – |
| Protein | 42g | 84% |
| Carbohydrates | 52g | 17% |
| Fat | 30g | 46% |
| Saturated Fat | 16g | 80% |
| Cholesterol | 120mg | 40% |
| Sodium | 780mg | 32% |
| Fiber | 3g | 12% |
| Sugar | 4g | 8% |
| Calcium | 350mg | 35% |
| Iron | 2.5mg | 14% |
Equipment & Ingredients
Kitchen Tools
| Tool | Purpose |
|---|---|
| Large pot | For boiling pasta |
| Colander | For draining pasta |
| Large skillet | For cooking chicken and making sauce |
| Sharp knife | For cutting chicken and herbs |
| Cutting board | For prep work |
| Measuring cups and spoons | For accurate measurements |
| Wooden spoon | For stirring sauce |
| Tongs | For handling pasta |
| Meat thermometer | For checking chicken doneness |
| Timer | To track cooking times |
| Bowl | For seasoning chicken |
| Aluminum foil | To keep chicken warm |
Ingredients for Chicken Pasta Gorgonzola
| Ingredient | Amount | Notes |
|---|---|---|
| Fettuccine pasta | 12 oz (340g) | Or penne, rigatoni, or farfalle |
| Boneless, skinless chicken breasts | 1.5 lbs (680g) | Cut into 1-inch cubes |
| Gorgonzola cheese | 6 oz (170g) | Crumbled |
| Heavy cream | 1 cup (240ml) | Room temperature |
| Unsalted butter | 3 tbsp (42g) | Divided |
| Olive oil | 2 tbsp (30ml) | For cooking chicken |
| Garlic | 3 cloves | Minced |
| Shallot | 1 medium | Finely chopped |
| White wine (dry) | 1/4 cup (60ml) | Optional |
| Chicken broth | 1/2 cup (120ml) | Low sodium preferred |
| Fresh thyme | 1 tbsp | Leaves only, plus more for garnish |
| Fresh parsley | 2 tbsp | Chopped, for garnish |
| Salt | 1 tsp | Plus more for pasta water |
| Black pepper | 1/2 tsp | Freshly ground |
| Parmesan cheese | 1/4 cup (25g) | Freshly grated, for serving |
| Walnuts | 1/4 cup (30g) | Chopped, for garnish (optional) |
Substitutions
- Pasta: Any pasta shape works well. Try whole wheat pasta for extra fiber.
- Chicken: Swap with turkey breast, shrimp, or mushrooms for a vegetarian option.
- Gorgonzola: Blue cheese or a mix of cream cheese and feta can work in a pinch.
- Heavy cream: Half-and-half or full-fat Greek yogurt mixed with milk can substitute.
- White wine: Replace with extra chicken broth or a splash of white wine vinegar.
- Shallot: Substitute with 1/4 cup finely diced red or sweet onion.
Step-by-Step Instructions
Preparation Phase
- Set up your workspace
- Clear your kitchen counter to give yourself plenty of room to work.
- Place your cutting board on a stable surface.
- Get a small bowl for discarded packaging and scraps.
- Wash your hands thoroughly with soap and warm water for at least 20 seconds.
- Pull all ingredients from the refrigerator at least 30 minutes before cooking to bring them to room temperature (especially the heavy cream and cheese).
- Measuring ingredients
- Place each measuring cup on a flat surface before filling.
- For dry ingredients like cheese, fill the measuring cup and level off with the back of a knife.
- For liquid ingredients like cream and broth, place the measuring cup on a flat surface and bend down to check at eye level that you have the correct amount.
- Pre-measure all ingredients and arrange them in the order you’ll use them (this is called “mise en place”).
- Prepare the pasta water
- Select a pot large enough to hold at least 4 quarts (3.8 liters) of water plus the pasta with room for stirring.
- Fill the pot with cold water about 3/4 full (approximately 4 quarts/3.8 liters).
- Add 1 tablespoon of salt to the water. The water should taste salty like the sea.
- Place on stove but don’t turn on the heat yet. You’ll do this later.
- Prepare the chicken
- Unwrap the chicken breasts and place them on a clean cutting board dedicated to raw meat.
- Using paper towels, pat the chicken completely dry on all sides. This helps the chicken brown better when cooking.
- Place your hand flat on top of a chicken breast to stabilize it.
- With a sharp knife, carefully cut the chicken into even 1-inch cubes. Try to make the pieces similar in size so they cook evenly.
- Transfer the cubed chicken to a medium bowl.
- Add 1/2 teaspoon salt and 1/4 teaspoon freshly ground black pepper to the chicken.
- Using clean hands or a spoon, toss the chicken to coat evenly with the seasoning.
- Wash your hands immediately after handling raw chicken.
- Prepare the aromatics and herbs
- Place a fresh cutting board (not the one used for chicken) on your work surface.
- For the garlic:
- Place a garlic clove on the cutting board.
- Put the flat side of your knife on top of the clove and press down firmly with the heel of your hand to crush it.
- The skin should now easily peel off. Discard the skin.
- Finely chop the garlic by rocking your knife back and forth over it until it’s in tiny pieces.
- Repeat with the remaining cloves.
- For the shallot:
- Cut off both ends of the shallot and peel away the papery skin.
- Cut the shallot in half lengthwise.
- Place the flat sides down on the cutting board for stability.
- Make thin slices lengthwise, then crosswise to create a fine dice.
- For the thyme:
- Hold the stem at the bottom with one hand.
- With your other hand, pinch the stem and pull upward to strip off the leaves.
- Discard the stems and gather the leaves.
- Roughly chop if the leaves are large.
- For the parsley:
- Remove the leaves from the stems.
- Gather the leaves into a tight pile.
- Rock your knife back and forth through the pile until finely chopped.
- Prepare the cheese
- For the Gorgonzola:
- If the cheese has a rind, use a knife to carefully cut it away and discard.
- Place the cheese on a cutting board and use a knife to break it into small chunks.
- Use your fingers to crumble it into even smaller pieces.
- For the Parmesan:
- Use the small holes on a box grater to grate the cheese.
- Alternatively, use a microplane grater for a finer texture.
- Grate directly onto a plate or piece of parchment paper for easy transfer.
- For the Gorgonzola:
Cooking Phase
- Cook the pasta
- Place the pot of water (from step 3) on high heat.
- Bring to a full, rolling boil. You’ll know it’s ready when you see large bubbles consistently breaking the surface.
- Once boiling, add the pasta to the water.
- Immediately stir with a wooden spoon or tongs to prevent sticking.
- Set a timer according to the package directions for al dente pasta (usually 8-10 minutes).
- Stir occasionally during cooking to prevent the pasta from clumping together.
- About 2 minutes before the pasta is done, dip a measuring cup into the pot and reserve 1 cup of the starchy pasta water. This is important! Set this water aside.
- When the timer goes off, test a piece of pasta by carefully removing it, running it under cold water, and tasting it. It should be firm but not crunchy (al dente).
- Once done, turn off the heat.
- Place the colander in the sink and carefully pour the contents of the pot into it to drain the pasta.
- Do not rinse the pasta! The starch on the surface helps the sauce adhere better.
- Leave the pasta in the colander while you prepare the sauce. Shake it occasionally to prevent sticking.
- Cook the chicken
- While the pasta is cooking, place a large skillet on the stove over medium-high heat.
- Add 1 tablespoon of butter and 2 tablespoons of olive oil to the pan.
- Allow the butter to melt completely and begin to bubble slightly. The oil should appear shimmery.
- To test if the pan is hot enough, add one piece of chicken. If it sizzles immediately, the pan is ready.
- Using tongs or a spoon, carefully add the chicken pieces to the hot pan in a single layer.
- Important for beginners: Do not overcrowd the pan. If your pan isn’t large enough, cook the chicken in two batches. Overcrowding causes the chicken to steam rather than brown.
- Let the chicken cook undisturbed for 2-3 minutes. Resist the urge to move it around!
- Check one piece by lifting it with tongs. If it’s golden brown on the bottom, it’s time to flip.
- Using tongs or a spatula, carefully flip each piece of chicken to cook the other side.
- Cook for another 2-3 minutes until golden brown and no pink remains in the center.
- To be certain the chicken is fully cooked, use a meat thermometer. It should read 165°F (74°C) when inserted into the thickest piece.
- Once cooked, transfer the chicken to a clean plate.
- Cover loosely with aluminum foil to keep warm while you make the sauce.
- If you cooked the chicken in batches, repeat the process until all chicken is cooked.
- Make the sauce base
- Using the same skillet that cooked the chicken (don’t clean it!), reduce heat to medium.
- The brown bits stuck to the bottom of the pan (fond) are full of flavor. We’ll incorporate them into the sauce.
- Add the remaining 2 tablespoons of butter to the pan and allow it to melt completely.
- Add the chopped shallot to the melted butter.
- Cook for 2 minutes, stirring occasionally with a wooden spoon, until the shallot becomes translucent and soft. They shouldn’t brown, just soften.
- Add the minced garlic to the pan.
- Safety note for beginners: Garlic burns easily and becomes bitter. Cook it for only 30 seconds, stirring constantly, until it becomes fragrant.
- If at any point the garlic or shallots start to brown too quickly, immediately reduce the heat or temporarily remove the pan from the burner.
- Deglaze the pan
- If using white wine:
- Pour the 1/4 cup of white wine into the pan.
- As the wine hits the hot pan, it will sizzle and steam. This is normal!
- Using a wooden spoon, scrape the bottom of the pan to loosen all the flavorful browned bits.
- Let the wine simmer for 1-2 minutes until it reduces by about half. You’ll notice it becoming slightly syrupy.
- If not using wine:
- Skip to adding the chicken broth in the next step and use it to deglaze the pan instead.
- If using white wine:
- Build the sauce
- Pour the 1/2 cup of chicken broth into the pan.
- Stir to combine with the wine reduction (if used) and aromatics.
- Let simmer for 2 minutes to reduce slightly.
- Reduce the heat to medium-low.
- Slowly pour in the 1 cup of heavy cream while stirring continuously.
- Beginner tip: If the cream is cold, it might curdle when it hits the hot pan. That’s why room temperature cream is important.
- Add the fresh thyme leaves to the sauce.
- Allow the sauce to simmer gently (small bubbles around the edge, not a rolling boil) for 3-4 minutes, stirring occasionally.
- You’ll notice the sauce beginning to thicken slightly as it reduces.
- Beginner warning: Don’t walk away during this process. Cream sauces can boil over quickly if left unattended.
- Add the cheese
- Reduce the heat to low. This is crucial for smooth cheese melting.
- Add about 1/3 of the crumbled Gorgonzola to the sauce.
- Stir constantly with a wooden spoon or whisk until the cheese is completely melted and incorporated.
- Continue adding the cheese in small batches, making sure each addition is fully melted before adding more.
- If at any point the sauce seems too thick, add 2 tablespoons of the reserved pasta water and stir to incorporate.
- Once all cheese is melted, taste the sauce.
- Season with the remaining 1/2 teaspoon salt and 1/4 teaspoon pepper, adjusting to your preference.
- Beginner tip: Remember that Gorgonzola is naturally salty, so taste before adding all the salt.
- Combine everything
- Add the cooked chicken pieces back to the sauce in the skillet.
- Gently stir to coat the chicken evenly with sauce.
- Let the chicken warm in the sauce for about 1 minute.
- Using tongs, transfer the drained pasta directly from the colander to the sauce.
- If the pasta has cooled and stuck together, you can briefly dip it in hot water to loosen before adding to the sauce.
- Using tongs or two large spoons, gently toss the pasta to coat it evenly with the sauce.
- Beginner technique: Lift and turn the pasta repeatedly rather than stirring aggressively, which can break the pasta.
- If the sauce seems too thick and isn’t coating the pasta well, add more reserved pasta water, 1 tablespoon at a time, until you reach the desired consistency.
- The sauce should cling to the pasta but still be loose enough to pool slightly at the bottom of the pan.
- Let everything cook together for 1-2 minutes, gently tossing occasionally to help the pasta absorb some of the sauce.
Finishing Touches
- Plate the dish
- Turn off the heat.
- If serving family-style:
- Transfer the pasta to a large, pre-warmed serving dish using tongs or two large spoons.
- Pour any remaining sauce from the skillet over the pasta.
- If serving individual portions:
- Use tongs to twirl pasta into nests on each warmed plate.
- Spoon chicken and extra sauce over and around the pasta.
- Garnish
- Sprinkle the freshly grated Parmesan cheese evenly over the top.
- Scatter the chopped fresh parsley across the dish.
- Add a few extra fresh thyme leaves for color and flavor.
- If using walnuts, sprinkle them on top for a pleasing crunch.
- Serve immediately
- This dish is best enjoyed while hot.
- Provide extra grated Parmesan at the table for those who want more cheese.
- Pair with a simple green salad dressed with a light vinaigrette to balance the richness of the pasta.
Troubleshooting
Sauce Too Thin
- Problem: Your sauce is runny and doesn’t coat the pasta well.
- Solution:
- Continue simmering the sauce on low heat for a few more minutes, stirring constantly. The liquid will gradually evaporate, thickening the sauce.
- If that doesn’t work, make a slurry by mixing 1 teaspoon cornstarch with 1 tablespoon cold water in a small bowl until smooth.
- While whisking the sauce constantly, slowly drizzle in half the slurry.
- Continue whisking for 1-2 minutes as the sauce thickens.
- If needed, add the remaining slurry and cook for another minute.
Sauce Too Thick
- Problem: Your sauce is too thick and gloppy.
- Solution:
- Add the reserved pasta water, 1 tablespoon at a time, stirring after each addition.
- Continue until the sauce reaches your desired consistency.
- If you’ve used all your pasta water, you can add a splash of chicken broth or warm cream instead.
Sauce Breaking or Curdling
- Problem: Your sauce looks grainy or separated instead of smooth and creamy.
- Solution:
- This usually happens if the heat is too high or the cream was too cold when added.
- Immediately remove the pan from the heat.
- Add 1-2 tablespoons of warm heavy cream.
- Whisk vigorously until the sauce begins to come back together.
- Return to very low heat and continue whisking until smooth.
- In the future, ensure cream is at room temperature before adding.
Cheese Not Melting Smoothly
- Problem: The Gorgonzola remains in clumps rather than creating a smooth sauce.
- Solution:
- Remove pan from heat and let it cool slightly for 30 seconds.
- Whisk vigorously to break up cheese clumps.
- Return to very low heat.
- Add any remaining cheese in much smaller portions, ensuring each portion melts completely before adding more.
- Try using a whisk instead of a spoon for better incorporation.
- Next time, make sure the cheese is at room temperature and crumbled into smaller pieces before adding.
Chicken Too Dry
- Problem: Your chicken pieces are overcooked and dry.
- Solution:
- For the current dish, let the chicken sit in the sauce for a bit longer before serving to absorb more moisture.
- Add a bit more sauce when plating to compensate.
- For future reference, cook the chicken for less time (about 2 minutes per side) and use a meat thermometer to check for doneness at 165°F (74°C).
- Consider brining the chicken next time (soak in salt water for 15-30 minutes before cooking).
Pasta Clumping Together
- Problem: Your pasta is sticking together in clumps.
- Solution:
- If caught early, immediately place the pasta back into hot water for 10 seconds, then drain again.
- Be sure to stir the pasta frequently while cooking.
- Always add pasta to sauce immediately after draining.
- In the future, save more pasta water and toss the pasta with a small amount of olive oil if you can’t add it to the sauce right away.
Variations & Substitutions
Protein Options
- Grilled Shrimp:
- Replace chicken with 1.5 pounds (about 680g) peeled, deveined shrimp.
- Season with the same amount of salt and pepper.
- Cook for just 1-2 minutes per side until pink and opaque.
- Be careful not to overcook, as shrimp becomes tough quickly.
- This creates a dish similar to my Chicken Fettuccine Alfredo but with the distinct tang of Gorgonzola.
- Crispy Pancetta:
- Add 4 ounces (about 115g) diced pancetta to the pan before cooking the shallots.
- Cook until crispy, about 3-4 minutes.
- Remove half and set aside for garnish.
- Continue with the recipe, leaving the rendered fat in the pan for extra flavor.
- Vegetarian Version:
- Substitute chicken with 1 pound (about 450g) mixed mushrooms (cremini, shiitake, oyster).
- Clean mushrooms with a damp paper towel (don’t wash them).
- Slice or tear into bite-sized pieces.
- Cook in butter and oil until golden brown and moisture has evaporated, about 7-8 minutes.
- Season as you would the chicken.
Pasta Variations
- Whole Wheat Pasta:
- Substitute regular pasta with whole wheat for a nuttier flavor and extra fiber.
- Note that whole wheat pasta may require slightly more cooking time.
- Check package instructions and taste for doneness.
- Gluten-Free Pasta:
- Use rice, corn, or quinoa-based gluten-free pasta.
- Be extra careful not to overcook, as gluten-free pasta can become mushy quickly.
- Test frequently for doneness.
- Gnocchi:
- Replace long pasta with 1 pound (about 450g) potato gnocchi.
- Cook according to package directions (usually just until they float to the surface).
- Gnocchi’s pillowy texture pairs wonderfully with the creamy sauce.
Flavor Enhancements
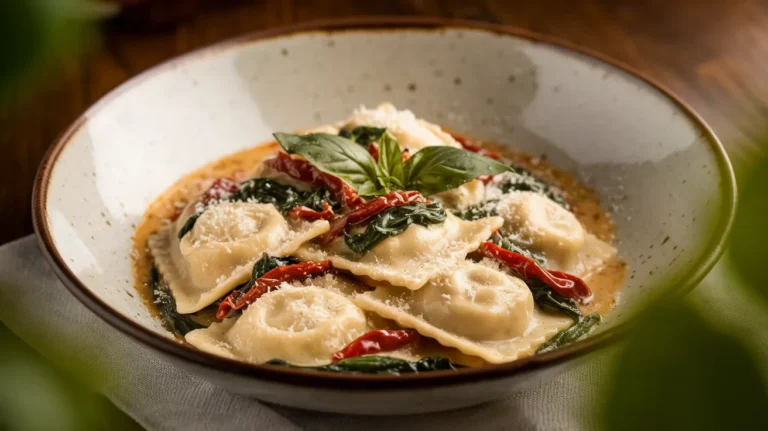
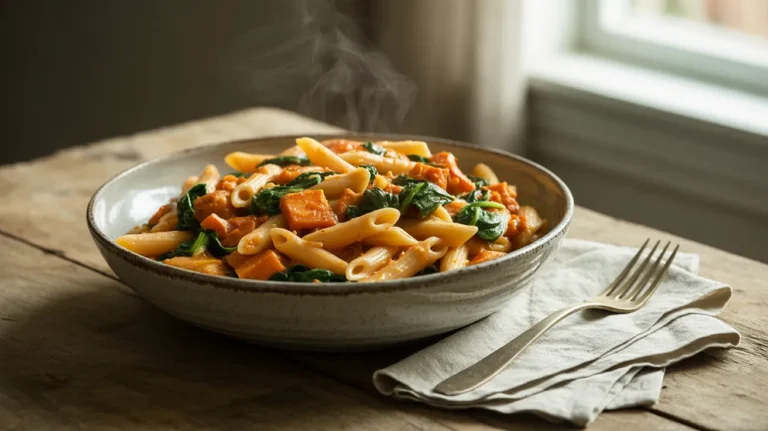
- Sun-Dried Tomatoes:
- Add 1/4 cup chopped sun-dried tomatoes for a tangy-sweet contrast.
- If using oil-packed tomatoes, drain well and add with the chicken.
- If using dry-packed, rehydrate in hot water for 10 minutes, drain, then add.
- Spinach:
- Stir in 2 cups fresh baby spinach just before serving.
- The residual heat will wilt the spinach perfectly.
- Gently toss until spinach is just wilted but still bright green.
- Roasted Garlic:
- Instead of fresh garlic, use 1 head of roasted garlic.
- To roast garlic: Cut the top off a head of garlic, drizzle with olive oil, wrap in foil, and bake at 400°F (205°C) for 30-40 minutes until soft.
- Squeeze the roasted cloves into the sauce and mash with a fork.
- Herb Varieties:
- Substitute thyme with other herbs for different flavor profiles:
- Rosemary (1 teaspoon chopped) for a piney, aromatic flavor
- Sage (5-6 leaves, chopped) for an earthy, peppery taste
- Tarragon (2 teaspoons chopped) for a sweet, anise-like flavor
- Substitute thyme with other herbs for different flavor profiles:
Storage & Reheating
Refrigerating
- Cooling Process:
- Allow the pasta to cool completely before storing, but don’t leave it at room temperature for more than 2 hours.
- Divide into portion-sized airtight containers for easier reheating.
- Make sure containers are sealed well to prevent absorption of other flavors in the refrigerator.
- Storage Duration:
- Keeps in refrigerator for up to 3 days.
- Tip: The flavors often develop and improve overnight!
Freezing
- Important Note:
- Cream-based sauces generally don’t freeze well as they tend to separate when thawed.
- If you must freeze, store pasta and sauce separately when possible.
- Use freezer-safe containers or heavy-duty freezer bags.
- Remove as much air as possible before sealing.
- Label with the date and contents.
- Use within 1 month for best quality.
Reheating
- Stovetop Method (Preferred for best results):
- Place the pasta in a skillet or saucepan over medium-low heat.
- Add 1-2 tablespoons of milk, cream, or chicken broth to revive the sauce.
- Cover the pan with a lid to create steam.
- Stir gently every 30 seconds to prevent sticking and ensure even heating.
- Heat until the internal temperature reaches 165°F (74°C), about 5-7 minutes.
- If the sauce seems to separate, whisk vigorously to recombine.
- Microwave Method (For quick reheating):
- Place a portion in a microwave-safe dish.
- Add 1 tablespoon of milk or cream and stir gently.
- Cover with a damp paper towel to create steam and prevent splattering.
- Heat at 50% power in 30-second intervals.
- Stir between each interval to distribute heat evenly.
- Continue until heated through (usually 1-2 minutes total, depending on portion size).
- Let stand for 1 minute before eating.
- Oven Method (For larger portions):
- Preheat oven to 325°F (165°C).
- Transfer pasta to an oven-safe baking dish.
- Add 2-3 tablespoons of milk, cream, or broth and stir gently.
- Cover tightly with aluminum foil.
- Bake for 15-20 minutes until heated through.
- Stir halfway through heating time.
- Warning: Never reheat at high temperatures, as this will cause the sauce to separate and the cheese to become stringy.
Safety Notes & Tips
Food Safety
- Chicken Handling:
- Chicken must reach an internal temperature of 165°F (74°C) to be safe for consumption.
- Always use a meat thermometer to check doneness, inserting it into the thickest part of the meat.
- Never place cooked chicken back on the same plate that held raw chicken.
- Wash hands thoroughly with soap and warm water for at least 20 seconds after handling raw chicken.
- Sanitize all surfaces, cutting boards, and utensils that came into contact with raw chicken.
- Temperature Danger Zone:
- Do not leave cream-based dishes at room temperature for more than 2 hours (1 hour if the room is warmer than 90°F/32°C).
- Refrigerate leftovers promptly in shallow containers for quick cooling.
- Cross-Contamination Prevention:
- Use separate cutting boards for chicken and other ingredients.
- Keep raw chicken away from ready-to-eat foods.
- Consider color-coding your cutting boards (e.g., red for meat, green for vegetables).
Cooking Tips
- Pasta Water Magic:
- Always save some pasta cooking water! The starchy water helps create a silky sauce and adjust consistency.
- A measuring cup stored next to the stove while pasta cooks serves as a good reminder.
- Temperature Management:
- Allow cream and cheese to come to room temperature for a smoother sauce (about 30 minutes on the counter).
- Cold dairy products can cause sauces to break or curdle when added to hot liquids.
- Cheese Selection:
- If your Gorgonzola has a rind, remove it before crumbling for smoother melting.
- Choose a creamy Gorgonzola dolce rather than a firmer Gorgonzola piccante for a milder flavor and better melting.
- Salt Management:
- Remember that Gorgonzola is already salty, so adjust additional salt carefully.
- Always taste before adding the final seasoning.
- Testing Doneness:
- Cut into the thickest piece of chicken to visually check if it’s cooked through – no pink should remain.
- For absolute certainty, use a meat thermometer.
- Multi-tasking Management:
- Start the pasta water before preparing other ingredients so it has time to come to a boil.
- Use the pasta cooking time to prepare your sauce.
- If you’re a beginner, consider preparing all ingredients before starting to cook anything.
Perfect Pairings
- Side Dishes:
- Serve with a crisp green salad dressed with lemon vinaigrette to cut through the richness.
- Roasted vegetables like asparagus or broccoli make a great complementary side.
- Garlic bread is perfect for soaking up extra sauce.
- Beverage Pairings:
- A light, dry white wine like Pinot Grigio or Sauvignon Blanc pairs perfectly.
- For non-alcoholic options, sparkling water with lemon or a light iced tea works well.
For Beginner Cooks
- Preparation Tips:
- Read through the entire recipe twice before starting.
- Prep all ingredients before turning on any heat (mise en place).
- Line up ingredients in the order you’ll use them.
- Set timers for each cooking stage.
- Technique Guidance:
- Don’t rush the sauce – low and slow is best for cream sauces.
- If anything starts burning or cooking too fast, simply remove the pan from heat to regain control.
- Taste and adjust seasonings as you go!
- When in doubt, lower the heat – most cooking failures happen because the heat is too high.
- Tools Usage:
- Use tongs for pasta – they give you better control than a spoon.
- A wooden spoon won’t scratch your cookware and is perfect for sauce-making.
- Invest in a meat thermometer if you cook meat frequently – it takes the guesswork out of doneness.
- Mental Preparation:
- Give yourself more time than you think you need for your first attempt.
- Remember that even professional chefs make mistakes – cooking is a learning process.
- Focus on techniques rather than perfectly following every instruction.
- Enjoy the process!