This Chicken Romano recipe transforms simple chicken breasts into golden, cheese-crusted perfection that’ll have your family asking for seconds. With its crispy Parmesan coating and tender, juicy interior, this Italian-inspired dish delivers restaurant-quality results right in your home kitchen—and it’s surprisingly easy to master, even if you’re just starting your cooking journey.
SERVES: 4 | PREP: 15 MIN | COOK: 20 MIN | TOTAL: 35 MIN
Ingredients
For the Chicken
| Ingredient | Amount |
|---|---|
| Boneless, skinless chicken breasts | 4 pieces (6-8 oz each) |
| Salt | 1 teaspoon |
| Black pepper | ½ teaspoon |
| Garlic powder | 1 teaspoon |
For the Coating
| Ingredient | Amount |
|---|---|
| All-purpose flour | ¾ cup |
| Large eggs | 3 eggs |
| Whole milk | 2 tablespoons |
| Grated Romano cheese | 1 cup |
| Italian breadcrumbs | 1½ cups |
| Dried parsley | 2 tablespoons |
| Dried oregano | 1 teaspoon |
| Paprika | ½ teaspoon |
For Cooking
| Ingredient | Amount |
|---|---|
| Olive oil | ¼ cup |
| Unsalted butter | 3 tablespoons |
| Fresh lemon wedges | For serving |
| Fresh parsley | For garnish |
Step-by-Step Instructions
Phase 1: Preparing the Chicken (5 minutes)
Step 1: Remove your chicken breasts from the refrigerator and let them sit at room temperature for 10 minutes. This ensures even cooking throughout. Pat each piece completely dry with paper towels—moisture is the enemy of a crispy coating.
Step 2: Place each chicken breast between two sheets of plastic wrap or parchment paper. Using a meat mallet or heavy skillet, gently pound the chicken to an even ¾-inch thickness. Why? This uniform thickness means every part cooks at the same rate, preventing dry edges and raw centers.
Step 3: Season both sides of each chicken breast with salt, black pepper, and garlic powder. Press the seasonings into the meat with your fingers so they really stick. This base seasoning layer is crucial—it flavors the chicken itself, not just the coating.
Phase 2: Setting Up Your Breading Station (5 minutes)
Step 4: Grab three shallow bowls or pie plates and line them up in a row. This assembly-line setup makes coating much easier and less messy.
Step 5: In the first bowl, add your flour. This initial flour layer creates a dry surface that helps the egg mixture stick—think of it as the foundation of your coating.
Step 6: In the second bowl, whisk together the eggs and milk until completely combined and slightly frothy (about 30 seconds of whisking). The milk makes the egg wash thinner and easier to work with.
Step 7: In the third bowl, combine the Romano cheese, breadcrumbs, parsley, oregano, and paprika. Mix thoroughly with a fork, breaking up any cheese clumps. The cheese should be evenly distributed throughout—this is what creates those amazing golden patches on your finished chicken.
Safety Tip: Keep one hand for dry ingredients and one hand for wet. This prevents your fingers from getting completely coated in breading!
Phase 3: Breading the Chicken (5 minutes)
Step 8: Take one chicken breast and dredge it in the flour, coating both sides completely. Shake off any excess flour—too much creates a gummy coating. You want a light, even dusting.
Step 9: Dip the floured chicken into the egg mixture, turning to coat both sides. Let excess egg drip off for 2-3 seconds. Why wait? Too much egg makes the breadcrumb coating slide off during cooking.
Step 10: Press the chicken firmly into the Romano breadcrumb mixture. Really press down and pack those crumbs onto the surface. Flip and repeat on the other side. The more you press, the better the coating adheres. Place the breaded chicken on a clean plate and repeat with remaining pieces.
Pro Tip: If you notice bare spots after breading, simply press more breadcrumb mixture onto those areas. The coating should be thick and even.
Phase 4: Cooking the Chicken Romano (15 minutes)
Step 11: Heat a large skillet (12-inch works perfectly for 4 pieces) over medium heat for 2 minutes. Add the olive oil and butter, swirling the pan as the butter melts. The combination of oil and butter gives you the best flavor while preventing burning. You’ll know it’s ready when the butter foam subsides and the oil shimmers—it should register about 350°F if you have a thermometer.
Step 12: Carefully place the breaded chicken breasts in the hot skillet, leaving at least ½ inch of space between each piece. Overcrowding drops the temperature and creates steam instead of that crispy crust we’re after. If your pan is smaller, cook in two batches.
Step 13: Don’t touch the chicken for 6 minutes. This is hard, but crucial! Moving it too early tears the coating. You’ll hear a steady sizzle—that’s good. After 6 minutes, peek underneath with a spatula. You’re looking for a deep golden brown crust that looks crispy and set.
Step 14: Flip the chicken carefully using a wide spatula, supporting the entire piece as you turn it. Cook the second side for another 6-8 minutes. The chicken is done when an instant-read thermometer inserted into the thickest part reads 165°F and the juices run clear when pierced.
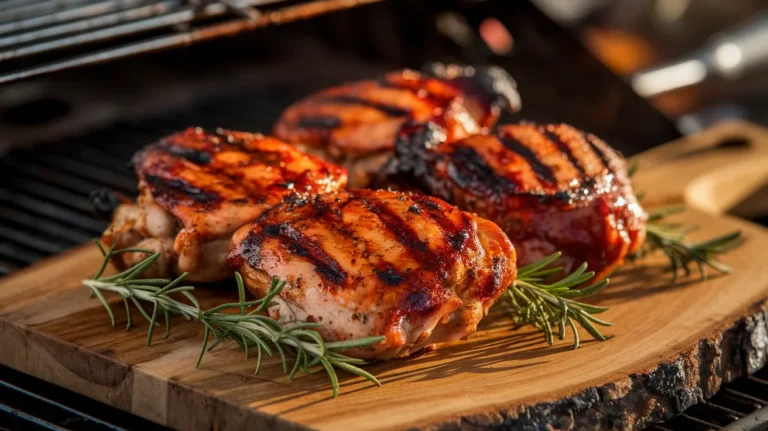
Visual Cue: The coating should be dark golden brown, almost amber in color, with the cheese creating beautiful crispy patches throughout.
Step 15: Transfer the cooked Chicken Romano to a wire rack set over a baking sheet (or paper towel-lined plate if that’s what you have). Let rest for 3-4 minutes before serving. This resting time lets the juices redistribute, keeping every bite moist.
Chef’s Notes
The Romano Difference: Romano cheese has a sharper, saltier flavor than Parmesan, which creates a more assertive, savory crust. If you can only find Parmesan, it works beautifully too—your Chicken Romano will just have a slightly milder flavor profile.
Temperature Control: If your coating browns too quickly but the chicken isn’t cooked through, reduce heat to medium-low and add 2-3 minutes to the cooking time. Better to go slower than burn the outside.
Batch Cooking: Making multiple batches? Keep finished chicken warm in a 200°F oven on a wire rack while you cook the rest. This maintains that crispy coating without steaming it.
The Best Results: Use freshly grated Romano cheese from a wedge rather than pre-grated. Pre-grated cheese contains anti-caking agents that prevent proper browning and crispiness.
Nutrition Information (Per Serving)
Calories: 485 | Protein: 52g | Carbohydrates: 28g | Fat: 18g | Saturated Fat: 7g | Fiber: 2g | Sodium: 890mg | Calcium: 285mg
Creative Variations
Spicy Romano Chicken
Add 1 teaspoon cayenne pepper and ½ teaspoon red pepper flakes to your breadcrumb mixture. The cheese coating balances the heat perfectly, creating a flavor similar to what you’d find in Chicken Bruschetta Cutlets but with an extra kick.
Herb-Crusted Romano Chicken
Replace dried herbs with 3 tablespoons fresh herbs (basil, thyme, and parsley). Chop them finely and mix into the breadcrumb coating. Fresh herbs add a bright, garden-fresh flavor that elevates the whole dish.
Lemon-Pepper Romano Chicken
Add 2 tablespoons lemon zest and 1 tablespoon coarsely ground black pepper to your breading mixture. After cooking, squeeze fresh lemon juice over the top. This citrus-forward version pairs wonderfully with the same creamy sides that complement Chicken Florentine.
Garlic-Butter Romano Chicken
Increase garlic powder to 2 teaspoons in the breading. After cooking, brush each piece with melted garlic butter (2 tablespoons butter + 3 minced garlic cloves). This creates an extra-rich, aromatic version.
Storage & Reheating
Refrigerator Storage: Place cooled Chicken Romano in an airtight container with parchment paper between layers. Stores well for 3-4 days. The coating softens slightly but still tastes delicious.
Freezing: Freeze breaded but uncooked chicken on a baking sheet until solid (about 2 hours), then transfer to freezer bags. Stores for up to 3 months. Cook from frozen, adding 5-8 extra minutes to cooking time.
Reheating for Crispy Results: Skip the microwave! Reheat in a 375°F oven on a wire rack for 12-15 minutes until heated through and the coating crisps up again. You can also use an air fryer at 350°F for 8-10 minutes.
Make-Ahead Tip: Bread the chicken up to 8 hours ahead, cover with plastic wrap, and refrigerate. This actually helps the coating adhere better during cooking.

Troubleshooting Common Problems
Problem 1: Coating Falls Off During Cooking
Solution: This usually means the chicken wasn’t dry enough before breading or you didn’t press the coating firmly. Next time, pat the chicken completely dry and really press those breadcrumbs into the egg wash layer. Also, resist the urge to flip too early—wait until the first side is golden and set.
Problem 2: Chicken Is Dry and Overcooked
Solution: You likely used chicken breasts that were too thick or cooked at too high heat. Always pound to an even ¾-inch thickness and keep your heat at medium (not medium-high). Invest in an instant-read thermometer and pull the chicken at exactly 165°F—carryover cooking will bring it up another degree or two.
Problem 3: Coating Burns Before Chicken Cooks Through
Solution: Your pan was too hot. Reduce heat to medium-low and be patient. The butter-oil mixture should sizzle gently, not aggressively. If you notice the coating browning too fast, transfer the pan to a 375°F oven to finish cooking through (usually 8-10 minutes).
Problem 4: Coating Is Soggy, Not Crispy
Solution: Two likely culprits—too much oil in the pan (it should just coat the bottom) or you rested the chicken directly on a plate instead of a wire rack. The rack allows air circulation underneath, preventing steam from softening your hard-earned crispy coating.
Problem 5: Bland Flavor Despite Following Recipe
Solution: You probably used pre-grated cheese, which has less flavor. Invest in a wedge of Romano and grate it yourself. Also, make sure you’re seasoning the chicken itself before breading—that base layer of salt, pepper, and garlic powder is crucial for deep flavor.
Equipment Essentials
- Meat mallet or heavy skillet (for pounding chicken)
- 3 shallow bowls or pie plates (for breading station)
- 12-inch skillet (preferably heavy-bottomed)
- Wide spatula (for flipping without breaking coating)
- Instant-read thermometer (for perfect doneness)
- Wire cooling rack (for resting cooked chicken)
- Box grater or food processor (if grating cheese yourself)
- Plastic wrap or parchment paper (for pounding chicken)
Shopping List by Store Section
Meat Department
- 4 boneless, skinless chicken breasts (6-8 oz each)
Dairy Section
- 3 large eggs
- Whole milk
- Unsalted butter
- Romano cheese wedge (8 oz)
Pantry Aisle
- All-purpose flour
- Italian breadcrumbs
- Olive oil
- Dried parsley
- Dried oregano
- Paprika
- Garlic powder
Produce Section
- Fresh lemons
- Fresh parsley (for garnish)
Spice Section
- Salt
- Black pepper
Success Secrets for Perfect Chicken Romano
1. Room Temperature Matters: Let your chicken sit out for 10-15 minutes before cooking. Cold chicken straight from the fridge won’t cook evenly and tends to release moisture that can make your coating soggy.
2. The Press Test: After breading, press each piece between your palms for 5 seconds. This compacts the coating and helps it stick. It might seem odd, but this chef’s trick makes a huge difference in coating adhesion.
3. Oil Temperature Check: Not sure if your oil is hot enough? Drop a pinch of breadcrumbs into the pan. If they sizzle immediately and turn golden in 30 seconds, you’re ready. If they just sit there, wait another minute.
4. The Flip Technique: When flipping, slide your spatula completely under the chicken and support it with a fork on top as you turn. This prevents the coating from tearing or sliding off during that crucial moment.
5. Resting Is Non-Negotiable: Those 3-4 minutes of resting time aren’t optional. Cut into your Chicken Romano too early and all those delicious juices run out onto your cutting board instead of staying in the meat. Patience pays off with every juicy bite!
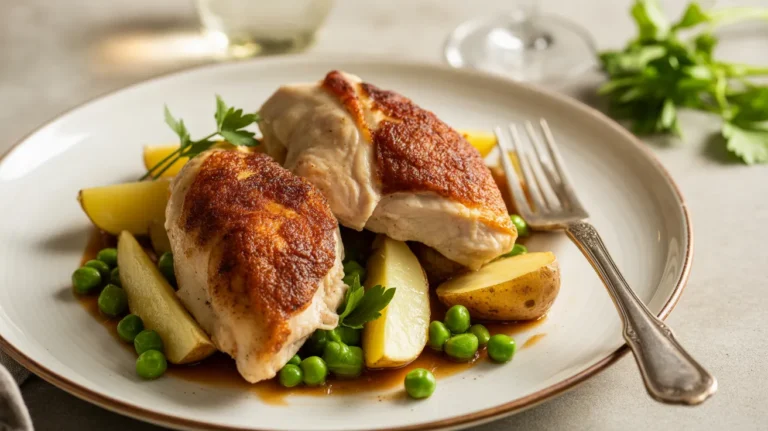
Serving Suggestion: Plate your golden Chicken Romano with a squeeze of fresh lemon, a sprinkle of chopped parsley, and your favorite sides. This pairs beautifully with buttery pasta, roasted vegetables, or a crisp Caesar salad. The crispy, cheesy crust and tender chicken create a restaurant-worthy meal that proves homemade always beats takeout!