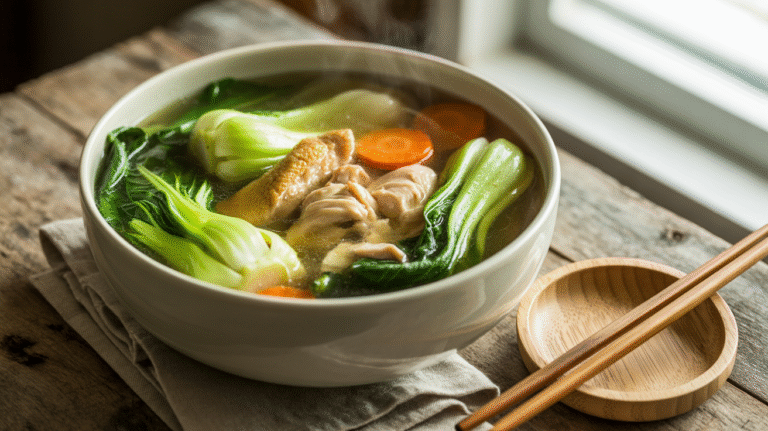
This authentic chicken sopas recipe creates the perfect Filipino comfort food with tender shredded chicken, creamy milk broth, and fresh vegetables. Our step-by-step chicken sopas guide makes this beloved soup easy for beginners, delivering restaurant-quality results with simple techniques and common ingredients that transform into pure comfort.
Meta Description: Learn how to make authentic chicken sopas with this beginner-friendly recipe. Step-by-step instructions for creamy Filipino comfort soup that serves 4 people perfectly.
SERVES: 4 | PREP: 20 MIN | COOK: 25 MIN | TOTAL: 45 MIN
Ingredients for Perfect Chicken Sopas
Protein & Base Ingredients
| Ingredient | Amount | Notes |
|---|---|---|
| Chicken thighs, bone-in | 2 lbs | Skin-on for best flavor |
| Chicken broth | 6 cups | Low-sodium preferred |
| Water | 2 cups | For cooking liquid |
| Macaroni pasta | 1 cup | Elbow or shells work too |
| Evaporated milk | 1 can (12 oz) | Room temperature |
Fresh Vegetables & Aromatics
| Ingredient | Amount | Preparation |
|---|---|---|
| Yellow onion | 1 medium | Diced fine |
| Garlic cloves | 4 pieces | Minced fresh |
| Carrots | 2 medium | Cut into ¼-inch rounds |
| Cabbage | 2 cups | Roughly chopped |
| Celery stalks | 2 pieces | Diced with leaves |
Essential Seasonings
| Ingredient | Amount | Purpose |
|---|---|---|
| Vegetable oil | 2 tbsp | For browning |
| Salt | 2 tsp | Season to taste |
| Black pepper | 1 tsp | Freshly ground best |
| Bay leaves | 2 pieces | Dried whole leaves |
| Fish sauce | 1 tbsp | Adds umami depth |
Detailed Chicken Sopas Instructions for Beginners
Phase 1: Preparing and Browning the Chicken (12 minutes)
Step 1: Heat Your Cooking Oil Properly Place a large, heavy-bottomed pot (at least 6-quart capacity) on your stove over medium-high heat. Add 2 tablespoons vegetable oil and let it heat for 1-2 minutes. The oil is ready when it shimmers and moves easily when you tilt the pot slightly. Don’t let it smoke – this means it’s too hot and will burn your chicken sopas base.
Step 2: Season the Chicken Thoroughly While the oil heats, remove 2 pounds bone-in chicken thighs from refrigerator. Pat each piece completely dry with paper towels – this is crucial for good browning. Moisture on the surface prevents proper browning and creates steam instead. Season both sides generously with 1 teaspoon salt and ½ teaspoon black pepper, pressing the seasonings into the meat with your hands.
Step 3: Brown the Chicken Skin-Side Down Carefully place chicken thighs in the hot oil, skin-side down. You should hear a nice sizzling sound immediately – if not, your oil isn’t hot enough yet. Don’t overcrowd the pot; work in batches if necessary. Let the chicken brown undisturbed for 5-6 minutes. Resist the urge to move or peek – proper browning takes patience and creates the flavor foundation for your chicken sopas.
Step 4: Check for Golden Brown Color After 5-6 minutes, gently lift one edge of a chicken thigh with tongs. The skin should be deep golden brown and release easily from the pot bottom. If it’s still pale or sticks when you try to lift it, cook for another 1-2 minutes. This browning process creates hundreds of flavor compounds that make your chicken sopas taste restaurant-quality.
Step 5: Brown the Second Side Flip each chicken thigh carefully using tongs – they may splatter a bit, so have a lid nearby to shield yourself. Brown the second side for 4-5 minutes until golden. The chicken doesn’t need to cook through completely at this stage; we’re just building flavor. Remove browned chicken to a clean plate and set aside.
Phase 2: Building the Aromatic Soup Base (10 minutes)
Step 6: Cook the Onions in Chicken Drippings Look at the bottom of your pot – you should see golden-brown bits and rendered chicken fat. This is liquid gold for flavor! Add 1 diced medium onion directly to these drippings without cleaning the pot. Cook over medium heat for 3-4 minutes, stirring occasionally with a wooden spoon. The onions should become translucent and start to caramelize slightly.
Step 7: Add Garlic at the Right Time Add 4 minced garlic cloves to the softened onions. Stir constantly and cook for just 30-45 seconds until you smell the garlic’s aroma. Be very careful here – garlic burns quickly and turns bitter if overcooked. If you smell any burning, remove the pot from heat immediately and stir vigorously.
Step 8: Return Chicken and Add Liquid Place the browned chicken thighs back into the pot, nestling them among the onions and garlic. Pour in 6 cups chicken broth and 2 cups water. The liquid should cover the chicken by about 1 inch – add more water if needed. Drop in 2 bay leaves and give everything a gentle stir.
Step 9: Bring to Proper Simmer Increase heat to high and bring the mixture to a rolling boil – you’ll see large bubbles breaking the surface constantly. Once boiling, immediately reduce heat to medium-low to maintain a gentle simmer. You should see small bubbles occasionally breaking the surface, not a vigorous boil. Cover the pot with a lid slightly ajar (leave a small gap for steam to escape).
Step 10: Cook Chicken Until Tender Simmer the chicken sopas base for 18-20 minutes. Check doneness by piercing the thickest part of a thigh with a knife – the juices should run clear, not pink. For food safety, use a meat thermometer to ensure internal temperature reaches 165°F. The meat should be tender enough to shred easily with a fork.
Phase 3: Shredding Chicken and Adding Vegetables (8 minutes)
Step 11: Remove and Cool Chicken Safely Using tongs, carefully lift each chicken thigh from the hot broth and place on a clean cutting board. Let cool for 3-4 minutes until safe to handle. Don’t skip this cooling time – hot chicken is difficult to handle and you risk burning yourself. The chicken will continue cooking slightly from residual heat.
Step 12: Shred Chicken Properly Remove and discard all skin and bones from the cooled chicken. Using two forks or your clean hands, shred the meat into bite-sized pieces about ½ inch wide. Don’t make the pieces too small – they’ll break apart more during cooking. Look for any small bone fragments and remove them carefully.
Step 13: Add Harder Vegetables First Return the pot with broth to medium heat if it’s not already simmering. Add 2 carrots cut into ¼-inch rounds and 2 diced celery stalks to the broth. These harder vegetables need more cooking time. Simmer for 5-6 minutes until carrots are tender when pierced with a fork but still have slight firmness.
Step 14: Cook Macaroni in the Broth Add 1 cup macaroni pasta to the simmering broth with vegetables. Stir gently to prevent sticking and separate any pieces that clump together. Cook according to package directions minus 1 minute – if the package says 8 minutes, cook for 7 minutes. The pasta will continue cooking in the hot soup, and this prevents it from becoming mushy in your finished chicken sopas.
Phase 4: Final Assembly and Seasoning (5 minutes)
Step 15: Return Shredded Chicken Add all the shredded chicken back to the pot with the cooked pasta and vegetables. Stir gently to distribute evenly throughout the soup. The chicken will heat through quickly since it’s already cooked.
Step 16: Add Cabbage for Texture Add 2 cups roughly chopped cabbage to the pot. Stir once and cook for just 2-3 minutes until the cabbage wilts but still has a slight crunch. Overcooking cabbage makes it mushy and sulfurous-smelling, which ruins the fresh taste of your chicken sopas.
Step 17: Add Evaporated Milk Carefully This is the most critical step for creamy chicken sopas! Remove the pot from heat completely. Let it cool for 30 seconds, then slowly pour in 1 can (12 oz) evaporated milk while stirring constantly with a wooden spoon. Pour in a thin stream, not all at once, to prevent curdling. The milk should blend smoothly into the broth.
Step 18: Season and Final Cooking Return pot to very low heat. Add 1 tablespoon fish sauce, 1 teaspoon salt, and ½ teaspoon black pepper. Stir gently and taste – adjust seasoning as needed. The fish sauce adds essential umami depth to authentic chicken sopas. Simmer on low heat for 2-3 minutes until everything is heated through.
Step 19: Final Checks and Serving Remove and discard the bay leaves – they’ve done their job of adding subtle flavor. Taste one final time and adjust salt if needed. The finished chicken sopas should be creamy but not too thick, with tender chicken, perfectly cooked pasta, and crisp-tender vegetables. Serve immediately in bowls while hot.
Professional Chef’s Notes for Chicken Sopas Success
Chicken Selection for Best Results: Bone-in, skin-on chicken thighs create the richest, most flavorful broth for chicken sopas. The bones release gelatin during cooking, creating natural body and richness that boneless cuts simply cannot match.
Temperature Control for Creamy Texture: The secret to perfectly creamy chicken sopas lies in temperature control when adding evaporated milk. Never add milk to boiling liquid – it will curdle immediately and create an unappetizing separated texture.
Pasta Timing Strategy: Slightly undercook your macaroni initially since it continues cooking in the hot soup. This technique prevents mushy noodles and maintains perfect texture even when reheating leftover chicken sopas.
Vegetable Texture Management: Add vegetables based on their cooking requirements – hard vegetables like carrots first, then softer ones like cabbage last. This ensures every component finishes with ideal texture.
Chicken Sopas Nutrition Information (Per Serving)
- Calories: 485
- Protein: 32g
- Carbohydrates: 28g
- Fat: 24g
- Fiber: 3g
- Sodium: 1,240mg
Creative Chicken Sopas Variations
Seafood Sopas Adventure
Transform your chicken sopas into a coastal delight by replacing chicken with 1 pound mixed seafood (shrimp, fish fillets, scallops). Add seafood during the last 5 minutes of cooking to prevent overcooking. This elegant variation pairs beautifully with the creamy base.
Hearty Vegetarian Sopas
Create plant-based comfort by using vegetable broth and adding 1 cup diced firm tofu plus extra vegetables like bell peppers, green beans, and mushrooms. Season with extra fish sauce alternative or soy sauce for umami depth.
Spicy Chicken Sopas Kick
Add heat to your chicken sopas with 2 diced jalapeños cooked with the onions and 1 teaspoon red pepper flakes. The spice balances beautifully with the creamy milk base, creating a warming soup similar to our popular caldo de pollo with its bold flavors.
Cheesy Sopas Supreme
Elevate your chicken sopas by stirring in 1 cup shredded cheddar cheese just before serving. The cheese melts into the creamy soup, creating an ultra-rich version that rivals any chicken corn soup for pure comfort factor.
Proper Chicken Sopas Storage & Reheating
Refrigerator Storage Method
Store leftover chicken sopas in airtight containers for up to 3 days in the refrigerator. The flavors actually improve overnight as all ingredients meld together, making day-two soup even more delicious.
Freezing Instructions
Freeze chicken sopas portions in freezer-safe containers for up to 2 months. Note that pasta texture may change slightly after freezing – the noodles might become softer, but the flavor remains excellent.
Gentle Reheating Technique
Reheat chicken sopas slowly over low heat, stirring frequently to prevent scorching. Add 2-3 tablespoons milk or chicken broth if the soup has thickened too much during storage. Never boil reheated soup – gentle warming preserves the creamy texture.

Chicken Sopas Troubleshooting Guide
Problem: Curdled Evaporated Milk
Solution: If your evaporated milk curdles, remove from heat immediately and whisk vigorously. The soup may still be salvageable. Prevention: Always add milk to cooled soup off the heat, stirring constantly.
Problem: Mushy, Overcooked Pasta
Solution: For future batches, cook pasta separately and add just before serving if making ahead. For immediate serving, undercook pasta by 1-2 minutes initially since it continues cooking in the hot soup.
Problem: Bland, Flavorless Chicken Sopas
Solution: Increase fish sauce gradually – it’s the secret umami booster that authentic chicken sopas requires. Also ensure you’re properly browning the chicken for maximum flavor development in the base.
Problem: Too Thin, Watery Consistency
Solution: Mix 2 tablespoons all-purpose flour with ¼ cup cold milk until smooth, then stir into the soup. Simmer for 3-4 minutes until thickened to desired consistency.
Problem: Vegetables Too Soft and Mushy
Solution: Add vegetables in proper stages based on cooking time requirements. Carrots and celery need 5-6 minutes, while cabbage needs only 2-3 minutes for perfect texture in chicken sopas.
Essential Equipment for Chicken Sopas
- Large heavy-bottomed pot (6-8 quart capacity minimum)
- Sharp chef’s knife for efficient vegetable preparation
- Separate cutting boards (one for raw chicken, one for vegetables)
- Wooden spoon for stirring without scratching pot surface
- Tongs for safely handling hot chicken pieces
- Ladle for serving hot soup into bowls
- Measuring cups and spoons for accurate ingredient portions
- Instant-read meat thermometer for food safety verification
Organized Chicken Sopas Shopping List
Meat Counter Section
- Bone-in chicken thighs, skin-on (2 lbs)
Dairy Refrigerated Section
- Evaporated milk (1 can, 12 oz)
Fresh Produce Section
- Yellow onion (1 medium)
- Fresh garlic bulb (1 whole bulb)
- Carrots (2 medium)
- Fresh cabbage (1 small head)
- Celery bunch (1 complete bunch)
Pantry Dry Goods
- Macaroni pasta (1 standard box)
- Chicken broth (48 oz container)
- Vegetable oil for cooking
- Salt, black pepper, dried bay leaves
- Fish sauce (small bottle)
Top 5 Chicken Sopas Success Secrets
1. Brown Your Chicken Thoroughly First Never skip the browning step – this creates the deep flavor foundation that separates homemade chicken sopas from bland soup. Proper browning takes patience but delivers restaurant-quality results.
2. Choose Bone-In, Skin-On Chicken Thighs Always use thighs instead of breasts for chicken sopas. The extra fat and collagen create a naturally richer, more satisfying broth that doesn’t require artificial thickeners.
3. Master the Milk Addition Technique Add evaporated milk off heat while stirring constantly. This single technique prevents curdling and ensures the silky, creamy texture that makes chicken sopas so comforting.
4. Season in Layers Throughout Cooking Taste and adjust seasoning multiple times during cooking. The fish sauce should enhance all other flavors without overpowering – it’s the secret ingredient that makes authentic chicken sopas taste complete.
5. Serve Immediately for Best Results Chicken sopas tastes best when served fresh and hot. If making ahead, store pasta separately and combine just before serving to prevent mushy noodles and maintain perfect texture.
This complete chicken sopas recipe delivers authentic Filipino comfort food that transforms simple ingredients into satisfying, restaurant-quality soup. Perfect for family dinners, cold weather, or anytime you crave something warm and nourishing, this chicken sopas guide ensures success every time.


