Prep Time: 15 minutes | Cook Time: 20 minutes | Total Time: 35 minutes | Servings: 4
Key Takeaways
- Sweet and savory chicken teriyaki noodles ready in just 35 minutes
- Simple pantry ingredients make this an easy weeknight dinner option
- Customize with your choice of vegetables for a balanced meal
- Meal-prep friendly – stores well for up to 3 days in the refrigerator
Introduction
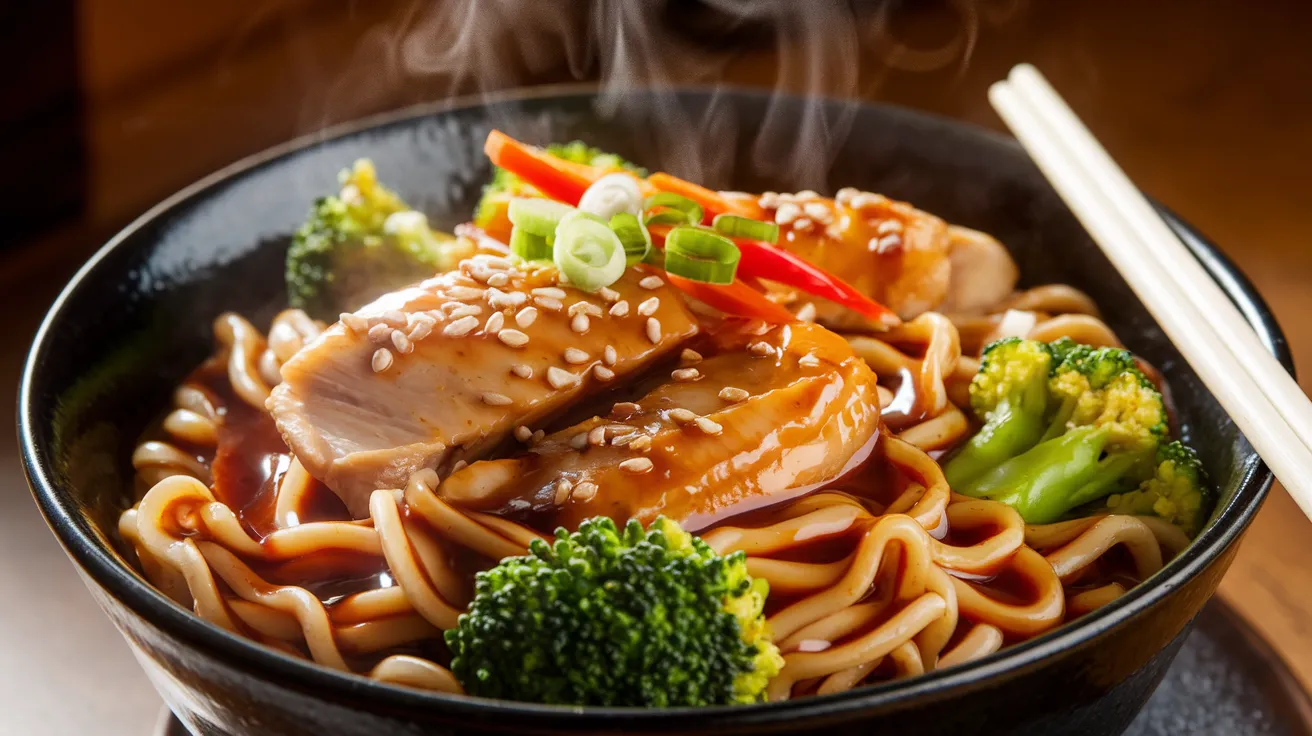
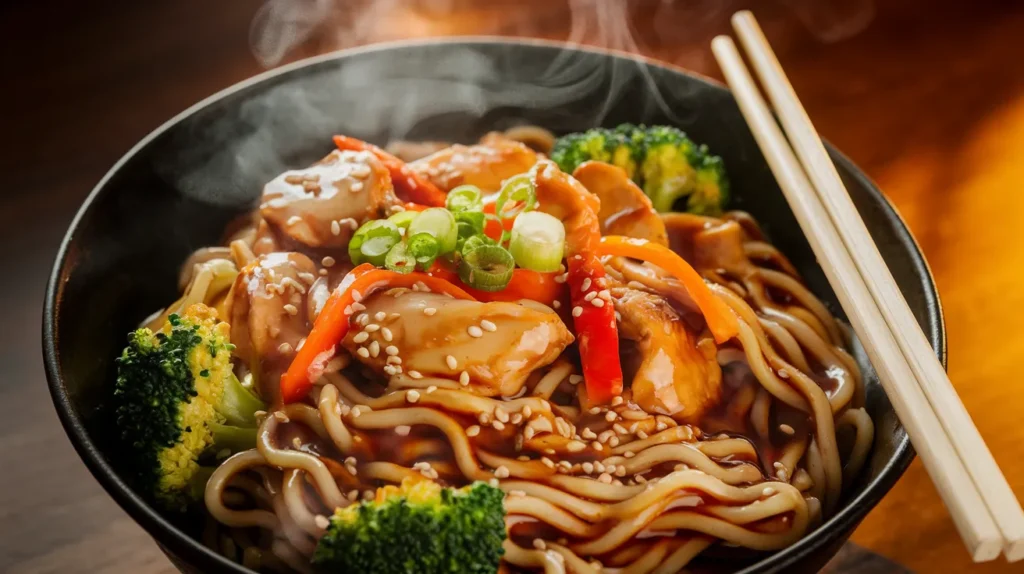
Want restaurant-quality chicken teriyaki noodles without the takeout price? This chicken teriyaki noodles recipe delivers bold flavors in every bite. With juicy chicken, tender noodles, and a sticky-sweet teriyaki sauce, this dish brings the authentic flavors of Japanese cuisine straight to your kitchen.
Perfect for busy weeknights when you need a quick but impressive meal, this recipe serves four people and takes just 35 minutes from start to finish. Let’s get cooking!
Nutrition Information
| Nutrient | Amount per Serving |
|---|---|
| Calories | 420 |
| Protein | 28g |
| Carbohydrates | 58g |
| Fat | 10g |
| Fiber | 4g |
| Sugar | 18g |
| Sodium | 890mg |
Equipment & Ingredients
Kitchen Tools
| Tool | Purpose |
|---|---|
| Large pot | For boiling noodles |
| Large skillet or wok | For cooking chicken and combining ingredients |
| Cutting board | For prepping ingredients |
| Sharp knife | For cutting chicken and vegetables |
| Mixing bowl | For marinating chicken |
| Measuring cups and spoons | For accurate measurements |
| Tongs | For tossing noodles |
| Wooden spoon | For stirring |
Ingredients List
| Ingredient | Measurement | Notes |
|---|---|---|
| For the Chicken & Noodles | ||
| Boneless, skinless chicken thighs | 1.5 pounds | Cut into 1-inch pieces |
| Egg noodles or udon noodles | 12 ounces | |
| Broccoli florets | 2 cups | Cut into bite-sized pieces |
| Red bell pepper | 1 | Thinly sliced |
| Carrots | 2 medium | Julienned |
| Green onions | 4 | Sliced, whites and greens separated |
| Garlic | 4 cloves | Minced |
| Fresh ginger | 1 tablespoon | Grated |
| Vegetable oil | 2 tablespoons | For cooking |
| Sesame seeds | 1 tablespoon | For garnish |
| For the Teriyaki Sauce | ||
| Soy sauce | 1/2 cup | Low-sodium recommended |
| Mirin | 1/4 cup | Rice wine |
| Brown sugar | 3 tablespoons | |
| Honey | 2 tablespoons | |
| Rice vinegar | 1 tablespoon | |
| Sesame oil | 1 teaspoon | |
| Cornstarch | 1 tablespoon | Mixed with 2 tablespoons water |
Optional Substitutions
- Noodles: Swap egg or udon noodles for soba, rice noodles, or even spaghetti
- Protein: Use chicken breast instead of thighs, or substitute with tofu for a vegetarian option
- Vegetables: Add snow peas, mushrooms, baby corn, or any vegetables you enjoy
- Mirin: If unavailable, use 1/4 cup of dry white wine mixed with 1 teaspoon of sugar
- Soy sauce: Use tamari for a gluten-free option
- Brown sugar: Substitute with coconut sugar or regular white sugar
Step-by-Step Instructions
Preparation Phase
- Prepare your workspace
- Find a clean, flat counter space where you can work comfortably
- Wash your hands thoroughly with soap and warm water for at least 20 seconds
- Take out all equipment (pots, pans, utensils) and place them within easy reach
- Place a trash bin or bowl for scraps nearby to keep your area clean as you work
- Fill a large pot (at least 4-quart capacity) with water about 3/4 full
- Place the pot on your largest burner but don’t turn it on yet
- Prep the chicken
- Open the package of chicken thighs over your sink to catch any juices
- Use paper towels to pat each piece of chicken dry (this helps them brown better)
- Place chicken on a clean cutting board designated for raw meat
- Hold your knife with your dominant hand, keeping fingers curled under to avoid cuts
- Cut each chicken thigh into evenly sized 1-inch pieces (about the size of a dice)
- Beginner tip: Partially freezing the chicken for 15 minutes makes it easier to cut
- Place cut pieces in a clean bowl, cover, and set aside
- Wash your hands immediately after handling raw chicken
- Clean the cutting board with hot, soapy water or place in dishwasher
- Prepare the vegetables
- Fill a clean bowl with cold water
- Place broccoli, bell pepper, and carrots in the water and swish around to clean
- Drain vegetables in a colander and pat dry with paper towels
- Place vegetables on a clean cutting board (different from the one used for chicken)
- For broccoli: Hold the stem and use your knife to cut off the florets, then cut larger florets into bite-sized pieces (about 1-1.5 inches)
- For bell pepper: Stand the pepper upright on your cutting board. Cut down along each side to remove the flesh from the core. Discard the stem, seeds, and white membranes. Place each pepper piece flat on the board and slice into thin strips about 1/4 inch wide
- For carrots: Peel each carrot using a vegetable peeler, moving from the thick end to the thin end. Cut off and discard the top and bottom. Cut each carrot in half lengthwise, then place flat side down and cut into thin planks. Stack the planks and cut into matchsticks (julienne)
- For green onions: Cut off and discard the root ends and any wilted parts at the top. Separate the white/light green parts from the dark green parts. Slice both portions thinly (about 1/8 inch rings), keeping them in separate piles
- For garlic: Place a clove on your cutting board and place the flat side of your knife on top. Carefully press down with the heel of your hand to crush the clove, making it easier to peel. Remove the papery skin. Mince the peeled garlic by cutting it into very small pieces (about the size of a grain of rice)
- For ginger: Use the edge of a spoon to scrape off the skin. Grate the peeled ginger using the small holes of a box grater or a microplane
- Place each prepped ingredient in separate small bowls or pile them neatly on your cutting board
- Make the teriyaki sauce
- Get a medium-sized mixing bowl
- Carefully measure each sauce ingredient:
- Pour 1/2 cup soy sauce into the bowl
- Add 1/4 cup mirin (it should reach halfway up the 1/2 cup measure)
- Add 3 tablespoons brown sugar (use a measuring spoon, not a regular spoon)
- Add 2 tablespoons honey (spray the measuring spoon with a tiny bit of oil first so the honey slides off easily)
- Add 1 tablespoon rice vinegar
- Add 1 teaspoon sesame oil (be careful – it’s strong!)
- Use a whisk or fork to stir the mixture until the sugar is completely dissolved (about 30-60 seconds of stirring)
- In a separate small bowl, add 1 tablespoon cornstarch
- Add 2 tablespoons cold water to the cornstarch
- Stir vigorously with a fork until the mixture is smooth with no lumps (this is your cornstarch slurry)
- Set both the sauce mixture and cornstarch slurry aside, but keep them separate for now
Cooking Phase
- Cook the noodles
- Place the large pot of water on the stove and turn heat to high
- Cover the pot with a lid to help the water boil faster
- When you see large bubbles breaking the surface rapidly, the water is boiling
- Add 1 tablespoon of salt to the boiling water (this flavors the noodles)
- Remove the package of noodles and check the cooking instructions
- Add noodles to the pot, stirring gently with a wooden spoon to separate them
- Set a timer for 1 minute less than the package instructions (ex: if it says 5 minutes, set timer for 4 minutes)
- Stir occasionally during cooking to prevent sticking
- Test for doneness: Remove one noodle with a fork, run it under cold water for a few seconds, then taste it. It should be tender but still slightly firm (al dente)
- Once done, place a colander in the sink
- Carefully pour the noodles and hot water into the colander (tilt the pot away from you to avoid steam burns)
- Immediately rinse noodles with cold water to stop the cooking process
- Gently shake the colander to remove excess water
- Beginner tip: If not using immediately, toss with 1 teaspoon of oil to prevent sticking
- Cook the chicken
- Place your large skillet or wok on the stove over medium-high heat
- Add 1 tablespoon of vegetable oil to the pan
- Wait about 30 seconds for the oil to heat up – you’ll know it’s ready when it moves around the pan easily and shimmers slightly
- Safety tip: The pan should not be smoking. If it starts to smoke, reduce the heat
- Using clean tongs or a spoon, place chicken pieces in the pan in a single layer
- Important: Leave space between pieces – if they’re too crowded, they’ll steam instead of brown. Cook in batches if necessary
- Let the chicken cook undisturbed for 2-3 minutes (resist the urge to move it around!)
- Look for golden-brown color on the bottom side
- Using tongs or a spatula, flip each piece of chicken over
- Cook for another 2-3 minutes until both sides are golden and the center is no longer pink
- Safety check: Cut into the thickest piece – the juice should run clear and there should be no pink in the center
- Use a clean spoon or tongs to transfer the cooked chicken to a clean plate
- If cooking in batches, repeat these steps until all chicken is cooked
- Cook the vegetables
- Using the same skillet (don’t clean it – the brown bits add flavor!), add remaining 1 tablespoon of oil
- When oil is hot, add the white parts of green onions and stir for 10 seconds
- Add minced garlic and grated ginger
- Stir continuously for 30 seconds until fragrant (be careful not to burn the garlic – it can become bitter)
- Add broccoli florets, bell pepper strips, and carrot julienne to the pan
- Stir-fry for 3-4 minutes, moving vegetables around frequently with a wooden spoon or spatula
- Checking doneness: Vegetables should start to soften but still have some crunch – you should be able to pierce broccoli with a fork with some resistance
- Beginner tip: If vegetables are browning too quickly, reduce heat to medium
- Beginner tip: If pan seems dry, add 1-2 tablespoons of water and cover for 1 minute to steam-cook
- Combine everything
- Return cooked chicken pieces to the skillet with the vegetables
- Pour in the teriyaki sauce mixture (not the cornstarch slurry yet) and stir to combine
- Increase heat to medium-high if you lowered it
- Bring the sauce to a simmer – you’ll see small bubbles forming around the edge of the pan
- Give your cornstarch slurry another quick stir (it may have settled)
- While stirring the pan contents constantly, slowly pour in the cornstarch slurry
- Continue stirring for 1-2 minutes until the sauce thickens enough to coat the back of a spoon
- Visual cue: Sauce is thick enough when you can draw a line with your finger on the back of a coated spoon and the line remains
- Reduce heat to low
- Add cooked, drained noodles to the skillet
- Using tongs, gently lift and turn the noodles to coat them evenly with sauce
- Continue tossing for about 1 minute until everything is well combined and heated through
- Beginner tip: If the mixture seems too dry, add 1-2 tablespoons of water; if too wet, simmer for 1-2 minutes longer
Finishing Steps
- Serve the dish
- Turn off the heat under the skillet
- Sprinkle half of the sesame seeds and half of the green onion tops over the noodles
- Use tongs to toss once more, distributing the garnishes
- Get four serving plates or bowls ready
- Use tongs to portion the noodles evenly onto the plates (about 1.5 cups per serving)
- Make sure each serving has a good mix of chicken, vegetables, and noodles
- Sprinkle remaining sesame seeds and green onion tops over each portion
- Serve immediately while hot
- Optional: Place extra soy sauce or sriracha on the table for those who want additional seasoning
Troubleshooting
Common Issues and Solutions
Problem: Sauce is too thin
- Solution: Mix an additional teaspoon of cornstarch with 1 tablespoon cold water and stir into the sauce. Bring to a simmer while stirring until thickened.
- Why this happens: You may have added too much liquid or not cooked the sauce long enough after adding the cornstarch slurry.
Problem: Sauce is too thick
- Solution: Add 1-2 tablespoons of water or chicken broth, one at a time, stirring until you reach desired consistency.
- Why this happens: Too much cornstarch or cooking the sauce too long can make it overly thick.
Problem: Chicken is dry
- Solution: Next time, don’t cook the chicken for as long. Chicken thighs should be cooked to 165°F (74°C).
- Why this happens: Overcooking or using very small chicken pieces that cook too quickly.
Problem: Noodles clumped together
- Solution: If you notice clumping before mixing with sauce, rinse again under warm water and separate with your fingers. After mixing, add a tablespoon of warm water and toss.
- Why this happens: Not rinsing noodles thoroughly or letting them sit too long before using.
Problem: Vegetables are too crunchy
- Solution: Add 2 tablespoons of water to the pan, cover with a lid, and steam for 1-2 minutes.
- Why this happens: Inadequate cooking time or vegetables cut too thick.
Problem: Vegetables are too soft
- Solution: Unfortunately, this can’t be fixed after cooking. Next time, cook for less time or cut vegetables into larger pieces.
- Why this happens: Cooking too long or cutting vegetables too small.
Problem: Dish lacks flavor
- Solution: Add an extra tablespoon of soy sauce or a teaspoon of sriracha for heat. A splash of rice vinegar can brighten flavors.
- Why this happens: Under-seasoning or not letting sauce reduce enough to concentrate flavors.
Variations & Substitutions
Dietary Modifications
Gluten-Free Version
- Use tamari instead of soy sauce (check label to ensure it’s gluten-free)
- Choose rice noodles or 100% buckwheat soba noodles (verify packaging says “gluten-free”)
- Ensure your mirin is gluten-free (some brands contain wheat)
Vegetarian Option
- Replace chicken with 14 oz extra-firm tofu, pressed and cubed
- Press tofu by wrapping in paper towels, placing a heavy book on top for 30 minutes
- Cut tofu into 1-inch cubes and cook until golden on all sides (about 2-3 minutes per side)
- Use vegetable broth instead of chicken broth if needed
Lower Sugar Option
- Reduce brown sugar to 1 tablespoon
- Use 1 tablespoon honey instead of 2
- Add a touch more rice vinegar (1/2 teaspoon) to balance flavors
Flavor Variations
Spicy Chicken Teriyaki Noodles
- Add 1-2 teaspoons of sriracha or 1/4 teaspoon of red pepper flakes when making the sauce
- Garnish with thinly sliced fresh jalapeño
Peanut Chicken Teriyaki
- Add 2 tablespoons of peanut butter to the sauce while simmering
- Garnish with 2 tablespoons of chopped peanuts instead of sesame seeds
Citrus Teriyaki
- Add the zest of one orange (use the small holes of a grater to remove just the orange part of the peel)
- Add 2 tablespoons of fresh orange juice to the sauce
- Garnish with a few thin orange slices
Storage & Reheating
Proper Storage
- Refrigeration:
- Allow leftovers to cool completely (no more than 2 hours at room temperature)
- Transfer to airtight containers, separating into meal-sized portions
- Store in refrigerator for up to 3 days
- Beginner tip: Glass containers work best as they won’t stain from the sauce
- Freezing:
- While possible, freezing is not recommended as the noodles and vegetables may become mushy when thawed
- If you must freeze, store in freezer-safe containers for up to 1 month
- Thaw overnight in the refrigerator before reheating
Reheating Instructions
- Microwave Method:
- Place a single portion in a microwave-safe dish
- Add 1 tablespoon of water and stir gently
- Cover with a microwave-safe lid or damp paper towel
- Heat on 70% power for 1 minute
- Stir the noodles to distribute heat
- Continue heating in 30-second intervals until steaming hot (internal temperature of 165°F/74°C)
- Let stand for 1 minute before eating
- Stovetop Method:
- Place a non-stick skillet over medium heat
- Add 1-2 tablespoons of water to the pan
- Add leftover noodles to the pan
- Cover with a lid and heat for 3-4 minutes
- Remove lid and stir occasionally until heated through
- Add a splash of soy sauce (about 1/2 teaspoon) to refresh flavors
- If noodles seem dry, add 1 tablespoon of water and stir
Safety Notes & Tips
Food Safety
- Always wash hands thoroughly with soap for at least 20 seconds before and after handling raw chicken
- Use separate cutting boards for meat and vegetables to prevent cross-contamination
- Clean all surfaces that come in contact with raw chicken using hot, soapy water
- Ensure chicken reaches an internal temperature of 165°F (74°C) – use a food thermometer if available
- Refrigerate leftovers within 2 hours of cooking (1 hour if room temperature is above 90°F/32°C)
- Never thaw frozen leftovers at room temperature – always thaw in the refrigerator
Tips for Success
- For more flavor: Marinate the chicken in 2 tablespoons of soy sauce and 1 teaspoon of grated ginger for 15-30 minutes before cooking
- For perfect noodles: Set a timer and taste-test before draining. They should be slightly firmer than you want in the final dish
- For easier vegetable prep: Cut all vegetables before starting to cook anything else
- For consistent cooking: Try to cut all chicken pieces roughly the same size so they cook evenly
- For meal prep: Keep sauce separate until ready to serve to prevent noodles from absorbing too much liquid and becoming soggy
- For less mess: Clean as you go – wash utensils and bowls while waiting for things to cook
- For presentation: Reserve some sliced green onions and sesame seeds to sprinkle just before serving
Time-Saving Tips
- Pre-cut vegetables can save time during preparation
- Make the sauce up to 3 days ahead and store in the refrigerator
- Use pre-minced garlic and ginger (found in the produce section) to reduce prep time
- Cook extra chicken and freeze in portion sizes for quick future meals
- Measure out all ingredients before starting to cook (this is called “mise en place”)