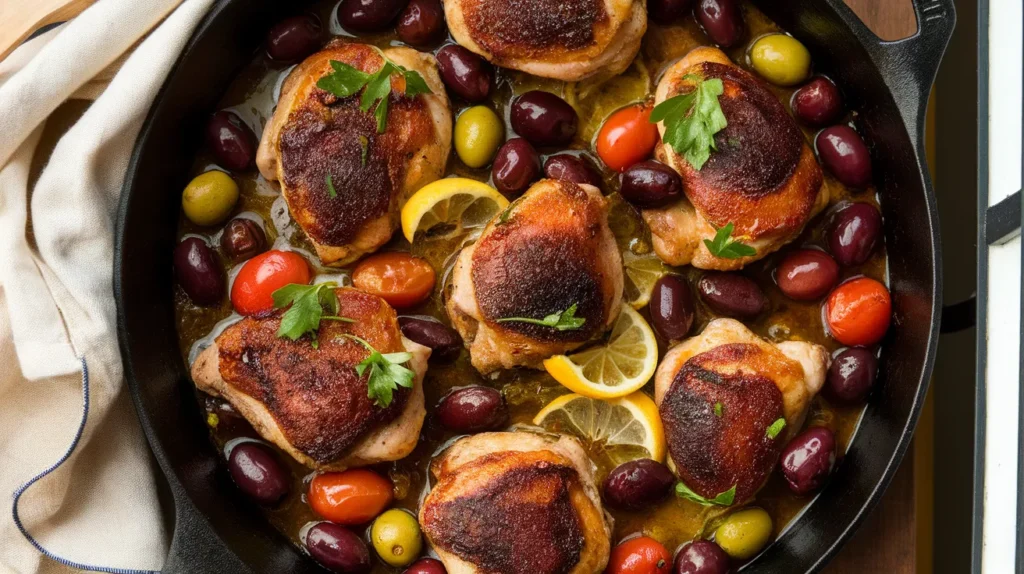
Craving bold Mediterranean flavors? This chicken with olives recipe transforms humble ingredients into a restaurant-worthy dish that’s surprisingly simple. Tender chicken pieces swim in a savory olive-studded sauce with garlic, tomatoes, and fresh herbs—perfect for busy weeknights when you want something special without the fuss.
SERVES: 4 | PREP: 15 MIN | COOK: 35 MIN | TOTAL: 50 MIN
Ingredients You’ll Need
For the Chicken
| Ingredient | Amount |
|---|---|
| Chicken thighs, bone-in, skin-on | 8 pieces (about 2.5 lbs) |
| Olive oil | 2 tablespoons |
| Salt | 1 teaspoon |
| Black pepper | ½ teaspoon |
| Paprika | 1 teaspoon |
For the Olive Sauce
| Ingredient | Amount |
|---|---|
| Kalamata olives, pitted | 1 cup |
| Green olives, pitted | ½ cup |
| Garlic cloves, minced | 4 large |
| Cherry tomatoes, halved | 1 pint |
| White wine (or chicken broth) | ½ cup |
| Chicken broth | ¾ cup |
| Fresh thyme | 4 sprigs |
| Fresh rosemary | 2 sprigs |
| Lemon, sliced | 1 medium |
| Red pepper flakes | ¼ teaspoon |
For Finishing
| Ingredient | Amount |
|---|---|
| Fresh parsley, chopped | ¼ cup |
| Lemon juice | 2 tablespoons |
How to Make Chicken with Olives: Step-by-Step
Phase 1: Preparing the Chicken (5 minutes)
Step 1: Take your chicken thighs out of the refrigerator 20 minutes before cooking. This brings them to room temperature, which helps them cook evenly throughout. Pat each piece completely dry with paper towels—this is crucial because moisture prevents that beautiful golden-brown skin we’re after.
Step 2: Mix together the salt, black pepper, and paprika in a small bowl. Season both sides of each chicken thigh generously with this spice mixture. Don’t be shy here—the seasoning creates that flavorful crust. Let the seasoned chicken sit for 5 minutes while you prep your other ingredients.
Step 3: Drain your olives thoroughly and pat them dry with paper towels. If your olives still have pits, remove them now using a paring knife or olive pitter. Why this matters: Wet olives can cause dangerous oil splatter when they hit the hot pan, and unpitted olives are an unpleasant surprise for your guests.
Phase 2: Searing the Chicken (12 minutes)
Step 4: Heat a large, deep skillet or Dutch oven over medium-high heat for 2 minutes. Add the olive oil and swirl to coat the bottom evenly. You’ll know it’s ready when the oil shimmers and moves easily across the pan—but not smoking, which means it’s too hot.
Step 5: Carefully place chicken thighs skin-side down in the pan, making sure they’re not touching each other. You should hear an immediate sizzle. Don’t move them! This is the hardest part—resist the urge to peek for at least 6 minutes. Moving them prevents that crispy golden skin from forming.
Step 6: After 6-7 minutes, use tongs to lift one piece and check underneath. You’re looking for deep golden-brown color with crispy edges. If it’s pale or sticks to the pan, give it another minute. Once properly browned, flip each piece and cook the other side for 5 minutes.
Step 7: The chicken doesn’t need to be fully cooked yet—we’re just creating flavor and texture. Transfer the seared chicken to a plate and don’t worry if the inside looks pink. That’s exactly what we want at this stage.
Phase 3: Building the Olive Sauce (8 minutes)
Step 8: Lower your heat to medium. In the same pan with all those delicious browned bits, add your minced garlic. Stir constantly for 30-45 seconds until fragrant and just starting to turn golden. Safety tip: Garlic burns quickly and turns bitter, so watch it closely and keep stirring.
Step 9: Immediately add both types of olives to the pan and stir them around for 1 minute. This toasts them slightly and helps them release their briny flavor into the oil. You’ll smell a wonderful Mediterranean aroma at this point.
Step 10: Pour in the white wine (or chicken broth if you prefer). Use a wooden spoon to scrape up all those brown bits stuck to the bottom of the pan—this is called deglazing, and it’s where tons of flavor lives. Let the wine bubble vigorously for 2 minutes to cook off the alcohol.
Step 11: Add the chicken broth, cherry tomatoes, red pepper flakes, thyme sprigs, and rosemary sprigs. Stir everything together and bring to a gentle simmer. The tomatoes will start to soften and release their juices, creating a beautiful sauce base.
Phase 4: Braising to Perfection (25 minutes)
Step 12: Nestle the chicken thighs back into the pan, skin-side up this time. Arrange the lemon slices around and on top of the chicken pieces. The lemon adds brightness and helps tenderize the meat as it cooks.
Step 13: Reduce heat to medium-low so the liquid maintains a gentle simmer—you should see small bubbles breaking the surface occasionally, not a rolling boil. Why this matters: Too high heat will make the chicken tough and dry; too low won’t cook it properly.
Step 14: Cover the pan with a lid, leaving it slightly ajar (about 1 inch gap) to let steam escape. Cook for 20 minutes without lifting the lid. This steamy environment keeps the chicken incredibly moist while it finishes cooking.
Step 15: After 20 minutes, remove the lid and check the internal temperature with a meat thermometer inserted into the thickest part of a thigh (avoid hitting bone). You’re looking for 165°F. If it’s not there yet, cover and cook for 5 more minutes, then check again.
Step 16: Once the chicken reaches 165°F, increase heat to medium-high and let the sauce bubble uncovered for 5 minutes. This concentrates the flavors and thickens the sauce slightly. The tomatoes should be completely soft and jammy now.
Phase 5: Final Touches (3 minutes)
Step 17: Remove the pan from heat and fish out the herb sprigs—they’ve given their flavor and look scraggly now. Stir in the fresh lemon juice and half of the chopped parsley. Taste the sauce and add more salt if needed, remembering that olives are already salty.
Step 18: Let the dish rest for 3-5 minutes before serving. This allows the juices to redistribute through the chicken, making every bite tender and juicy. Sprinkle the remaining parsley over the top just before bringing to the table for a pop of fresh color.
Chef’s Notes for Restaurant-Quality Results
Olive Selection Matters: Using a mix of Kalamata and green olives creates complexity—the Kalamatas bring deep, wine-like notes while green olives add bright, sharp contrast. If you only have one type, use what you’ve got, but the combination truly elevates this chicken with olives recipe.
Skin-On is Non-Negotiable: Boneless, skinless chicken breasts simply won’t work here. The skin protects the meat during the long simmer and becomes wonderfully crispy. The bones add incredible flavor to the sauce. Trust the process—the slightly higher fat content is what makes this dish memorable.
Wine Substitution: If you’re skipping the wine, use chicken broth but add 1 tablespoon of white wine vinegar to mimic that acidic brightness wine provides. The sauce needs that tang to balance the rich olives and chicken fat.
Make It Ahead: This dish actually tastes better the next day after flavors meld. Cook completely, refrigerate in the pan covered with foil, then reheat gently over medium-low heat for 15 minutes. Add a splash of broth if the sauce seems too thick.
Nutrition Information (Per Serving)
| Nutrient | Amount |
|---|---|
| Calories | 485 |
| Protein | 38g |
| Carbohydrates | 9g |
| Fat | 32g |
| Saturated Fat | 7g |
| Fiber | 2g |
| Sodium | 890mg |
Creative Variations to Try
Greek-Style with Feta: Add ½ cup crumbled feta cheese during the last 5 minutes of cooking and garnish with fresh oregano instead of parsley. The creamy, tangy cheese melts slightly into the sauce, creating pockets of richness. This version pairs beautifully with the bold flavors in our orange glazed chicken thighs for a complete Mediterranean feast.
Spicy North African: Replace paprika with 1 teaspoon cumin and ½ teaspoon cinnamon. Add ½ cup diced dried apricots with the olives and increase red pepper flakes to ½ teaspoon. The sweet-spicy combination transforms this into a Moroccan-inspired masterpiece.
Creamy Tuscan Version: After removing the chicken in step 18, stir ½ cup heavy cream and 2 tablespoons sun-dried tomato paste into the sauce. Bring to a simmer for 2 minutes, then return the chicken. This creates a luscious, restaurant-quality sauce that rivals our chicken with white sauce.
Provençal with Lavender: Add 1 teaspoon dried lavender with the herbs and substitute ½ cup sliced fennel for half the tomatoes. The floral notes create an elegant, French countryside flavor perfect for special occasions.
Storage & Reheating Guide
Refrigerator Storage: Transfer chicken with olives to an airtight container once cooled to room temperature (within 2 hours of cooking). It keeps beautifully for 4 days in the fridge. The sauce may solidify slightly due to the chicken fat—this is normal and actually shows you made it with quality ingredients.
Freezer Storage: This dish freezes exceptionally well for up to 3 months. Cool completely, then transfer to freezer-safe containers, leaving 1 inch of headspace for expansion. Label with the date and reheating instructions.
Reheating from Refrigerated: Place in a covered skillet over medium-low heat with 2-3 tablespoons of chicken broth. Heat for 12-15 minutes, stirring occasionally, until the internal temperature reaches 165°F. The gentle reheating prevents the chicken from drying out.
Reheating from Frozen: Thaw overnight in the refrigerator for best results. If you’re in a hurry, reheat from frozen over low heat for 25-30 minutes, stirring gently every 5 minutes and adding extra broth as needed.
Microwave Option: While not ideal, you can microwave individual portions in a covered dish at 50% power for 3-4 minutes, stirring halfway through. Add a tablespoon of water to prevent drying.
Troubleshooting Common Problems
Problem: Chicken skin is rubbery instead of crispy Solution: You didn’t dry the chicken well enough before searing, or your pan wasn’t hot enough. Next time, pat the chicken completely dry and wait for the oil to shimmer before adding the meat. You can also finish the dish under the broiler for 2-3 minutes to crisp up the skin—watch it closely to prevent burning.
Problem: Sauce is too salty Solution: Olives contain lots of sodium, and some brands are saltier than others. Add 1-2 peeled, cubed potatoes during the last 15 minutes of cooking—they’ll absorb excess salt. Remove them before serving. You can also balance saltiness by adding 1 teaspoon of honey or sugar and an extra squeeze of lemon juice.
Problem: Chicken is dry and overcooked Solution: You either cooked it at too high heat or for too long. Dark meat is forgiving, but it does have limits. Use a meat thermometer and remove from heat the moment it hits 165°F. If it’s already overcooked, shred the meat and mix it thoroughly with the sauce—the moisture will help mask the dryness.
Problem: Sauce is too thin and watery Solution: Your tomatoes released more liquid than expected, or you didn’t simmer uncovered long enough at the end. Remove the chicken and boil the sauce over high heat for 3-5 minutes until reduced. Alternatively, mix 1 tablespoon cornstarch with 2 tablespoons cold water and stir into the simmering sauce until thickened.
Problem: Garlic burned and tastes bitter Solution: The pan was too hot when you added the garlic, or you didn’t stir it constantly. Unfortunately, burned garlic can’t be fixed—it will make the entire dish taste acrid. Start over with fresh garlic, reduce your heat, and remember that garlic needs only 30-45 seconds in the pan before adding liquid.
Equipment Essentials
Large Deep Skillet or Dutch Oven (12-inch diameter, 3-inch depth minimum) – A heavy-bottomed pan distributes heat evenly and prevents hot spots that burn garlic
Meat Thermometer – The only reliable way to know when chicken is perfectly cooked to 165°F without cutting it open
Tongs – Essential for flipping chicken pieces without piercing the skin and losing juices
Wooden Spoon – Perfect for scraping up those flavorful brown bits without scratching your pan
Sharp Chef’s Knife – Makes quick work of mincing garlic and halving cherry tomatoes
Cutting Board – Use separate boards for chicken and vegetables to prevent cross-contamination
Paper Towels – Critical for patting chicken dry before searing
Measuring Cups and Spoons – Accuracy matters when balancing the salty olives with other flavors
Shopping List by Store Section
Meat Department
- 8 bone-in, skin-on chicken thighs (about 2.5 lbs)
Produce Section
- 4 large garlic bulbs (you need 4 cloves)
- 1 pint cherry tomatoes
- 1 bunch fresh thyme
- 1 bunch fresh rosemary
- 1 bunch fresh parsley
- 2 medium lemons
Canned/Jarred Goods Aisle
- 1 jar Kalamata olives (need 1 cup pitted)
- 1 jar green olives (need ½ cup pitted)
- 1 carton chicken broth (32 oz)
Baking/Spices Aisle
- Paprika
- Red pepper flakes
- Black pepper
- Salt
Wine/Spirits Aisle (Optional)
- 1 bottle white wine (any dry white like Sauvignon Blanc or Pinot Grigio)
Oil Section
- Olive oil
Success Secrets from Professional Kitchens
1. Room Temperature is Your Friend Cold chicken hits a hot pan and immediately contracts, making the meat tough and releasing excess moisture. Taking chicken out 20-30 minutes early ensures even cooking from edge to center and prevents that rubbery texture home cooks often complain about.
2. Master the Art of Not Touching When searing chicken with olives, the biggest rookie mistake is moving the meat around in the pan. Those brown crusty bits form only when protein makes continuous contact with hot metal. Leave it alone for the full 6-7 minutes, even if you’re convinced it’s burning. That gorgeous crust releases naturally when it’s ready.
3. Layer Your Flavors Notice how we toast the garlic first, then the olives, then add liquids? Each ingredient gets its moment to develop flavor before the next is added. This technique—called building layers—is what separates restaurant food from home cooking. It takes an extra 5 minutes but creates incredible depth.
4. Low and Slow for the Win Once the chicken goes back in the pan, patience becomes your secret weapon. That gentle simmer breaks down connective tissue in the dark meat, making it fall-off-the-bone tender. High heat cooks it faster but leaves you with tough, chewy chicken that’s impossible to save.
5. Rest Before You Serve Three minutes might seem pointless when you’re hungry, but those final minutes off the heat let meat fibers relax and reabsorb juices. Cut into chicken immediately after cooking and watch all those flavorful juices run onto the cutting board instead of staying where they belong. Good things come to those who wait—literally.