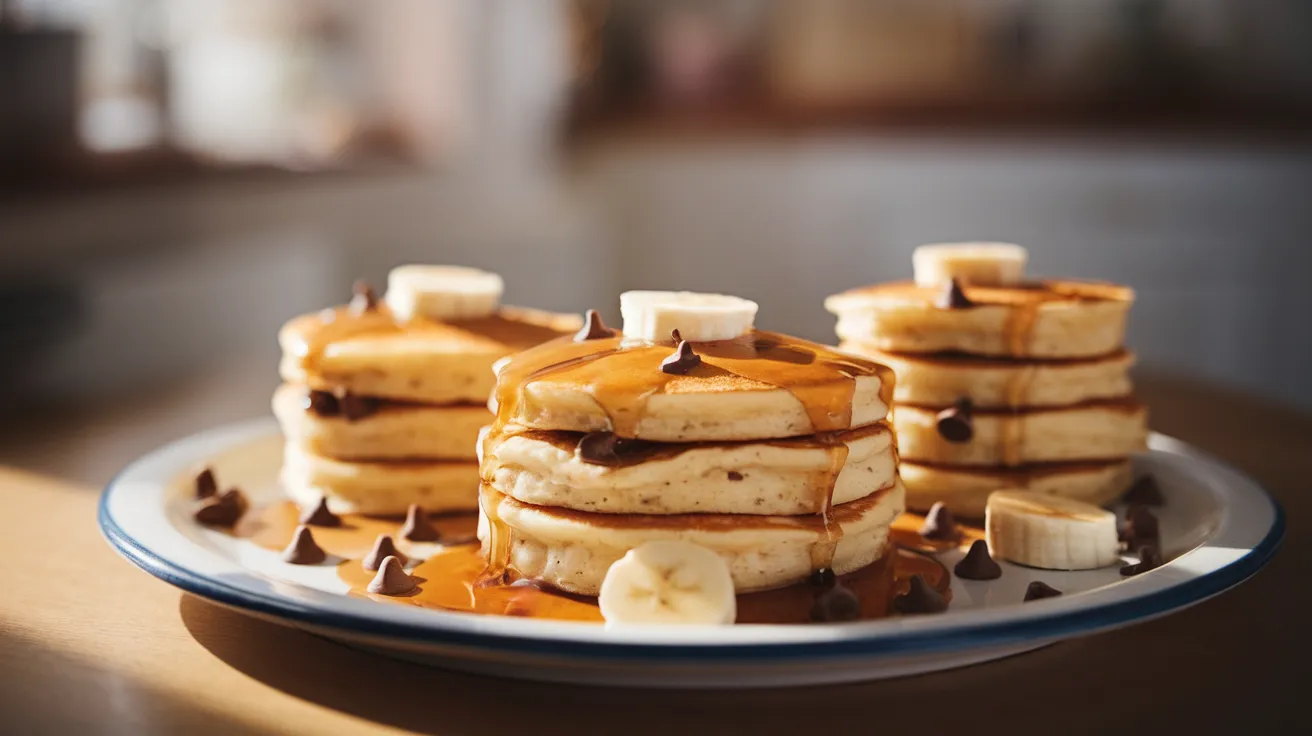
These chocolate chip and banana pancakes bring bakery-quality breakfast to your home kitchen with surprisingly simple techniques. Each fluffy stack combines sweet banana pieces with melty chocolate chips for the ultimate morning indulgence. Master these chocolate chip and banana pancakes once, and you’ll have a go-to recipe that transforms ordinary weekends into something special.
SERVES: 4 | PREP: 20 MIN | COOK: 25 MIN | TOTAL: 45 MIN
Ingredients for Chocolate Chip and Banana Pancakes
Dry Ingredients
| Ingredient | Amount | Purpose |
|---|---|---|
| All-purpose flour | 2 cups | Creates structure |
| Granulated sugar | 3 tablespoons | Adds sweetness and browning |
| Baking powder | 2 teaspoons | Provides lift and fluffiness |
| Salt | 1/2 teaspoon | Enhances flavors |
| Ground cinnamon | 1/4 teaspoon | Complements banana flavor |
Wet Ingredients
| Ingredient | Amount | Temperature Notes |
|---|---|---|
| Large eggs | 2 | Room temperature works best |
| Whole milk | 1 1/2 cups | Room temperature prevents curdling |
| Vanilla extract | 1 teaspoon | Pure extract recommended |
| Unsalted butter, melted | 4 tablespoons | Slightly cooled after melting |
Mix-Ins
| Ingredient | Amount | Selection Tips |
|---|---|---|
| Ripe bananas, sliced | 2 medium | Yellow with brown spots |
| Mini chocolate chips | 3/4 cup | Mini size distributes better |
| Butter for cooking | 2 tablespoons | For greasing the pan |
Detailed Step-by-Step Instructions for Beginners
Phase 1: Kitchen Setup and Preparation (8 minutes)
Step 1: Prepare Your Cooking Surface (3 minutes) Heat your griddle to exactly 375°F using the temperature dial, or place a large non-stick pan over medium heat. Why this temperature matters: Too hot burns the outside while leaving centers raw. Test readiness by sprinkling a few drops of water on the surface. The water should sizzle and evaporate within 2-3 seconds. If it evaporates instantly, reduce heat slightly. If it just sits there, increase heat.
Step 2: Prepare Your Bananas Properly (3 minutes) Choose bananas that are yellow with brown spots – these provide natural sweetness and won’t taste starchy. Peel both bananas and slice them into rounds approximately 1/4-inch thick. Pro tip: Slice on a slight diagonal for larger pieces that won’t disappear into the batter. Place sliced bananas on a plate and set aside. Timing note: Don’t slice bananas more than 10 minutes before using, as they’ll start browning.
Step 3: Set Up Your Workspace (2 minutes) Arrange all ingredients on your counter in the order you’ll use them. Get out two mixing bowls – one large (at least 3-quart) and one medium. Place measuring cups, whisk, rubber spatula, and 1/4-cup measure within easy reach. Organization tip: This prevents scrambling for tools when your batter is ready.
Phase 2: Creating the Perfect Batter (12 minutes)
Step 4: Mix Dry Ingredients Thoroughly (3 minutes) In your large mixing bowl, add flour, sugar, baking powder, salt, and cinnamon. Use a wire whisk to combine everything for at least 30 seconds of active whisking. What you’re looking for: No streaks of any single ingredient should be visible. The mixture should look uniformly light tan from the cinnamon. Common mistake: Rushing this step leaves pockets of baking powder that create uneven rising.
Step 5: Create a Well in Dry Ingredients (1 minute) Use the back of a large spoon or your whisk to push dry ingredients toward the edges of the bowl, creating a crater-like depression in the center about 4 inches wide. Why this works: Adding wet ingredients to a well prevents overmixing because you’ll naturally stir from the center outward.
Step 6: Prepare Wet Ingredients in Correct Order (4 minutes) In your medium bowl, crack both eggs and whisk them vigorously for 30 seconds until completely broken up – no white streaks should remain. Next, pour in the milk slowly while whisking to prevent the eggs from cooking if the milk is too warm. Add vanilla extract and whisk again. Finally, drizzle in the melted butter while whisking constantly. Temperature check: The melted butter should be warm to touch, not hot. If it’s too hot, let it cool for 2-3 minutes.
Step 7: Combine Wet and Dry Ingredients Carefully (3 minutes) Pour the entire wet ingredient mixture into the well you created in the dry ingredients. Critical technique: Use a fork (not a whisk) to gently stir from the center outward. Stop mixing the moment you can’t see dry flour patches – the batter should still look lumpy with some small flour streaks visible. Overmixing warning: If you mix until smooth, your chocolate chip and banana pancakes will be dense and chewy instead of fluffy.
Step 8: Fold in Bananas with Care (1 minute) Add your sliced bananas to the batter. Using a rubber spatula, gently fold them in with 4-5 careful scooping motions from bottom to top. Goal: Distribute bananas without mashing them. Some pieces breaking is normal, but try to keep most slices intact.
Step 9: Add Chocolate Chips Last (1 minute) Sprinkle mini chocolate chips over the batter surface. Fold them in with just 2-3 gentle motions. Stop immediately once they’re roughly distributed. Tip: Toss chocolate chips in a tablespoon of flour before adding – this prevents them from sinking to the bottom.
Phase 3: Cooking Your Chocolate Chip and Banana Pancakes (15 minutes)
Step 10: Test and Adjust Griddle Temperature (2 minutes) Drop a teaspoon of batter onto your cooking surface. It should start bubbling gently within 10 seconds and the edges should begin setting within 30 seconds. Too hot: Batter bubbles violently and browns within 30 seconds. Too cool: No immediate bubbling occurs. Adjust heat accordingly and wait 1-2 minutes before testing again.
Step 11: Prepare Cooking Surface Properly (1 minute) Add about 1/2 teaspoon of butter to your griddle or pan. Technique: Let it melt completely, then use a paper towel to spread it evenly across the entire cooking surface. Visual cue: The surface should look shiny but not have puddles of butter. Excess butter makes pancakes greasy and can cause uneven browning.
Step 12: Pour Perfect-Sized Pancakes (2 minutes) Use your 1/4-cup measure to scoop batter, but don’t pack it down. Pour technique: Hold the measure about 2 inches above the griddle and pour steadily to create round pancakes approximately 4 inches across. Leave at least 2 inches of space between each pancake for easy flipping. Batch size: Don’t overcrowd – cook only 3-4 pancakes at once on a large griddle.
Step 13: Watch for the Critical First-Side Signs (3-4 minutes) Phase 1 (First 60 seconds): Batter will look wet and shiny on top. You might hear gentle sizzling. Phase 2 (1-2 minutes): Small bubbles will form around the edges and gradually move toward the center. Phase 3 (2-3 minutes): Bubbles will form across the entire surface and begin popping, leaving small holes that don’t immediately fill back in. Ready to flip: When bubbles pop and stay open for 5-10 seconds, and the edges look set and slightly dry.
Step 14: Execute the Perfect Flip (30 seconds) Slide a thin spatula completely under one pancake, supporting as much surface area as possible. Lift test: The bottom should be golden brown – peek quickly to check. Flip motion: One confident, quick motion flipping away from yourself. Don’t press down on the pancake after flipping. What you’ll see: The cooked side should be golden brown with slightly darker spots where banana pieces were.
Step 15: Cook the Second Side Properly (1-2 minutes) The second side cooks faster than the first. Visual cues: The pancake will puff slightly and feel springy when gently pressed with the spatula. Color check: Lift one edge to peek – it should match the golden brown of the first side. Don’t flip again: Flipping multiple times creates tough pancakes.
Step 16: Keep Finished Pancakes Warm (Ongoing) Transfer cooked pancakes to a baking sheet and place in a 200°F oven. Arrangement: Don’t stack them – lay in a single layer so they stay crispy on the outside. Cover option: If they start looking dry, tent loosely with foil.
Step 17: Maintain Your Cooking Surface (Between batches) Add fresh butter between each batch, wiping away any burnt bits with a paper towel. Temperature adjustment: After several batches, you may need to reduce heat slightly as the pan gets hotter.
Professional Chef’s Notes for Chocolate Chip and Banana Pancakes
• Banana selection transforms your results. Perfectly ripe bananas have yellow peels with small brown spots and give slightly to gentle pressure. Under-ripe bananas taste starchy and won’t provide the natural sweetness that makes these chocolate chip and banana pancakes special.
• Batter consistency determines texture. Proper batter looks lumpy and rough, not smooth. When you can still see small streaks of flour, stop mixing immediately. This preserves the air bubbles created by baking powder.
• Heat management separates good from great. Medium heat allows the inside to cook completely before the outside burns. Test method: A drop of water should dance on the surface for 2-3 seconds before evaporating.
• Fresh batter produces maximum fluffiness. Chemical leavening agents like baking powder start working immediately when mixed with liquid. Cook your chocolate chip and banana pancakes within 10 minutes of mixing for best results.
Complete Nutrition Information (Per Serving)
- Calories: 385
- Protein: 12g
- Carbohydrates: 58g
- Fat: 14g
- Fiber: 3g
- Sugar: 18g
- Sodium: 420mg
- Calcium: 180mg
Creative Variations for Chocolate Chip and Banana Pancakes
Double Chocolate Version
Replace 1/4 cup flour with unsweetened cocoa powder and add an extra tablespoon of sugar. The result rivals any chocolate dessert pancake. These work beautifully for special occasions like the creative Christmas pancakes that bring holiday magic to your breakfast table.
Healthy Whole Grain Option
Substitute half the all-purpose flour with whole wheat pastry flour (not regular whole wheat, which creates dense pancakes). Add 2 extra tablespoons of milk to maintain proper consistency.
Peanut Butter Banana Delight
Warm 3 tablespoons of creamy peanut butter until slightly runny and whisk it into your wet ingredients. The combination creates restaurant-quality flavor at home.
Quick Weekend Alternative
For busy morning shortcuts, consider using Carbquik pancakes as your base mix and folding in mashed bananas and chocolate chips for a faster version that still delivers great taste.
Storage and Reheating Guide
Proper Refrigerator Storage
Cool pancakes completely to room temperature before storing – this prevents condensation that makes them soggy. Place parchment paper between each pancake and store in airtight containers for up to 4 days. Layer tip: No more than 4 pancakes per stack to prevent crushing.
Freezer Storage Method
Individual freezing: Arrange pancakes in single layer on baking sheet and freeze for 2 hours until solid. Bulk storage: Transfer to freezer bags, removing as much air as possible. Label with date and contents. Properly stored pancakes maintain quality for 3 months.
Reheating Techniques
Toaster method: Toast frozen pancakes directly on medium setting until heated through and slightly crispy. Microwave option: Place 2-3 pancakes on microwave-safe plate, cover with damp paper towel, heat 60-90 seconds. Oven warming: Arrange on baking sheet, cover with foil, reheat at 350°F for 8-10 minutes until warmed completely.
Troubleshooting Your Chocolate Chip and Banana Pancakes
Dense, Heavy Pancakes
Root cause: Overmixed batter destroys the air bubbles that create fluffiness. Prevention: Mix wet and dry ingredients just until combined – lumpy batter is perfect batter. Fix for next time: Use a fork instead of whisk for combining, and stop mixing while flour streaks are still visible.
Burnt Outside, Raw Inside
Root cause: Cooking temperature too high for the pancake thickness. Immediate fix: Reduce heat to medium-low and cook longer on each side. Prevention: Test griddle temperature with water drops – they should sizzle gently, not violently.
Pancakes Falling Apart During Flipping
Root cause: Either flipped too early or batter lacks binding ingredients. Solution: Wait for bubbles to pop and stay open before flipping. Ensure you’re using fresh baking powder. Technique fix: Use a wide, thin spatula and support the entire pancake when flipping.
Chocolate Chips Sinking to Bottom
Root cause: Batter too thin or chocolate chips too heavy. Prevention: Toss mini chocolate chips in flour before folding into batter. Batter adjustment: If batter seems too thin, add 1-2 tablespoons flour.
Uneven Browning
Root cause: Uneven heat distribution or too much butter on cooking surface. Solution: Wipe excess butter with paper towel between batches. Equipment note: Thin pans create hot spots – use heavy-bottomed pans or griddles for even heating.
Essential Equipment for Perfect Results
Must-Have Tools
• Heavy-bottomed non-stick pan (12-inch diameter) or electric griddle • Large mixing bowl (3-quart minimum) for proper mixing space • Medium bowl for wet ingredients • Wire whisk for combining dry ingredients • Rubber spatula for gentle folding • Thin, wide spatula for flipping without breaking • 1/4-cup measure for consistent pancake sizes
Optional but Helpful
• Kitchen scale for precise flour measurement (1 cup = 120g) • Instant-read thermometer for testing griddle temperature • Baking sheet for keeping pancakes warm in oven
Complete Shopping List
Dairy Section
- 2 large eggs (check expiration date)
- 1 quart whole milk
- 1 stick unsalted butter
Baking Aisle
- All-purpose flour (5-pound bag recommended)
- Granulated sugar
- Baking powder (check expiration – replace if over 6 months old)
- Table salt
- Ground cinnamon
- Pure vanilla extract
- Mini chocolate chips (avoid baking chips – they don’t melt as well)
Produce Section
- 2 medium bananas (yellow with small brown spots)
Five Success Secrets from Professional Kitchens
1. Temperature precision wins consistently. Invest in an infrared thermometer to maintain exact 375°F griddle temperature. Consistent heat creates consistently perfect chocolate chip and banana pancakes every single time.
2. Ingredient temperature coordination matters tremendously. Room temperature eggs and milk blend smoothly with melted butter, creating uniform batter texture without lumps or separation.
3. Master the gentle folding technique completely. Treat batter like delicate meringue – rough handling develops gluten strands that create tough, chewy pancakes instead of tender, fluffy ones.
4. Timing everything perfectly prevents disappointment. Have your oven preheated to 200°F, plates ready, and syrup warmed before you start cooking. Hot pancakes served immediately taste infinitely better than lukewarm ones.
5. Quality ingredients create noticeable differences. Fresh baking powder, real vanilla extract, and good chocolate chips elevate your chocolate chip and banana pancakes from ordinary to extraordinary. The investment in premium ingredients pays off in every bite.