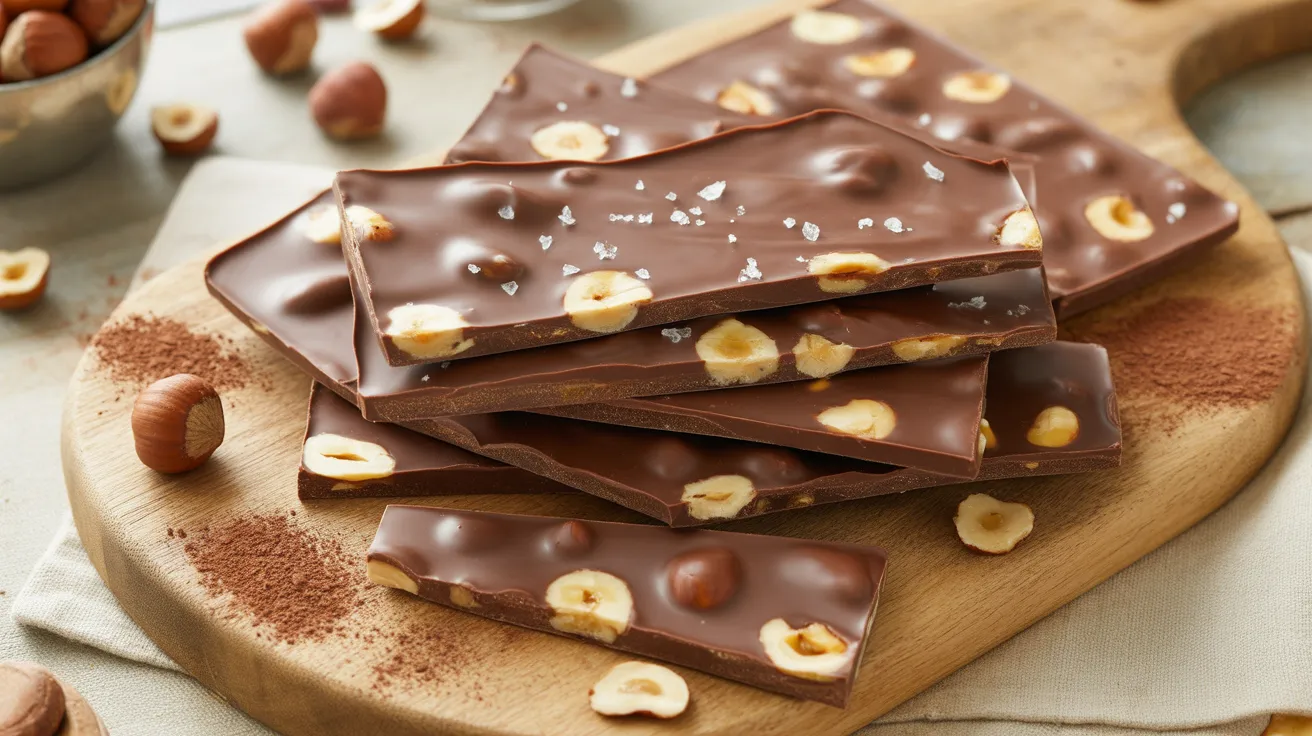
Making chocolate hazelnut bark at home transforms simple ingredients into an irresistible treat that rivals any artisan confection. This chocolate hazelnut bark recipe delivers rich, nutty flavor with a satisfying crunch in every bite, and you’ll never want the boxed version again.
SERVES: 4 | PREP: 15 MIN | COOK: 5 MIN | TOTAL: 2 HR 20 MIN (includes setting time)
Ingredients
Chocolate Base
| Ingredient | Amount |
|---|---|
| Dark chocolate chips (60-70% cacao) | 2 cups |
| Milk chocolate chips | 1 cup |
| Coconut oil | 1 tablespoon |
Hazelnut Layer
| Ingredient | Amount |
|---|---|
| Hazelnuts, toasted and roughly chopped | 1½ cups |
| Sea salt flakes | ½ teaspoon |
| Vanilla extract | 1 teaspoon |
Optional Garnish
| Ingredient | Amount |
|---|---|
| Cocoa powder for dusting | 1 teaspoon |
| Gold leaf (optional) | 2-3 small pieces |
Step-by-Step Instructions
Phase 1: Preparing Your Workspace (5 minutes)
Step 1: Line a 9×13-inch baking sheet with parchment paper, making sure it extends over the edges by about 2 inches on each side. This overhang becomes your handles for lifting the finished bark out cleanly without breaking it.
Step 2: Place your hazelnuts on a separate small baking sheet. Toast them in a preheated 350°F oven for 8-10 minutes, shaking the pan halfway through. You’ll know they’re ready when they smell nutty and the skins start to crack.
Step 3: Wrap the warm hazelnuts in a clean kitchen towel and rub them together vigorously. This removes the bitter skins, which can make your chocolate hazelnut bark taste slightly off. Don’t worry if some skin remains—that’s completely normal.
Step 4: Let the skinned hazelnuts cool completely, then roughly chop them into ¼-inch pieces. Keep some chunks larger for dramatic texture and visual appeal. Set aside in a small bowl.
Phase 2: Melting the Chocolate (8 minutes)
Step 5: Fill a medium saucepan with 2 inches of water and bring it to a gentle simmer over medium heat. Place a heatproof bowl on top, making sure the bottom doesn’t touch the water. This double-boiler method prevents the chocolate from scorching.
Step 6: Add the dark chocolate chips and 1 tablespoon coconut oil to the bowl. Stir constantly with a rubber spatula, scraping the sides. The coconut oil helps create that professional glossy finish and makes the bark easier to break into pieces later.
Step 7: Once the dark chocolate melts completely (about 4-5 minutes), remove the bowl from heat. The chocolate should look smooth and flow like thick cream off your spatula. If you see any lumps, keep stirring—the residual heat will smooth them out.
Step 8: Immediately pour the melted dark chocolate onto your prepared baking sheet. Use an offset spatula to spread it into an even layer about ¼-inch thick. Work quickly because the chocolate starts setting as it cools.
Phase 3: Creating Layers (5 minutes)
Step 9: While the dark chocolate is still warm and tacky, sprinkle 1 cup of chopped hazelnuts evenly across the surface. Gently press them down with clean fingers so they stick to the chocolate base. This prevents them from falling off when you break the bark later.
Step 10: Return the saucepan water to a simmer. Melt the milk chocolate chips using the same double-boiler technique. This second layer adds creamy sweetness that balances the rich dark chocolate perfectly.
Step 11: Drizzle the melted milk chocolate over the hazelnut layer in a zigzag pattern. Use a toothpick or skewer to create decorative swirls, dragging it through both chocolate layers. These marbled patterns make each piece of chocolate hazelnut bark look bakery-worthy.
Step 12: Sprinkle the remaining ½ cup hazelnuts on top, followed by the sea salt flakes. The salt crystals catch light beautifully and enhance the chocolate’s flavor by creating sweet-salty contrast.
Phase 4: Setting and Finishing (2+ hours)
Step 13: Place the baking sheet in your refrigerator on a flat surface. Let it chill for at least 2 hours or until the chocolate feels completely firm when you touch the surface. Rushing this step creates soft bark that’s difficult to break cleanly.
Step 14: Remove the chilled bark from the refrigerator and let it sit at room temperature for 5 minutes. This slight warming prevents the chocolate from shattering into tiny pieces when you break it.
Step 15: Lift the bark out using the parchment paper handles. Place it on a cutting board and use a large sharp knife to score it into desired sizes, then break along the score lines. The pieces should snap cleanly with satisfying sound.
Step 16: If desired, dust lightly with cocoa powder or add gold leaf pieces for an elegant presentation. Your homemade chocolate hazelnut bark is now ready to serve or package as gifts.
Chef’s Notes
Temperature Control: Keep your chocolate between 88-90°F when working with it. If it gets too hot (above 95°F), it can seize or develop a grainy texture that ruins the smooth finish.
Hazelnut Alternatives: Can’t find hazelnuts? The same technique works beautifully with almonds, pecans, or macadamia nuts. Each brings its own character to the chocolate hazelnut bark concept.
Make It Festive: Add 2 tablespoons of crushed peppermint during winter holidays, or fold in ¼ cup dried cranberries for a tart contrast that brightens the chocolate.
Storage Wisdom: This bark keeps best in an airtight container with parchment paper between layers. The coconut oil helps it stay snappy even at room temperature, unlike pure chocolate which can bloom.
Nutrition Information (Per Serving)
- Calories: 485
- Protein: 8g
- Carbohydrates: 42g
- Fat: 34g
- Fiber: 6g
- Sugar: 32g
Creative Variations
Mint Chocolate Dream: Replace hazelnuts with 1½ cups crushed chocolate cookies and add ½ teaspoon peppermint extract to your melted chocolate. This variation tastes similar to our mint chocolate swirl bark, with extra crunch from the cookies.
Cherry Hazelnut Bliss: Fold in ½ cup dried cherries along with the hazelnuts for a sweet-tart flavor that makes the chocolate sing. The ruby-red fruit pieces create stunning visual contrast against dark chocolate.
White Chocolate Drizzle: Melt ½ cup white chocolate chips and drizzle over the finished bark for triple-chocolate decadence. This technique also works with our cherry cashew chocolate bark recipe.
Espresso Boost: Stir 1 tablespoon instant espresso powder into your melted dark chocolate for a sophisticated mocha flavor that adult guests appreciate at dinner parties.
Storage & Reheating
Room Temperature Storage: Keep your chocolate hazelnut bark in an airtight container at 65-70°F for up to 2 weeks. Layer parchment paper between pieces to prevent sticking.
Refrigerator Method: Store in the fridge for up to 1 month when you need longer shelf life. Let it sit at room temperature for 10 minutes before serving so the chocolate develops its full flavor.
Freezer Storage: Wrap individual pieces in wax paper, then place in freezer bags for up to 3 months. Thaw in the refrigerator overnight before bringing to room temperature.
Humidity Warning: Avoid storing chocolate hazelnut bark in humid environments. Moisture causes “sugar bloom”—a white, dusty coating that looks unappealing even though the bark is still safe to eat.
Troubleshooting Common Problems
Problem 1: Chocolate Won’t Melt Smoothly Your chocolate seized because water got into the bowl. Even one drop creates a grainy paste. Start over with dry equipment, or try whisking in 1 teaspoon of vegetable oil per cup of chocolate to bring it back.
Problem 2: Hazelnuts Fall Off the Bark You didn’t press the nuts into the warm chocolate base firmly enough. Next time, use gentle palm pressure across the entire surface, or warm the chocolate layer slightly with a kitchen torch before adding toppings.
Problem 3: White Streaks Appeared on Surface This “fat bloom” happens when chocolate cools too quickly or experiences temperature fluctuations. It’s harmless but looks unattractive. Prevent it by cooling your bark gradually at room temperature for 30 minutes before refrigerating.
Problem 4: Bark Won’t Break Cleanly Your chocolate layer is too thick or too thin. Aim for exactly ¼-inch thickness when spreading. Also, score the chilled bark with a knife before breaking to create clean edges.
Problem 5: Chocolate Tastes Waxy You used chocolate chips with stabilizers instead of real chocolate. Next batch, choose bar chocolate broken into pieces, or buy high-quality chips labeled “couverture” for professional results.
Equipment Essentials
- 9×13-inch baking sheet (rimmed)
- Parchment paper (never wax paper—it sticks)
- Medium saucepan for double boiler
- Heatproof glass or metal bowl
- Rubber spatula for stirring
- Offset spatula for spreading
- Sharp chef’s knife for breaking bark
- Kitchen towel for removing hazelnut skins
- Small bowl for organizing ingredients
Shopping List
Baking Aisle
- Dark chocolate chips (60-70% cacao)
- Milk chocolate chips
- Vanilla extract
- Cocoa powder (optional)
Nuts & Dried Fruit
- Raw hazelnuts (or pre-toasted to save time)
Oils & Fats
- Coconut oil (refined for neutral flavor)
Seasonings
- Sea salt flakes (not table salt)
Success Secrets
Secret 1: Always taste-test your chocolate before melting. Chocolate hazelnut bark is only as good as its ingredients, so choose brands you’d enjoy eating straight from the package.
Secret 2: Toast hazelnuts until they’re one shade darker than you think necessary. The deeper roast creates nutty complexity that prevents your bark from tasting flat or one-dimensional.
Secret 3: Work in a cool kitchen (below 72°F). Warm environments make chocolate soft and difficult to handle, leading to messy results and fingerprints all over your beautiful bark.
Secret 4: Score the chilled bark before breaking it. Use a ruler and sharp knife to create straight lines, then snap along those guides for professional-looking rectangular pieces instead of random shards.
Secret 5: Package bark in clear cellophane bags tied with ribbon for gift-giving. The visual appeal sells itself, and homemade chocolate hazelnut bark makes thoughtful presents that show you care.