This chocolate mousse recipe transforms four simple ingredients into a dessert that rivals any French bistro. I’ll show you how to make chocolate mousse that’s impossibly light, deeply chocolatey, and foolproof enough for your first attempt.
SERVES: 4 | PREP: 20 MIN | COOK: 5 MIN | TOTAL: 3 HRS 25 MIN (includes chilling)
Why This Recipe Works
I’ve tested dozens of chocolate mousse variations, and this version nails the perfect balance.
The secret? Proper folding technique and quality chocolate. You don’t need fancy equipment or pastry school training—just patience and the right moves.
This recipe skips raw eggs entirely, using a cooked custard base that’s both safe and stable. The texture comes out cloudlike every single time.
Ingredients
For the Chocolate Base
| Ingredient | Amount |
|---|---|
| Dark chocolate (60-70% cacao) | 8 oz (225g) |
| Heavy cream | 2 cups (480ml), divided |
| Egg yolks | 4 large |
| Granulated sugar | ¼ cup (50g) |
| Vanilla extract | 1 tsp |
| Salt | Pinch |
For Serving (Optional)
| Ingredient | Amount |
|---|---|
| Whipped cream | ½ cup |
| Fresh berries | 1 cup |
| Chocolate shavings | 2 tbsp |
Step-by-Step Instructions
Phase 1: Preparing the Chocolate (5 minutes)
Step 1: Chop your dark chocolate into small, even pieces about the size of chocolate chips.
Small pieces melt faster and more evenly, preventing that grainy texture that ruins mousse. Use a serrated knife for cleanest cuts.
Step 2: Place chopped chocolate in a medium heatproof bowl and set aside at room temperature.
Don’t skip bringing chocolate to room temp—cold chocolate seizes when hot cream hits it.
Step 3: Set up a fine-mesh strainer over another bowl nearby.
You’ll strain the custard later to catch any cooked egg bits. This step guarantees silky texture.
Phase 2: Making the Custard Base (8 minutes)
Step 4: Pour ½ cup of heavy cream into a small saucepan over medium heat.
Watch it closely—you want it just steaming, not boiling. Boiling cream will scramble your eggs in the next step.
Step 5: While cream heats, whisk egg yolks and sugar together in a medium bowl for 60 seconds.
The mixture should turn pale yellow and slightly thick. This process (called “ribboning”) helps prevent scrambling.
Step 6: When cream starts steaming (around 180°F if you have a thermometer), remove from heat immediately.
Tiny bubbles around the edges mean it’s ready. No bubbles yet? Give it 30 more seconds.
Step 7: Pour half the hot cream into the egg mixture while whisking constantly.
This is called tempering—it slowly raises the egg temperature without cooking them. Pour in a thin, steady stream, never stopping your whisk.
Step 8: Pour the warmed egg mixture back into the saucepan with remaining cream, whisking as you pour.
Now everything’s the same temperature, so you can cook it safely.
Step 9: Return pan to medium-low heat and stir constantly with a wooden spoon or silicone spatula for 2-3 minutes.
The custard is ready when it coats the back of your spoon and you can draw a line through it that holds. Temperature should reach 170-175°F.
Step 10: Immediately strain the hot custard through your prepared strainer into the bowl of chocolate.
Press the custard through with the spatula—don’t leave any behind. The strainer catches any bits of cooked egg.
Phase 3: Creating the Mousse Base (7 minutes)
Step 11: Let the hot custard sit on the chocolate for 60 seconds without touching it.
This gives the chocolate time to start melting from the heat. If you stir too early, you’ll get lumps.
Step 12: Whisk the mixture starting from the center, gradually working outward in bigger circles.
The chocolate will resist at first, then suddenly become smooth and glossy. Keep whisking for 30 seconds after it looks smooth.
Step 13: Add vanilla extract and salt, whisking to combine.
The salt amplifies chocolate flavor—don’t skip it. Now let this mixture cool to room temperature (about 15 minutes).
Phase 4: Whipping and Folding (10 minutes)
Step 14: Pour remaining 1½ cups heavy cream into a large, cold mixing bowl.
Cold bowl + cold cream = faster whipping and more stable peaks. I stick my bowl in the freezer for 5 minutes first.
Step 15: Beat the cream with an electric mixer on medium speed until soft peaks form (2-3 minutes).
Soft peaks bend over when you lift the beater. Don’t overbeat—you need the cream soft enough to fold smoothly.
Step 16: Add one-third of the whipped cream to your cooled chocolate mixture.
First addition doesn’t need gentle treatment—whisk it in vigorously. This lightens the chocolate so it accepts the remaining cream.
Step 17: Add half the remaining whipped cream and fold with a rubber spatula.
Cut down through the center, scrape across the bottom, and lift up the side. Rotate bowl and repeat. Stop when you see just a few white streaks.
Step 18: Add final portion of whipped cream and fold just until no white streaks remain.
Each stroke deflates the mousse slightly, so use the minimum strokes possible. Usually takes 15-20 folds total.
Step 19: Divide mousse among four serving glasses or bowls, using about ¾ cup per serving.
I use a large spoon or ice cream scoop for neat portions. Tap glasses gently on counter to remove air bubbles.
Step 20: Cover each glass with plastic wrap touching the surface (prevents skin formation) and refrigerate for at least 3 hours.
The mousse needs this time to set properly. Overnight is even better—the flavors develop more fully.
Chef’s Notes
Chocolate Quality Matters: I use Ghirardelli or Guittard chocolate mousse base for consistent results. Chocolate chips contain stabilizers that prevent smooth melting—stick with bar chocolate.
Temperature Control: Your chocolate mousse can break if the custard’s too hot when it hits the chocolate. Let it cool slightly if you see the mixture looking oily instead of smooth.
Folding Technique: The difference between dense pudding and airy chocolate mousse comes down to folding. Think of each fold as preserving air bubbles, not mixing ingredients.
Make-Ahead Advantage: This chocolate mousse actually improves after 24 hours in the fridge. The texture becomes even more velvety as everything melds together.
Nutrition Information (Per Serving)
Calories: 420 | Protein: 6g | Carbohydrates: 28g | Fat: 34g | Saturated Fat: 21g | Cholesterol: 245mg | Sodium: 45mg | Fiber: 3g | Sugar: 22g
Variations to Try
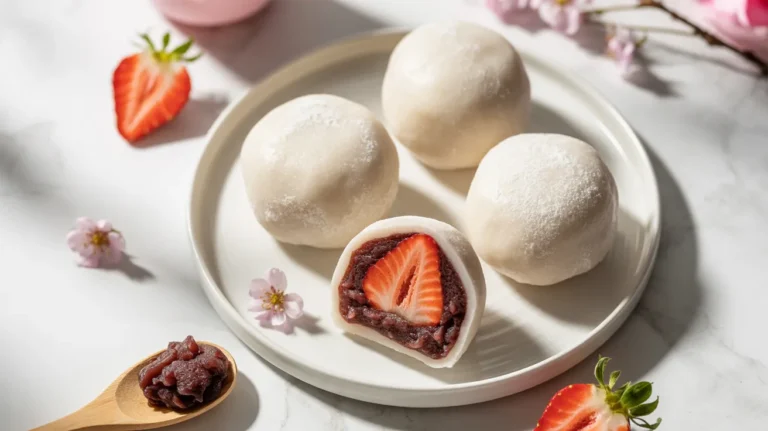
White Chocolate Clouds: Swap dark chocolate for white chocolate and add lemon zest. The bright citrus cuts through the sweetness perfectly. If you enjoy creative dessert combinations, check out my strawberry daifuku mochi for another elegant treat.
Mocha Mousse: Add 2 tablespoons espresso powder to the hot cream in step 4. The coffee intensifies chocolate flavor without tasting like coffee.
Mexican Chocolate Spice: Whisk ½ teaspoon cinnamon and ⅛ teaspoon cayenne into the chocolate mixture. The heat builds slowly—it’s addictive.
Dairy-Free Alternative: Use full-fat coconut cream (refrigerated overnight, whipped) instead of heavy cream. For more dairy-free dessert ideas, explore my almond flour dessert recipes collection.
Storage & Reheating
Refrigerator Storage: Cover mousse tightly with plastic wrap and refrigerate up to 4 days. The texture stays perfect through day 3, then gradually becomes slightly denser.
Freezer Storage: Freeze in individual portions up to 2 months. Thaw overnight in refrigerator—never at room temperature, which makes the texture grainy.
Serving Temperature: Pull mousse from fridge 10 minutes before serving. Slightly softened mousse has better flavor and creamier texture.
No Reheating Needed: This dessert serves cold. If you accidentally freeze it solid, let it thaw completely in the fridge rather than trying to speed the process.

Troubleshooting Common Problems
Problem 1: Grainy or Separated Chocolate Your custard was too hot when poured over chocolate, or you stirred before letting it sit. Fix it by whisking in 2 tablespoons of warm cream until smooth again.
Problem 2: Mousse Won’t Thicken You overbeat the cream to stiff peaks before folding, or your chocolate mixture was too warm. Pop the bowl in the fridge for 20 minutes, then gently re-fold. If it’s still loose, refrigerate it overnight—it usually sets eventually.
Problem 3: Deflated or Dense Texture Over-folding knocked out all the air bubbles. You can’t fix deflated mousse, but you can rebrand it as “chocolate cream” and serve it over cake. Nobody will complain.
Problem 4: Scrambled Egg Bits in Custard Your heat was too high or you stopped stirring while cooking. Always strain the custard (step 10) to catch any bits. Lower your heat next time and never walk away from cooking custard.
Problem 5: Mousse Tastes Flat You forgot the salt or used low-quality chocolate. Salt amplifies chocolate flavor dramatically—add a tiny pinch to each serving if you forgot it earlier. Can’t fix cheap chocolate, though.
Equipment Essentials
- Medium saucepan (2-quart capacity)
- Heatproof mixing bowls (3 different sizes)
- Fine-mesh strainer
- Electric hand mixer or stand mixer
- Rubber spatula (essential for proper folding)
- Whisk (both balloon and flat work fine)
- Instant-read thermometer (optional but helpful)
- Serving glasses or ramekins (4 individual portions)
- Plastic wrap
Shopping List
Dairy Section
- Heavy cream (1 pint)
- Large eggs (need 4 yolks)
Baking Aisle
- Dark chocolate bar (8 oz, 60-70% cacao)
- Granulated sugar
- Vanilla extract
You Probably Have
- Salt
Optional Garnishes
- Fresh berries
- Extra chocolate for shaving
- Extra heavy cream for topping
Success Secrets
1. Room Temperature Matters Bring your chocolate to room temperature before starting. Cold chocolate + hot custard = seized, grainy disaster.
2. Don’t Rush the Chill Three hours minimum refrigeration isn’t negotiable. The mousse needs time for the chocolate to fully set and the flavors to develop.
3. Fold, Don’t Stir The moment you start stirring instead of folding, you’re making chocolate pudding instead of mousse. Keep that spatula moving in slow, deliberate scoops.
4. Quality Over Everything Your mousse is only four ingredients—each one shows up loud and clear. Splurge on good chocolate. Use real vanilla extract. Buy the freshest eggs you can find.
5. The Spoon Test Never Lies When making the custard in step 9, coat your spoon and draw a line through it with your finger. If the line holds for 2 seconds without running, you’re done. If it runs immediately, keep cooking for another minute.
This recipe proves that restaurant-quality desserts don’t need complicated techniques or special training. Once you nail the folding technique, you’ll make this mousse on repeat—it’s that good and that easy.
The real magic happens during those three hours in the fridge when everything transforms into something silky, rich, and completely irresistible.