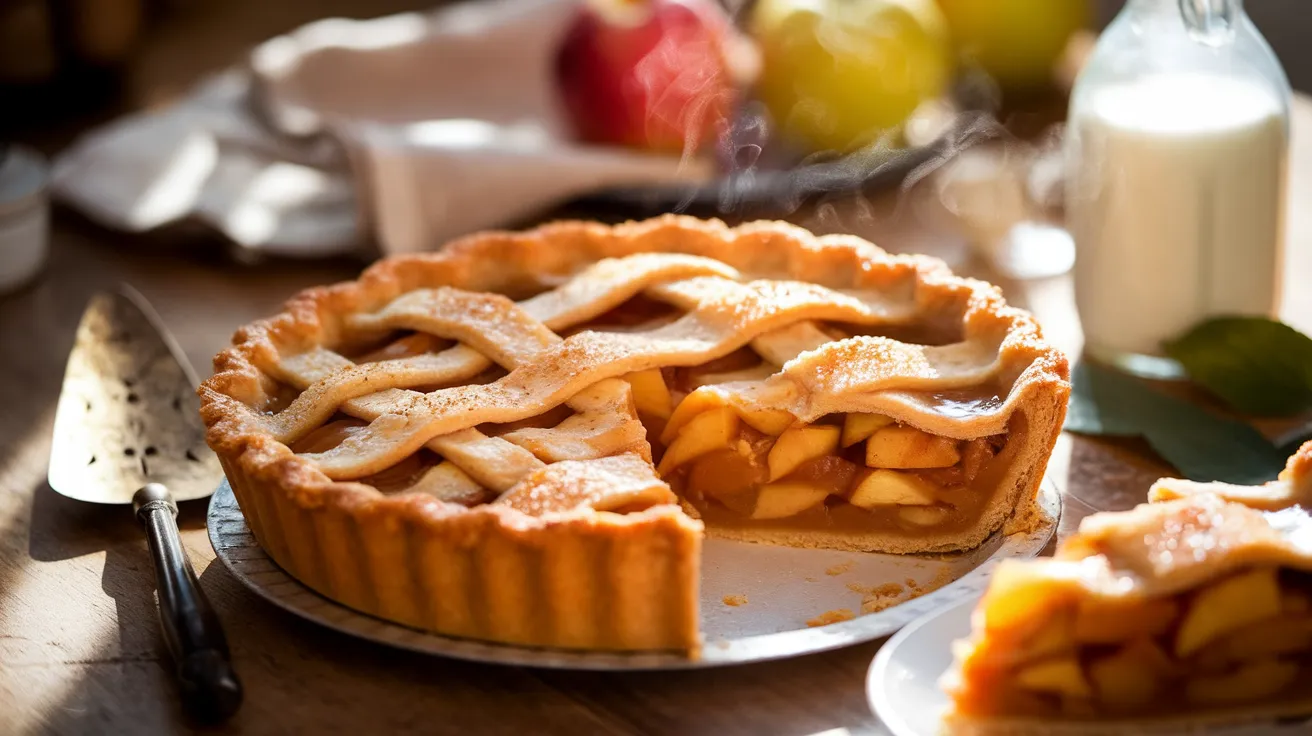
Your quest for the perfect classic apple pie ends here. This foolproof recipe transforms simple ingredients into a golden-crusted masterpiece that’ll have everyone begging for seconds. Whether you’re baking your first classic apple pie or your fiftieth, these tested techniques guarantee flaky crust and perfectly spiced apples every single time.
SERVES: 4 | PREP: 30 MIN | COOK: 55 MIN | TOTAL: 85 MIN
Ingredients
For the Crust
| Ingredient | Amount |
|---|---|
| All-purpose flour | 2½ cups |
| Cold unsalted butter (cubed) | 1 cup |
| Ice water | 6-8 tbsp |
| Granulated sugar | 1 tbsp |
| Salt | 1 tsp |
For the Filling
| Ingredient | Amount |
|---|---|
| Granny Smith apples | 4 medium |
| Honeycrisp apples | 2 medium |
| Granulated sugar | ¾ cup |
| Light brown sugar | ¼ cup |
| All-purpose flour | 3 tbsp |
| Ground cinnamon | 1½ tsp |
| Ground nutmeg | ¼ tsp |
| Fresh lemon juice | 2 tbsp |
| Vanilla extract | 1 tsp |
| Salt | ¼ tsp |
| Cold butter (cubed) | 2 tbsp |
For Assembly
| Ingredient | Amount |
|---|---|
| Egg (beaten) | 1 |
| Coarse sugar | 1 tbsp |
Step-by-Step Instructions
Phase 1: Making the Perfect Crust (15 minutes)
Step 1: Combine 2½ cups flour, 1 tablespoon sugar, and 1 teaspoon salt in a large bowl. Whisk these dry ingredients together for 30 seconds to distribute evenly. This prevents salty or sweet spots in your crust.
Step 2: Add your cubed cold butter straight from the fridge. Using a pastry cutter or two forks, cut the butter into the flour until the mixture looks like coarse breadcrumbs with some pea-sized butter chunks remaining. These butter pieces create the flaky layers, so don’t overwork it. The process takes about 3-4 minutes.
Step 3: Drizzle in 6 tablespoons ice water, one tablespoon at a time. Toss gently with a fork after each addition. The dough should start clumping together but still look shaggy. If it’s too dry and won’t hold when squeezed, add 1-2 more tablespoons of ice water. Too much water makes tough crust, so add carefully.
Step 4: Turn the dough onto your counter and gently press it into a ball. Don’t knead it like bread—just bring it together with a few gentle presses. Divide into two discs (one slightly larger), wrap each tightly in plastic wrap, and refrigerate for 30 minutes minimum. This rest time lets the gluten relax and keeps your crust tender.
Phase 2: Preparing the Apple Filling (10 minutes)
Step 5: Peel all 6 apples using a vegetable peeler. Core them and slice into ¼-inch thick pieces. Why two apple varieties? Granny Smiths hold their shape and add tartness, while Honeycrisps contribute sweetness and break down slightly to create that signature pie sauce.
Step 6: Toss the sliced apples with 2 tablespoons lemon juice in your largest bowl. The acid prevents browning and brightens the flavor. Let this sit while you prepare the sugar mixture.
Step 7: In a small bowl, whisk together ¾ cup granulated sugar, ¼ cup brown sugar, 3 tablespoons flour, 1½ teaspoons cinnamon, ¼ teaspoon nutmeg, and ¼ teaspoon salt. The flour acts as a thickener that absorbs the apple juices during baking, preventing a soggy bottom crust.
Step 8: Pour the sugar mixture over your apples and toss gently with your hands for about 1 minute. Make sure every apple slice gets coated. Add 1 teaspoon vanilla extract and toss once more. Let this sit for 5 minutes—the sugar will start pulling moisture from the apples, which is exactly what you want.
Phase 3: Assembling Your Classic Apple Pie (15 minutes)
Step 9: Preheat your oven to 425°F (220°C). Place a baking sheet on the lowest rack to catch any drips and ensure bottom crust crispness.
Step 10: Remove your larger dough disc from the fridge. On a lightly floured surface, roll it into a 12-inch circle about ⅛-inch thick. Rolling tip: Start from the center and roll outward, rotating the dough 90 degrees after every few rolls. This keeps it circular and prevents sticking.
Step 11: Carefully transfer the dough to a 9-inch pie pan by rolling it onto your rolling pin, then unrolling it over the pan. Gently press it into the bottom and sides without stretching—stretched dough shrinks during baking. Let any excess hang over the edges.
Step 12: Pour your apple mixture into the crust, mounding it slightly in the center. The apples will cook down, so pack them in—they should form a generous dome. Dot the top with 2 tablespoons cold butter cut into small pieces. This adds richness and helps create that glossy filling.
Step 13: Roll out your second dough disc into an 11-inch circle. You can create a lattice top or keep it simple with a full top crust. For a full crust, lay it over the apples and press the edges together with the bottom crust.
Step 14: Trim excess dough to a 1-inch overhang using kitchen scissors. Tuck this overhang under itself around the entire pie, creating a thick edge. Crimp with your fingers or press with a fork to seal—this isn’t just pretty, it prevents filling from bubbling out.
Phase 4: Baking to Golden Perfection (55 minutes)
Step 15: Cut 4-5 slits in the top crust (or skip this if you made a lattice). These vents let steam escape, preventing a soggy crust. Brush the entire top with beaten egg using a pastry brush—this creates that gorgeous golden shine. Sprinkle with coarse sugar for extra crunch.
Step 16: Place your pie on the preheated baking sheet in the oven. Bake at 425°F for 20 minutes. The high heat jump-starts the crust, making it extra flaky. You’ll notice the edges starting to turn golden.
Step 17: Reduce heat to 375°F (190°C) without opening the oven door. Bake for an additional 35-40 minutes. The pie is done when the crust is deep golden brown and you can see the filling bubbling through the vents. If the edges brown too quickly, cover them with aluminum foil strips or a pie shield around the 40-minute mark.
Step 18: Remove from the oven and cool on a wire rack for at least 2 hours before slicing. I know it’s tempting, but cutting into a hot pie results in soupy filling. The cooling time lets everything set properly, giving you clean, beautiful slices.
Chef’s Notes
Butter Temperature Matters: Keep your butter cold until the moment you use it. Warm butter melts into the flour instead of creating flaky layers. Some bakers even freeze their cubed butter for 10 minutes before starting.
The Right Apple Mix: This classic apple pie recipe relies on mixing tart and sweet apples. All Granny Smith makes it too tart; all sweet apples turn mushy. The 2-to-1 ratio creates perfect balance.
Blind Baking Alternative: If you consistently get soggy bottoms, try this trick: After rolling out your bottom crust, refrigerate the filled pie for 30 minutes before adding the top crust and baking. The cold filling takes longer to heat up, giving the bottom crust a head start.
Egg Wash Options: No eggs? Brush the top with heavy cream or milk instead. It won’t shine quite as much, but you’ll still get a beautiful golden finish.
Nutrition Information (Per Serving)
| Nutrient | Amount |
|---|---|
| Calories | 520 |
| Protein | 5g |
| Carbohydrates | 72g |
| Fat | 25g |
| Fiber | 4g |
| Sugar | 38g |
| Sodium | 380mg |
Delicious Variations
Caramel Apple Dream: Want to take your pie to the next level? Drizzle ¼ cup homemade caramel between the apple layers before adding the top crust. The result rivals any caramel apple pie you’ve ever tasted.
Crumb Top Classic: Skip the top crust entirely and make a streusel topping with ½ cup flour, ⅓ cup brown sugar, ⅓ cup oats, and 6 tablespoons melted butter. Sprinkle this over your apples for a rustic look that’s incredibly easy for beginners.
Dutch Apple Twist: Add ¼ cup heavy cream to your filling for an ultra-creamy center. This technique creates a custard-like sauce that makes your classic apple pie even more indulgent. If you love this style, you’ll definitely want to try a dutch apple cobbler next.
Spiced Chai Version: Replace the cinnamon and nutmeg with 2 teaspoons chai spice blend (or make your own with cardamom, ginger, cloves, and cinnamon). This warming variation is perfect for holiday gatherings.
Storage & Reheating
Room Temperature: Your baked classic apple pie sits happily on the counter, loosely covered with foil, for 2 days. The crust stays crispest this way.
Refrigerator: After day two, wrap the pie tightly and refrigerate for up to 5 days. Bring slices to room temperature or reheat before serving for the best flavor.
Freezing Unbaked: Assemble your pie completely, wrap tightly in plastic wrap and then aluminum foil. Freeze for up to 3 months. Bake directly from frozen, adding 15-20 minutes to the baking time. Cover the edges with foil after the first 30 minutes.
Freezing Baked: Cool completely, wrap tightly, and freeze for up to 4 months. Thaw overnight in the fridge, then reheat individual slices at 350°F for 15 minutes or the whole pie for 30 minutes.
Reheating Tips: Warm slices in a 350°F oven for 10-12 minutes instead of the microwave. This re-crisps the crust instead of making it soggy. For extra indulgence, top with vanilla ice cream that melts into the warm filling.

Troubleshooting Common Problems
Soggy Bottom Crust: This usually happens when the bottom crust doesn’t get hot enough fast enough. Solution: Place your pie on a preheated baking sheet or pizza stone on the bottom oven rack. The direct heat crisps the bottom while the filling cooks. Also, make sure you’re not adding too much liquid to your filling.
Filling Boiling Over: If you see filling bubbling out during baking, your vents might be too small or your pie was overfilled. Solution: Place a baking sheet underneath to catch drips (you should already have one there). For next time, cut larger steam vents or slightly reduce your apple quantity. A tablespoon of tapioca starch mixed with your flour thickener also helps.
Pale, Underbaked Top: Your oven temperature might be off, or you pulled it too early. Solution: Use an oven thermometer to verify your actual temperature. The pie needs the full baking time—the filling should be actively bubbling and the crust deep golden brown. Don’t rely on the timer alone; use your eyes.
Apples Too Firm or Mushy: Slice thickness matters more than you think. Solution: Keep apple slices at a consistent ¼-inch thickness. Thicker slices stay too crisp; thinner slices dissolve into mush. A mandoline slicer helps maintain uniformity if you’re nervous about knife skills.
Shrinking Crust: The dough was either overworked, not rested long enough, or stretched during assembly. Solution: Handle the dough gently, refrigerate for at least 30 minutes, and never stretch it to fit the pan. If needed, re-roll and try again. Once crimped, you can even freeze the assembled pie for 15 minutes before baking to set the shape.
Equipment Essentials
- 9-inch pie pan (glass or ceramic shows off the golden bottom)
- Rolling pin (marble or wooden)
- Pastry cutter or two forks
- Large mixing bowls (at least one that holds 6 cups)
- Vegetable peeler
- Sharp chef’s knife or apple slicer
- Pastry brush for egg wash
- Kitchen scissors for trimming dough
- Wire cooling rack
- Baking sheet to catch drips
- Measuring cups and spoons
- Plastic wrap for chilling dough
- Optional: Pie weights for blind baking, pie shield for edge protection
Shopping List
Produce Section
- 4 Granny Smith apples
- 2 Honeycrisp apples
- 1 lemon (for juice)
Dairy Case
- 1 cup unsalted butter (2 sticks)
- Plus 2 tablespoons butter
- 1 egg
Baking Aisle
- All-purpose flour
- Granulated sugar
- Light brown sugar
- Ground cinnamon
- Ground nutmeg
- Vanilla extract
- Coarse sugar (turbinado or sanding sugar)
- Salt
Success Secrets
1. Temperature Control is Everything Cold ingredients make flaky crusts. Keep your butter in the fridge until the last second. Some bakers chill their flour and bowl too. Warm dough = tough, chewy crust. Cold dough = layers that shatter in your mouth.
2. Don’t Skip the Resting Time That 30-minute chill isn’t optional. Resting lets the gluten strands relax, making the dough easier to roll and preventing shrinkage. Rushing this step ruins more pies than any other mistake.
3. Pile Those Apples High Your apple mound should look ridiculously tall—almost comically so. Apples lose about 30% of their volume during baking, so what seems like too much becomes just right. A skimpy filling leaves a gap between crust and apples.
4. Listen for the Bubble The filling should be actively bubbling through the vents before you pull the pie out. This bubbling means the thickeners have activated properly. A quiet pie needs more time, or you’ll end up with runny filling when you cut into it.
5. Cool Completely Before Cutting This is the hardest rule to follow, but it’s critical for clean slices. Hot filling is liquid; cooled filling is gel. Two hours minimum, three hours is better. Serve it warm later by reheating individual slices instead of cutting into a hot pie.
This classic apple pie recipe proves you don’t need fancy techniques to create something spectacular. With the right apple mix, proper crust handling, and a little patience, you’ll pull a magazine-worthy pie from your oven every single time. The secret isn’t magic—it’s just understanding why each step matters.