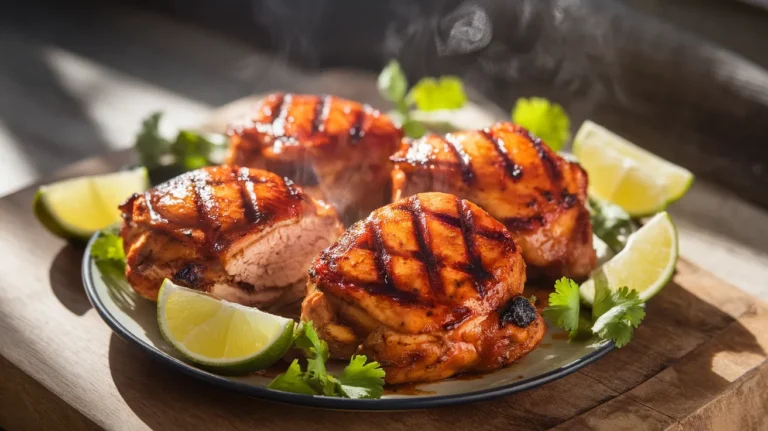
These classic baked chicken thighs deliver restaurant-quality results with minimal effort. Featuring golden, crispy skin and juicy, tender meat, this classic baked chicken thighs recipe transforms simple ingredients into a family favorite that’s perfect for weeknight dinners or special occasions.
SERVES: 4 | PREP: 15 MIN | COOK: 45 MIN | TOTAL: 60 MIN
Ingredients You’ll Need
Main Components
| Ingredient | Amount | Notes |
|---|---|---|
| Bone-in, skin-on chicken thighs | 8 pieces (2 lbs) | Room temperature |
| Olive oil | 2 tablespoons | Extra virgin preferred |
| Salt | 2 teaspoons | Kosher or sea salt |
| Black pepper | 1 teaspoon | Freshly ground |
| Garlic powder | 1 teaspoon | Not garlic salt |
| Onion powder | 1 teaspoon | Fresh alternative: 1 small minced onion |
| Paprika | 1 teaspoon | Sweet or smoked |
| Dried thyme | ½ teaspoon | Fresh alternative: 1 tablespoon |
| Dried rosemary | ½ teaspoon | Crushed between fingers |
Step-by-Step Instructions
Phase 1: Preparation (10 minutes)
Step 1: Remove chicken thighs from refrigerator 30 minutes before cooking. This ensures even cooking throughout. Pat each thigh completely dry with paper towels – moisture is the enemy of crispy skin.
Step 2: Preheat your oven to 425°F (220°C). This high temperature creates the perfect environment for crispy skin while keeping the meat juicy inside.
Step 3: Line a rimmed baking sheet with parchment paper or aluminum foil. This prevents sticking and makes cleanup effortless later.
Step 4: In a small bowl, combine all dry seasonings: salt, pepper, garlic powder, onion powder, paprika, thyme, and rosemary. Mix thoroughly with a fork to distribute evenly.
Phase 2: Seasoning (5 minutes)
Step 5: Place chicken thighs on the prepared baking sheet. Drizzle olive oil evenly over both sides of each thigh, using your hands to rub it into the skin. The oil helps seasonings stick and promotes browning.
Step 6: Sprinkle half the seasoning mixture over the chicken. Flip each thigh and season the other side with remaining mixture. Press seasonings gently into the skin to ensure adherence.
Step 7: Arrange thighs skin-side up, ensuring pieces don’t touch each other. This spacing allows hot air to circulate, creating crispy skin on all sides.
Phase 3: Initial Baking (25 minutes)
Step 8: Place the baking sheet on the middle rack of your preheated oven. Avoid opening the oven door during the first 20 minutes – this maintains consistent temperature for proper browning.
Step 9: After 25 minutes, check for golden browning on the skin. The thighs should be developing a beautiful bronze color. If skin appears pale, increase oven temperature to 450°F for the remaining cooking time.
Phase 4: Finishing and Testing (20 minutes)
Step 10: Continue baking for an additional 15-20 minutes. The skin should be deep golden brown and crispy when gently touched with tongs.
Step 11: Test doneness with an instant-read thermometer inserted into the thickest part of the thigh, avoiding bone. Internal temperature should reach 175°F (79°C) for perfectly cooked dark meat.
Step 12: If temperature hasn’t reached 175°F, continue baking in 5-minute intervals, checking temperature each time. Overcooked chicken becomes dry, so monitor carefully.
Phase 5: Resting and Serving (5 minutes)
Step 13: Remove chicken from oven and let rest for 5 minutes before serving. This resting period allows juices to redistribute throughout the meat, ensuring maximum tenderness.
Step 14: Transfer to serving platter using tongs to maintain crispy skin integrity. Serve immediately while skin is at peak crispiness.
Chef’s Notes
Skin Success Secret: The key to achieving crispy skin in these classic baked chicken thighs lies in starting with completely dry chicken and using high heat. Never skip the patting-dry step.
Temperature Matters: Dark meat like thighs can handle higher internal temperatures than breast meat. The extra 10 degrees above the standard 165°F ensures falling-off-the-bone tenderness.
Even Cooking Tip: Choose thighs of similar size for uniform cooking. Smaller pieces cook faster and may dry out before larger ones reach proper temperature.
Flavor Enhancement: For deeper flavor, season chicken thighs 2-4 hours ahead and refrigerate. Bring to room temperature before baking for best results.
Nutrition Information (Per Serving)
- Calories: 285
- Protein: 28g
- Carbohydrates: 1g
- Fat: 18g
- Sodium: 520mg
Delicious Variations
Mediterranean Classic Baked Chicken Thighs
Replace thyme and rosemary with oregano and add lemon zest. Serve with roasted vegetables for a complete meal similar to our lemon herb roasted chicken thighs.
Spicy Southern Style
Add 1 teaspoon cayenne pepper and ½ teaspoon smoked paprika to the seasoning mix. This creates a flavor profile reminiscent of homemade KFC chicken with a baked twist.
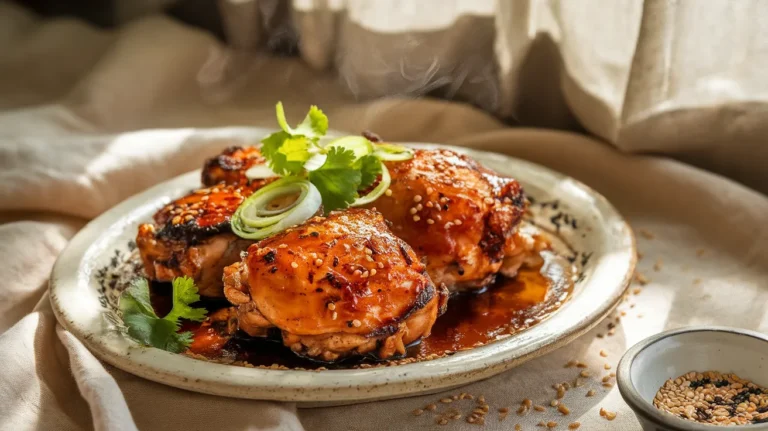
Asian-Inspired Glaze
Brush with soy sauce and honey mixture during last 10 minutes of baking. Sprinkle with sesame seeds before serving.
Italian Herb Blend
Use Italian seasoning instead of individual herbs and add grated Parmesan cheese during the last 5 minutes of cooking.
Storage and Reheating
Refrigerator Storage: Store leftover classic baked chicken thighs in airtight containers for up to 4 days. Place paper towels in container to absorb excess moisture.
Freezer Storage: Wrap individual thighs in plastic wrap, then aluminum foil. Freeze for up to 3 months. Label with date and contents.
Reheating Method: Preheat oven to 375°F. Place thighs on baking sheet and heat for 15-20 minutes until warmed through. This method maintains crispy skin better than microwaving.
Make-Ahead Tip: Season thighs up to 24 hours in advance. Cover and refrigerate, then bring to room temperature before baking for optimal results.

Troubleshooting Common Issues
Problem: Skin Not Crispy
Solution: Pat chicken completely dry before seasoning. Increase oven temperature to 450°F during last 10 minutes. Ensure thighs aren’t overcrowded on the pan.
Problem: Chicken Appears Dry
Solution: Check internal temperature – overcooked chicken loses moisture rapidly. Next time, remove at exactly 175°F and let carryover cooking finish the process.
Problem: Uneven Browning
Solution: Rotate baking sheet halfway through cooking. Choose thighs of similar size for uniform results. Position rack in center of oven for even heat distribution.
Problem: Seasonings Fall Off
Solution: Ensure chicken is properly oiled before seasoning. Press seasonings gently into skin. Avoid moving chicken during first 20 minutes of baking.
Problem: Internal Temperature Reached But Skin Pale
Solution: Switch oven to broil setting for final 2-3 minutes, watching carefully to prevent burning. Move rack to upper-middle position if needed.
Equipment Essentials
- Rimmed Baking Sheet: Prevents juices from spilling in oven
- Instant-Read Thermometer: Essential for food safety and perfect doneness
- Tongs: For flipping and moving chicken without piercing skin
- Paper Towels: Critical for achieving dry skin before seasoning
- Small Mixing Bowl: For combining seasoning blend evenly
Shopping List by Store Section
Meat Department
- 8 bone-in, skin-on chicken thighs (about 2 pounds)
Pantry/Spice Aisle
- Olive oil
- Kosher salt
- Black peppercorns (if grinding fresh)
- Garlic powder
- Onion powder
- Paprika
- Dried thyme
- Dried rosemary
Success Secrets
- Temperature Control: Always use an instant-read thermometer for perfect doneness. Guessing leads to overcooked or undercooked chicken.
- Skin Preparation: Completely dry chicken is non-negotiable for crispy skin. Use paper towels and let air-dry for 10 minutes after patting.
- Seasoning Timing: Season just before baking for weeknight meals, or up to 24 hours ahead for deeper flavor development.
- Spacing Strategy: Leave space between thighs on the baking sheet. Overcrowding creates steam, preventing crispy skin formation.
- Resting Ritual: Always let chicken rest 5 minutes after baking. This simple step ensures juicy, tender meat in every bite.
These classic baked chicken thighs prove that simple techniques and quality ingredients create extraordinary results. Master this basic recipe, and you’ll have a reliable dinner solution that satisfies every time.