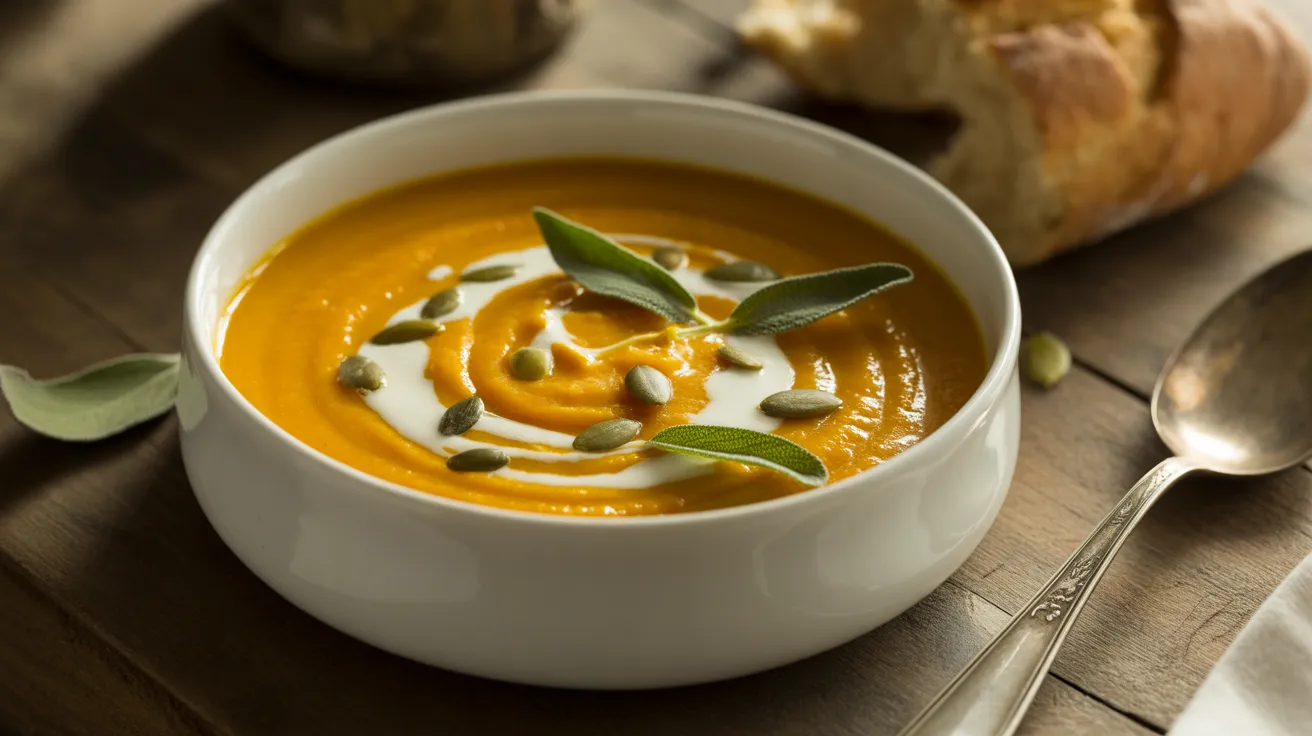
There’s something magical about a bowl of classic roasted butternut squash soup on a crisp fall evening. This classic roasted butternut squash soup transforms humble winter squash into a creamy, caramelized masterpiece that’ll have everyone asking for seconds.
SERVES: 4 | PREP: 20 MIN | COOK: 50 MIN | TOTAL: 70 MIN
Ingredients
For the Roasted Squash
| Ingredient | Amount |
|---|---|
| Butternut squash (medium) | 1 whole (about 3 lbs) |
| Olive oil | 3 tablespoons |
| Salt | 1 teaspoon |
| Black pepper | ½ teaspoon |
For the Soup Base
| Ingredient | Amount |
|---|---|
| Yellow onion (diced) | 1 large |
| Garlic cloves (minced) | 4 cloves |
| Vegetable broth | 4 cups |
| Heavy cream | ½ cup |
| Butter | 2 tablespoons |
| Ground cinnamon | ½ teaspoon |
| Ground nutmeg | ¼ teaspoon |
| Maple syrup | 1 tablespoon |
| Fresh thyme | 2 sprigs |
For Garnish
| Ingredient | Amount |
|---|---|
| Pumpkin seeds (toasted) | ¼ cup |
| Fresh sage leaves | 8 leaves |
| Crème fraîche | 4 tablespoons |
Step-by-Step Instructions
Phase 1: Preparing and Roasting the Squash (30 minutes)
1. Preheat your oven to 425°F (220°C). Line a large baking sheet with parchment paper. This prevents sticking and makes cleanup easier. The high temperature is crucial because it caramelizes the natural sugars in the squash, creating deeper flavor than boiling would ever achieve.
2. Cut the butternut squash in half lengthwise. Use a sharp chef’s knife and cut from stem to bottom. Apply steady pressure and rock the knife gently. If your squash is too hard, microwave it for 2-3 minutes first to soften the skin slightly. Be careful—butternut squash can be slippery!
3. Scoop out all the seeds and stringy pulp. Use a sturdy spoon to scrape the cavity completely clean. Save those seeds if you want to roast them separately as a snack! The cleaner you get this cavity, the easier it’ll be to scoop out the flesh later.
4. Brush the cut sides with 2 tablespoons of olive oil. Make sure you cover every bit of the orange flesh. Drizzle any extra oil into the cavity. The oil helps with caramelization and prevents drying out during roasting.
5. Season generously with salt and black pepper. Sprinkle about ½ teaspoon salt and ¼ teaspoon pepper on each half. Don’t be shy here—proper seasoning at this stage builds flavor throughout the entire soup.
6. Place squash halves cut-side down on the baking sheet. This position allows the flesh to make direct contact with the hot pan, creating beautiful caramelized spots. These brown bits are flavor gold!
7. Roast for 40-45 minutes until fork-tender. The squash is ready when a fork slides through the flesh like butter. You should see some golden-brown caramelization around the edges. The skin will also start to wrinkle slightly. If your squash pieces are particularly large, add 5-10 extra minutes.
8. Remove from oven and let cool for 10 minutes. This cooling time makes handling much safer and allows the flesh to firm up slightly, making it easier to scoop. Don’t skip this—hot squash can cause serious burns!
Phase 2: Building the Soup Base (15 minutes)
9. Scoop the roasted flesh from the skin. Use a large spoon and scrape firmly along the inside of the skin. You should get about 4 cups of cooked squash. Discard the skins. The flesh should be soft, golden, and smell slightly sweet.
10. Melt butter in a large pot over medium heat. Use a 6-quart pot minimum—you’ll need room for all that broth! Let the butter melt completely but don’t let it brown. You want gentle heat here.
11. Add diced onion and cook for 5-6 minutes until softened. Stir occasionally with a wooden spoon. The onions should turn translucent and smell sweet, but they shouldn’t brown. If they start browning, reduce your heat slightly. This gentle cooking removes the raw onion bite.
12. Add minced garlic and cook for 1 minute. Stir constantly during this minute. Garlic burns quickly and turns bitter, so keep it moving! You’ll smell that amazing garlic aroma when it’s ready.
Phase 3: Combining and Blending (15 minutes)
13. Add the roasted squash, vegetable broth, cinnamon, nutmeg, and thyme. Pour everything into the pot. The broth should just cover the squash. Bring to a gentle boil over medium-high heat, then reduce to a simmer. Let it cook for 10 minutes so all the flavors can get friendly with each other.
14. Remove thyme sprigs and blend the soup until silky smooth. Fish out those thyme stems before blending! Use an immersion blender right in the pot (easiest method), or carefully transfer to a regular blender in batches. If using a regular blender, only fill it halfway and hold the lid with a towel—hot soup expands and can explode out. Blend for 1-2 minutes until completely smooth with no lumps.
15. Stir in heavy cream and maple syrup. Pour them in and stir well. The cream adds richness while the maple syrup balances the savory notes with subtle sweetness. Taste and adjust seasoning—you might want another ¼-½ teaspoon salt depending on your broth.
16. Simmer for 5 more minutes to marry the flavors. Keep the heat low and stir occasionally. This final simmer brings everything together into soup perfection. If your soup seems too thick, add broth ¼ cup at a time until you reach your preferred consistency. It should coat a spoon but still pour easily.
Phase 4: Finishing Touches (5 minutes)
17. Crisp the sage leaves in remaining olive oil. Heat 1 tablespoon olive oil in a small pan over medium heat. Add sage leaves and fry for 30-45 seconds per side until crispy but still green. They’ll crisp more as they cool. Drain on paper towels.
18. Ladle soup into bowls and garnish. Pour about 1½ cups per serving. Top each bowl with 1 tablespoon crème fraîche, a swirl of it looks restaurant-fancy. Sprinkle with toasted pumpkin seeds and add 2 crispy sage leaves per bowl.
Chef’s Notes
The roasting makes all the difference. Don’t skip the roasting step to save time. Boiled squash creates a watery, bland soup. Roasted squash develops caramelized edges that give this classic roasted butternut squash soup its signature depth.
Immersion blender vs. regular blender. An immersion blender is safer and easier, but a regular blender creates an even silkier texture. If you want restaurant-quality smoothness, use a regular blender and strain through a fine-mesh sieve afterward.
The cream is negotiable. Full-fat coconut milk works beautifully as a dairy-free substitute. It adds richness without changing the flavor profile dramatically. For an even lighter version, skip cream entirely—the roasted squash provides enough body.
Make it a meal. Pair this soup with crusty bread or serve it alongside a simple salad. If you’re looking for other ways to use butternut squash, try making baked butternut squash fries as a fun side dish or appetizer.
Nutrition Information (Per Serving)
| Nutrient | Amount |
|---|---|
| Calories | 285 |
| Protein | 5g |
| Carbohydrates | 35g |
| Fat | 16g |
| Fiber | 6g |
| Sugar | 9g |
| Sodium | 890mg |
Recipe Variations
Spicy Southwestern Version: Add 1 teaspoon cumin, ½ teaspoon chipotle powder, and top with pepitas, cilantro, and a squeeze of lime. The smoky heat transforms this into a completely different soup that’s perfect for those who like bold flavors.
Curry-Spiced Soup: Replace cinnamon and nutmeg with 1 tablespoon curry powder and 1 teaspoon fresh grated ginger. Finish with coconut milk instead of cream. This variation pairs beautifully with naan bread for dipping.
Vegan Butternut Squash Soup: Skip the butter (use olive oil), cream (use coconut milk), and crème fraîche (use cashew cream). The result is just as creamy and satisfying. For a complete vegan approach, check out this vegan butternut squash soup recipe that uses different techniques.
Apple-Sage Version: Add 1 diced Granny Smith apple when sautéing the onions and double the sage. The tartness from the apple cuts through the richness and adds an unexpected brightness that works wonderfully with the sweet squash.
Storage & Reheating
Refrigerator Storage: Cool the soup completely before storing. Transfer to an airtight container and refrigerate for up to 5 days. The flavors actually improve on day two as everything melds together.
Freezer Storage: Freeze in portions for easy future meals. Use freezer-safe containers or heavy-duty freezer bags, leaving 1 inch of headspace for expansion. Label with the date and freeze for up to 3 months.
Reheating Instructions: Thaw frozen soup overnight in the refrigerator. Reheat gently on the stovetop over medium-low heat, stirring occasionally. Add a splash of broth or cream if it’s thickened too much. Microwave individual portions for 2-3 minutes, stirring halfway through.
Make-Ahead Tips: Roast the squash up to 2 days ahead and store in the fridge. You can also make the entire soup ahead and just prepare fresh garnishes when serving. The crispy sage leaves don’t store well, so always make those fresh.
Troubleshooting Guide
Problem 1: Soup is too thick and gloopy. Solution: Thin it out gradually with warm vegetable broth or cream, adding ¼ cup at a time while stirring. The soup thickens as it sits, so this is common when reheating. You want a consistency that coats the back of a spoon but still pours smoothly.
Problem 2: Soup tastes bland or flat. Solution: You probably need more salt! Add ¼ teaspoon at a time and taste after each addition. Also try adding 1 tablespoon lemon juice or 1 teaspoon apple cider vinegar—acid brightens all the flavors. A pinch of cayenne pepper or extra nutmeg can also wake things up.
Problem 3: Squash won’t soften even after extended roasting. Solution: Your oven temperature might be off, or the squash is old and dried out. Cover the squash with foil after 30 minutes and continue roasting—this traps moisture. Next time, test your oven temperature with an oven thermometer, and choose squash that feels heavy for its size.
Problem 4: Soup is too sweet. Solution: Balance sweetness with acid and salt. Add 1-2 tablespoons lemon juice and ¼ teaspoon salt. A pinch of cayenne or black pepper also helps cut through excessive sweetness. You can also stir in an extra ½ cup broth to dilute the sweetness.
Problem 5: Soup has a grainy or stringy texture. Solution: Blend longer! Most people don’t blend enough. Use a high-powered blender and process for a full 2 minutes. For ultimate smoothness, pass the blended soup through a fine-mesh strainer, pushing it through with a spatula. This removes any remaining fiber strands.
Equipment Essentials

- Large baking sheet (at least 13×18 inches)
- Sharp chef’s knife (8-inch minimum)
- Sturdy spoon for scooping seeds
- 6-quart heavy-bottomed pot
- Immersion blender or regular blender
- Wooden spoon for stirring
- Measuring cups and spoons
- Ladle for serving
- Small skillet for frying sage
Shopping List
Produce Section
- 1 medium butternut squash (3 lbs)
- 1 large yellow onion
- 1 head garlic
- Fresh thyme (1 small package)
- Fresh sage (1 small package)
Dairy Section
- Heavy cream (½ pint)
- Butter (small amount from stick)
- Crème fraîche (small container)
Pantry & Baking
- Olive oil
- Vegetable broth (32 oz carton)
- Maple syrup
- Ground cinnamon
- Ground nutmeg
- Salt and black pepper
- Toasted pumpkin seeds
Success Secrets
1. Choose the right squash. Look for butternut squash with a long neck and small bulb bottom—more neck means more usable flesh and less seeds. The skin should be matte, not shiny, indicating it’s fully ripe. Heavy squash means more moisture and better flavor.
2. Don’t overcrowd your baking sheet. Give those squash halves space! Crowding creates steam instead of the caramelization you want. If you’re doubling the recipe, use two baking sheets rather than cramming everything onto one.
3. Taste and adjust constantly. Season in layers—after roasting, after sautéing onions, and before serving. Soup that tastes flat usually just needs more salt. The maple syrup amount can vary depending on your squash’s natural sweetness, so always taste first.
4. Control the consistency. This classic roasted butternut squash soup should be creamy but pourable, coating a spoon without being gloopy. Start with less liquid than you think you need—you can always thin it out, but you can’t easily thicken it without changing the flavor.
5. Garnishes aren’t just decoration. The crispy sage, crunchy pepitas, and tangy crème fraîche provide essential texture and flavor contrast. A bowl of smooth soup needs those textural elements to keep each bite interesting. Don’t skip them!