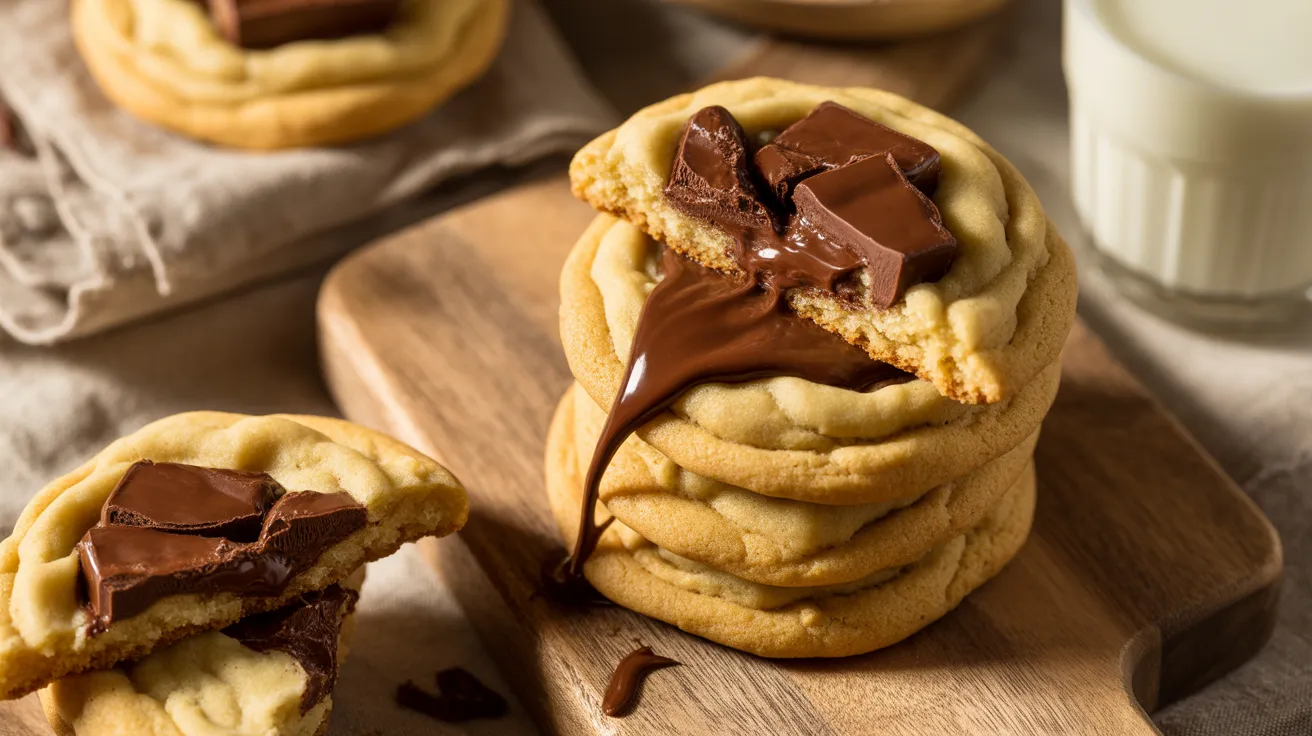
Looking for a cookie recipe that turns out right every single time, even if you’ve never baked before? This cookie recipe walks you through every single step, so you end up with soft, chewy centers and crisp golden edges using ingredients you probably already have in your kitchen.
Recipe Info Bar
SERVES: 4 (2 cookies per serving) | PREP: 15 MIN | COOK: 12 MIN | CHILL (optional): 20-30 MIN | TOTAL: 27 MIN active time
Ingredients
Dry Ingredients
| Ingredient | Amount |
|---|---|
| All-purpose flour | 1 ¼ cups (150g) |
| Baking soda | ½ tsp |
| Salt | ½ tsp |
Wet Ingredients
| Ingredient | Amount |
|---|---|
| Unsalted butter, softened | ½ cup / 1 stick (113g) |
| Brown sugar, packed | ½ cup (110g) |
| Granulated sugar | ¼ cup (50g) |
| Egg | 1 large |
| Vanilla extract | 1 tsp |
Mix-Ins
| Ingredient | Amount |
|---|---|
| Semi-sweet chocolate chunks | ¾ cup (130g) |
| Flaky sea salt (optional) | Small pinch per cookie |
A quick note on the flour: measure it by spooning it into your measuring cup and leveling off the top with a knife. Scooping straight from the bag packs in extra flour and dries out your dough — this is the single biggest reason home bakers end up with tough cookies.
Step-by-Step Instructions
Phase 1: Get Your Kitchen Ready
- Set your oven to 375°F and let it preheat fully before your dough is even ready. Ovens need time to reach an even temperature all the way through, and a half-heated oven bakes unevenly.
- Line a baking sheet with parchment paper. This stops the cookies from sticking and helps the bottoms brown evenly instead of burning.
- Make sure your butter is truly softened, not melted. Press a finger into it — it should dent easily without your finger sinking all the way to the counter. If it’s too firm, cut it into small cubes and let it sit at room temperature for 20-30 minutes.
- Pull out two mixing bowls (one medium, one large), a hand mixer if you have one, and a spatula. Having everything measured and ready before you start makes the rest of this go smoothly.
Phase 2: Mix the Dry Ingredients
- In your medium bowl, whisk together the flour, baking soda, and salt. Whisking now spreads the baking soda evenly through the flour so you don’t end up with a bitter spot in one bite of cookie. Set this bowl aside.
Phase 3: Cream the Butter and Sugar
- In your large bowl, add the softened butter, brown sugar, and granulated sugar. Beat with a hand mixer on medium speed for about 2 full minutes.
- Keep beating until the mixture looks noticeably lighter in color and fluffy, almost like frosting. This step is called “creaming,” and it works tiny air bubbles into the butter that help your cookies rise slightly and stay soft. Don’t rush past the 2-minute mark, even if it looks done sooner.
- Add the egg and vanilla extract to the butter mixture. Beat again until everything looks smooth, glossy, and fully blended, with no streaks of egg left.
Phase 4: Bring the Dough Together
- Pour the dry flour mixture into the wet butter mixture all at once.
- Stir gently with a spatula, folding from the bottom of the bowl up. Stop as soon as you no longer see dry streaks of flour. The dough should look thick and slightly sticky.
- Overmixing at this stage builds up gluten, which is what makes cookies turn out tough and bread-like instead of tender. If you’re using a hand mixer for this step, switch to low speed and mix for only a few seconds.
- Fold in the chocolate chunks by hand with your spatula, turning the dough over a few times until the chunks are spread evenly, not clumped in one spot.
Phase 5: Shape and Chill the Dough
- Using a cookie scoop or a spoon, portion the dough into 8 balls, about 3 tablespoons of dough each. If you don’t have a scoop, rolling the dough between your palms works fine.
- Place the dough balls on your lined baking sheet, spacing them 2 inches apart. They’ll spread quite a bit as they bake, so don’t crowd them.
- Chill the shaped dough balls in the fridge for 20-30 minutes. This step is optional, but it firms up the butter so the cookies hold their shape instead of melting flat, and it also deepens the flavor. If you’re short on time, you can skip straight to baking.
Phase 6: Bake to Golden Perfection
- Bake one sheet at a time on the middle oven rack for 10-12 minutes.
- Start checking at the 9-minute mark. You’re looking for edges that are turning light golden brown while the centers still look a little soft and slightly underdone. This is normal — the cookies keep cooking after they come out of the oven.
- If you like a little extra flourish, sprinkle a small pinch of flaky sea salt over each cookie the moment they come out of the oven. The leftover heat helps it stick to the top.
- Let the cookies sit on the hot baking sheet for 5 minutes before moving them. This “resting” time lets them finish setting up so they don’t fall apart when you lift them.
Phase 7: Cool Completely
- Use a flat spatula to carefully move the cookies from the baking sheet to a wire cooling rack. This lets air move underneath them so the bottoms stay crisp instead of turning soggy from trapped steam.
- Let the cookies cool for at least 10 minutes before eating. The centers are still setting during this time, so a cookie you taste too early will seem doughy even though it’s fully baked.
Chef’s Notes
- Room-temperature ingredients matter more than people think. Cold butter or egg won’t blend smoothly into the sugar, and that smooth blend is what gives this cookie recipe its soft texture.
- Chill the dough if you can spare the time. It’s the easiest fix for cookies that spread too thin and turn greasy.
- Pull the cookies out while the centers still look slightly soft. They firm up as they cool, and this is the real secret to a chewy middle instead of a hard, dry one.
- Weigh your flour if you bake often. The gram measurements above (150g flour) give you the most consistent results batch after batch, since a “cup” of flour can vary depending on how it’s scooped.
Nutrition Information
Per serving (2 cookies), calculated from the exact ingredient amounts above, divided across 4 servings:
- Calories: ~660
- Protein: 6g
- Carbohydrates: 85g
- Fat: 34g
These are generous, bakery-style cookies (about 75g of dough each before baking), which is why the numbers run higher than a small store-bought cookie. If you’d like a lighter serving, portion the dough into 12 smaller cookies instead of 8 — same total recipe, roughly 440 calories for 2 cookies.
Creative Variations
Once you’ve got this base cookie recipe down, try one of these:
- Double Chocolate — Replace ¼ cup of the flour with cocoa powder for a rich, brownie-like bite.
- Nutty Crunch — Fold in ½ cup chopped walnuts or pecans along with the chocolate.
- Classic Swap — Want the original instead? Try this chocolate chip cookie recipe for a timeless take.
- Simple and Sweet — If chocolate isn’t your thing, this sugar cookie recipe is a lighter, buttery alternative.
Storage & Reheating
- Room temperature: Store cooled cookies in an airtight container for up to 5 days.
- Freezer (baked): Freeze cookies in a single layer until solid, then move them to a freezer bag for up to 3 months.
- Freezer (raw dough): Freeze shaped dough balls on a tray until firm, then bag them. Bake straight from frozen, adding 1-2 extra minutes to the bake time.
- Reheating: Warm cookies in a 300°F oven for 3-4 minutes to bring back that fresh-baked softness.
Troubleshooting
- Cookies spread too much and turned thin: Your butter was probably too warm, or the dough skipped chilling. Chill the shaped dough for at least 30 minutes next time.
- Cookies came out dry or crumbly: Too much flour is the usual cause. Spoon flour into the measuring cup and level it off instead of scooping straight from the bag.
- Cookies stayed pale instead of turning golden: Your oven may be running cooler than the dial shows. An inexpensive oven thermometer will confirm the real temperature.
- Cookies turned out flat and greasy: The butter was likely overmixed or too soft going in. It should dent when pressed, not feel oily or shiny.
- Centers stayed raw or gummy in the middle: Give them another 1-2 minutes in the oven, and double-check your oven’s real temperature with a thermometer.
Equipment Essentials
- Large mixing bowl
- Medium mixing bowl
- Hand mixer or stand mixer (a sturdy whisk works too, with more effort)
- Cookie scoop or a regular spoon
- Baking sheet
- Parchment paper
- Wire cooling rack
- Kitchen scale (optional, but recommended for accuracy)
Shopping List
Baking Aisle
- All-purpose flour
- Baking soda
- Brown sugar
- Granulated sugar
- Vanilla extract
- Semi-sweet chocolate chunks
Refrigerated Section
- Unsalted butter
- Eggs
Spice Aisle
- Salt
- Flaky sea salt (optional)
Success Secrets
- Spoon and level your flour instead of scooping — this alone fixes most dry, crumbly cookies.
- Cream the butter and sugar for the full 2 minutes so the dough has enough air worked into it.
- Chill the dough for 20-30 minutes whenever you have the time.
- Pull the cookies out while the centers still look a little soft — they finish cooking as they cool.
- Let cookies rest on the hot baking sheet for 5 minutes before moving them to a rack.