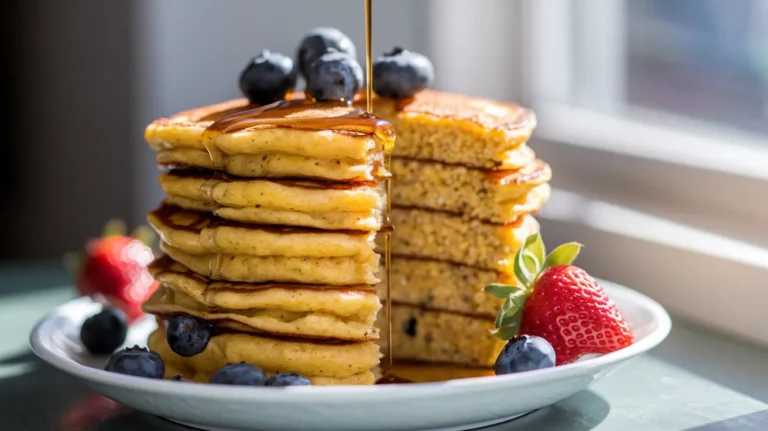
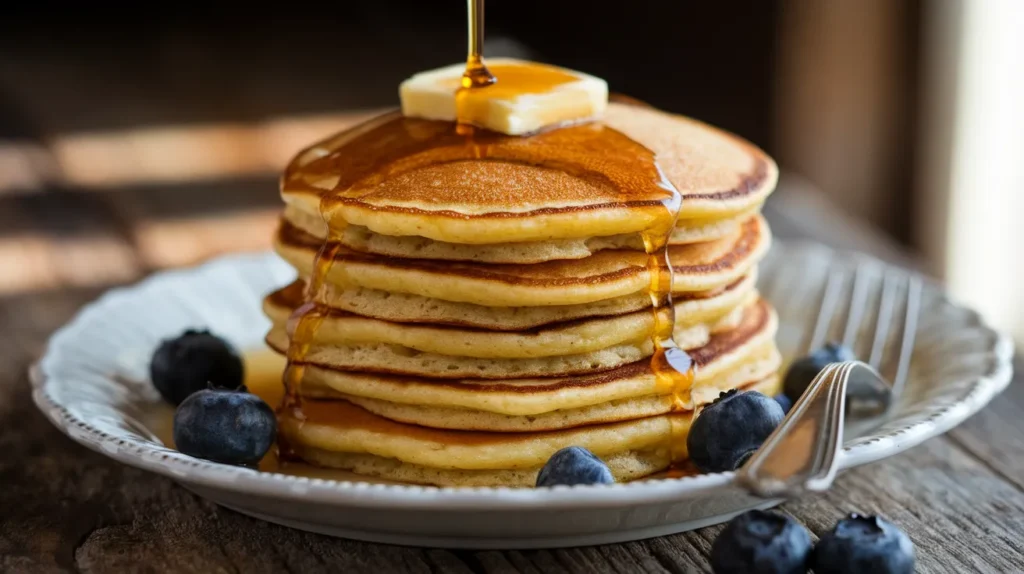
These golden cornmeal pancakes no flour create the perfect breakfast treat with their naturally sweet corn flavor and tender crumb. Made entirely without wheat flour, these cornmeal pancakes no flour deliver a delightfully rustic texture that pairs beautifully with maple syrup and fresh berries.
SERVES: 4 | PREP: 20 MIN | COOK: 25 MIN | TOTAL: 45 MIN
Ingredients
Dry Ingredients
| Ingredient | Amount |
|---|---|
| Fine cornmeal | 2 cups |
| Baking powder | 2 teaspoons |
| Salt | 1 teaspoon |
| Sugar | 3 tablespoons |
Wet Ingredients
| Ingredient | Amount |
|---|---|
| Large eggs | 3 |
| Whole milk | 1¾ cups |
| Melted butter | 4 tablespoons |
| Vanilla extract | 1 teaspoon |
For Cooking
| Ingredient | Amount |
|---|---|
| Butter or oil | As needed |
Detailed Step-by-Step Instructions for Cornmeal Pancakes No Flour
Phase 1: Setting Up Your Kitchen (5 minutes)
Step 1: Prepare Your Cooking Station Start by gathering all your ingredients on the counter. This prevents scrambling mid-recipe. Place your griddle or large heavy-bottomed skillet on the stove but don’t turn on the heat yet. If you don’t have a griddle, a cast iron skillet or non-stick pan works perfectly. Position a wire cooling rack inside a rimmed baking sheet and place it near your stove – this will hold finished pancakes.
Step 2: Get Your Mixing Bowls Ready Set out two large mixing bowls – one for dry ingredients and one for wet ingredients. Having separate bowls prevents overmixing, which makes tough pancakes. Also grab a medium bowl for beating eggs, a wire whisk, measuring cups, and a wooden spoon or rubber spatula for folding.
Step 3: Preheat Your Oven Turn your oven to 200°F (93°C). This low temperature keeps finished pancakes warm without drying them out. If your oven doesn’t go this low, use the “warm” setting.
Phase 2: Preparing the Dry Ingredients (3 minutes)
Step 4: Measure the Cornmeal Correctly Using a dry measuring cup, spoon cornmeal into the cup without packing it down. Level off with a knife edge. Packed cornmeal creates dense, heavy pancakes. Pour 2 cups into your large mixing bowl. Fine cornmeal works best for smooth texture – coarse cornmeal creates grittier pancakes.
Step 5: Add Remaining Dry Ingredients Measure 2 teaspoons baking powder using measuring spoons – too much creates bitter flavor, too little means flat pancakes. Add 1 teaspoon salt (table salt works fine) and 3 tablespoons sugar. White granulated sugar is perfect, but you can substitute brown sugar for deeper flavor.
Step 6: Whisk Dry Ingredients Thoroughly Using your wire whisk, mix all dry ingredients for 30-45 seconds until completely combined. Make sure no clumps of cornmeal or baking powder remain. This even distribution prevents pockets of salty or bitter flavor in finished pancakes.
Phase 3: Preparing Wet Ingredients (5 minutes)
Step 7: Beat the Eggs Properly Crack 3 large eggs into your medium bowl. Check each egg for broken shells before adding the next. Using a fork or small whisk, beat eggs for 1-2 minutes until the mixture is completely smooth and slightly frothy. Properly beaten eggs create lighter, fluffier pancakes.
Step 8: Melt the Butter Safely Place 4 tablespoons (½ stick) butter in a microwave-safe bowl. Microwave for 30-45 seconds until completely melted but not bubbling. Safety tip: The bowl will be hot, so use oven mitts. Let melted butter cool for 2-3 minutes – adding hot butter to eggs can cook them.
Step 9: Combine All Wet Ingredients Pour 1¾ cups whole milk into the beaten eggs. Add the cooled melted butter and 1 teaspoon vanilla extract. Whisk everything together for 30 seconds until the mixture looks smooth and uniform. The combination should have a pale yellow color.
Phase 4: Creating the Perfect Batter (7 minutes)
Step 10: Make a Well in Dry Ingredients Using a wooden spoon, create a deep well (like a crater) in the center of your dry ingredient mixture. The well should reach almost to the bottom of the bowl. This technique prevents overmixing when combining wet and dry ingredients.
Step 11: Combine Ingredients Gently Pour all wet ingredients into the well at once. Using a wooden spoon or rubber spatula, start folding from the bottom of the bowl upward. Make gentle circular motions, scraping the sides occasionally. Mix until ingredients are just combined – about 15-20 stirs. Important: The batter should look slightly lumpy. Smooth batter means overmixing, which creates tough pancakes.
Step 12: Rest the Batter Set your batter aside for exactly 5 minutes. During this time, cornmeal absorbs moisture and swells, creating better texture. The batter will thicken slightly – this is normal and desired. Don’t stir during resting period.
Step 13: Check Batter Consistency After resting, gently stir once or twice. The batter should coat a spoon but still pour easily. If too thick (doesn’t pour), add 1 tablespoon milk and stir gently. If too thin (runs off spoon immediately), add 1 tablespoon cornmeal. Perfect consistency resembles thick pancake syrup.
Phase 5: Heating Your Cooking Surface (3 minutes)
Step 14: Heat Your Griddle Properly Turn heat to medium (on electric stoves, use setting 5-6 out of 10). Let the cooking surface heat for 3-4 minutes. Proper preheating is crucial – too hot burns the outside before cooking the center, too cool creates pale, dense pancakes.
Step 15: Test the Temperature Sprinkle 3-4 drops of water on the cooking surface. Correct temperature makes water droplets dance and sizzle, evaporating within 2-3 seconds. If water sits quietly, increase heat. If water disappears instantly with violent sizzling, reduce heat and wait 1 minute before testing again.
Phase 6: Cooking Perfect Cornmeal Pancakes No Flour (15 minutes)
Step 16: Grease the Cooking Surface Add ½ teaspoon butter or oil to your hot griddle. Using a paper towel, spread fat evenly across the surface. You want just enough to prevent sticking – too much creates uneven browning and greasy pancakes.
Step 17: Pour the Batter Using a ¼ cup measuring cup or ladle, pour batter onto the griddle. These cornmeal pancakes no flour don’t spread as much as regular pancakes, so pour them 2-3 inches apart. Each pancake should be about 4 inches wide. For even cooking, pour all pancakes for one batch before any start browning.
Step 18: Watch for Visual Cues Cook for 3-4 minutes without moving the pancakes. Watch for these signs they’re ready to flip:
- Small bubbles form across the surface
- Edges look set and slightly dry
- Bottom edges start pulling away from the griddle
- Surface loses its wet shine
Step 19: The Perfect Flip Using a wide, thin spatula, slide it completely under each pancake. Flip with one quick, confident motion. Don’t press down after flipping – this squeezes out air and creates dense pancakes. The second side cooks faster, typically 2-3 minutes.
Step 20: Check for Doneness The second side is done when it’s golden brown and feels slightly springy when gently pressed with the spatula. If you’re unsure, lift one edge to peek at the color. Properly cooked cornmeal pancakes no flour should be golden brown with slightly crispy edges.
Phase 7: Finishing and Serving (5 minutes)
Step 21: Keep Pancakes Warm Transfer finished pancakes to your prepared wire rack in the warm oven. The wire rack prevents sogginess by allowing air circulation. Don’t stack pancakes directly on a plate – they’ll steam and become soggy.
Step 22: Cook Remaining Batches Re-grease the griddle lightly between batches. The batter may thicken as it sits – add 1-2 tablespoons milk if needed. Maintain consistent heat throughout cooking.
Step 23: Final Temperature Check Before serving, check that pancakes are heated through by cutting one in half. The center should be fluffy and completely cooked, not gummy or wet. If centers seem undercooked, your griddle temperature is too high.
Step 24: Serve Immediately Serve your cornmeal pancakes no flour hot with butter, maple syrup, honey, or fresh berries. The natural corn sweetness pairs beautifully with traditional toppings.
Chef’s Notes for Perfect Cornmeal Pancakes No Flour
Cornmeal Selection: Use fine cornmeal for the smoothest texture in your cornmeal pancakes no flour. Coarse cornmeal creates a grittier texture that some prefer for rustic appeal.
Temperature Control: These pancakes require slightly lower heat than traditional flour pancakes because cornmeal browns faster and can become bitter if overcooked.
Batter Consistency: The batter will thicken as it sits due to cornmeal absorption. Have extra milk ready to thin if needed between batches.
Flavor Enhancement: Toast your cornmeal in a dry skillet for 2-3 minutes before mixing to add deeper, nuttier flavor to your finished pancakes.
Nutrition Information (Per Serving)
- Calories: 285
- Protein: 9g
- Carbohydrates: 42g
- Fat: 9g
- Fiber: 3g
- Sugar: 12g
Creative Variations for Cornmeal Pancakes No Flour
Blueberry Cornmeal Pancakes: Fold ½ cup fresh blueberries into the rested batter. The berries add natural sweetness and beautiful color contrast.
Savory Herb Version: Reduce sugar to 1 tablespoon and add 2 tablespoons chopped fresh herbs like chives or thyme. Perfect alongside eggs and bacon.
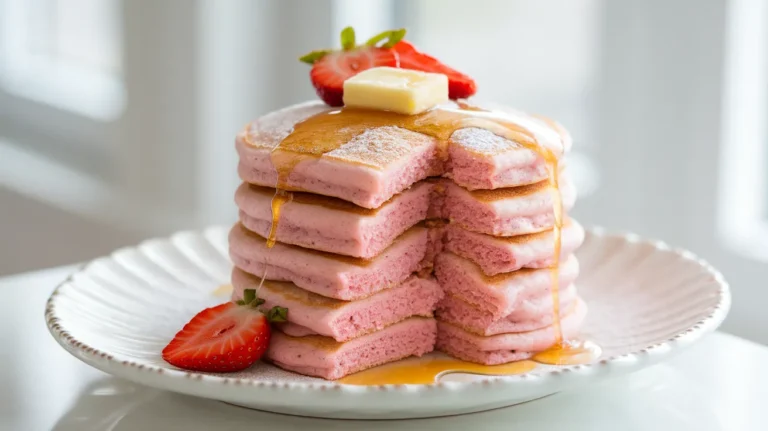
Cinnamon Spice Pancakes: Add 1 teaspoon cinnamon and ½ teaspoon nutmeg to dry ingredients. These pair wonderfully with our cinnamon roll pancakes for a spiced breakfast spread.
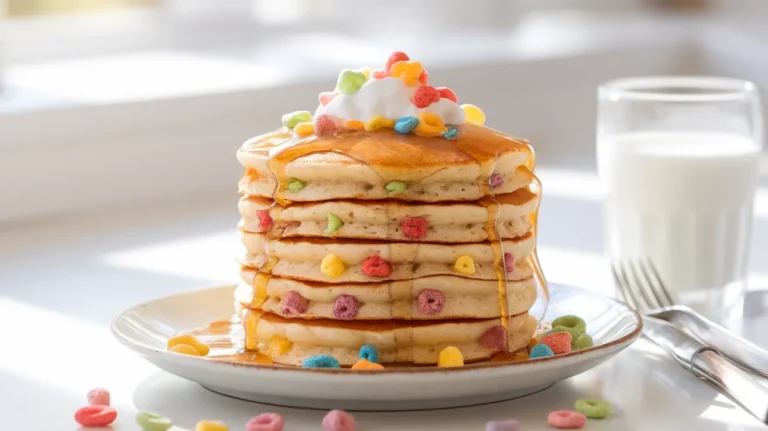
Chocolate Chip Delight: Stir in ⅓ cup mini chocolate chips after the batter rests. Kids love this variation almost as much as our colorful fruity pebble pancakes.
Storage & Reheating
Refrigerator Storage: Cool completely before storing in airtight containers for up to 3 days. Layer parchment paper between pancakes to prevent sticking.
Freezer Storage: Wrap individual pancakes in plastic wrap and freeze for up to 2 months. This makes quick weekday breakfasts possible.
Reheating Methods: Toast frozen pancakes directly in the toaster for best texture. Microwave for 30-45 seconds or warm in a 300°F oven for 5 minutes.
Make-Ahead Tips: Prepare dry ingredients the night before. Mix wet ingredients fresh for best results and optimal rise.
Troubleshooting Guide for Cornmeal Pancakes No Flour
Problem: Pancakes are too dense Solution: Check baking powder freshness (should foam when mixed with hot water) and avoid overmixing the batter. Dense pancakes usually result from expired leavening or overworked batter.
Problem: Pancakes fall apart when flipping Solution: Let them cook longer before flipping – the surface should look almost dry with set edges. Also ensure your spatula is wide enough to support the entire pancake.
Problem: Bitter or burnt flavor Solution: Reduce heat and ensure your cornmeal is fresh (old cornmeal can taste bitter). Store cornmeal in airtight containers in cool, dry places.
Problem: Pancakes are too dry Solution: Add an extra 2-3 tablespoons of milk to the batter and don’t overcook. Dry pancakes often result from too little liquid or excessive cooking time.
Problem: Uneven browning Solution: Ensure even heat distribution and use just enough fat to coat the pan lightly. Rotate your pan occasionally if you notice hot spots.
Equipment Essentials
- Large mixing bowls (2)
- Wire whisk
- Measuring cups and spoons
- Large griddle or heavy skillet
- Wide spatula
- Ladle or ¼ cup measure
Alternative Equipment: Cast iron skillet works beautifully for even heat distribution. Electric griddle offers consistent temperature control.
Shopping List
Dairy Section
- Whole milk
- Large eggs
- Butter
Baking Aisle
- Fine cornmeal
- Baking powder
- Vanilla extract
- Sugar
- Salt
Optional Add-ins
- Fresh blueberries
- Maple syrup
- Honey
Success Secrets
- Test your baking powder before starting – it should bubble vigorously in hot water to ensure proper rise.
- Measure cornmeal correctly by spooning into measuring cups and leveling off – packed cornmeal creates heavy pancakes.
- Keep finished pancakes warm in a 200°F oven on a wire rack to maintain crispness while cooking batches.
- Adjust consistency gradually – add liquids 1 tablespoon at a time to avoid making batter too thin.
- Listen for the sizzle when batter hits the griddle – it should sizzle gently, not violently or not at all.
These cornmeal pancakes no flour prove that simple ingredients create extraordinary breakfast experiences. The natural corn sweetness and hearty texture make them a satisfying alternative to traditional pancakes that the whole family will request again and again.