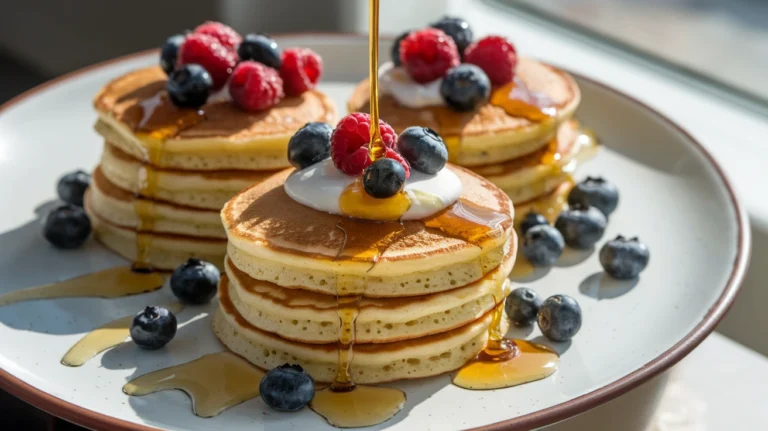
These incredibly fluffy cottage cheese pancakes transform your breakfast into a protein-packed masterpiece that rivals any diner stack. With their creamy texture and satisfying taste, these cottage cheese pancakes deliver 20 grams of protein per serving while maintaining that classic pancake comfort we all crave.
SERVES: 4 | PREP: 10 MIN | COOK: 15 MIN | TOTAL: 25 MIN
Ingredients
Wet Ingredients
| Ingredient | Amount |
|---|---|
| Cottage cheese (small curd) | 1 cup |
| Large eggs | 4 |
| Milk (whole or 2%) | 1/4 cup |
| Vanilla extract | 1 teaspoon |
Dry Ingredients
| Ingredient | Amount |
|---|---|
| All-purpose flour | 1/2 cup |
| Sugar | 2 tablespoons |
| Baking powder | 1 teaspoon |
| Salt | 1/4 teaspoon |
For Cooking
| Ingredient | Amount |
|---|---|
| Butter or oil | 2 tablespoons |
Step-by-Step Instructions
Phase 1: Prepare the Batter (5 minutes)
Step 1: Place the cottage cheese in a large mixing bowl and gently mash with a fork for 30 seconds. This breaks down larger curds and creates a smoother texture in your finished pancakes. Don’t over-mash – you want some small curds remaining for texture.
Step 2: Crack the eggs directly into the bowl with cottage cheese. Whisk vigorously for 1 minute until the mixture becomes pale yellow and slightly frothy. This aeration step is crucial for creating fluffy cottage cheese pancakes.
Step 3: Pour in the milk and vanilla extract. Stir gently with a wooden spoon until just combined. The mixture should look creamy but slightly lumpy from the cottage cheese curds.
Step 4: In a separate medium bowl, whisk together flour, sugar, baking powder, and salt. This ensures even distribution of leavening agents, preventing dense spots in your pancakes.
Step 5: Create a well in the center of the dry ingredients. Pour the cottage cheese mixture into this well. Using a rubber spatula, fold the ingredients together with 8-10 gentle strokes. Warning: Overmixing creates tough, rubbery pancakes.
Step 6: Let the batter rest for 3 minutes. This allows the flour to hydrate and the baking powder to activate, resulting in extra-fluffy cottage cheese pancakes.
Phase 2: Heat the Pan (2 minutes)
Step 7: Preheat a large non-stick skillet or griddle over medium heat (300-325°F if you have a thermometer). The surface is ready when a drop of water sizzles and evaporates within 2 seconds.
Step 8: Add 1 teaspoon of butter to the pan, swirling to coat evenly. The butter should foam but not brown – if it browns immediately, lower your heat.
Phase 3: Cook the Pancakes (12 minutes)
Step 9: Using a 1/4 cup measuring cup, pour batter onto the heated surface, spacing pancakes 2 inches apart. The batter will be thicker than regular pancake batter – this is normal for cottage cheese pancakes.
Step 10: Cook for 2-3 minutes until bubbles form on the surface and the edges look set. You’ll see fewer bubbles than with regular pancakes due to the dense cottage cheese base.
Step 11: Carefully flip using a wide spatula. The first side should be golden brown with slight cottage cheese speckles visible. Cook the second side for 2 minutes until golden.
Step 12: Transfer finished pancakes to a warm plate and cover loosely with foil. This keeps them warm while you cook the remaining batches.
Step 13: Add more butter to the pan between batches as needed. Maintain consistent medium heat – too high will burn the outside while leaving centers undercooked.
Step 14: Repeat the process until all batter is used, typically making 12-14 pancakes total.
Chef’s Notes
Texture Perfection: The key to exceptional cottage cheese pancakes lies in finding the right balance between smooth and chunky cottage cheese. Small curd varieties work best, but if you only have large curd, pulse it 2-3 times in a food processor before using.
Temperature Control: Medium heat is crucial for these protein-rich pancakes. The cottage cheese can cause them to brown quickly on the outside while remaining undercooked inside if your heat is too high.
Batter Consistency: Unlike traditional pancake batter, cottage cheese pancakes batter should be thick and slightly lumpy. If it seems too thick, add milk one tablespoon at a time.
Make-Ahead Tip: Double the recipe and freeze extras in a single layer on a baking sheet, then transfer to freezer bags. Toast directly from frozen for quick weekday breakfasts.
Nutrition Information (Per Serving)
- Calories: 245
- Protein: 20g
- Carbohydrates: 18g
- Fat: 12g
- Fiber: 1g
- Sugar: 8g
Creative Variations
Berry Bliss Cottage Cheese Pancakes: Fold 1/2 cup fresh blueberries or chopped strawberries into the batter during step 5. The berries add natural sweetness and beautiful color bursts.
Chocolate Chip Delight: Add 1/3 cup mini chocolate chips to create an indulgent weekend treat that kids absolutely love. The chips won’t sink due to the thick batter consistency.
Lemon Ricotta Style: Replace vanilla with lemon zest from one lemon and add 1 tablespoon lemon juice. This creates a bright, café-style breakfast that pairs beautifully with fresh berries.
Protein Power Stack: For even more protein, try incorporating techniques from our protein pancakes guide, which offers additional ways to boost your morning nutrition without sacrificing taste.
Storage & Reheating
Refrigerator Storage: Store leftover cottage cheese pancakes in an airtight container for up to 3 days. Layer parchment paper between pancakes to prevent sticking.
Freezing Instructions: Freeze individual pancakes on a baking sheet for 2 hours, then transfer to freezer bags for up to 2 months. Label with date and quantity.
Reheating Methods:
- Toaster: Toast frozen pancakes directly on medium setting for 2 cycles
- Microwave: Heat refrigerated pancakes for 30-45 seconds on 70% power
- Oven: Warm at 350°F for 5-7 minutes, covering with foil to prevent drying

Troubleshooting Common Issues
Problem 1: Pancakes are dense and heavy Solution: You likely overmixed the batter or used too much flour. Measure flour by spooning it into the cup and leveling off, rather than scooping directly from the bag.
Problem 2: Pancakes fall apart when flipping Solution: Let them cook longer on the first side until bubbles form and edges are completely set. Use a wide, thin spatula for easier flipping.
Problem 3: Centers are undercooked while edges burn Solution: Lower your heat to medium-low. Cottage cheese pancakes need gentle, even cooking due to their dense texture and high protein content.
Problem 4: Pancakes taste too tangy Solution: Use mild cottage cheese rather than sharp varieties. You can also add an extra tablespoon of sugar to balance the flavors.
Problem 5: Batter seems too thick to pour Solution: Add milk one tablespoon at a time until you achieve a thick but pourable consistency. The batter should drop from a spoon rather than pour smoothly.
Equipment Essentials
- Large mixing bowl (for combining wet ingredients)
- Medium mixing bowl (for dry ingredients)
- Non-stick skillet or griddle (at least 10-inch diameter)
- Wire whisk (for beating eggs and cottage cheese)
- Rubber spatula (for gentle folding)
- Wide, thin spatula (for easy flipping)
- 1/4 cup measuring cup (for consistent pancake sizes)
- Fork (for initial cottage cheese mashing)
Shopping List
Dairy Section
- Cottage cheese (small curd, 16 oz container)
- Large eggs (dozen)
- Whole milk (quart)
- Butter (stick form)
Pantry/Baking Aisle
- All-purpose flour
- Granulated sugar
- Baking powder
- Vanilla extract
- Salt
Optional Add-ins
- Fresh berries
- Mini chocolate chips
- Lemons (for zest variation)
Success Secrets
1. Room temperature ingredients blend more easily and create smoother cottage cheese pancakes. Take eggs and milk out 30 minutes before cooking.
2. Test your first pancake as a “tester.” Adjust heat and timing based on how it cooks before making the full batch.
3. Keep finished pancakes warm in a 200°F oven on a wire rack set over a baking sheet. This prevents sogginess while maintaining perfect temperature.
4. For extra fluffy results, separate the eggs and whip the whites to soft peaks, then fold them in last. This technique creates restaurant-quality height and texture.
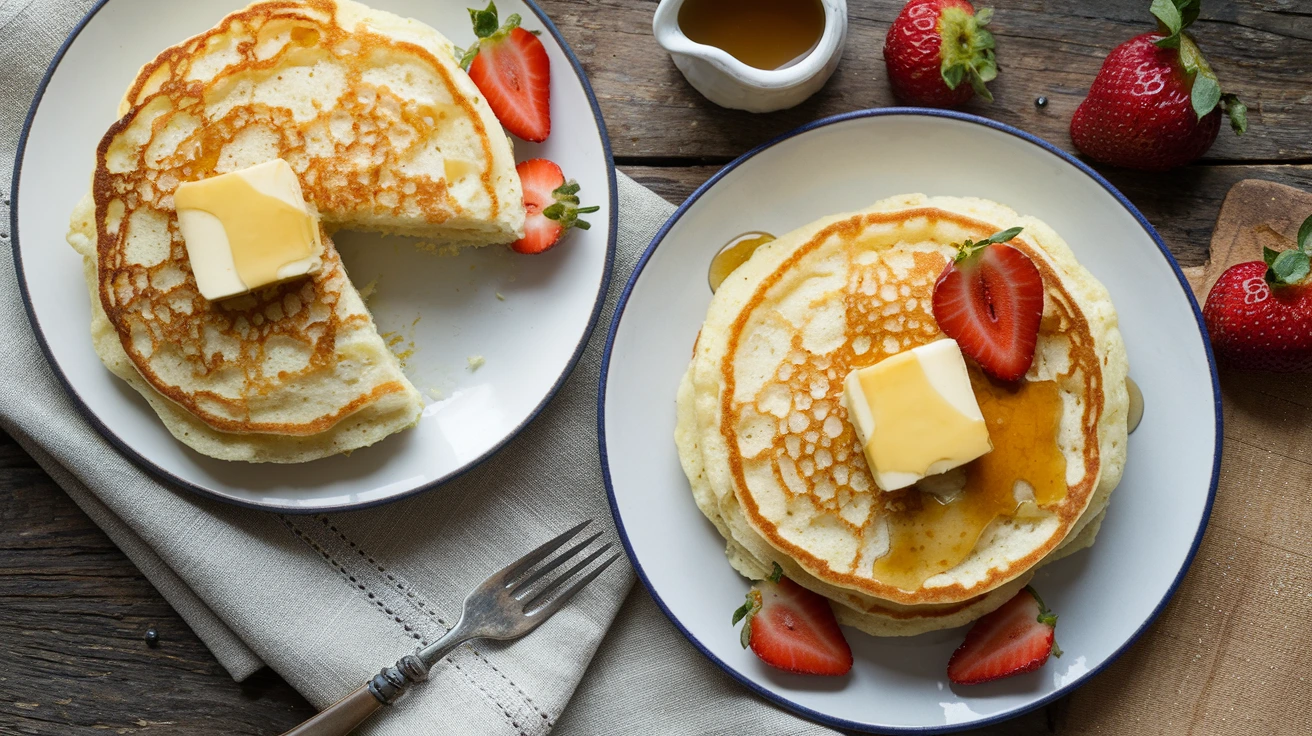
5. Serve immediately with warm syrup, fresh fruit, or a light dusting of powdered sugar. Unlike traditional pancakes, cottage cheese pancakes are best enjoyed fresh and hot.
If you’re looking for more breakfast inspiration, our sourdough pancakes offer a tangy twist that pairs wonderfully with these protein-rich cottage cheese pancakes for a varied weekend brunch spread.