Prep Time: 5 minutes | Cook Time: 10 minutes | Total Time: 15 minutes | Servings: 4 persons
Key Takeaways
- This velvety garlic sauce comes together in just 15 minutes with basic pantry ingredients
- Perfect for pasta, chicken, seafood, or vegetables
- Can be made ahead and stored for quick weeknight meals
- Easily customizable with herbs, spices, or cheese
Introduction
Making restaurant-quality sauce at home seems hard. Most recipes take too long or need special ingredients.
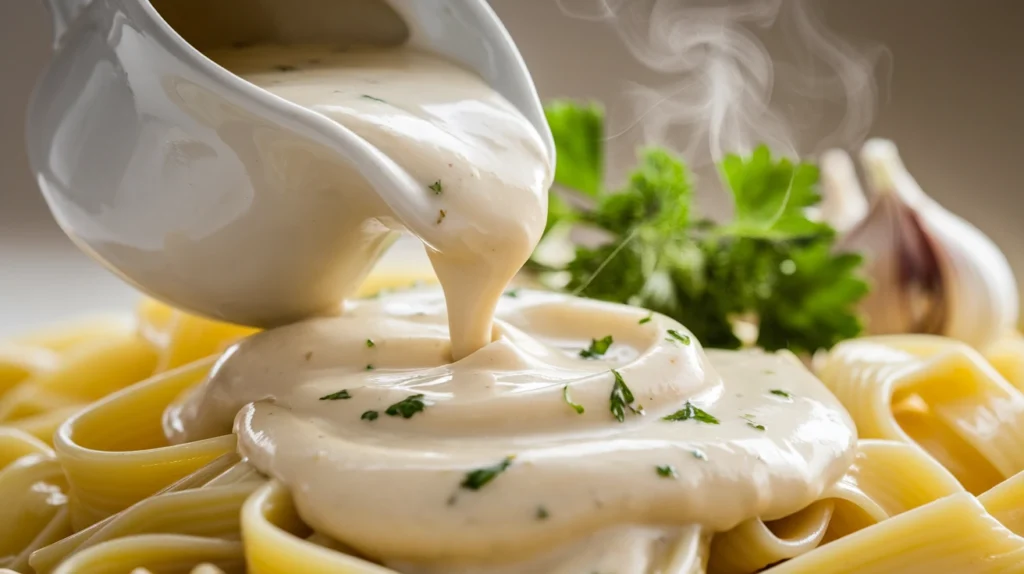
But what if you could make a creamy, rich garlic sauce in just 15 minutes?
This Simple Creamy Garlic Sauce Recipe gives you that perfect balance of garlic and cream without the fuss. Ready in 15 minutes, it’s ideal for busy weeknights when you want something special without spending hours in the kitchen. It’s one of my favorite creamy and dairy-based sauces that work with almost any meal.
Nutrition Information
| Nutrient | Amount per Serving |
|---|---|
| Calories | 245 |
| Total Fat | 23g |
| Saturated Fat | 14g |
| Cholesterol | 75mg |
| Sodium | 320mg |
| Total Carbohydrates | 6g |
| Dietary Fiber | 0g |
| Sugars | 2g |
| Protein | 3g |
Based on using heavy cream and butter. Values may change with substitutions.
What You’ll Need
Ingredients
| Ingredient | Amount | Notes |
|---|---|---|
| Butter | 2 tablespoons | Unsalted preferred |
| Garlic | 4-6 cloves | Freshly minced |
| All-purpose flour | 1 tablespoon | For thickening |
| Heavy cream | 1 cup | Room temperature |
| Chicken broth | ½ cup | Low sodium |
| Parmesan cheese | ¼ cup | Freshly grated |
| Salt | ½ teaspoon | To taste |
| Black pepper | ¼ teaspoon | Freshly ground |
| Parsley | 1 tablespoon | Chopped, for garnish |
Kitchen Tools
| Tool | Purpose |
|---|---|
| Small saucepan | For cooking the sauce |
| Wooden spoon | For stirring |
| Measuring cups | For accurate measurements |
| Measuring spoons | For accurate measurements |
| Garlic press | Optional, for mincing garlic |
| Whisk | For smooth incorporation |
| Grater | For cheese |
Substitutions
- Dairy-Free Option: Replace heavy cream with full-fat coconut milk and butter with olive oil
- Lighter Version: Use half-and-half instead of heavy cream
- Vegetarian Option: Use vegetable broth instead of chicken broth
- Gluten-Free: Substitute rice flour or cornstarch for all-purpose flour
- Cheese Options: Romano or Asiago can replace Parmesan
Step-by-Step Instructions for Beginners
Preparation Phase
- Take out all ingredients
- Open your refrigerator and remove butter, heavy cream, and Parmesan cheese
- Place heavy cream on the counter to warm up slightly (15 minutes)
- Tip: Cold cream can curdle when added to hot mixtures
- Measure all ingredients
- Use measuring spoons to portion out 2 tablespoons butter
- Measure 1 tablespoon flour and set aside in a small bowl
- Use measuring cup to measure ½ cup chicken broth
- Measure 1 cup heavy cream in a separate measuring cup
- Tip: Place all measured ingredients in separate small bowls for easy access
- Prepare the garlic
- Break apart a head of garlic to remove 4-6 individual cloves
- Place each clove on a cutting board and press down firmly with the flat side of a knife
- The skin will loosen and can be easily peeled off
- Use a knife to cut off the hard stem end of each peeled clove
- Mince the garlic by cutting it into very small pieces (about 1/16 inch or as small as you can manage)
- Tip for beginners: If you have a garlic press, simply place the peeled clove in the press and squeeze for perfectly minced garlic
- Prepare the cheese
- Take a block of Parmesan cheese and a grater
- Hold the grater at a 45-degree angle over a small bowl
- Firmly run the cheese along the small holes of the grater
- Continue until you have ¼ cup of grated cheese
- Tip: Pre-grated cheese works too, but freshly grated melts better
- Prepare your herbs
- Rinse a small bunch of parsley under cold water
- Pat dry with a paper towel
- Remove the leaves from the stems
- Gather the leaves into a small pile and chop with a sharp knife until you have 1 tablespoon
- Set aside for garnish
- Set up your cooking station
- Place your saucepan on the stove
- Arrange all measured ingredients around your cooking area in the order you’ll use them
- Have your wooden spoon and whisk within reach
- Beginner tip: Read through all cooking steps once before turning on the heat
Cooking Phase
- Melt the butter
- Place your saucepan on the stove
- Turn the heat to medium (typically a 4-5 on most stove dials)
- Add the 2 tablespoons of butter to the pan
- Wait until the butter is completely melted and starts to bubble slightly
- What to look for: The butter should be liquid and clear but not brown
- Warning: If the butter starts to brown, your heat is too high – lower it immediately
- Cook the garlic
- Once butter is melted, add your minced garlic to the pan
- Using your wooden spoon, stir continuously for 60 seconds
- What to look for: Garlic should become fragrant and slightly translucent
- Important warning: Watch carefully! Garlic burns in seconds and will ruin your sauce. If it starts to turn brown, immediately proceed to the next step
- Beginner tip: Set a timer for exactly 60 seconds to avoid overcooking
- Add the flour to create a roux
- Sprinkle the 1 tablespoon of flour evenly over the garlic and butter
- Switch to your whisk
- Whisk continuously for 1 full minute without stopping
- What to look for: The mixture will thicken and form a paste-like consistency
- What’s happening: This is called a “roux” and it will thicken your sauce
- Beginner tip: Don’t skip this step – it prevents lumps later!
- Add the broth
- While continuing to whisk, slowly pour in the ½ cup chicken broth
- Pour in a thin stream while whisking constantly, not all at once
- Whisk vigorously to incorporate the liquid with the roux
- Continue whisking for 30 seconds after all broth is added
- What to look for: The mixture should be smooth with no visible lumps
- Troubleshooting: If you see lumps, increase your whisking speed and press the whisk against the side of the pan to break them up
- Add the cream
- While still whisking, slowly pour in the 1 cup of heavy cream
- Add it gradually, about ¼ cup at a time, incorporating completely before adding more
- Whisk continuously during this process
- Beginner tip: Adding the cream too quickly can cause temperature shock and separation
- Simmer the sauce
- Allow the mixture to come to a gentle simmer (small bubbles forming around the edge)
- Reduce heat to medium-low (typically a 3 on most stove dials)
- Let the sauce simmer for 3-5 minutes, stirring occasionally with the wooden spoon
- What to look for: The sauce should thicken enough to coat the back of your spoon, similar to my garlic parmesan white sauce
- How to test: Dip your wooden spoon into the sauce, then run your finger across the back. If it leaves a clear path that doesn’t immediately fill in, your sauce is the right consistency
- Add cheese and seasonings
- Remove the pan from the heat
- Add the ¼ cup grated Parmesan cheese to the sauce
- Stir with the wooden spoon until the cheese is completely melted
- Add ½ teaspoon salt and ¼ teaspoon black pepper
- Stir to combine
- Beginner tip: Taste the sauce and adjust seasonings if needed
Finishing Steps
- Check the consistency
- Your sauce should be thick enough to coat pasta but still be pourable
- If the sauce is too thick:
- Add 1 tablespoon of chicken broth or cream and stir
- Continue adding 1 tablespoon at a time until desired consistency is reached
- If the sauce is too thin:
- Return to heat and simmer for 1-2 more minutes, stirring constantly
- What’s happening: Additional heat evaporates liquid and thickens the sauce
- Final touches
- Add half of the chopped parsley (about ½ tablespoon) and stir
- Taste once more and make any final adjustments to salt and pepper
- Beginner tip: The sauce will continue to thicken slightly as it cools
- Serve the sauce
- Pour immediately over pasta, chicken, fish, vegetables, or use as a delicious base for homemade pizza
- Sprinkle the remaining parsley on top
- Serve while hot
- Serving suggestion: For a complete meal, toss with 8 ounces cooked pasta and add cooked chicken or shrimp
Troubleshooting
Common Issues and Solutions
Problem: Sauce is lumpy
- Why this happens: Flour wasn’t properly incorporated or liquids were added too quickly
- Solution for beginners:
- Remove from heat
- Whisk vigorously for 1-2 minutes
- If lumps persist, pour sauce through a fine-mesh strainer
- Press any lumps against the strainer with a spoon to break them up
Problem: Garlic tastes burnt
- Why this happens: Heat was too high or garlic was cooked too long
- Solution for beginners:
- Unfortunately, burnt garlic can’t be fixed and will make the entire sauce bitter
- Start over, keeping a closer eye on the garlic
- Next time, cook on lower heat and set a timer for 30-60 seconds
Problem: Sauce is too thin
- Why this happens: Not enough simmering time or flour wasn’t properly cooked
- Solution for beginners:
- In a small bowl, mix 1 teaspoon cornstarch with 1 teaspoon cold water
- Stir until completely dissolved to make a “slurry”
- Return sauce to a simmer
- Add the cornstarch slurry while stirring
- Cook for 30 seconds until thickened
Problem: Sauce separated or curdled
- Why this happens: Cream was too cold or heat was too high
- Solution for beginners:
- Remove from heat immediately
- Add 2 tablespoons of cold heavy cream
- Whisk vigorously until sauce comes back together
- Beginner tip: Prevention is key – always use room temperature cream
Variations & Substitutions
Herb Variations
- Italian Style: Add 1 teaspoon Italian seasoning and 2 tablespoons chopped basil
- French Style: Add 1 teaspoon herbs de Provence and a pinch of nutmeg
- Spicy Version: Add ¼ teaspoon red pepper flakes or a dash of cayenne
Protein Additions
- Shrimp Garlic Sauce: Add 1 pound cooked shrimp during the final minute
- Chicken Garlic Sauce: Stir in 1 cup diced cooked chicken
- Bacon Garlic Sauce: Add ¼ cup crispy bacon bits
Storage & Reheating
Storage Instructions
- Refrigerator:
- Allow sauce to cool completely (about 30 minutes)
- Transfer to an airtight container with a lid
- Store in refrigerator for up to 3 days
- Beginner tip: Label container with date made
- Freezer: Not recommended, as cream sauces can separate when frozen
Reheating Guidelines
- Stovetop Method (Best option)
- Transfer sauce to a small saucepan
- Heat over low heat (2 on stove dial)
- Stir constantly with a wooden spoon
- Heat until just warmed through (about 5 minutes)
- Add 1-2 tablespoons cream if sauce has thickened too much
- Beginner tip: Never bring back to a boil
- Microwave Method
- Transfer sauce to a microwave-safe bowl
- Cover with a microwave-safe lid or paper towel
- Heat at 50% power in 30-second intervals
- Stir between each interval
- Repeat until just heated through (typically 1-2 minutes total)
- Warning: Be careful not to overheat or sauce may separate
Safety Notes & Tips
Food Safety
- Cream sauce should not sit at room temperature for more than 2 hours
- Always use clean utensils when handling
- If sauce has developed an off smell or appearance, discard it
- Beginner tip: When in doubt, throw it out
Pro Tips
- For extra flavor: Roast garlic beforehand for a sweeter, more mellow flavor
- Prevent curdling: Ensure cream is room temperature before adding to hot liquids
- Even cooking: Use a heavy-bottomed pan for better heat distribution
- Meal prep: Make sauce up to 3 days ahead and reheat when needed
- Portion control: This recipe makes about 1½ cups of sauce, perfect for 4 servings
This Simple Creamy Garlic Sauce Recipe is ready in just 15 minutes and transforms ordinary meals into special occasions. Whether you’re a beginner or experienced cook, this foolproof recipe delivers restaurant-quality results with minimal effort.
Meta Description: Master this Simple Creamy Garlic Sauce Recipe in just 15 minutes! Perfect for pasta, chicken, or seafood – creamy, rich, and packed with garlic flavor.