Prep Time: 15 minutes | Cook Time: 30 minutes | Total Time: 45 minutes | Servings: 4
Key Takeaways
- This Creamy Tomato Sauce with Hidden Veggies secretly packs in 3 vegetables kids won’t detect
- Ready in just 45 minutes with simple pantry ingredients
- Freezes perfectly for quick weeknight meals
- Versatile base for pasta, pizza, or as a dipping sauce
The Veggie Struggle Is Real
Getting enough vegetables into your family’s diet can feel impossible.
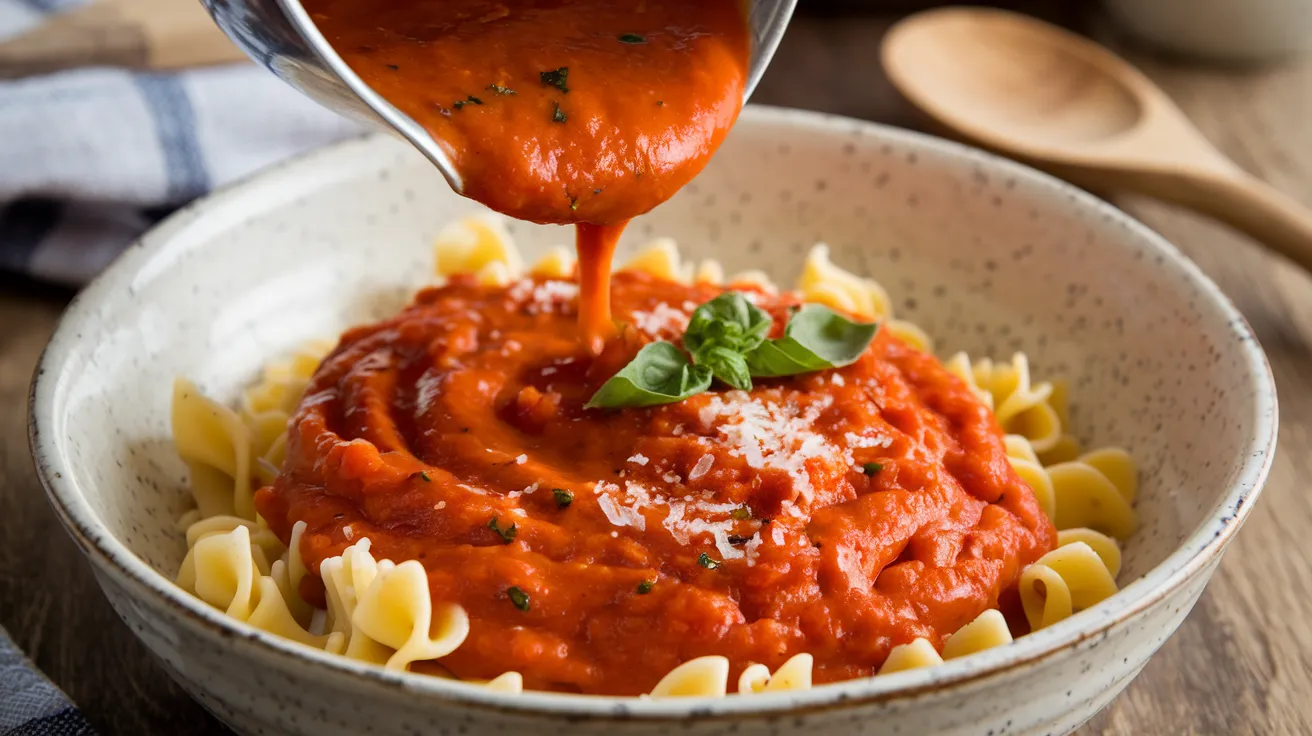
This Creamy Tomato Sauce with Hidden Veggies solves that problem by cleverly hiding nutrient-rich vegetables in a velvety, flavorful sauce everyone will love. The secret? A perfect blend of carrots, red bell peppers, and zucchini that disappear into the smooth texture while boosting nutrition.
No more dinner table battles. Just delicious sauce that happens to be packed with goodness. If you love the creamy texture of this sauce, you might also enjoy my Creamy Roast Garlic and Lemon Pasta Sauce for a different but equally delicious flavor profile.
Nutrition Comparison
| Nutrient | Regular Tomato Sauce (1/2 cup) | Our Creamy Tomato Sauce with Hidden Veggies (1/2 cup) |
|---|---|---|
| Calories | 80 | 95 |
| Protein | 2g | 3g |
| Fiber | 2g | 4g |
| Vitamin A | 10% DV | 45% DV |
| Vitamin C | 15% DV | 60% DV |
| Calcium | 2% DV | 6% DV |
| Iron | 5% DV | 8% DV |
Equipment & Ingredients for Creamy Tomato Sauce
Kitchen Tools Needed
| Tool | Purpose |
|---|---|
| Large pot | For cooking sauce |
| Blender or food processor | For pureeing vegetables |
| Sharp knife | For chopping vegetables |
| Cutting board | For prep work |
| Wooden spoon | For stirring |
| Measuring cups and spoons | For accurate measurements |
Full Ingredients List
| Ingredient | Amount | Purpose |
|---|---|---|
| Olive oil | 2 tablespoons | Base for sautéing |
| Yellow onion | 1 medium, diced | Flavor foundation |
| Garlic | 3 cloves, minced | Aromatic flavor |
| Carrots | 2 medium, peeled and diced | Sweetness and nutrition |
| Red bell pepper | 1 medium, seeded and diced | Color and vitamin C |
| Zucchini | 1 medium, diced | Mild flavor and nutrients |
| Canned crushed tomatoes | 28 oz (1 large can) | Main sauce base |
| Tomato paste | 2 tablespoons | Richness and thickness |
| Heavy cream | 1/4 cup | Creaminess |
| Parmesan cheese | 1/3 cup, freshly grated | Savory depth |
| Dried oregano | 1 teaspoon | Italian flavor |
| Dried basil | 1 teaspoon | Classic herb flavor |
| Salt | 1 teaspoon (or to taste) | Flavor enhancement |
| Black pepper | 1/2 teaspoon | Mild spice |
| Sugar | 1/2 teaspoon (optional) | Balances acidity |
Substitution Options
- Dairy-free version: Replace heavy cream with full-fat coconut milk and skip the Parmesan
- Lower calorie option: Use half-and-half instead of heavy cream
- Herb variations: Fresh herbs work wonderfully (use 1 tablespoon fresh for each teaspoon dried)
- Veggie swaps: Butternut squash, spinach, or cauliflower can replace any of the vegetables
Detailed Step-by-Step Instructions for Beginners
Preparation Phase
- Set up your cutting station
- Place your cutting board on a flat, stable surface
- Position your cutting board on a damp paper towel to prevent slipping
- Have a small bowl ready for vegetable scraps
- Make sure your knife is sharp (dull knives are more dangerous)
- Prepare the onion
- Cut one medium yellow onion in half from top to bottom
- Peel off the papery skin and remove the root end
- Place the flat side down on the cutting board for stability
- Cut into thin slices, then rotate and cut across to create 1/4-inch dice
- Tip: If your eyes water, refrigerate the onion for 30 minutes before cutting
- Prepare the garlic
- Separate 3 cloves from the garlic bulb
- Place the flat side of your knife on each clove and press firmly with your palm to crush it
- Peel away the papery skin
- Finely chop the garlic by rocking your knife back and forth across the cloves
- Warning: Keep fingers tucked away from the blade while chopping
- Prepare the carrots
- Wash 2 medium carrots under cold water
- Using a vegetable peeler, remove the outer skin completely
- Cut off both ends of the carrots
- Cut each carrot in half lengthwise
- Place the flat sides down and slice into thin strips
- Turn and cut across the strips to create 1/4-inch dice
- Tip: For even cooking, try to make all carrot pieces roughly the same size
- Prepare the red bell pepper
- Wash 1 medium red bell pepper under cold water
- Cut around the stem and pull it out along with the seeds
- Cut the pepper in half and remove any remaining white parts and seeds
- Place the pepper skin-side down and cut into 1/4-inch strips
- Turn and cut across the strips to create 1/4-inch dice
- Tip: Red bell peppers add natural sweetness and bright color
- Prepare the zucchini
- Wash 1 medium zucchini under cold water
- Cut off both ends of the zucchini
- Cut the zucchini in half lengthwise
- Cut each half lengthwise again to create quarters
- Slice across the quarters to create 1/4-inch dice
- Note: No need to peel the zucchini as the skin contains nutrients and will blend smoothly
- Measure remaining ingredients
- Open the can of crushed tomatoes (28 oz)
- Measure 2 tablespoons of tomato paste
- Measure 1/4 cup of heavy cream
- Grate 1/3 cup of Parmesan cheese
- Measure 1 teaspoon each of dried oregano and dried basil
- Measure 1 teaspoon of salt and 1/2 teaspoon of black pepper
- Measure 1/2 teaspoon of sugar (optional)
- Tip: Having all ingredients measured and ready makes cooking much easier
- Position your cooking equipment
- Place your large pot on the stove
- Have your wooden spoon ready for stirring
- Set your blender or food processor nearby
- Safety tip: Make sure pot handles are turned inward to prevent accidental bumping
Cooking Phase
- Heat the pot and add oil (1 minute)
- Turn stove burner to medium heat
- Add 2 tablespoons of olive oil to the pot
- Wait about 30-60 seconds for the oil to heat up
- Test if oil is ready: Add a small piece of onion – it should sizzle gently
- Warning: If oil is smoking, it’s too hot; remove from heat briefly and reduce temperature
- Sauté the onions (3-4 minutes)
- Add all the diced onion to the hot oil
- Using your wooden spoon, stir to coat all pieces with oil
- Stir occasionally, every 30-45 seconds
- Cook until onions turn translucent (see-through) and slightly soft
- Visual cue: Onions will change from bright white to a more transparent look
- Tip: Don’t rush this step – properly cooked onions build flavor foundation
- Add and cook the garlic (1 minute)
- Add all the minced garlic to the pot with the onions
- Stir constantly for 1 minute
- Warning: Garlic burns easily and becomes bitter, so watch carefully
- Visual/smell cue: Garlic should become fragrant but not brown
- Add and cook the carrots (4-5 minutes)
- Add all the diced carrots to the pot
- Stir to combine with the onion and garlic mixture
- Cook for 4-5 minutes, stirring every minute
- Tip: Carrots take longest to soften, so they go in first
- Add and cook the bell pepper and zucchini (4-5 minutes)
- Add all the diced red bell pepper and zucchini to the pot
- Stir to combine all vegetables thoroughly
- Continue to cook for 4-5 minutes, stirring occasionally
- Optional step: Cover the pot with a lid for 2-3 minutes to help steam and soften the vegetables
- Visual cue: Vegetables should be fork-tender but not mushy
- Test for doneness: Poke the carrots with a fork – they should slide in easily
- Add tomato products and seasonings (2 minutes)
- Add the entire can (28 oz) of crushed tomatoes to the pot
- Add 2 tablespoons of tomato paste
- Stir to combine with the vegetable mixture
- Add 1 teaspoon dried oregano
- Add 1 teaspoon dried basil
- Add 1 teaspoon salt
- Add 1/2 teaspoon black pepper
- Add 1/2 teaspoon sugar (if using)
- Stir all ingredients thoroughly to combine
- Simmer the sauce (5 minutes)
- Bring the mixture to a gentle simmer (small bubbles around the edge of the pot)
- Tip: If bubbling too vigorously, reduce heat
- Simmer for 5 minutes, stirring occasionally to prevent sticking
- Caution: The sauce may splatter, so be careful and use a splatter screen if available
- Prepare for blending (1 minute)
- Turn off heat
- Allow the sauce to cool slightly for 1-2 minutes
- Safety warning: Hot liquids expand when blended and can cause burns
- Blend the sauce (5 minutes)
- If using a blender:
- Transfer sauce in batches (no more than half-full)
- Remove the center cap from the blender lid
- Cover the opening with a folded kitchen towel to allow steam to escape
- Start blending on low speed, then gradually increase
- Blend each batch for 30-60 seconds until completely smooth
- If using a food processor:
- Transfer in batches (no more than 2/3 full)
- Pulse a few times before processing continuously
- Process each batch for 30-60 seconds until smooth
- If using an immersion blender:
- Keep the pot off the heat
- Insert the immersion blender and start on low speed
- Blend in circular motions until sauce is completely smooth
- Visual check: No visible vegetable pieces should remain
- If using a blender:
- Return sauce to pot (1 minute)
- If you used a blender or food processor, pour all blended sauce back into the original pot
- Return pot to stove over low heat
- Add dairy components (3 minutes)
- Pour in 1/4 cup of heavy cream
- Tip: For beginners, add cream slowly while stirring to prevent curdling
- Sprinkle in 1/3 cup of grated Parmesan cheese
- Stir continuously until cheese is fully melted and sauce is uniform
- Visual cue: Sauce will take on a slightly lighter orange-pink color
- Final simmer and taste test (2-3 minutes)
- Simmer on low heat for 2-3 minutes to allow flavors to blend
- Taste the sauce using a clean spoon
- Adjustments if needed:
- If too acidic: Add another 1/4 teaspoon sugar
- If bland: Add another 1/4 teaspoon salt
- If too thick: Add 2-4 tablespoons water or broth
- If too thin: Simmer for 3-5 more minutes to reduce
Serving Phase
- Serve the sauce (2 minutes)
- For pasta: Toss with 1 pound of cooked pasta to serve 4 people
- Pro tip: Save 1/2 cup of pasta cooking water to mix with sauce if needed
- For an extra special meal, try pairing with my Cheesy Chicken Pasta recipe
- For pizza: Spread on pizza dough as base sauce
- For dipping: Transfer to a bowl for bread, mozzarella sticks, or vegetables
- For protein: Pour over cooked chicken, meatballs, or fish
- For pasta: Toss with 1 pound of cooked pasta to serve 4 people
- Garnish if desired (1 minute)
- Sprinkle with extra Parmesan cheese
- Add a few fresh basil leaves
- Drizzle with a small amount of good olive oil
- Tip: Garnishes add visual appeal and extra flavor dimension
Troubleshooting Creamy Tomato Sauce
Common Issues and Solutions
| Problem | Cause | Solution |
|---|---|---|
| Sauce is too thin | Not enough reduction | Simmer uncovered for additional 5-10 minutes |
| Too much liquid from vegetables | Add 1-2 tablespoons more tomato paste | |
| Sauce is too thick | Too much reduction | Add 1/4 cup vegetable broth or water and stir |
| Too much tomato paste | Add 2-3 tablespoons water and 1 tablespoon cream | |
| Sauce is too acidic | Tomato acidity | Add 1/4 teaspoon more sugar |
| Need more fat to balance | Add 1 tablespoon more cream or 1 tablespoon butter | |
| Cream curdled | Added to hot sauce too quickly | Temper cream by mixing with a small amount of sauce first |
| Heat too high when adding cream | Start over with new cream, ensuring low heat | |
| Lumpy sauce | Insufficient blending | Blend again until completely smooth |
| Parmesan not fully melted | Return to low heat and stir until smooth | |
| Burnt taste | Garlic or onions scorched | Unfortunately, burnt flavors can’t be fixed. For mild cases, add more cream and herbs |
| Bland flavor | Not enough salt | Add salt 1/4 teaspoon at a time, tasting between additions |
| Not enough herbs | Add 1/4 teaspoon more dried herbs or 1 tablespoon fresh |
Variations & Substitutions
Kid-Friendly Version
- Reduce black pepper to 1/4 teaspoon
- Increase cream to 1/3 cup for milder flavor
- Consider adding 1/4 cup shredded mozzarella for extra creaminess
Spicy Adult Version
- Add 1/2 teaspoon red pepper flakes with the dried herbs
- Mix in 1 tablespoon chopped fresh basil before serving
- Try adding 2 tablespoons vodka (cook for extra 5 minutes to burn off alcohol)
Protein Additions
- Brown 1 pound of ground beef, turkey, or Italian sausage before starting recipe
- Add cooked, shredded rotisserie chicken when sauce is finished
- Mix in 1 can of drained, rinsed white beans for vegetarian protein
- For those avoiding dairy altogether, check out my Creamy Vegan Caramelized Onion Pasta for inspiration on plant-based alternatives
Storage & Reheating
Refrigerator Storage
- Cool sauce completely before refrigerating
- Safety tip: Don’t leave sauce at room temperature for more than 2 hours
- To cool quickly, transfer to a wide, shallow container
- Transfer to airtight containers, leaving 1/2 inch space at top
- Keeps fresh for up to 4 days
- Visual check: If you see any mold or smell anything off, discard immediately
Freezer Storage
- Portion into freezer-safe containers or bags (1-2 cup portions work well)
- Leave 1/2 inch headspace for expansion
- Label with date and contents using freezer tape or permanent marker
- Freezes well for up to 3 months
- Tip: Freeze in ice cube trays first, then transfer frozen cubes to bags for smaller portions
Reheating Instructions
- From refrigerated:
- Reheat in microwave:
- Transfer to microwave-safe container
- Cover with microwave-safe lid or paper towel (leave vent)
- Heat for 1 minute, stir thoroughly
- Continue heating in 30-second intervals, stirring between each
- Sauce is ready when it reaches 165°F or is steaming hot throughout
- Reheat on stovetop:
- Transfer to small saucepan
- Heat over medium-low heat
- Stir frequently to prevent scorching on bottom
- Ready when sauce bubbles gently at edges and reaches 165°F
- Reheat in microwave:
- From frozen:
- Thaw overnight in refrigerator (safest method)
- Quick thaw method:
- Place frozen container in bowl of cool water
- Change water every 30 minutes
- Once partially thawed, follow refrigerated reheating instructions
- Direct from frozen (emergency method):
- Transfer frozen block to saucepan
- Heat on lowest setting with 2 tablespoons water
- Cover and heat for 5 minutes
- As sauce begins to melt, stir frequently, breaking up frozen chunks
- May need to add 1-2 tablespoons more liquid
- Caution: Heat very gently to prevent scorching
Safety Notes & Tips
Food Safety
- Wash hands with soap for 20 seconds before handling food
- Wash all vegetables thoroughly before cutting
- Keep dairy products refrigerated until needed
- Store sauce within 2 hours of cooking
- Never leave dairy-based sauce at room temperature for extended periods
- When reheating, ensure sauce reaches 165°F internal temperature
- Use separate cutting boards for vegetables and any raw meat
- Reminder: If sauce has been left out more than 2 hours, discard it
Time-Saving Tips
- Prep vegetables up to 2 days in advance and store in airtight containers in refrigerator
- Make double batch and freeze half for future meals
- Use pre-cut fresh or frozen vegetables (thawed and drained)
- Clean as you go to avoid a big mess at the end
- Smart shortcut: If really pressed for time, use pre-minced garlic (1.5 teaspoons)
Beginner Tips
- First time? Read the entire recipe twice before starting
- Chop all vegetables before turning on the stove
- Set a timer for each cooking step to avoid under or overcooking
- Taste as you go (except after adding raw meat if making that variation)
- Have a designated “tasting spoon” separate from your stirring spoon
- Kitchen confidence: If you make a mistake, most can be fixed – don’t panic!
Pro Tips
- For extra smoothness: Strain the sauce through a fine-mesh sieve after blending
- For deeper flavor: Roast the vegetables at 425°F for 20 minutes before adding to sauce
- For brighter color: Add a tablespoon of fresh lemon juice just before serving
- For thicker sauce: Add 1-2 tablespoons of tomato paste
- For restaurant quality: Finish with a drizzle of high-quality extra virgin olive oil
Enjoy this versatile, nutrition-packed Creamy Tomato Sauce with Hidden Veggies that makes healthy eating simple and delicious!