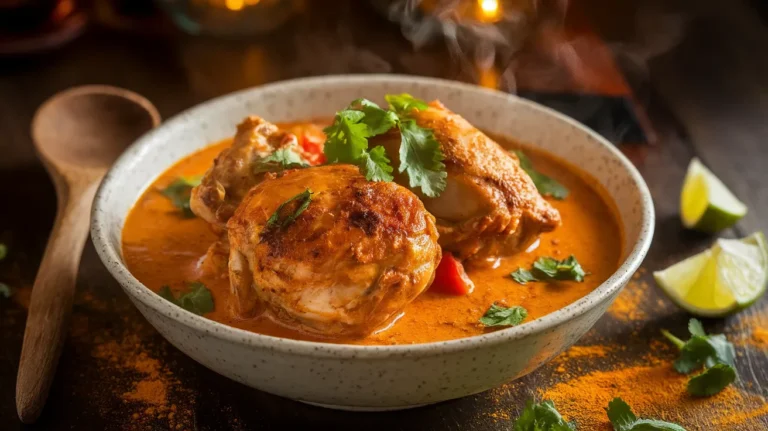
This Delicious Chicken Masala Recipe transforms simple chicken thighs into restaurant-quality Indian cuisine in just 40 minutes. Rich, aromatic, and perfectly spiced, this Delicious Chicken Masala Recipe delivers authentic flavors without complicated techniques or hard-to-find ingredients—just everyday pantry spices and straightforward methods that work every time.
SERVES: 4 | PREP: 15 MIN | COOK: 25 MIN | TOTAL: 40 MIN
What Makes This Chicken Masala Special
Most chicken dinners fall flat. They’re either bland or require a culinary degree to execute properly.
This recipe changes that game completely. You’ll build layers of flavor through proper technique, not shortcuts. The result tastes like your favorite Indian restaurant, but you made it yourself.
The secret lies in how we handle the spices. Toast them at the right moment, and they release oils that create depth you can’t fake.
Ingredients You’ll Need
Main Components
| Ingredient | Amount | Notes |
|---|---|---|
| Boneless chicken thighs | 1.5 pounds | Cut into 1.5-inch pieces |
| Plain yogurt | 1/4 cup | Full-fat preferred |
| Fresh lemon juice | 1 tablespoon | About half a lemon |
| Garlic cloves | 4 cloves | Minced |
| Fresh ginger | 1 tablespoon | Grated |
| Onion | 1 large | Finely diced |
| Tomatoes | 3 medium | Or 1 (14oz) can crushed |
| Tomato paste | 1 tablespoon | Adds depth |
| Heavy cream | 1/2 cup | Creates rich sauce |
| Butter | 2 tablespoons | Finishing touch |
| Fresh cilantro | 1/4 cup | For garnish |
Spice Blend
| Spice | Amount | Purpose |
|---|---|---|
| Garam masala | 2 teaspoons | Core flavor |
| Ground turmeric | 1/2 teaspoon | Color and warmth |
| Ground cumin | 1 teaspoon | Earthy notes |
| Ground coriander | 1 teaspoon | Citrus undertones |
| Red chili powder | 1/2 teaspoon | Heat level |
| Salt | 1 teaspoon | Divided use |
Cooking Essentials
| Item | Amount | Note |
|---|---|---|
| Vegetable oil | 3 tablespoons | Divided use |
Step-by-Step Cooking Instructions
Preparation Phase (15 minutes)
Step 1: Set Up Your Workspace
Clear your counter and gather every ingredient before you start cooking. Place them in the order you’ll use them. Read through all the steps once—this prevents surprises when your hands are covered in marinade.
Step 2: Prep the Chicken Properly
Unwrap your chicken thighs on a clean cutting board. Use a sharp knife to trim any visible fat from the edges. Cut each thigh into 1.5-inch pieces (about grape-sized chunks). Pat them completely dry with paper towels—this step is critical for getting that golden sear later.
Step 3: Create the Marinade
Place your chicken pieces in a large bowl. Add the yogurt, lemon juice, 2 minced garlic cloves, half the ginger, 1 teaspoon garam masala, 1/4 teaspoon turmeric, and 1/2 teaspoon salt. Mix thoroughly with your hands until every piece is coated. Let this sit for 15 minutes at room temperature while you prep other ingredients. Why this matters: The yogurt’s acidity tenderizes the meat while the spices begin penetrating the surface.
Step 4: Prepare Your Aromatics
While the chicken marinates, dice your onion into pea-sized pieces. Mince the remaining 2 garlic cloves. Grate the remaining ginger. Dice your tomatoes if using fresh. In a small bowl, combine the remaining spices: 1 teaspoon garam masala, 1/4 teaspoon turmeric, 1 teaspoon cumin, 1 teaspoon coriander, and 1/2 teaspoon chili powder. Having everything ready prevents burning while you cook.
Cooking Phase (25 minutes)
Step 5: Heat Your Pan Correctly
Place a heavy-bottomed pan or Dutch oven over medium-high heat. Add 2 tablespoons of oil. Wait until you see slight shimmering on the oil’s surface—about 90 seconds. Test readiness by dropping in a tiny piece of onion; it should sizzle immediately. Too hot: Oil will smoke. Too cold: Chicken will stick.
Step 6: Sear the First Batch
Using tongs, transfer about half your marinated chicken to the pan. Leave space between pieces—crowding makes them steam instead of sear. Stand back slightly as the oil may splatter when chicken hits the pan. Let pieces sit undisturbed for 2-3 minutes until the bottom turns golden brown. Flip each piece and cook another 2-3 minutes. Transfer to a clean plate. The chicken won’t be fully cooked yet—that’s exactly right.
Step 7: Sear the Second Batch
Repeat with remaining chicken. If the pan looks dry, add another splash of oil. Remove to the same plate when browned.
Step 8: Build Your Masala Base
Keep the same pan with all those flavorful browned bits. Add the remaining tablespoon of oil. Reduce heat to medium. Add your diced onion and cook for 3-4 minutes, stirring occasionally with a wooden spoon. You want them soft and translucent, not browned. Visual cue: They should look glossy and almost see-through at the edges.
Step 9: Add Aromatics and Toast Spices
Add your remaining minced garlic and grated ginger to the onions. Stir continuously for 30 seconds until the aroma hits you—sharp and pungent. Pour in your pre-measured spice mixture. Stir constantly for 30 seconds—this toasts the spices and releases their essential oils. Watch carefully! If they start sticking or smell burnt, immediately move to the next step.
Step 10: Create the Tomato Base
Add your diced tomatoes (or canned crushed tomatoes) and tomato paste. Stir everything together. Increase heat to medium-high and cook for 5-6 minutes, stirring every 30 seconds. The tomatoes will break down and the mixture will thicken. What success looks like: You’ll see tiny oil droplets forming around the edges of the pan, and the mixture will pull away slightly from the sides when you stir.
Step 11: Combine and Simmer
Return all the chicken pieces and any accumulated juices to the pan. Add 1/2 cup water and the remaining 1/2 teaspoon salt. Stir gently to coat everything in that tomato-spice mixture. Bring to a gentle simmer (small bubbles around the edges). Reduce heat to medium-low, cover with a lid, and cook for 10-12 minutes. Stir once halfway through.
Step 12: Check for Doneness
Remove the lid. Cut into the largest piece of chicken—it should be completely white inside with no pink. Temperature check: A meat thermometer should read 165°F (74°C) in the thickest part.
Step 13: Finish with Cream and Butter
Remove from high heat and reduce to low. Pour in the heavy cream slowly while stirring continuously. Add the butter and stir until it melts completely. Let this simmer gently, uncovered, for 4-5 minutes until the sauce thickens slightly. Thickness test: The sauce should coat the back of a spoon and leave a clear line when you draw your finger through it.
Final Touches (5 minutes)
Step 14: Adjust and Rest
Turn off the heat completely. Taste a small spoonful (blow on it first—it’s hot!). Add more salt if needed, starting with 1/4 teaspoon. Let the curry sit uncovered for 5 minutes. This resting time allows the flavors to blend and the sauce to set to the perfect consistency.
Step 15: Garnish and Serve
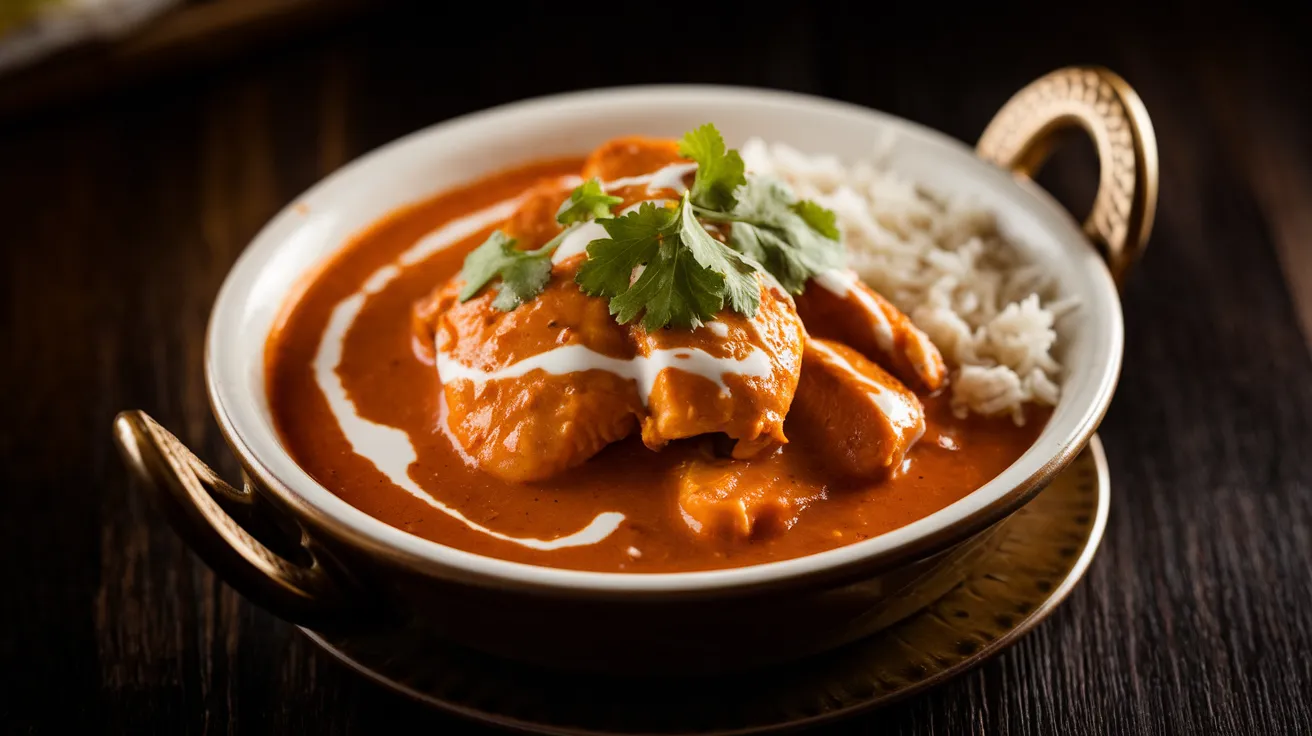
Sprinkle fresh chopped cilantro over the top. Serve in bowls alongside steamed basmati rice or warm naan bread. Provide extra cilantro and lemon wedges on the side for those who want more brightness.
Chef’s Notes for Perfect Results
Yogurt Selection Matters: Full-fat yogurt creates a creamier marinade and won’t curdle as easily when heated. Greek yogurt works but makes the marinade thicker—thin it with a tablespoon of water.
Chicken Thigh vs. Breast: Thighs stay juicier and more tender through the cooking process. If using breasts, reduce the simmering time by 2-3 minutes and check for doneness earlier.
Spice Freshness: Your Delicious Chicken Masala Recipe only tastes as good as your spices. If your garam masala has been in the cupboard for over a year, replace it. Fresh spices smell pungent and vibrant when you open the jar.
Sauce Consistency Control: Every stove heats differently. If your sauce looks too thick after adding cream, stir in water 1 tablespoon at a time. Too thin? Simmer uncovered for a few extra minutes.
Nutrition Information
Per Serving (1/4 of recipe):
| Nutrient | Amount | % Daily Value |
|---|---|---|
| Calories | 375 | — |
| Protein | 32g | 64% |
| Carbohydrates | 18g | 6% |
| Fat | 21g | 27% |
| Fiber | 3g | 11% |
| Sodium | 485mg | 21% |
| Potassium | 680mg | 19% |
| Vitamin A | — | 25% |
| Vitamin C | — | 45% |
| Calcium | — | 8% |
| Iron | — | 15% |
Creative Variations
Make It Vegetarian
Replace chicken with 14oz firm tofu (pressed and cubed), 2 cups cauliflower florets plus 1 cup diced potatoes, or 2 cans drained chickpeas. Cook vegetables until just tender before simmering in sauce—about 10-15 minutes longer than chicken.
Adjust the Heat Level
Mild: Skip the red chili powder and use 1/4 teaspoon paprika instead for color without heat.
Medium: Follow the recipe exactly as written.
Spicy: Add 1 finely diced green chili (with seeds) when cooking the onions, or increase red chili powder to 1 teaspoon. If you love bold, spicy flavors, try these Sheet Pan Chicken Fajitas for a Tex-Mex twist that packs similar heat.
Coconut Curry Version
Replace heavy cream with full-fat coconut milk for a dairy-free option. This creates a slightly sweeter, more aromatic sauce with Southeast Asian undertones.
Butter Chicken Style
Add an extra tablespoon of butter and 2 tablespoons of honey during the final simmering stage. This creates a sweeter, richer sauce similar to butter chicken. For another indulgent chicken dish with butter and cream, check out our Garlic Butter Chicken Bites with Creamy Parmesan Pasta.
Storage & Reheating Guidelines
This dish actually improves overnight as spices continue developing their flavors.
Refrigerator Storage
Cool completely before transferring to an airtight container. Store for up to 3 days. The sauce will thicken when cold—that’s normal.
Freezer Storage
Freeze in freezer-safe containers for up to 2 months. Leave 1 inch of space at the top for expansion. Label with the date and contents.
Reheating on the Stovetop (Best Method)
Thaw overnight in the refrigerator if frozen. Place in a pan over medium-low heat with 2 tablespoons of water to thin the sauce. Cover and heat for 5-7 minutes, stirring occasionally. Add more water if the sauce becomes too thick.
Microwave Reheating
Place in a microwave-safe container with 1 tablespoon of water. Cover loosely with a microwave-safe lid. Heat on 70% power for 2 minutes. Stir thoroughly, then continue heating in 30-second intervals until hot throughout.
Troubleshooting Common Problems
Problem 1: Sauce Is Too Thin
Solution: Simmer uncovered for 5-10 minutes to reduce and concentrate flavors. If still thin, mix 1 teaspoon cornstarch with 1 tablespoon cold water, then stir into the simmering sauce. This thickens it within 2 minutes.
Problem 2: Sauce Has Curdled or Split
Solution: Heat was too high when cream was added. Lower heat immediately. Whisk in 2-3 tablespoons of warm water vigorously to help re-emulsify. The sauce won’t look perfect but will still taste good.
Problem 3: Chicken Turned Out Tough
Solution: Overcooking is the culprit. Chicken continues cooking even after you remove it from heat, so check doneness 2 minutes earlier than instructed next time. For this batch, add a splash more cream and simmer gently for 3-4 minutes—the liquid helps soften the fibers slightly.
Problem 4: Not Enough Flavor Depth
Solution: The spices may not have toasted long enough, or your spices are old. Mix 1/2 teaspoon fresh garam masala with 1 tablespoon warm water and stir in at the end. Taste and add 1/4 teaspoon more salt if needed—salt brightens all flavors.
Problem 5: Spices Burned During Cooking
Solution: Once spices burn, the bitter taste penetrates everything. If this happens early, it’s best to start the sauce portion over. Next time, use slightly lower heat and add tomatoes within 30 seconds of adding spices. Keep stirring constantly during the spice-toasting phase.
Equipment Essentials
You don’t need fancy tools, but these items make the process smoother:
- Heavy-bottomed pan or Dutch oven (3-4 quart capacity)
- Sharp chef’s knife for cutting chicken and vegetables
- Cutting board (use separate boards for raw chicken and vegetables)
- Large mixing bowl for marinating
- Small prep bowls for organizing spices
- Measuring spoons and cups for accuracy
- Wooden spoon or silicone spatula for stirring
- Tongs for handling chicken pieces
- Grater for fresh ginger (microplane works best)
- Meat thermometer for checking doneness (optional but helpful)
Organized Shopping List
Meat Department
- 1.5 pounds boneless chicken thighs
Produce Section
- 1 large onion
- 3 medium tomatoes (or skip for canned)
- 4 garlic cloves
- 1-inch piece fresh ginger
- 1 lemon
- 1 bunch fresh cilantro
Dairy Section
- 1/4 cup plain yogurt (full-fat)
- 1/2 cup heavy cream
- 2 tablespoons butter
Canned Goods Aisle
- 1 (14oz) can crushed tomatoes (if not using fresh)
- 1 small can tomato paste
Spice Aisle
- Garam masala
- Ground turmeric
- Ground cumin
- Ground coriander
- Red chili powder
Pantry Staples
- Vegetable oil
- Salt
Five Success Secrets
1. Never Skip the Searing Step
That golden crust on your chicken isn’t just for looks. Searing creates hundreds of flavor compounds through the Maillard reaction. These browned bits that stick to your pan become the foundation of your sauce. Skip this, and your curry tastes flat no matter how many spices you add.
2. Toast Spices at the Right Moment
Add spices to hot oil with aromatics for exactly 30 seconds. Too short and they taste raw. Too long and they burn bitter. You’ll smell them bloom—that’s your signal that oils are releasing. This single step separates amateur curry from restaurant-quality results.
3. Let Tomatoes Break Down Completely
Don’t rush the tomato cooking phase. Those 5-6 minutes allow water to evaporate and natural sugars to concentrate. You’ll know it’s ready when you see oil separating at the edges. This creates the rich, clingy sauce that coats every piece of chicken perfectly.
4. Control Your Heat When Adding Cream
High heat + dairy = curdled disaster. Always reduce to low heat before adding cream. Pour it slowly while stirring continuously. This gradual temperature change keeps your sauce silky smooth instead of grainy and separated.
5. Rest Before Serving
That 5-minute rest period isn’t optional. The sauce thickens slightly as it cools, and flavors continue melding together. Chicken reabsorbs some sauce, making every bite more flavorful. Serve immediately and you’ll have watery sauce pooling on the plate.
This Delicious Chicken Masala Recipe proves that restaurant-quality Indian food belongs in your weeknight dinner rotation. With proper technique and timing, you’ll create layers of flavor that taste like they took hours—not 40 minutes.