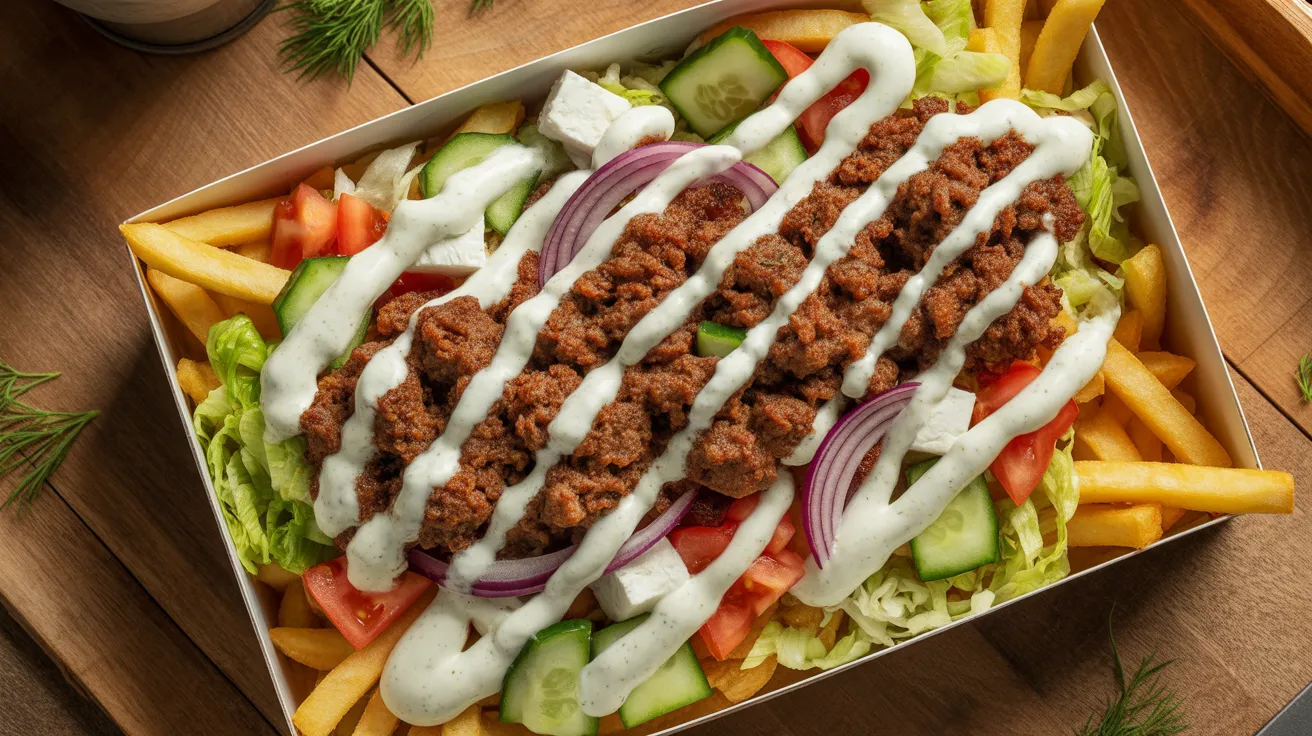
Picture this: crispy golden fries buried under tender strips of seasoned doner kebab meat, topped with fresh vegetables, creamy sauces, and melted cheese. This doner box kebab fries recipe transforms street food into a shareable feast that’s ready in under 45 minutes. I’m showing you how to create authentic Turkish-style loaded fries with perfectly spiced meat, restaurant-quality toppings, and that irresistible combination that makes doner box kebab fries the ultimate comfort food.
SERVES: 4 | PREP: 20 MIN | COOK: 25 MIN | TOTAL: 45 MIN
Ingredients
For the Doner Kebab Meat
| Ingredient | Amount |
|---|---|
| Ground lamb or beef (80/20 blend) | 1.5 lbs |
| Garlic cloves, minced | 4 cloves |
| Paprika | 2 tsp |
| Ground cumin | 1.5 tsp |
| Ground coriander | 1 tsp |
| Dried oregano | 1 tsp |
| Cayenne pepper | 1/2 tsp |
| Salt | 1 tsp |
| Black pepper | 1/2 tsp |
| Olive oil | 2 tbsp |
For the Fries Base
| Ingredient | Amount |
|---|---|
| Russet potatoes, cut into fries | 2 lbs |
| Vegetable oil for frying | As needed |
| Sea salt | To taste |
For the Toppings
| Ingredient | Amount |
|---|---|
| Iceberg lettuce, shredded | 2 cups |
| Tomatoes, diced | 2 medium |
| Red onion, thinly sliced | 1 medium |
| Cucumber, diced | 1 medium |
| Mozzarella cheese, shredded | 1 cup |
| Feta cheese, crumbled | 1/2 cup |
For the Sauces
| Ingredient | Amount |
|---|---|
| Greek yogurt or sour cream | 1 cup |
| Mayonnaise | 1/2 cup |
| Garlic powder | 1 tsp |
| Lemon juice | 2 tbsp |
| Hot sauce (optional) | 2 tsp |
| Fresh dill, chopped | 2 tbsp |
Step-by-Step Instructions
Phase 1: Prepare the Fries Base (15 minutes)
Step 1: Wash 2 lbs of russet potatoes under cold running water, scrubbing away any dirt with a vegetable brush.
Leave the skins on for extra texture and nutrients. Pat the potatoes completely dry with paper towels because any moisture will cause dangerous oil splattering when you fry them.
Step 2: Cut each potato lengthwise into 1/2-inch thick slices, then cut each slice into 1/2-inch wide sticks.
Keep your cuts uniform so all the fries cook at the same rate. Irregular sizes mean some fries will burn while others stay soggy.
Step 3: Place cut fries in a large bowl and cover with cold water for 10 minutes.
This soaking step removes excess starch from the potato surface, which is the secret to getting crispy exteriors instead of gummy fries. You’ll see the water turn cloudy – that’s the starch coming out.
Step 4: Drain the fries completely and spread them on clean kitchen towels.
Pat every single fry dry because water and hot oil create violent splattering. Take your time with this step – it’s worth it for safety and crispy results.
Phase 2: Season and Cook the Doner Meat (12 minutes)
Step 5: Combine 1.5 lbs ground meat with 4 minced garlic cloves, 2 tsp paprika, 1.5 tsp cumin, 1 tsp coriander, 1 tsp oregano, 1/2 tsp cayenne, 1 tsp salt, and 1/2 tsp black pepper in a large mixing bowl.
Mix the spices with your hands for about 2 minutes until the seasonings are evenly distributed throughout the meat. You’ll see the color become uniform, and you should smell the aromatic spices coating every bit of meat.
Step 6: Heat 2 tbsp olive oil in a large skillet over medium-high heat until it shimmers and moves easily across the pan (about 350°F if you have a thermometer).
The oil is ready when a tiny piece of meat sizzles immediately upon contact. Too cool and the meat will steam instead of browning; too hot and the spices will burn.
Step 7: Add the seasoned meat to the hot skillet, breaking it into small crumbles with a wooden spoon or spatula.
Spread the meat in an even layer and resist the urge to stir for the first 3 minutes. This creates those crispy, caramelized bits that give authentic doner flavor.
Step 8: Cook for 8-10 minutes total, stirring occasionally and breaking up any large chunks.
The meat is done when it’s deeply browned with crispy edges and no pink remains. You want some pieces to get almost crispy – that’s the texture you’d get from a vertical rotisserie. If you’re wondering how to elevate your kebab game even further, try making a doner kebab chicken shawarma wrap for a different take on these incredible flavors.
Step 9: Transfer cooked meat to a plate lined with paper towels to drain excess fat.
Keep the meat warm by loosely covering with aluminum foil. The residual heat will keep it hot while you finish the fries.
Phase 3: Fry the Potatoes (10 minutes)
Step 10: Heat 3-4 inches of vegetable oil in a heavy-bottomed pot or deep fryer to 325°F using a thermometer.
This lower temperature for the first fry cooks the potato interior without browning the outside. Never guess at oil temperature – use a thermometer for consistent results and safety.
Step 11: Working in batches, carefully lower one-third of the dried fries into the hot oil using a slotted spoon or fry basket.
Don’t overcrowd the pot or the temperature will drop too much, resulting in greasy fries. Each batch needs space to float freely and cook evenly.
Step 12: Fry for 4-5 minutes until the fries are cooked through but still pale and not crispy.
They should be tender when pierced with a fork but have no color. This is just the first fry – the magic happens in round two.
Step 13: Remove the fries with a slotted spoon and drain on paper towel-lined baking sheets.
Let them cool for at least 5 minutes while you fry the remaining batches. This rest period actually improves the final texture.
Step 14: Increase oil temperature to 375°F for the second frying.
This higher heat creates the crispy, golden exterior we’re after. Wait until the thermometer confirms 375°F before proceeding.
Step 15: Fry the potatoes again in batches for 2-3 minutes until golden brown and crispy.
You’ll hear the sizzling sound change to a lighter, crispier tone when they’re ready. They should be the color of honey and audibly crunchy when you tap them with the spoon.
Step 16: Drain on fresh paper towels and immediately sprinkle with sea salt while still hot.
The salt sticks better to hot, oily fries. This is your only chance to season them properly before assembly.
Phase 4: Prepare Sauces and Toppings (5 minutes)
Step 17: Whisk together 1 cup Greek yogurt, 1/2 cup mayonnaise, 1 tsp garlic powder, 2 tbsp lemon juice, 2 tbsp fresh dill, and 2 tsp hot sauce in a medium bowl until smooth and creamy.
Taste and adjust seasoning – you might want more lemon for brightness or more garlic for punch. The sauce should be pourable but not watery.
Step 18: Prepare all fresh toppings by shredding 2 cups lettuce, dicing 2 tomatoes and 1 cucumber, and thinly slicing 1 red onion.
Keep the onion slices in ice water for 5 minutes if you want them milder and crisper. Drain well before using.
Phase 5: Assemble the Doner Box Kebab Fries (3 minutes)
Step 19: Divide the hot, crispy fries among 4 serving boxes, bowls, or plates, creating a generous base layer.
Pack them loosely so the toppings can nestle into the gaps. You want fries poking up through the toppings for texture contrast.
Step 20: Top each portion with one-quarter of the warm doner meat, spreading it evenly over the fries.
The heat from the meat will slightly wilt the cheese and keep everything warm. Work quickly so nothing gets cold.
Step 21: Sprinkle 1/4 cup mozzarella and 2 tbsp feta cheese over each portion, followed by the fresh vegetables – lettuce, tomatoes, cucumbers, and red onions.
Layer in the order listed so the cheese melts slightly from the meat’s heat and the vegetables stay fresh and crisp on top.
Step 22: Drizzle each doner box kebab fries serving generously with the creamy garlic sauce, using about 1/4 cup per portion.
Create crisscross patterns with the sauce for restaurant-style presentation. Serve any extra sauce on the side for dipping.
Chef’s Notes
Meat Selection Matters: Using an 80/20 blend of ground lamb gives you authentic doner flavor with enough fat to stay juicy and develop crispy edges. Ground beef works well too, but lamb delivers that distinctive taste you remember from street vendors.
Double-Frying Is Non-Negotiable: The two-stage frying process might seem like extra work, but it’s the only way to achieve fries that are fluffy inside and shatteringly crisp outside. The first fry at lower temperature cooks the interior, while the second fry at higher heat creates that perfect golden crunch.
Temperature Control: Invest in a reliable oil thermometer because guessing at frying temperatures ruins batches. Oil that’s too cool produces greasy, limp fries; oil that’s too hot burns the outside before cooking the inside. Maintaining 325°F and 375°F precisely makes all the difference.
Fresh Herbs Elevate Everything: While dried oregano goes in the meat, fresh dill in the sauce adds brightness you can’t replicate with dried herbs. Chop it just before using for maximum flavor impact in your doner box kebab fries.
Nutrition Information (Per Serving)
Calories: 785 | Protein: 32g | Carbohydrates: 58g | Fat: 46g | Fiber: 6g | Sodium: 890mg
Nutrition values are approximate and will vary based on specific ingredients used and portion sizes.
Delicious Variations
Chicken Doner Box: Replace the ground meat with 1.5 lbs thinly sliced chicken thighs marinated in the same spice blend for 30 minutes. Cook in the skillet until golden and cooked through (165°F internal temperature). This lighter version has about 150 fewer calories per serving while maintaining that amazing flavor profile.
Vegetarian Mediterranean Fries: Skip the meat entirely and double up on the roasted chickpeas tossed in the doner spices. Add 1 cup hummus drizzle and 1/2 cup pickled red cabbage for tangy crunch. It’s a plant-based option that doesn’t sacrifice the bold flavors that make this dish special.
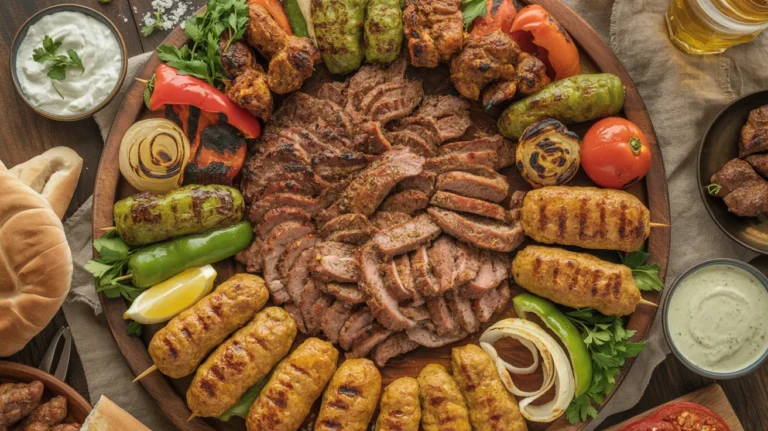
Spicy Harissa Version: Stir 3 tbsp harissa paste into the meat mixture and add 1/4 cup harissa to the yogurt sauce for intense North African heat. Top with 1/4 cup sliced jalapeños and swap the feta for pepper jack cheese. If you enjoy experimenting with different kebab preparations, you’ll love the variety in a doner kebab mixed grill platter that showcases multiple meat and seasoning combinations.
Breakfast Doner Box: Top your fries with the seasoned meat, then add 4 fried eggs (one per serving) and crumbled 4 strips bacon. Replace the yogurt sauce with hollandaise for an indulgent brunch version that combines the best of breakfast and doner flavors.
Storage & Reheating
Refrigeration: Store components separately in airtight containers for up to 3 days. Keep the cooked meat, fried potatoes, fresh vegetables, and sauce in different containers to maintain texture and prevent sogginess.
Freezing the Meat: The seasoned, cooked doner meat freezes beautifully for up to 3 months in freezer-safe bags. Thaw overnight in the refrigerator, then reheat in a skillet over medium heat with 1 tbsp water to prevent drying.
Reheating Fries: Revive leftover fries by spreading them on a baking sheet and heating at 400°F for 5-7 minutes until crispy again. Never microwave fries – they turn into soggy, sad versions of their former selves. The oven or air fryer at 400°F restores about 80% of the original crispiness.
Assembly for Meal Prep: These components make excellent meal prep because you can store everything separately and assemble fresh boxes throughout the week. The fries take just 7 minutes to crisp up in the oven when you’re ready to eat.
Troubleshooting Common Problems
Problem: Fries Are Soggy Instead of Crispy
Solution: You skipped the soaking step or didn’t dry the potatoes thoroughly before frying. Excess starch and moisture are the enemies of crispy fries. Next time, soak for the full 10 minutes and pat every fry completely dry. Also check your oil temperature – if it dips below 325°F for the first fry or 375°F for the second, you’ll get greasy results.
Problem: Meat Is Dry and Tough
Solution: You’re using meat that’s too lean or cooking it too long. Ground meat with at least 20% fat stays juicy and develops those crispy bits without drying out. Cook just until no pink remains – overcooking by even 2 minutes turns it into sawdust. Keep the heat at medium-high, not screaming hot, and remember that carryover cooking continues after you remove it from the pan.
Problem: Cheese Won’t Melt
Solution: Your meat and fries cooled down too much before assembly. Everything needs to be hot when you layer it – the residual heat melts the cheese naturally. If you’ve already assembled cold components, pop the whole thing under the broiler for 1-2 minutes, watching constantly to prevent burning.
Problem: Sauce Is Too Thick or Too Thin
Solution: The thickness depends on your yogurt’s water content. Greek yogurt varies widely between brands. If your sauce is too thick to drizzle, whisk in 1-2 tbsp milk or water until it reaches pourable consistency. If it’s too thin, add 2-3 tbsp more Greek yogurt or a small squeeze of fresh lemon juice, which helps thicken as the acid interacts with the dairy.
Problem: Raw Potato Centers in Fried Potatoes
Solution: Your fries are cut too thick or the first frying temperature was too high. Cut fries no thicker than 1/2 inch and maintain 325°F during the first fry for the full 4-5 minutes. If you rush this step or fry at higher heat, the outside looks done while the inside stays raw and hard.
Equipment Essentials
- Heavy-bottomed pot or deep fryer (at least 4-quart capacity)
- Deep-fry thermometer or instant-read thermometer
- Large skillet (12-inch minimum)
- Sharp chef’s knife for cutting potatoes uniformly
- Slotted spoon or spider strainer for safe frying
- Multiple baking sheets lined with paper towels
- Large mixing bowls for soaking potatoes and mixing meat
- Whisk for sauce preparation
- Serving boxes, bowls, or plates for assembly
Shopping List Organized by Store Section
Meat Department
- 1.5 lbs ground lamb or beef (80/20)
Produce Section
- 2 lbs russet potatoes
- 1 head iceberg lettuce
- 2 medium tomatoes
- 1 medium red onion
- 1 medium cucumber
- 1 bunch fresh dill
- 1 lemon
- 4 cloves garlic (or 1 bulb)
Dairy Section
- 1 cup Greek yogurt or sour cream
- 1 cup shredded mozzarella cheese
- 1/2 cup crumbled feta cheese
- 1/2 cup mayonnaise
Spice Aisle
- Paprika
- Ground cumin
- Ground coriander
- Dried oregano
- Cayenne pepper
- Garlic powder
- Sea salt
- Black pepper
Oils & Condiments
- Olive oil
- Vegetable oil (for frying)
- Hot sauce (optional)
Success Secrets
1. Cut Fries the Day Before: Prep your potatoes up to 24 hours ahead by cutting, soaking, and storing them submerged in cold water in the refrigerator. This actually improves texture because the extended soak removes even more starch. Just drain and dry thoroughly before frying.
2. Season in Layers: Don’t just season the meat – season every component. Salt the fries immediately after frying, season the vegetables with a pinch of salt and pepper, and make sure your sauce is well-seasoned. This layered seasoning approach creates complex flavor in every bite of your doner box kebab fries.
3. Control the Crowd: Never fill your frying pot more than half full with oil, and never fry more than one-third of your potatoes at once. Overcrowding drops the temperature dramatically, resulting in greasy fries that never crisp up. Patience during frying pays off with perfect texture.
4. Warm Your Serving Vessels: Run hot water over your serving bowls or plates and dry them just before assembly. This simple step keeps your doner box kebab fries hot for an extra 5-10 minutes, which matters when feeding a group where people start eating at different times.
5. Make It Interactive: Set up a toppings bar with extra vegetables, additional sauces (hot sauce, tahini, tzatziki), pickled peppers, and fresh herbs. Let each person customize their box, which turns a simple meal into an experience and accommodates different heat preferences and dietary needs.
This doner box kebab fries recipe delivers everything you crave in loaded street food – crispy potatoes, seasoned meat, fresh vegetables, and creamy sauce – all in one satisfying bowl. The combination of textures and flavors makes this a meal that satisfies four people without anyone leaving the table hungry.