Prep Time: 15 minutes | Cook Time: 30 minutes | Total Time: 45 minutes | Servings: 4
Key Takeaways
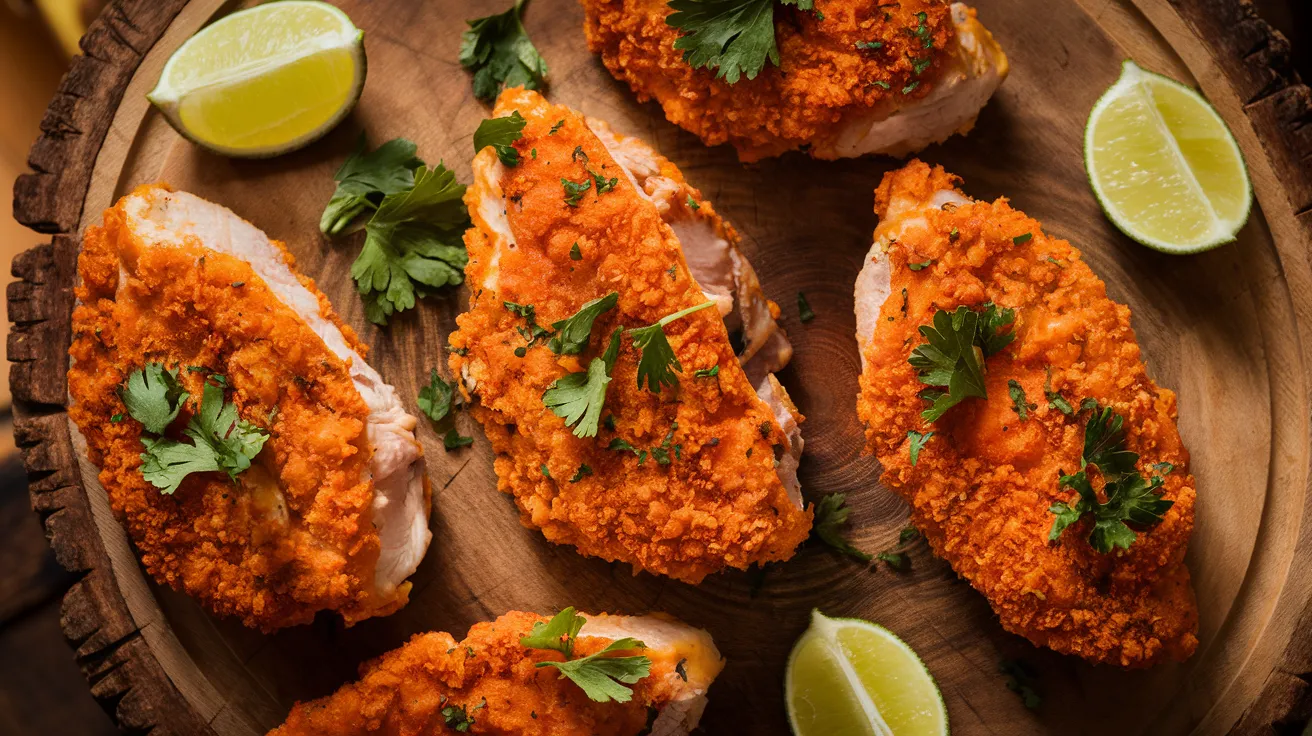
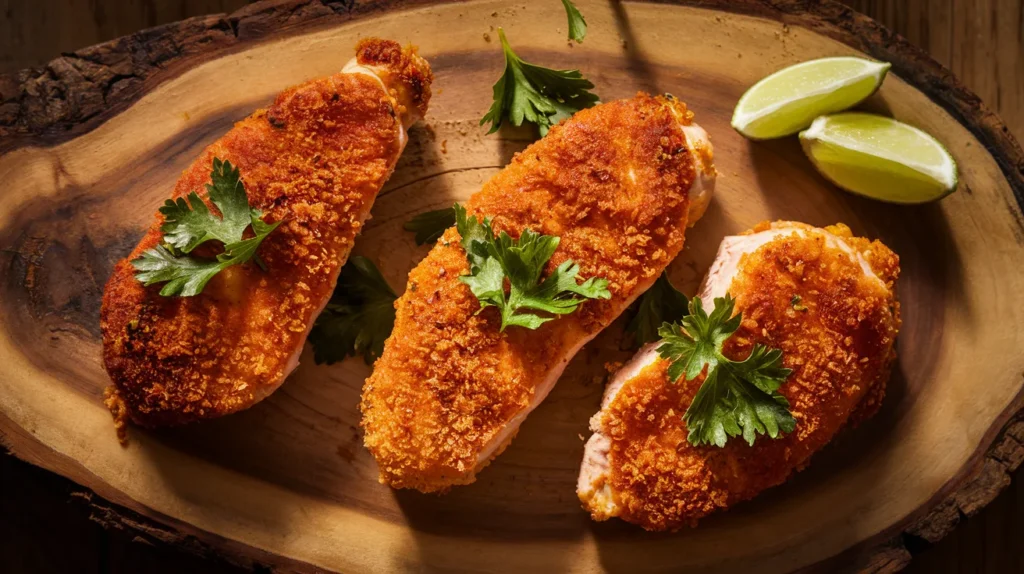
- Crispy, cheesy Dorito Chicken with juicy meat inside – no frying needed!
- Ready in just 45 minutes with simple pantry ingredients
- Make-ahead friendly – prep the Dorito Chicken up to 8 hours before baking
- Perfect for picky eaters who love the familiar Dorito flavor
Why You Need This Dorito Chicken Recipe
Ever stared at chicken breasts wondering how to make them exciting? We’ve all been there.
Plain chicken gets boring fast. But this Dorito Chicken recipe solves that problem with a crispy, cheesy coating everyone will love.
The secret? Crushed Doritos create a crust that’s crunchy, flavorful, and honestly, pretty fun to make. Kids go crazy for it, and adults secretly love it too. If you enjoy crispy chicken recipes, you’ll find this even more satisfying than classic chicken tenders and fries but just as family-friendly.
Nutrition Facts
| Nutrient | Amount per Serving |
|---|---|
| Calories | 425 |
| Protein | 38g |
| Carbohydrates | 21g |
| Fat | 22g |
| Fiber | 2g |
| Sodium | 680mg |
What You’ll Need for Dorito Chicken
Ingredients
| Ingredient | Amount | Notes |
|---|---|---|
| Boneless, skinless chicken breasts | 4 (about 6-7 oz each) | Trimmed of excess fat |
| Large eggs | 2 | Room temperature |
| Sour cream | 1/4 cup | Full-fat works best |
| All-purpose flour | 1/2 cup | For dredging |
| Nacho Cheese Doritos | 1 (9.25 oz) bag | Crushed into crumbs |
| Garlic powder | 1 teaspoon | |
| Onion powder | 1 teaspoon | |
| Paprika | 1/2 teaspoon | Regular or smoked |
| Salt | 1 teaspoon | |
| Black pepper | 1/2 teaspoon | Freshly ground |
| Cooking spray | As needed | Non-stick variety |
Equipment
| Tool | Purpose |
|---|---|
| Meat mallet or rolling pin | For pounding chicken |
| 3 shallow bowls or plates | For breading station |
| Baking sheet | For cooking chicken |
| Wire rack (optional) | For crispier results |
| Food processor or zip-top bag | For crushing chips |
| Instant-read thermometer | For checking doneness |
| Parchment paper | For easy cleanup |
Substitution Options
- Doritos flavors: Try Cool Ranch, Spicy Sweet Chili, or Flamin’ Hot for variety
- Sour cream: Greek yogurt works as a lighter option
- Chicken: Chicken tenders work well (reduce cooking time by 5-7 minutes)
- Gluten-free option: Use gluten-free flour blend instead of all-purpose flour
Step-by-Step Dorito Chicken Instructions
Preparation Phase
- Gather all ingredients and equipment:
- Take out all ingredients from the refrigerator and pantry
- Set out the 3 shallow bowls or plates for your breading station
- Find your meat mallet or rolling pin
- Locate your baking sheet and parchment paper
- Make sure your oven rack is positioned in the middle of the oven
- Preheat your oven to 400°F (200°C):
- Turn your oven on and set it to 400°F
- Allow at least 10-15 minutes for it to fully preheat
- A fully preheated oven is critical for crispy Dorito Chicken
- Prepare the baking sheet:
- Take your baking sheet and lay a sheet of parchment paper on top
- The parchment should completely cover the surface
- If using a wire rack, place it on top of the parchment paper
- Spray the parchment paper or wire rack thoroughly with cooking spray
- BEGINNER TIP: The wire rack helps air circulate around the chicken, making all sides crispy. If you don’t have one, don’t worry – your Dorito Chicken will still be delicious!
- Crush the Doritos:
- Open the bag of Doritos and press out excess air
- If using a food processor: add chips and pulse 8-10 times until coarsely crushed (not powder)
- If using a zip-top bag: place chips inside, seal the bag removing excess air, and crush with a rolling pin
- BEGINNER TIP: You want a mix of fine crumbs and small pieces for the best texture
- Set up your breading station with three shallow dishes:
- First dish: Add 1/2 cup flour, 1/2 teaspoon salt, 1/4 teaspoon pepper, and mix with a fork until well combined
- Second dish: Crack 2 eggs into the bowl, add 1/4 cup sour cream, and whisk vigorously until smooth with no streaks
- Third dish: Add crushed Doritos, 1 teaspoon garlic powder, 1 teaspoon onion powder, 1/2 teaspoon paprika, 1/2 teaspoon salt, and 1/4 teaspoon pepper, then mix well
- Arrange dishes in order: flour mixture, egg mixture, Dorito mixture
- BEGINNER TIP: Set up your station from left to right if you’re right-handed, or right to left if left-handed
- Prepare the chicken:
- Remove chicken breasts from packaging and pat dry with paper towels
- Trim any visible fat with kitchen scissors or a sharp knife
- Lay a large piece of plastic wrap or parchment paper on your counter
- Place one chicken breast on top and cover with another piece of plastic wrap or parchment
- Using a meat mallet or rolling pin, gently pound the thickest parts of the chicken
- Pound until the chicken is an even 1/2-inch thickness throughout
- Repeat with each chicken breast
- BEGINNER TIP: Don’t pound too hard! Use gentle, even strokes to avoid tearing the meat
Coating Process for Dorito Chicken
- Bread the first chicken piece:
- Pick up one piece of chicken with your “dry hand” (this keeps one hand clean)
- Place it in the flour mixture and flip to coat both sides
- Gently shake off excess flour
- Transfer to egg mixture and use your “wet hand” to flip and fully coat
- Let excess egg drip off
- Place chicken in Dorito mixture
- Press Dorito crumbs firmly onto both sides of chicken using your dry hand
- Make sure chicken is completely covered with crumbs
- Place coated chicken on prepared baking sheet
- BEGINNER TIP: Using a “wet hand” and “dry hand” prevents your fingers from becoming coated with breading
- Bread remaining chicken pieces:
- Repeat the breading process with each chicken breast
- Leave at least 1 inch of space between pieces on the baking sheet
- After all pieces are coated, let them rest for 5 minutes (this helps the coating adhere better)
- Lightly spray the tops of chicken with cooking spray
- BEGINNER TIP: If your hands get too messy during the process, rinse and dry them before continuing
Baking Your Dorito Chicken
- Place chicken in oven:
- Check that your oven has fully preheated to 400°F
- Open the oven door and carefully slide the baking sheet onto the middle rack
- Close the door immediately to maintain temperature
- Set a timer for 15 minutes
- BEGINNER TIP: Opening the oven door too frequently lets heat escape and can affect cooking time
- Flip the chicken:
- When timer goes off, open the oven door and carefully remove the baking sheet
- Using tongs or a spatula, gently flip each piece of chicken
- Be careful not to dislodge the coating
- Return the baking sheet to the oven
- Set timer for another 12 minutes
- BEGINNER TIP: If any coating falls off during flipping, press it back onto the chicken
- Check for doneness:
- After 12 minutes, check if chicken is done
- Insert an instant-read thermometer into the thickest part of a chicken breast
- The temperature should read 165°F (74°C)
- The coating should be golden brown and crispy
- If not done, return to oven for 2-3 more minutes, then check again
- BEGINNER TIP: If you don’t have a thermometer, cut into the thickest part – the meat should be white with no pink, and juices should run clear
Finishing Steps
- Rest the chicken:
- Once fully cooked, remove the baking sheet from the oven
- Let Dorito Chicken rest on the baking sheet for 5 minutes
- This step allows juices to redistribute for maximum juiciness
- Don’t skip this step or your chicken might be dry!
- Serve the chicken:
- Using a clean spatula, transfer chicken to serving plates
- Serve immediately while still hot and crispy
- Pair with simple side dishes like:
- Mashed potatoes
- Corn on the cob
- Green salad
- Mac and cheese
- BEGINNER TIP: For a complete meal, include a starch, vegetable, and the protein (your Dorito Chicken)
Troubleshooting Dorito Chicken
Common Issues and Solutions
- Coating falls off during cooking:
- Possible cause: Chicken was too wet before coating
- Solution: Pat chicken completely dry with paper towels before starting
- Possible cause: Coating not pressed firmly enough
- Solution: Really press the crumbs into the chicken firmly on both sides
- Coating burns before chicken is cooked:
- Possible cause: Oven temperature too high
- Solution: Lower temperature to 375°F and cook a bit longer
- Possible cause: Chicken pieces too thick
- Solution: Make sure to pound to even 1/2-inch thickness
- Chicken is dry:
- Possible cause: Overcooked
- Solution: Use thermometer to avoid cooking past 165°F
- Possible cause: Didn’t rest after cooking
- Solution: Always let Dorito Chicken rest 5 minutes before cutting
- Uneven cooking:
- Possible cause: Chicken pieces different thicknesses
- Solution: Take time to pound all pieces to same thickness
Variations & Substitutions
Family-Friendly Dorito Chicken Options
Dorito Chicken Tenders
- Use 1.5 pounds chicken tenders instead of breasts
- Follow same process but reduce cooking time to 20-25 minutes
- Perfect for kids or as an appetizer
Spicy Dorito Chicken
- Add 1/4 teaspoon cayenne pepper to the Dorito mixture
- Use Flamin’ Hot Doritos for extra heat
- Serve with ranch or blue cheese dressing for dipping
Healthier Dorito Chicken
- Use boneless, skinless chicken thighs (same cooking time)
- Mix in some whole grain breadcrumbs with the Doritos (1:1 ratio)
- Bake on a wire rack for less oil absorption
- Use olive oil spray instead of regular cooking spray
For a completely different flavor profile that still maintains that comforting quality, try my Chicken French Onion Soup made in the slow cooker. It offers the same satisfying comfort as Dorito Chicken but with a savory, oniony twist.
Storage & Reheating Dorito Chicken
Refrigerator Storage:
- Allow chicken to cool completely to room temperature (but no longer than 2 hours)
- Place in an airtight container with paper towels between layers
- Store in refrigerator for up to 3 days
Freezer Storage:
- Cool completely
- Wrap individual pieces in aluminum foil
- Place wrapped pieces in a freezer-safe zip-top bag
- Remove as much air as possible and seal
- Label with name and date
- Freeze for up to 2 months
- Thaw overnight in refrigerator before reheating
Best Reheating Methods:
- Oven (best method):
- Preheat to 350°F
- Place chicken on a baking sheet
- Reheat for 10-15 minutes until internal temperature reaches 165°F
- Air fryer:
- Preheat to 370°F
- Cook for 3-4 minutes until crispy and heated through
- Avoid microwave if possible (makes coating soggy)
- If you must use microwave:
- Place on microwave-safe plate
- Cover with paper towel
- Heat on 50% power in 30-second intervals until warm
Safety Notes & Tips
Food Safety
- Always wash hands with soap and warm water for 20 seconds before and after handling raw chicken
- Use separate cutting boards for chicken and other ingredients
- Sanitize all surfaces that come in contact with raw chicken
- Never reuse marinade or breading that has touched raw chicken
- Check that internal temperature reaches 165°F (74°C)
- Don’t leave cooked chicken at room temperature for more than 2 hours (1 hour if above 90°F)
Pro Tips for Perfect Dorito Chicken
- Make ahead: The chicken can be breaded up to 8 hours ahead and refrigerated before baking
- For extra crunch: After crushing Doritos, mix in 1/4 cup panko breadcrumbs
- Flavor boost: Add 2 tablespoons grated Parmesan cheese to the Dorito mixture
- Serving suggestion: A squeeze of fresh lime juice just before serving brightens all the flavors
- For even cooking: Let chicken sit at room temperature for 15 minutes before breading
- Time-saving tip: Ask your butcher to pound the chicken breasts for you
If you’re looking for more gourmet chicken inspiration after mastering this Dorito Chicken recipe, try my Malai Chicken Maharaja for a creamy, Indian-inspired dish that will elevate your chicken dinner repertoire.