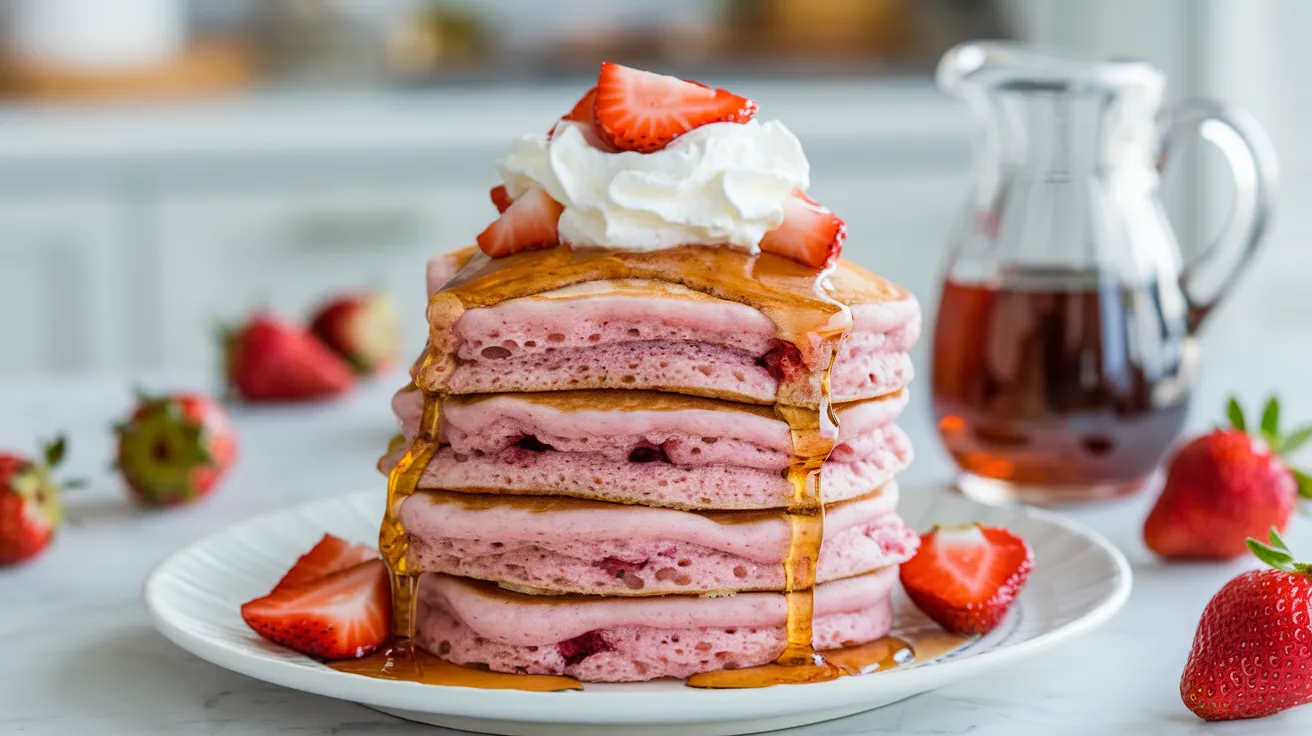
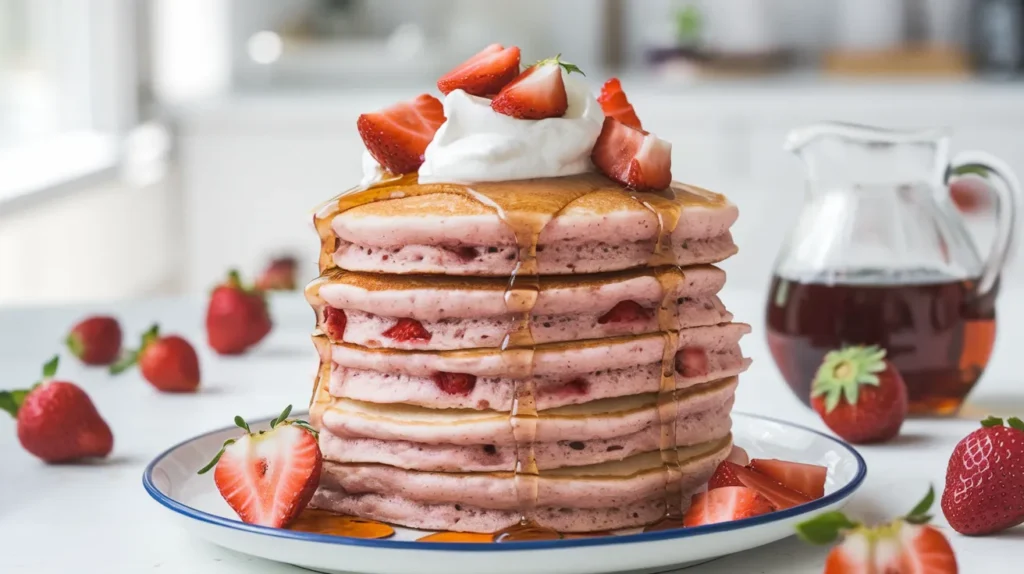
Indulge in fluffy, restaurant-quality double strawberry pancakes that combine fresh strawberry pieces with a luscious strawberry sauce. These double strawberry pancakes deliver twice the berry flavor in every bite, creating the perfect weekend breakfast that serves four people generously. With simple ingredients and foolproof techniques, you’ll master these double strawberry pancakes that rival any diner’s signature stack.
SERVES: 4 | PREP: 15 MIN | COOK: 20 MIN | TOTAL: 35 MIN
Fresh Strawberry Ingredients
| Pancake Batter | Amount | Strawberry Sauce | Amount |
|---|---|---|---|
| All-purpose flour | 2 cups | Fresh strawberries, diced | 1½ cups |
| Granulated sugar | 3 tablespoons | Granulated sugar | ⅓ cup |
| Baking powder | 2 teaspoons | Water | 2 tablespoons |
| Salt | 1 teaspoon | Lemon juice | 1 tablespoon |
| Large eggs | 2 | Cornstarch | 1 teaspoon |
| Whole milk | 1¾ cups | Vanilla extract | ½ teaspoon |
| Unsalted butter, melted | 4 tablespoons | ||
| Vanilla extract | 1 teaspoon | ||
| Fresh strawberries, diced | 1 cup |
Step-by-Step Cooking Instructions
Phase 1: Strawberry Sauce Preparation (8 minutes)
Step 1: Combine 1½ cups diced strawberries with ⅓ cup sugar in a medium saucepan. Let the mixture sit for 2-3 minutes to allow natural juices to release. This maceration process creates the base liquid for your sauce.
Step 2: Place the saucepan over medium heat and bring the strawberry mixture to a gentle simmer. Stir occasionally to prevent sticking. You’ll hear light bubbling sounds when it reaches the right temperature.
Step 3: Mix cornstarch with 2 tablespoons cold water in a small bowl until completely smooth. This slurry prevents lumpy sauce and ensures perfect thickening.
Step 4: Add the cornstarch mixture to the simmering strawberries while stirring continuously. The sauce will thicken within 30-45 seconds, coating the back of your spoon.
Step 5: Remove from heat and stir in lemon juice and vanilla extract. The acid brightens the strawberry flavor significantly. Set aside to cool while preparing pancakes.
Phase 2: Pancake Batter Creation (5 minutes)
Step 6: In a large mixing bowl, whisk together flour, sugar, baking powder, and salt until evenly distributed. Create a well in the center using your whisk handle – this prevents overmixing later.
Step 7: In a separate bowl, beat eggs until slightly frothy, about 30 seconds. Add milk, melted butter, and vanilla extract, whisking until completely combined.
Step 8: Pour the wet ingredients into the flour well all at once. Using a wooden spoon or spatula, gently fold the mixture together until just combined. Important: Stop mixing when you still see small flour streaks – overmixing creates tough pancakes.
Step 9: Gently fold in 1 cup diced fresh strawberries, being careful not to burst the berries. The batter should look lumpy and slightly thick, which is exactly what you want.
Phase 3: Pancake Cooking (15 minutes)
Step 10: Preheat a large non-stick skillet or griddle over medium heat for 2-3 minutes. Test the temperature by sprinkling water drops – they should sizzle and evaporate within 2 seconds.
Step 11: Lightly butter the cooking surface using a paper towel to spread evenly. Too much butter creates uneven browning, while too little causes sticking.
Step 12: Using a ¼-cup measuring cup, pour batter onto the hot surface, leaving 2 inches between each pancake. You should fit 3-4 pancakes per batch depending on your pan size.
Step 13: Cook for 2-3 minutes until bubbles form across the surface and edges look set. The bubbles should pop and stay open – this indicates the bottom is perfectly golden.
Step 14: Flip pancakes using a wide spatula in one confident motion. Cook for another 1-2 minutes until the second side is golden brown. Press gently with the spatula – pancakes should spring back when done.
Step 15: Transfer cooked pancakes to a warm oven (200°F) to keep hot while finishing remaining batches. This ensures everyone eats warm pancakes together.
Step 16: Repeat the cooking process with remaining batter, adding more butter to the pan between batches as needed.
Phase 4: Assembly and Serving (2 minutes)
Step 17: Stack 2-3 double strawberry pancakes per plate, creating attractive layers. Drizzle warm strawberry sauce generously between layers and over the top.
Step 18: Garnish with fresh strawberry slices and a pat of butter if desired. Serve immediately while pancakes are hot and sauce is warm.
Chef’s Professional Notes
Strawberry Selection: Choose strawberries that give slightly to gentle pressure but aren’t mushy. Overripe berries break down too much during cooking, while underripe ones lack sweetness in your double strawberry pancakes.
Temperature Control: Medium heat is crucial for even cooking. Too high creates burnt exteriors with raw centers, while too low makes pancakes dense and pale.
Batter Consistency: The perfect pancake batter looks lumpy and thick enough to hold its shape when poured. Smooth batter indicates overmixing, which develops gluten and creates tough results.
Make-Ahead Magic: Prepare strawberry sauce up to 3 days ahead and refrigerate. Reheat gently before serving your double strawberry pancakes for stress-free morning cooking.
Nutrition Information (Per Serving)
- Calories: 485
- Protein: 12g
- Carbohydrates: 68g
- Fat: 18g
- Fiber: 4g
- Sugar: 28g
Creative Double Strawberry Variations
Chocolate Strawberry Pancakes: Add 3 tablespoons cocoa powder to dry ingredients and fold in ½ cup mini chocolate chips with the strawberries. The combination creates dessert-worthy breakfast perfection.
Lemon Strawberry Pancakes: Incorporate 2 teaspoons lemon zest into the batter and add 1 tablespoon lemon juice to the strawberry sauce. This bright variation pairs beautifully with the berry flavors.
Cream Cheese Stuffed Version: Drop small dollops of sweetened cream cheese onto pancakes just after pouring batter into the pan. The cream cheese melts slightly, creating pockets of richness.
Whole Wheat Healthy Option: Substitute half the all-purpose flour with whole wheat flour and reduce sugar by 1 tablespoon. For more healthy pancake inspiration, check out these mini pancake cereal ideas that offer portion control benefits.
Storage and Reheating Guidelines
Refrigerator Storage: Cool pancakes completely before wrapping individually in plastic wrap. Store up to 3 days in the refrigerator alongside the strawberry sauce in a covered container.
Freezer Storage: Wrap cooled pancakes in plastic wrap, then aluminum foil for up to 3 months. Label with date and contents for easy identification.
Reheating Methods: Toast frozen pancakes directly in a toaster for 2-3 cycles, or microwave refrigerated ones for 30-45 seconds. For crispy edges, reheat in a 350°F oven for 5-7 minutes.
Sauce Storage: Refrigerated strawberry sauce keeps for 5 days. Reheat gently in microwave at 50% power, stirring every 30 seconds until warmed through.
Troubleshooting Common Problems
Dense, Heavy Pancakes: This typically results from overmixing the batter. Remember that lumpy batter is your friend – mix just until ingredients are barely combined for fluffy double strawberry pancakes.
Pale, Undercooked Centers: Your heat is too low or you’re flipping too early. Wait for surface bubbles to pop and stay open before flipping, and increase heat slightly.
Burnt Bottoms, Raw Centers: Heat is too high. Reduce to medium-low and allow longer cooking time. Cast iron retains heat longer than non-stick surfaces, so adjust accordingly.
Strawberries Sinking to Bottom: Toss diced strawberries in 1 tablespoon flour before folding into batter. This light coating helps suspend fruit throughout the pancake.
Sauce Too Thin: Return to heat and simmer 1-2 more minutes, or mix additional ½ teaspoon cornstarch with 1 tablespoon cold water and stir in while heating.
Essential Equipment List
- Large mixing bowls (2) for separating wet and dry ingredients
- Medium saucepan for strawberry sauce preparation
- Non-stick skillet or griddle (12-inch preferred) for even cooking
- Wide spatula for confident flipping without breaking
- ¼-cup measuring cup for consistent pancake sizing
- Wire whisk for proper ingredient incorporation
- Wooden spoon for gentle batter folding
Organized Shopping List
Dairy Section
- Large eggs (1 dozen)
- Whole milk (1 quart)
- Unsalted butter (1 stick package)
Produce Department
- Fresh strawberries (2 pounds for generous portions)
- Lemon (1 medium for juice)
Baking Aisle
- All-purpose flour (5-lb bag)
- Granulated sugar (4-lb bag)
- Baking powder (small container)
- Vanilla extract (small bottle)
- Cornstarch (small container)
- Salt (if needed)
Success Secrets for Perfect Results
1. Room Temperature Ingredients: Remove eggs and milk from refrigerator 30 minutes before cooking. Room temperature ingredients mix more easily and create smoother batter textures.
2. Fresh Berry Selection: Choose strawberries with bright green tops and deep red color throughout. Avoid berries with white shoulders or soft spots that indicate overripeness.
3. Proper Heat Testing: Your cooking surface is ready when a few water drops dance and evaporate within 2-3 seconds. This ensures even browning without burning.
4. Batch Cooking Strategy: Keep finished pancakes warm in a 200°F oven on a baking sheet. This maintains temperature and texture while you finish cooking remaining batter.
5. Advanced Timing Tip: Start your strawberry sauce first, then prepare pancake batter while sauce cools. This efficient workflow ensures both components finish simultaneously. For more time-saving breakfast ideas, try these air fryer pancakes that cook multiple servings quickly.
These double strawberry pancakes transform ordinary weekend mornings into special occasions. The combination of fresh strawberries in the fluffy pancakes plus the homemade strawberry sauce creates layers of berry flavor that satisfy both kids and adults. Master this recipe once, and it’ll become your go-to breakfast showstopper for years to come.