Prep Time: 5 minutes | Cook Time: 15 minutes | Total Time: 20 minutes | Servings: 4
Key Takeaways
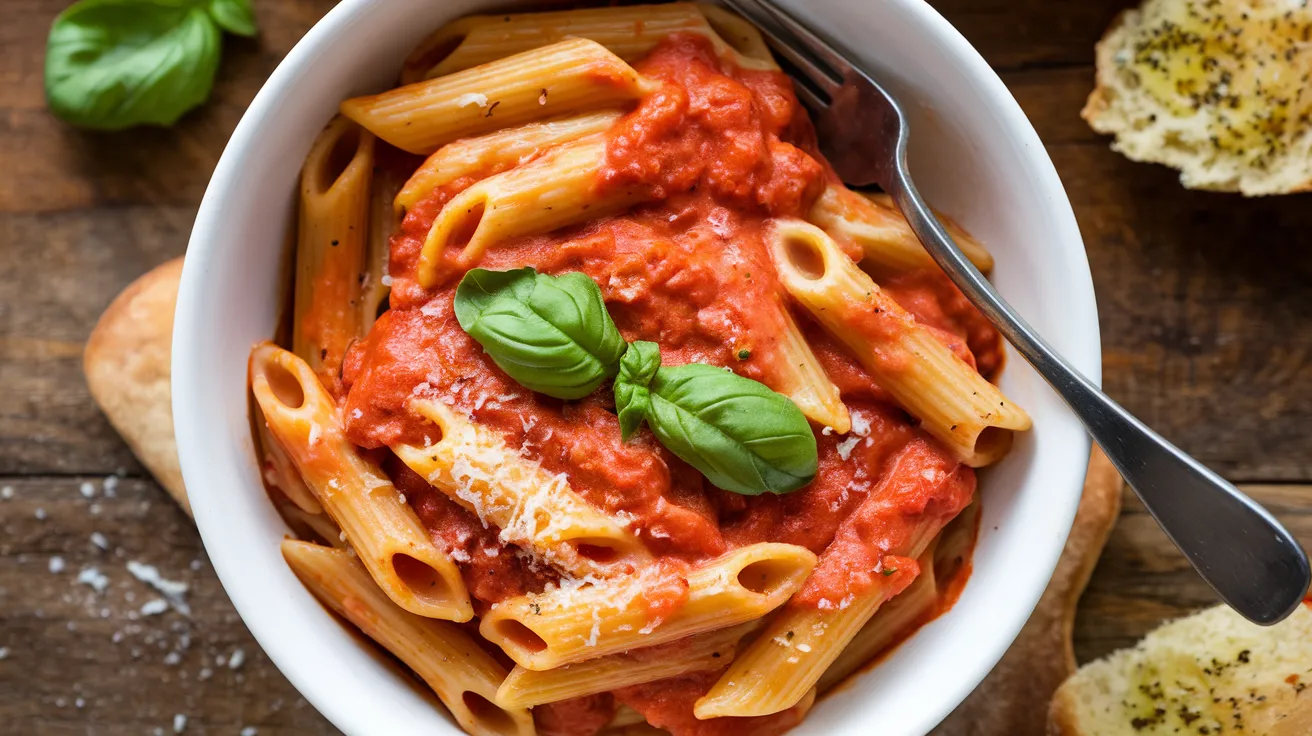
- This Easy One Pot Creamy Tomato Pasta cooks noodles directly in a rich sauce
- No need to drain pasta or use multiple pots – less cleanup!
- Ready in just 20 minutes – perfect for busy weeknights
- Easily customizable with your favorite proteins or vegetables
Why You’ll Love This Easy One Pot Creamy Tomato Pasta
Ever stood in your kitchen at 6 PM, hungry and tired, wishing dinner would just make itself? We’ve all been there.
This Easy One Pot Creamy Tomato Pasta solves that problem. You’ll have a rich, restaurant-quality meal on the table in just 20 minutes with minimal cleanup afterward.
The magic of this recipe happens when you cook pasta directly in the sauce, releasing its starch to create a naturally thick and creamy texture. No separate boiling, no colander, no fuss – just one pot of pure comfort food goodness.
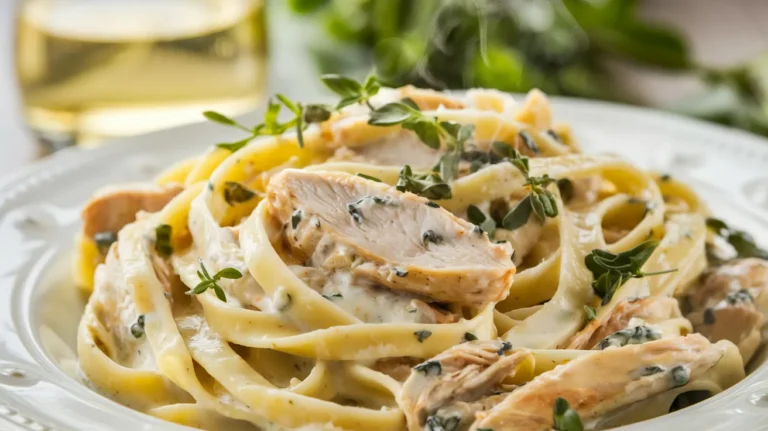
This technique works wonders for creating a silky sauce that clings to every bite of pasta. If you enjoy this cooking method, you might also love my Cheesy Chicken Pasta which uses a similar approach.
Nutrition Information
| Nutrient | Amount per Serving |
|---|---|
| Calories | 450 |
| Total Fat | 14g |
| Saturated Fat | 8g |
| Cholesterol | 40mg |
| Sodium | 680mg |
| Total Carbohydrates | 65g |
| Dietary Fiber | 4g |
| Sugars | 8g |
| Protein | 14g |
Note: This recipe contains dairy and gluten. See substitution options below for dietary restrictions.
What You’ll Need for Easy One Pot Creamy Tomato Pasta
Ingredients
| Ingredient | Amount | Notes |
|---|---|---|
| Penne pasta | 12 oz (340g) | Any short pasta works |
| Olive oil | 2 tablespoons | |
| Garlic | 4 cloves, minced | About 2 teaspoons |
| Red pepper flakes | ¼ teaspoon | Optional, for heat |
| Canned crushed tomatoes | 1 can (15 oz/425g) | San Marzano if available |
| Heavy cream | ½ cup (120ml) | |
| Chicken or vegetable broth | 3 cups (720ml) | Low sodium preferred |
| Parmesan cheese | ½ cup (50g), grated | Plus more for serving |
| Salt | 1 teaspoon | |
| Black pepper | ½ teaspoon | Freshly ground |
| Fresh basil | ¼ cup, chopped | Plus more for garnish |
Kitchen Equipment
| Tool | Why You Need It |
|---|---|
| Large, deep skillet or Dutch oven | For cooking everything in one pot |
| Wooden spoon | For stirring without scratching your pot |
| Measuring cups and spoons | For accurate measurements |
| Sharp knife | For mincing garlic and chopping basil |
| Cutting board | Safe surface for chopping |
| Cheese grater | For fresh Parmesan |
| Timer | To track cooking time |
Possible Substitutions
- Heavy cream: Half-and-half or full-fat coconut milk for dairy-free option
- Parmesan cheese: Pecorino Romano, Asiago, or nutritional yeast for vegan option
- Penne pasta: Any short pasta like rotini, farfalle, or gluten-free pasta
- Fresh basil: 1 tablespoon dried basil (add with tomatoes) or fresh parsley
- Vegetarian/vegan option: Use vegetable broth and plant-based alternatives. For a fully vegan version, check out my Best Ever Vegan Creamy Tomato Pasta recipe.
Step-by-Step Instructions for Easy One Pot Creamy Tomato Pasta
Preparation Phase
- Set up your workspace
- Clear your countertop to give yourself plenty of room to work.
- Read through the entire recipe before starting so you know what to expect.
- Place a large cutting board on your counter for prep work.
- Gather all ingredients
- Take out all ingredients from your refrigerator and pantry.
- Place them on your counter in the order you’ll use them.
- This prevents rushing to find items while cooking.
- Measure everything out
- Use measuring cups and spoons to portion all ingredients.
- For liquids: Pour broth into a large measuring cup.
- For dry ingredients: Measure pasta, salt, pepper and red pepper flakes.
- Place each measured ingredient in small bowls or directly on your cutting board.
- Prepare your aromatics
- Place garlic cloves on cutting board.
- With the flat side of your knife, gently press down on each clove to loosen the skin.
- Remove and discard all garlic skin.
- Finely chop the garlic by rocking your knife back and forth over the cloves until they’re in tiny pieces (about the size of grains of rice).
- Set minced garlic aside in a small bowl.
- Prepare your cheese and herbs
- If using a block of Parmesan, grate it using the fine side of your cheese grater.
- Measure ½ cup of grated cheese and set aside.
- Rinse fresh basil under cold water.
- Pat basil dry with paper towels.
- Stack basil leaves on top of each other.
- Roll the stack into a tight cylinder.
- Slice across the roll to create thin ribbons (this technique is called “chiffonade”).
- Chop these ribbons into smaller pieces if desired.
Cooking Phase
- Heat your pan
- Place your large skillet or Dutch oven on the stove.
- Turn the heat to medium.
- Add 2 tablespoons olive oil to the cold pan.
- Let the oil and pan heat up together for about 1 minute.
- Beginner tip: You’ll know the oil is hot enough when it looks shimmery, but not smoking.
- Cook the aromatics
- Carefully add the minced garlic to the hot oil.
- If using, add the red pepper flakes now too.
- Safety note: Stand back slightly as the garlic might sizzle when it hits the hot oil.
- Use your wooden spoon to stir constantly for 30-60 seconds.
- Important watch point: The garlic should become fragrant and just slightly golden. If it starts to brown too quickly, immediately lower your heat.
- Common mistake to avoid: Never walk away from cooking garlic! It can burn in seconds and will taste bitter.
- Add the tomatoes and broth
- Open your can of crushed tomatoes.
- Pour the entire can into the pan with the garlic.
- Tip: Use a silicone spatula to scrape out all tomato from the can.
- Stir well to combine with the garlic and oil for about 30 seconds.
- Carefully pour in the 3 cups of broth.
- Stir to combine all liquids.
- Season the base
- Add 1 teaspoon salt to the mixture.
- Add ½ teaspoon black pepper.
- Stir well to distribute seasonings evenly.
- Beginner tip: Always taste your cooking! Dip a clean spoon into the sauce, blow on it to cool, and taste to check if seasoning is to your liking.
- Bring to a boil
- Turn the heat up to medium-high.
- Wait patiently for the liquid to reach a gentle boil.
- Visual cue: You’ll see bubbles consistently breaking the surface.
- This should take about 3-4 minutes.
- Add the pasta
- Once boiling, add all the dry pasta directly to the sauce.
- Use your wooden spoon to push all pasta beneath the liquid surface.
- Beginner tip: If some pasta pieces stick up, don’t worry. Just stir again after 1 minute and they’ll soften enough to submerge.
- Simmer the pasta
- Reduce heat to medium-low.
- You want a gentle simmer, not a rolling boil.
- Visual cue: Small bubbles should steadily break the surface.
- Set your timer for 2 minutes less than the package cooking time.
- Stir every 2 minutes to prevent sticking.
- Important technique: Use your wooden spoon to scrape the bottom of the pan when stirring to prevent any pasta from sticking.
- Monitor the cooking process
- As the pasta cooks, it will absorb liquid and release starch.
- The sauce will gradually thicken.
- Troubleshooting: If the sauce gets too thick before pasta is tender, add ¼ cup more broth or water and stir.
- How to test pasta: At the 2-minute mark before package time, carefully remove one piece of pasta, let it cool slightly, and take a bite. It should be almost tender but have a slight firmness in the center.
- Finish the sauce
- Once pasta is nearly al dente (almost cooked but still firm to the bite), reduce heat to low.
- Pour in the ½ cup heavy cream.
- Stir gently but thoroughly to incorporate.
- The sauce will immediately look lighter in color.
- Beginner tip: Pour slowly around the pan rather than in one spot.
- Add the cheese
- Sprinkle the ½ cup grated Parmesan cheese over the pasta.
- Stir continuously until all cheese has melted.
- Visual cue: The sauce will become noticeably thicker and glossier.
- If the sauce seems too thick, add 1-2 tablespoons of broth.
- Incorporate the herbs
- Add most of the chopped fresh basil, saving some for garnish.
- Gently stir to distribute the basil throughout the dish.
- Color note: The bright green basil will create beautiful flecks in your creamy red sauce.
- Final seasoning check
- Turn off the heat.
- Using a clean spoon, taste the sauce and pasta.
- Add more salt or pepper if needed.
- Beginner tip: Season gradually—you can always add more, but you can’t take it away.
- Rest the dish
- Let the pasta rest in the pan for 2 minutes.
- Why this matters: This resting time allows the sauce to thicken to the perfect consistency and the pasta to finish cooking in the residual heat.
- Beginner tip: Use this time to clean up your prep area or set the table.
Serving
- Portion the pasta
- Use a pasta server or tongs to divide the pasta among four bowls.
- Try to distribute the sauce evenly among servings.
- Presentation tip: Twirl the pasta slightly as you place it in the bowl for a more attractive presentation.
- Garnish and serve
- Sprinkle each portion with:
- A pinch of the reserved fresh basil
- A small handful of extra grated Parmesan
- A tiny drizzle of olive oil (optional)
- Serve immediately while hot.
- Suggested pairing: Garlic bread or a simple green salad makes this a complete meal. If you enjoy fresh, lighter sides, my Cucumber and Tomato Pasta Salad makes a perfect complement to this rich pasta dish.
- Sprinkle each portion with:

Troubleshooting Tips for Easy One Pot Creamy Tomato Pasta
- Pasta too firm? If your pasta isn’t cooking properly, cover the pot for a few minutes to trap steam and help it soften. You can also add ¼ cup more hot broth or water.
- Sauce too thick? Add broth or water, 2 tablespoons at a time, stirring after each addition until you reach desired consistency.
- Sauce too thin? Continue simmering uncovered for 1-2 minutes. The sauce will thicken as it cools slightly. You can also add an extra tablespoon of grated Parmesan.
- Too bland? Add an extra pinch of salt, more black pepper, or a splash of lemon juice to brighten flavors. A pinch of Italian seasoning can also help.
- Sauce separating? Lower your heat immediately and whisk vigorously to re-emulsify. Never boil cream sauces after adding the cream.
- Garlic burned? Unfortunately, this will affect the flavor of the entire dish. It’s best to start over, as burned garlic cannot be fixed.
- Pasta sticking to the bottom? Next time, stir more frequently. For now, add a splash of broth, reduce heat, and gently scrape the bottom with your wooden spoon.
Variations & Additions for One Pot Pasta
Protein Options
- Italian sausage: Brown 8 oz of crumbled sausage before adding garlic
- Chicken: Add 1 cup of shredded rotisserie chicken with the cream
- Shrimp: Add 1 pound of peeled shrimp during the last 3-4 minutes of cooking
- Pancetta or bacon: Cook 4 oz diced before adding garlic, then remove excess fat
Vegetable Additions
- Spinach: Stir in 2 cups of fresh spinach with the cream
- Mushrooms: Sauté 8 oz of sliced mushrooms with the garlic
- Cherry tomatoes: Add 1 cup of halved cherry tomatoes when adding the crushed tomatoes
- Roasted red peppers: Add ½ cup chopped roasted red peppers with the tomatoes
- Peas: Add 1 cup frozen peas during the last 2 minutes of cooking
Flavor Boosters
- Sun-dried tomatoes: Add ¼ cup chopped with the crushed tomatoes
- Caramelized onions: Cook ½ cup before adding garlic
- Pesto: Stir in 1 tablespoon with the cream
- Lemon zest: Add ½ teaspoon with the basil
Storage & Reheating Instructions
Refrigerator Storage
- Allow pasta to cool completely (no more than 2 hours at room temperature).
- Transfer to airtight containers.
- Label with date and contents.
- Store in the refrigerator for up to 3 days.
Freezer Storage
- For best results, slightly undercook the pasta if you know you’ll be freezing it.
- Cool completely.
- Portion into freezer-safe containers or heavy-duty freezer bags.
- Remove as much air as possible.
- Label with date and contents.
- Freeze for up to 2 months.
- Thaw overnight in the refrigerator before reheating.
Reheating Instructions
Stovetop Method (Best for maintaining texture)
- Place pasta in a skillet or saucepan.
- Add 2-3 tablespoons of water or broth per serving.
- Cover with a lid.
- Heat over medium-low heat for 5-7 minutes.
- Stir occasionally to ensure even heating.
- Add more liquid if it seems too dry.
Microwave Method (Quickest option)
- Place a single serving in a microwave-safe bowl.
- Add 1 tablespoon of water or broth.
- Cover with a damp paper towel.
- Heat on 50% power for 1 minute.
- Stir and check temperature.
- Continue heating in 30-second intervals until warm throughout.
Refreshing Reheated Pasta
- Add a small pat of butter when reheating for extra richness.
- Sprinkle with freshly grated Parmesan after reheating.
- Add a few fresh basil leaves.
- A tiny splash of cream can help revive the sauce.
Safety Notes & Tips
- Food safety: Cream-based dishes should not sit out at room temperature for more than 2 hours.
- Hot pan handles: Always use oven mitts or a towel when touching the handles of your cooking pot, which can get very hot during cooking.
- Splatter protection: Turn your face away when adding liquids to hot oil to avoid potential splashes.
- Steam burns: When removing lids or stirring hot liquids, lift lids away from you to direct steam away from your face.
- Tasting safely: Never taste with your cooking spoon. Instead, take a small amount with a separate spoon and allow it to cool before tasting.
- Knife safety: Keep fingers curled under when chopping ingredients, and always cut away from your body.
- Heat management: If you need to step away from the stove even for a moment, turn off the heat first.
Pro Tips for Success
- Pasta selection tip: Shapes with ridges or curves (like penne rigate or rotini) hold onto creamy sauces better than smooth shapes.
- Cheese grating tip: Cold cheese is easier to grate. Keep your Parmesan refrigerated until right before you need to grate it.
- Garlic tip: The finer you mince garlic, the stronger its flavor will be in the final dish.
- One-pot secret: The starchy pasta water is your friend! It’s what makes this sauce so creamy without tons of cream.
- Prevent boil-overs: Keep a wooden spoon across the top of your pot—this breaks the surface tension of bubbles and helps prevent boil-overs.
- Test for doneness: Pasta should be “al dente”—tender but still with a slight bite. It will continue cooking slightly in the hot sauce even after the heat is turned off.
- Make-ahead tip: You can prep all ingredients earlier in the day and store them separately in the refrigerator until cooking time.
- Leftover transformation: Turn leftover pasta into a new meal by adding extra broth to make it into a soup the next day.