Prep Time: 5 minutes | Cook Time: 15 minutes | Total Time: 20 minutes | Servings: 4
- Never burn sweet potato toast again with our foolproof timing method
- Create 4 different flavor combos that work perfectly for breakfast or lunch
- Master the perfect slice thickness that ensures crispy edges and tender centers
- Learn the make-ahead trick that cuts morning prep time in half
Why Easy Sweet Potato Toast Will Change Your Breakfast Game
Tired of the same old breakfast? Easy sweet potato toast is about to become your new morning ritual.
Unlike regular toast that leaves you hungry an hour later, this easy sweet potato toast keeps you full until lunch while packing a serious nutritional punch. This simple swap brings more vitamins, minerals, and fiber to your plate without sacrificing taste or convenience.
Best of all? You need just 20 minutes to make this easy sweet potato toast recipe that serves four people. If you enjoy experimenting with breakfast options, you might also want to check out our French toast varieties for more morning inspiration. Let’s get cooking!
Nutrition Comparison: Sweet Potato Toast vs. Regular Toast
| Nutrient (per slice) | Sweet Potato Toast | Regular Wheat Toast |
|---|---|---|
| Calories | 90 | 75 |
| Carbs | 21g | 13g |
| Fiber | 3g | 1g |
| Protein | 2g | 3g |
| Vitamin A | 18,800 IU | 0 IU |
| Vitamin C | 20mg | 0mg |
| Potassium | 450mg | 80mg |
| Glycemic Index | Lower | Higher |
What You’ll Need for Easy Sweet Potato Toast
Ingredients List
| Ingredient | Amount | Notes |
|---|---|---|
| Medium sweet potatoes | 2 large (about 1 pound) | Choose firm, smooth potatoes |
| Olive oil | 1 tablespoon | For brushing slices |
| Salt | ¼ teaspoon | Kosher salt preferred |
| Topping Option 1: | ||
| Avocado | 1 ripe | Mashed or sliced |
| Cherry tomatoes | 8 | Halved |
| Microgreens | 1 cup | Any variety |
| Topping Option 2: | ||
| Nut butter | 4 tablespoons | Almond or peanut butter |
| Banana | 1 medium | Sliced |
| Cinnamon | ¼ teaspoon | Ground |
| Honey | 1 tablespoon | Optional |
| Topping Option 3: | ||
| Greek yogurt | ½ cup | Plain, full-fat |
| Berries | 1 cup | Mixed fresh berries |
| Granola | ¼ cup | Low-sugar variety |
| Topping Option 4: | ||
| Hummus | ½ cup | Plain or flavored |
| Cucumber | ½ medium | Thinly sliced |
| Red pepper flakes | Pinch | To taste |
Kitchen Tools
| Tool | Purpose |
|---|---|
| Sharp chef’s knife | For cutting sweet potatoes |
| Cutting board | Preferably wooden |
| Toaster or oven | For cooking sweet potato slices |
| Baking sheet | If using oven method |
| Pastry brush | For applying oil |
| Timer | To prevent burning |
| Tongs | For flipping and removing slices |
Ingredient Substitutions
- Sweet potatoes: Japanese purple sweet potatoes work great for a color change and slightly different flavor
- Olive oil: Avocado oil or coconut oil can be used instead
- Nut butter: Sunflower seed butter makes this recipe nut-free
- Greek yogurt: Coconut yogurt works for a dairy-free version
- Honey: Maple syrup is a great vegan alternative
Extremely Detailed Step-by-Step Instructions for Beginners
Preparation Phase
- Gather all your ingredients and tools
- Before you start cooking, make sure everything is within reach
- Place your cutting board on a flat, stable surface
- Take out the sweet potatoes, olive oil, and salt
- If you’re making all topping variations, arrange your topping ingredients in separate areas
- BEGINNER TIP: Read through the entire recipe once before starting
- Select your sweet potatoes
- Look for sweet potatoes that are about 2-3 inches in diameter
- Choose ones that are firm when gently squeezed (no soft spots)
- Pick potatoes that are relatively straight in shape (easier to cut evenly)
- Avoid potatoes with sprouts, cracks, or wrinkly skin
- BEGINNER TIP: Medium-sized sweet potatoes are easier to handle than very large ones
- Wash and prepare the sweet potatoes
- Hold each sweet potato under cold running water
- Use a clean vegetable brush to scrub the skin thoroughly (we’ll be eating the skin!)
- Pay special attention to any dirt in crevices or around the ends
- Rinse completely to remove any soap or residue
- Dry each potato thoroughly with a clean kitchen towel or paper towels
- BEGINNER TIP: Wet potatoes are slippery and dangerous to cut, so dry them well
- Set up your workspace
- Clear your counter space so you have room to work
- Place your cutting board on a non-slip surface (put a damp paper towel underneath if needed)
- Position your knife within easy reach but not where it might fall
- Have a small bowl of olive oil and a pastry brush ready
- Keep your salt nearby
- BEGINNER TIP: A cluttered workspace increases the chance of accidents
- Prepare your cooking method
- If using a toaster:
- Make sure your toaster is clean and crumb-free
- Place it on a heat-safe surface away from any flammable items
- Have a plate ready nearby for the finished toast
- If using an oven:
- Position an oven rack in the middle position
- Preheat your oven to 400°F (this takes about 10-15 minutes)
- Line your baking sheet with parchment paper
- BEGINNER TIP: Don’t put sweet potatoes in until the oven is fully preheated
- If using a toaster:
- Prepare your toppings while waiting
- For avocado topping:
- Cut the avocado in half and remove the pit
- Scoop the flesh into a small bowl
- Mash with a fork until mostly smooth but still slightly chunky
- Cut cherry tomatoes in half
- Wash microgreens if needed
- For a more detailed approach to avocado toppings, you might like our savory avocado toast guide for even more ideas
- For nut butter topping:
- Measure 4 tablespoons of nut butter into a small bowl
- If nut butter is cold and firm, microwave for 10 seconds to soften
- Peel and slice banana into ¼-inch rounds
- Have cinnamon and honey ready
- For yogurt topping:
- Measure Greek yogurt into a small bowl
- Wash and dry berries
- Have granola ready in a separate bowl
- For hummus topping:
- Measure hummus into a small bowl
- Wash and thinly slice cucumber
- Have red pepper flakes ready
- BEGINNER TIP: Having all toppings ready means you can top your sweet potato toast while it’s still warm
- For avocado topping:
Slicing and Cooking
- Position sweet potato for safe cutting
- Place a sweet potato on the cutting board
- First, cut off about ¼ inch from each end to create flat surfaces
- Stand the potato on one flat end so it’s stable
- BEGINNER WARNING: Never cut sweet potatoes while holding them in your hand
- Slice the sweet potatoes with proper technique
- Position your non-dominant hand in a “claw” grip (fingertips tucked under) on top of the potato
- Hold the knife in your dominant hand, gripping the handle firmly
- Starting from the top of the potato, cut straight down to create a ¼-inch thick slice
- How to measure ¼ inch without a ruler:
- It’s about the thickness of two quarters stacked together
- Or the width of a standard pencil
- Continue slicing the entire potato into ¼-inch slices
- Repeat with the second potato
- You should get approximately 8-10 slices total from two large potatoes
- BEGINNER WARNING: Cutting sweet potatoes requires some force – make sure your knife is sharp and take your time
- BEGINNER TIP: If your knife sticks, don’t force it – pull it out and start the cut again
- Prepare the slices for cooking
- Lay all your sweet potato slices flat on your cutting board or baking sheet
- Pour about 1 tablespoon of olive oil into a small bowl
- Dip your pastry brush into the oil
- Brush the top side of each slice with a thin, even layer of oil (not too much!)
- Sprinkle each slice with the tiniest pinch of salt (less than you think you need)
- Flip each slice over
- Repeat oiling and salting on the second side
- BEGINNER TIP: Too much oil will make your toast soggy, while too little will make it dry – aim for a light, even coating
- Cook using your chosen method
- Method A: Toaster Method
- Set your toaster to the highest setting
- Place 1-2 slices in the toaster slots (depending on your toaster size)
- Push down the lever to start toasting
- When the cycle finishes, check if the slices are fork-tender:
- Insert a fork into the center – it should go in easily with little resistance
- The edges should be starting to brown slightly
- If not done, toast for a second cycle
- Most sweet potato slices need 2-3 complete toasting cycles
- Use tongs to carefully remove hot slices
- BEGINNER WARNING: Never use metal utensils to remove toast from a plugged-in toaster!
- Method B: Oven Method
- Make sure your oven is fully preheated to 400°F
- Place your prepared sweet potato slices on the parchment-lined baking sheet
- Leave about 1 inch of space between each slice
- Place the baking sheet on the middle rack of the oven
- Set a timer for 8 minutes
- After 8 minutes, open the oven and carefully flip each slice using tongs
- Return to the oven and bake for another 7-10 minutes
- Check for doneness:
- Edges should be slightly crispy and browned
- Center should be easily pierced with a fork
- If needed, bake for an additional 2-3 minutes
- Remove from oven when done
- BEGINNER WARNING: Use oven mitts when handling the hot baking sheet!
- Method A: Toaster Method
- Test for doneness properly
- Properly cooked sweet potato toast should be:
- Browned around the edges
- Slightly crisp on the outside
- Tender and fully cooked inside
- Easily pierced with a fork (no resistance)
- If undercooked (still hard in center):
- Toaster method: Run through another full cycle
- Oven method: Return to oven for 3-5 more minutes
- BEGINNER TIP: It’s better to slightly overcook than undercook – nobody likes crunchy sweet potato!
- Properly cooked sweet potato toast should be:
Assembly and Serving
- Cool slightly before adding toppings
- Transfer cooked sweet potato slices to a plate or cooling rack
- Let them rest for 1-2 minutes (but not too long or they’ll get cold)
- This cooling period prevents toppings from melting completely
- BEGINNER TIP: Use this time to do a final check on your toppings and arrange serving plates
- Add toppings with proper technique
- For all toppings: Start with a thin, even layer of the base (avocado, nut butter, yogurt, or hummus)
- Avocado Toast Style:
- Spoon about 1 tablespoon mashed avocado onto each slice
- Use the back of a spoon to spread it evenly, leaving a small border around the edge
- Place 2-3 cherry tomato halves on top
- Sprinkle with a small handful of microgreens
- Finish with the tiniest pinch of salt
- Nut Butter & Banana Style:
- Spread about 1 tablespoon of nut butter evenly over each slice
- Arrange 3-4 banana slices on top, slightly overlapping
- Sprinkle lightly with cinnamon (less than you think you need)
- If desired, drizzle ½ teaspoon of honey over the top
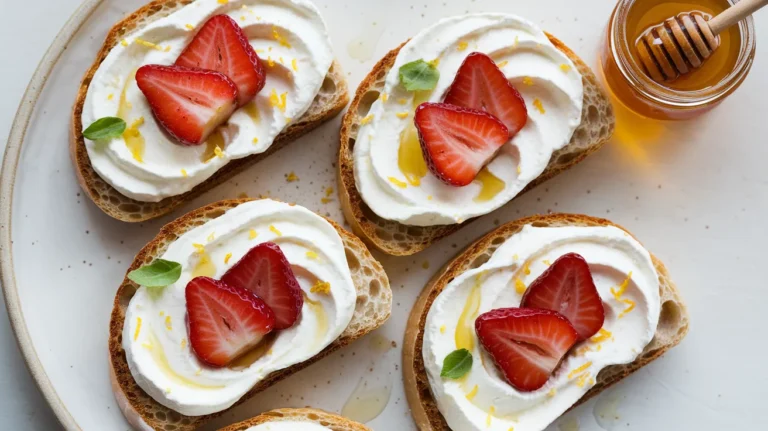
- Yogurt & Berry Style:
- Spread about 1 tablespoon of Greek yogurt over each slice
- Arrange 5-6 berries on top
- Sprinkle with 1 tablespoon of granola
- Optional: Add a tiny drizzle of honey
- Mediterranean Hummus Style:
- Spread about 1 tablespoon of hummus over each slice
- Arrange 3-4 cucumber slices on top
- Sprinkle with the smallest pinch of red pepper flakes
- Optional: Add a tiny drizzle of olive oil
- If you enjoy creamy toppings on toast, you might also like our scrambled egg toast with cream cheese recipe as another breakfast option
- BEGINNER TIP: Don’t overload your toppings or they’ll slide off when you try to eat the toast
- Serve immediately with proper presentation
- Place 2-3 sweet potato toast slices on each plate (for 4 servings total)
- Arrange different varieties together for visual appeal
- For a beautiful presentation:
- Alternate colors and textures
- Add a small side of fruit if desired
- Consider a small garnish like mint leaves for yogurt versions or basil for savory versions
- Serve with napkins – these can be messy to eat!
- BEGINNER TIP: Eat with a fork and knife for less mess, or pick up carefully from the sides

Troubleshooting Easy Sweet Potato Toast
Common Problems and Solutions
| Problem | Cause | Solution |
|---|---|---|
| Sweet potato burns before cooking through | Slices too thin | Cut slices exactly ¼-inch thick; use a ruler to check |
| Sweet potato stays hard in center | Slices too thick | Cut thinner or increase cooking time by 3-5 minutes |
| Toast is soggy, not crisp | Too much oil used | Use just enough oil to barely coat each side |
| Slices fall apart in toaster | Poor cutting technique | Cut evenly with a sharp knife; make sure slices are ¼-inch thick throughout |
| Toppings slide off | Too much topping or toast too hot | Let cool 1-2 minutes and use thin layer of toppings |
| Sticking to baking sheet | Not enough oil or no parchment paper | Always use parchment paper AND light oil coating |
| Burning on outside, raw inside | Heat too high | Lower toaster setting or oven temperature to 375°F |
| Toast is too dry | Cooked too long | Reduce cooking time; add more toppings to compensate |
Variations and Substitutions
Different Cooking Methods
- Air fryer method:
- Set to 350°F
- Arrange slices in a single layer (don’t overcrowd)
- Cook for 10-12 minutes, flipping halfway
- Check with a fork for tenderness
- Microwave + toaster method (quickest option):
- Place slices on a microwave-safe plate
- Microwave on high for 2 minutes
- Transfer to toaster for one cycle to crisp edges
- Great when you’re in a hurry!
- Grill method (summer option):
- Preheat grill to medium heat
- Oil grates well to prevent sticking
- Grill 4-5 minutes per side
- Watch carefully to prevent burning
Dietary Adaptations
- Keto-friendly:
- Use nut butter and skip the banana
- Top with avocado and a fried egg
- Add extra olive oil for healthy fats
- Vegan:
- Use plant-based yogurt like coconut or almond
- Replace honey with maple syrup
- Try coconut whipped cream instead of yogurt
- Gluten-free:
- Already naturally gluten-free!
- Double-check any store-bought toppings for hidden gluten
- Paleo:
- Use almond butter for topping
- Skip the granola or make your own with approved nuts
- Drizzle with raw honey instead of processed sweeteners
Storage and Reheating
Make-Ahead Tips
- Pre-slice and store raw:
- Slice sweet potatoes and submerge in cold water
- Store in airtight container in fridge up to 3 days
- Drain and pat completely dry before cooking
- BEGINNER TIP: Change water daily to keep slices fresh
- Par-cook for quick breakfasts:
- Cook slices 80% through (almost done but not quite)
- Cool completely on wire rack
- Refrigerate in airtight container with paper towels between layers
- When ready to eat, just finish in toaster for one cycle
- Pre-prepare toppings:
- Mix and store toppings separately
- Avocado mash should be made fresh (or use lemon juice to prevent browning)
- Pre-slice fruits and store in airtight containers
Storage Guidelines
- Store cooked sweet potato toast in the refrigerator for up to 3 days
- Use an airtight container to maintain freshness
- Place paper towels between layers to absorb moisture
- Keep toppings separate until ready to serve
- BEGINNER WARNING: Do not freeze cooked sweet potato toast – the texture becomes mushy and unpleasant
Reheating Instructions
- Toaster method:
- Place cold sweet potato slice in toaster
- Toast on medium setting for one cycle
- Check temperature and toast again if needed
- Oven method:
- Preheat oven to 350°F
- Place slices on baking sheet
- Reheat for 5 minutes until warmed through
- Watch carefully to prevent over-browning
- Air fryer method:
- Set to 350°F
- Heat for 2-3 minutes until warmed through
- BEGINNER TIP: Always add toppings after reheating, not before, to prevent sogginess
Safety Notes and Pro Tips
Safety First
- Knife safety:
- Use a sharp knife (dull knives require more force and are more dangerous)
- Always cut on a stable surface
- Keep fingertips curled under when holding food
- Cut away from your body, never toward yourself
- Take your time – sweet potatoes are hard to cut
- Toaster safety:
- Never insert metal utensils into a plugged-in toaster
- Use wooden or silicone tongs to remove hot slices
- Unplug the toaster if toast gets stuck
- Keep toaster away from water and flammable materials
- Oven safety:
- Always use oven mitts when handling hot baking sheets
- Open the oven door fully before reaching in
- Keep face away from oven when opening (steam can cause burns)
- Never leave the oven unattended while cooking
Pro Tips for Perfect Easy Sweet Potato Toast
- Even thickness is key – if you have one, a mandoline slicer with guard helps create perfectly even slices
- Use a ruler the first few times you make this recipe to ensure proper ¼-inch thickness
- Always pat sweet potatoes completely dry before slicing to prevent steaming
- If sweet potatoes are too hard to cut, microwave for 30 seconds to slightly soften
- Less is more with toppings – a thin layer stays put better than a thick layer
- For meal prep, keep toppings separate until ready to eat
- Cut sweet potatoes lengthwise for “artisanal” looking longer toasts
- Toast tends to be hotter in the center – let it cool slightly before biting in
FAQ
Q: Can I make sweet potato toast ahead of time? A: Yes! Slice and cook in advance, then reheat in the toaster when ready to eat. Store in the refrigerator for up to 3 days.
Q: How do I know when my sweet potato toast is done? A: It should be fork-tender in the center with slightly crisp edges. If you insert a fork, it should go in easily with little resistance.
Q: Can I eat the skin? A: Absolutely! The skin contains fiber and nutrients. Just be sure to wash well before cooking.
Q: My toaster isn’t deep enough for my sweet potato slices. What can I do? A: Cut your sweet potato lengthwise instead of crosswise for thinner pieces, or trim the slices to fit your toaster slots.
Q: Why do my sweet potato slices need multiple toaster cycles? A: Sweet potatoes are denser than bread and contain more moisture, so they need more time to cook through completely.
Q: How can I make my sweet potato toast crispy? A: For extra crispiness, pat slices very dry before cooking, use minimal oil, and cook slightly longer. The edges should get crispy while the center stays tender.
Q: Can I use other types of potatoes for this recipe? A: Regular white potatoes don’t work as well for this recipe. Stick with orange sweet potatoes or try purple sweet potatoes for variety.
Q: My sweet potato toast is too soft. What did I do wrong? A: You may have used too much oil or cut the slices too thick. Next time, use less oil and make sure slices are exactly ¼-inch thick.