- Never buy store-bought again – This simple recipe creates rich, authentic flavor in just minutes
- Customize the heat level – Make it mild or spicy based on your chili powder choice
- Budget-friendly – Uses basic pantry ingredients you likely already have
- Freezer-friendly – Make extra and store for quick future meals
Why Make Your Own Enchilada Sauce?
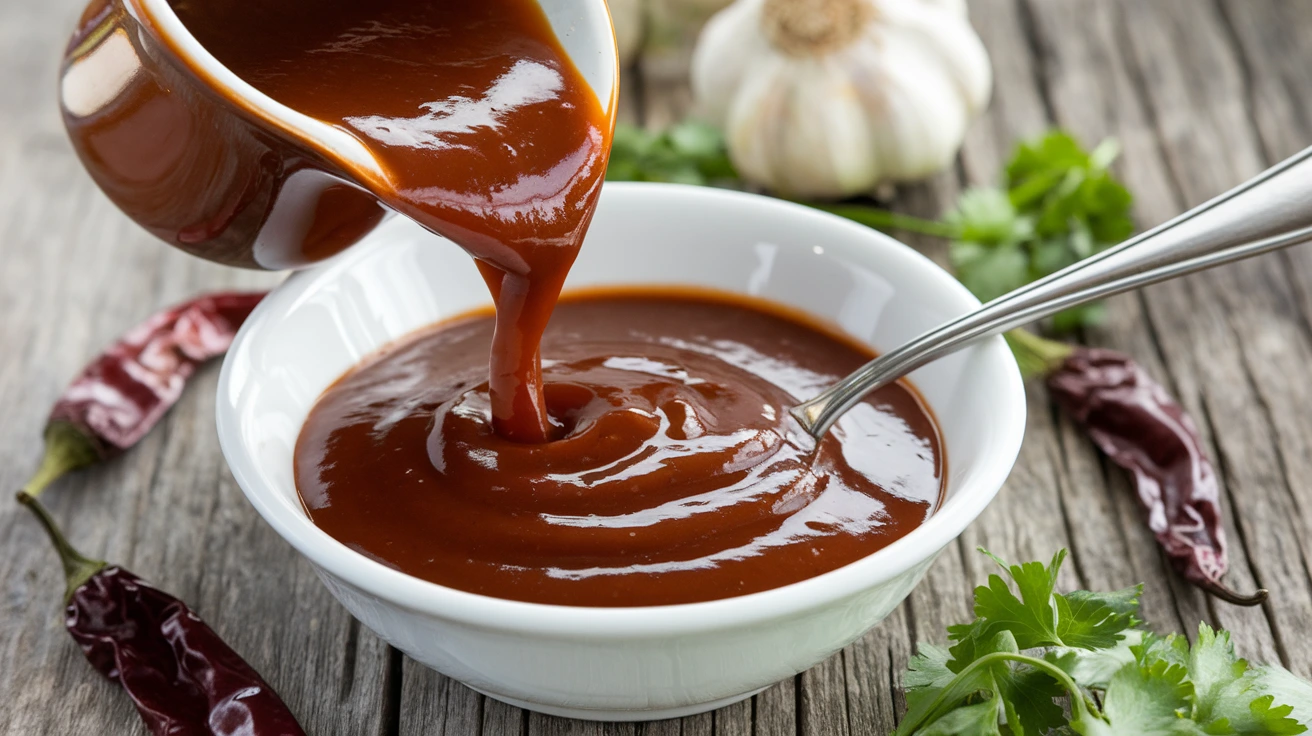
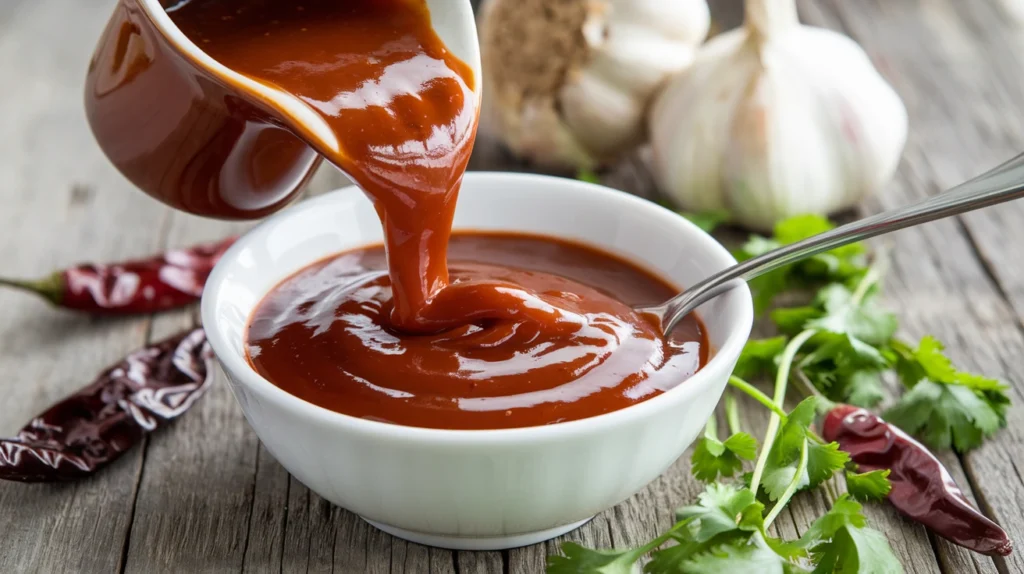
Ever bought canned enchilada sauce only to be disappointed by the bland, artificial taste? I’ve been there.
After trying countless store-bought options, I finally perfected this homemade version that’s become my go-to enchilada sauce recipe.
This red enchilada sauce recipe takes just 20 minutes and delivers unbeatable flavor that will transform your enchiladas from good to amazing. Once you master this recipe, you’ll understand why it’s considered one of the essential base sauces for Mexican cuisine.
Nutrition Information (Per ¼ Cup Serving)
| Nutrient | Amount |
|---|---|
| Calories | 68 |
| Total Fat | 4g |
| Saturated Fat | 0.5g |
| Sodium | 302mg |
| Carbohydrates | 7g |
| Fiber | 1g |
| Sugar | 2g |
| Protein | 1g |
Equipment & Ingredients
Kitchen Tools You’ll Need
| Tool | Purpose |
|---|---|
| Medium saucepan | For cooking the sauce |
| Measuring cups and spoons | For accurate measurements |
| Whisk | For mixing and preventing lumps |
| Mason jar or airtight container | For storage |
Ingredients List (Makes About 2 Cups – Enough for 8 Enchiladas)
| Ingredient | Amount | Notes |
|---|---|---|
| Vegetable oil | 3 tablespoons | Olive oil works too |
| All-purpose flour | 3 tablespoons | Creates the base for thickening |
| Chili powder | 3 tablespoons | Use medium heat for balanced flavor |
| Ground cumin | 1 teaspoon | Adds earthy flavor |
| Garlic powder | ½ teaspoon | For depth of flavor |
| Dried oregano | ½ teaspoon | Mexican oregano preferred but not required |
| Salt | ½ teaspoon | Adjust to taste |
| Tomato paste | 2 tablespoons | Concentrated flavor and color |
| Chicken broth | 2 cups | Vegetable broth works for vegetarian option |
| Distilled white vinegar | 1 teaspoon | Adds brightness |
Possible Substitutions
- Flour: Use gluten-free flour blend for gluten-free diets
- Broth: Vegetable broth makes this recipe vegetarian/vegan
- Chili powder: Ancho chili powder for mild flavor or chipotle chili powder for smoky heat
- Oil: Any neutral-flavored oil works well
Step-by-Step Instructions for Beginners
Preparation Phase (5 minutes)
- Get organized first: Before turning on any heat, take a moment to gather everything you’ll need.
- Pull out your medium saucepan and place it on the stove (don’t turn it on yet)
- Find your whisk and place it next to the stove
- Clear counter space for measuring ingredients
- Measure all ingredients precisely: Using proper measuring tools:
- For liquids (oil, broth): Use liquid measuring cups with a spout
- For dry ingredients (flour, spices): Use flat-topped measuring spoons and cups
- For the oil: Fill a tablespoon 3 times (3 tablespoons total)
- For the flour: Fill a tablespoon 3 times (3 tablespoons total)
- For the chili powder: Fill a tablespoon 3 times (3 tablespoons total)
- For cumin, garlic powder, oregano, and salt: Use the appropriate measuring spoons
- Set up ingredients in order of use: Arrange your measured ingredients in the order you’ll use them:
- First group: Oil
- Second group: Flour
- Third group: All dry spices together (chili powder, cumin, garlic powder, oregano, salt)
- Fourth group: Tomato paste
- Fifth group: Broth
- Final ingredient: Vinegar
- Preheat your pan: Now that everything is prepared, turn your stove to medium heat and allow the empty pan to warm up for about 1 minute.
- The pan is ready when you can feel heat radiating from it by holding your hand a few inches above it
- Don’t make it too hot—medium heat means the knob is at the middle position of your stove’s dial
Making the Roux Phase (5 minutes)
- Add oil carefully: Carefully pour the measured 3 tablespoons of oil into the warmed pan.
- The oil should spread easily but not smoke
- If you see smoke, your pan is too hot—remove from heat briefly and reduce temperature
- Allow oil to heat properly: Let the oil warm for 30-45 seconds.
- You’ll know it’s ready when the oil shimmers slightly
- Test by dropping a tiny pinch of flour—it should sizzle gently but not burn
- Add flour gradually: Sprinkle the 3 tablespoons of flour into the oil while whisking continuously.
- Don’t dump it all at once—sprinkle gradually while whisking
- Keep the whisk moving constantly to prevent clumping
- Cook the flour mixture carefully: Continue whisking the oil and flour mixture for 1-2 minutes.
- The mixture will start to bubble slightly
- It should smell slightly nutty, not burnt
- The color should change from white to a very light tan
- WARNING: This step is critical—if you stop whisking, it will burn quickly
- Keep the heat at medium—don’t increase it to speed things up
Adding Spices Phase (2 minutes)
- Add all spices at once: Once your roux is bubbling lightly, add all your measured dry spices (chili powder, cumin, garlic powder, oregano, and salt).
- Add them all at once to prevent any single spice from burning
- The mixture will immediately become darker and fragrant
- Stir vigorously for 30 seconds: Using your whisk, stir the spice and roux mixture constantly.
- The mixture will look paste-like and dark red
- Keep moving the paste around the pan continuously
- This brief cooking releases the essential oils in the spices
- WARNING: Don’t let it sit still or it will burn and become bitter
- Check texture: After 30 seconds, check if the mixture looks:
- Too dry: It looks crumbly or separated (add a teaspoon more oil)
- Just right: Looks like a thick, moist paste that moves together
Creating the Sauce Phase (8 minutes)
- Add tomato paste: Add the 2 tablespoons of tomato paste to the spice mixture.
- Stir quickly to incorporate it completely
- The mixture will become even thicker and deeper red
- Make sure to spread it around the pan while stirring
- Begin adding broth very slowly: This is a critical step to prevent lumps!
- Start with just ¼ cup of the broth
- Pour it in a thin stream while whisking vigorously
- The mixture will sizzle and steam—this is normal
- Keep whisking until this first portion is fully incorporated and smooth
- Add remaining broth gradually: Now add the remaining broth in three stages:
- Pour about ½ cup while whisking constantly
- Once smooth, add another ½ cup while whisking
- Finally, add the remaining broth while continuing to whisk
- Make sure to scrape the sides and bottom of the pan to incorporate all the spice mixture
- Bring to a proper simmer: Once all broth is added:
- Increase heat slightly if needed to medium-high
- Watch for small bubbles to form around the edges first
- Then bubbles will appear throughout the sauce
- Reduce heat to maintain a gentle simmer—not a rolling boil
- You should see steady small bubbles, not large violent ones
- Simmer with patience: Let the sauce simmer for 5-7 minutes, stirring occasionally.
- Stir every 1-2 minutes to prevent sticking
- The sauce will gradually thicken
- Watch how it coats your spoon or whisk—it should leave a visible coating
- Test thickness properly: After 5 minutes, check if your sauce is the right consistency.
- Dip a spoon in the sauce and run your finger across the back
- If it leaves a clear path that doesn’t immediately fill in, it’s ready
- Too thin? Continue simmering for 1-2 more minutes
- Too thick? Add 1-2 tablespoons of broth and stir
- Add finishing touch: Once your sauce reaches the perfect thickness, remove from heat and stir in the 1 teaspoon of vinegar.
- The vinegar brightens the flavor but evaporates quickly if added while still on heat
- Stir well to distribute evenly
- Taste test carefully: Let the sauce cool slightly, then carefully taste a small amount.
- Need more salt? Add a pinch and stir
- Need more acidity? Add a few more drops of vinegar
- Need more heat? Add a pinch of cayenne pepper
Finishing Steps
- Use immediately or cool properly: You can now:
- Use the hot sauce directly in your enchilada recipe
- Or allow it to cool to room temperature (about 30 minutes) before storing
- For faster cooling, transfer to a wide, shallow container
- Don’t cover until completely cooled or condensation will form
- Storage guidelines:
- For immediate use: Keep warm on the lowest heat setting, stirring occasionally
- For later use: Cool completely before transferring to airtight containers
- Label with the date if storing for later use
Troubleshooting
Common Problems and Solutions
- Lumpy sauce: If you notice lumps, whisk vigorously or blend with an immersion blender.
- Too thick: Add broth or water 1 tablespoon at a time until desired consistency.
- Too thin: Simmer longer to reduce, or mix 1 teaspoon cornstarch with 1 tablespoon cold water and stir into simmering sauce.
- Too spicy: Add more broth and a pinch of sugar to balance heat.
- Not spicy enough: Add a pinch of cayenne pepper.
- Bitter taste: This usually means the roux was overcooked. Next time, cook the flour mixture for less time.
Variations & Substitutions
Different Flavor Profiles
- Smoky: Use 2 tablespoons regular chili powder and 1 tablespoon chipotle chili powder.
- Extra Mild: Use mild chili powder or reduce to 2 tablespoons.
- Authentic: Replace some of the chili powder with ground dried whole chilis like ancho or guajillo.
- Green Enchilada Sauce: Substitute tomatillos and green chilis for the tomato paste and chili powder.
Dietary Adaptations
- Gluten-Free: Use gluten-free flour blend or cornstarch (2 tablespoons instead of 3).
- Vegan: Use vegetable broth instead of chicken broth.
- Low-Sodium: Use low-sodium broth and reduce added salt.
Storage & Reheating
Proper Storage
- Refrigerator: Store in an airtight container for up to 5 days.
- Freezer: Freeze in ziplock bags or containers for up to 3 months.
- Tip: Freeze in ice cube trays for small portions
- Label with date and contents
Reheating Instructions
- From refrigerated: Warm gently in a saucepan over medium-low heat until hot.
- From frozen: Thaw overnight in refrigerator, then warm in saucepan. Or heat directly from frozen over low heat, stirring frequently.
- Add a splash of broth if sauce has thickened too much during storage.
Safety Notes & Tips
Important Safety Considerations
- Hot oil warning: Be careful when heating oil, as it can splatter and cause burns.
- Steam burns: When simmering, keep face away from rising steam.
- Food safety: Don’t leave sauce at room temperature for more than 2 hours.
Pro Tips for Success
- Toast your spices: Cooking the spices in the roux enhances their flavor dramatically.
- Quality matters: Use fresh, good quality spices for the best flavor.
- Batch cooking: This recipe doubles easily for meal prep.
- Consistency: The perfect sauce should coat the back of a spoon without being too thick or thin.
- Let it rest: Like most sauces, flavor improves after sitting for a few hours or overnight.
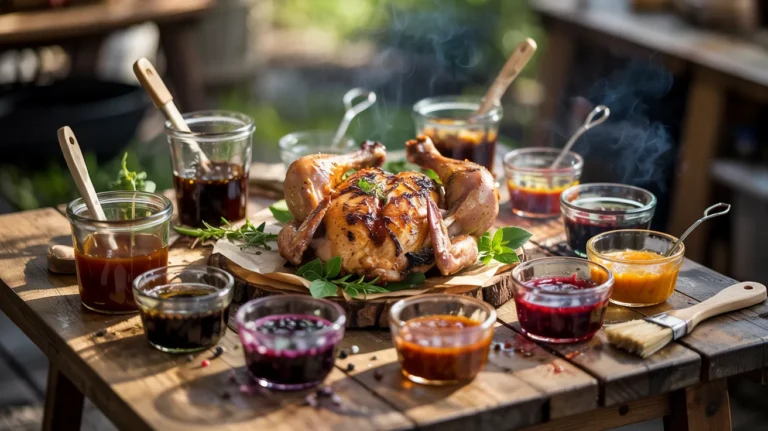
- Try different condiments: If you enjoy making this sauce, you might also love my homemade BBQ sauce recipe for another versatile condiment to keep in your kitchen.
Give this homemade enchilada sauce recipe a try, and your enchiladas will never be the same again! Perfect for chicken enchiladas, cheese enchiladas, or veggie enchiladas, this versatile sauce will become a staple in your recipe box.
Meta Description: Make perfect homemade enchilada sauce in just 20 minutes with this easy recipe. Rich, flavorful, and better than any store-bought version!