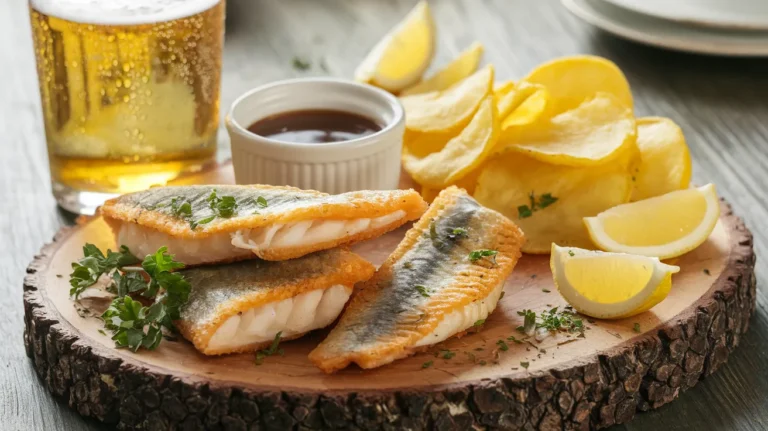
- Save money and reduce waste by transforming yesterday’s fish into today’s star dish
- Perfect crispy exterior with a moist, flavorful interior that kids and adults love
- Versatile recipe works with almost any cooked fish – salmon, cod, tilapia, or mix
- Ready in just 30 minutes from prep to table with simple pantry ingredients
Why Your Fish Cakes From Leftovers Deserve a Second Chance
Got leftover fish sitting in your fridge? Don’t throw it away!
This recipe transforms those leftovers into golden, crispy fish cakes that might taste even better than the original dish. With just a few pantry staples and 30 minutes, you’ll create a meal that’s budget-friendly and surprisingly elegant.
Whether you have leftover salmon, grilled fish from your Ikan Bakar night, cod, tilapia, or even a mix of different fish, this recipe works beautifully. The secret lies in the perfect balance of seasonings and the crispy pan-fried exterior that gives way to a tender, flavorful center.
Nutrition Facts (Per Serving)
| Nutrient | Amount | % Daily Value |
|---|---|---|
| Calories | 320 | – |
| Protein | 24g | 48% |
| Fat | 14g | 22% |
| Carbohydrates | 22g | 7% |
| Fiber | 2g | 8% |
| Sodium | 480mg | 20% |
| Potassium | 450mg | 13% |
Based on a 2,000 calorie diet using leftover salmon
What You’ll Need For Fish Cakes From Leftovers
Ingredients (Serves 4)
| Ingredient | Quantity | Notes |
|---|---|---|
| Leftover cooked fish | 2 cups (flaked) | Any variety works |
| Russet potatoes | 2 medium | About 1 cup mashed |
| Breadcrumbs | ½ cup | Plus extra for coating |
| Egg | 1 large | Lightly beaten |
| Green onions | 3 stalks | Finely chopped |
| Fresh parsley | 2 tablespoons | Chopped |
| Lemon zest | 1 teaspoon | From 1 lemon |
| Dijon mustard | 1 tablespoon | |
| Mayonnaise | 2 tablespoons | |
| Salt | ½ teaspoon | |
| Black pepper | ¼ teaspoon | |
| Paprika | ½ teaspoon | |
| Vegetable oil | 4 tablespoons | For frying |
| Lemon wedges | 1 lemon | For serving |
Kitchen Tools
| Tool | Purpose |
|---|---|
| Medium bowl | For mixing ingredients |
| Fork or potato masher | For flaking fish and mashing potatoes |
| Measuring cups and spoons | For precise measurements |
| Large non-stick skillet | For frying fish cakes |
| Spatula | For flipping cakes |
| Paper towels | For draining excess oil |
| Plate | For forming patties |
| Sharp knife | For chopping herbs and green onions |
| Cutting board | For safe food preparation |
| Vegetable peeler | For peeling potatoes |
| Pot | For boiling potatoes |
| Colander | For draining potatoes |
| Microplane or zester | For zesting lemon |
Ingredient Substitutions
- Fish: Any cooked fish works – salmon, cod, tilapia, haddock, or even canned tuna
- Potatoes: Swap with sweet potatoes or instant mashed potatoes
- Breadcrumbs: Use crushed crackers, panko, or cooked quinoa
- Herbs: Substitute parsley with dill, cilantro, or chives
- Mayonnaise: Greek yogurt or sour cream work well
Step-by-Step Instructions For Perfect Fish Cakes From Leftovers
Prep Time: 15 minutes
Cook Time: 15 minutes
Total Time: 30 minutes
Serves: 4 (makes 8 fish cakes)
Preparation Phase
- Prepare the potatoes
- Wash the potatoes under cool running water to remove any dirt
- Using a vegetable peeler, remove all the skin from the potatoes
- Place the potatoes on a cutting board and cut them into 1-inch cubes (about the size of dice)
- Fill a medium pot halfway with cold water
- Add the potato cubes to the cold water (starting with cold water helps potatoes cook evenly)
- Add ½ teaspoon salt to the water
- Place the pot on the stove and turn heat to high
- Bring the water to a boil (you’ll see large bubbles rising continuously)
- Once boiling, reduce heat to medium and let potatoes simmer for 10-12 minutes
- Test if potatoes are done by inserting a fork – it should slide in easily with no resistance
- Once tender, carefully pour the potatoes into a colander in the sink to drain
- Allow to drain for 1-2 minutes until no more water drips out
- Transfer the drained potatoes to a mixing bowl
- Using a fork or potato masher, press down on the potatoes until smooth but still slightly chunky
- Set aside and let cool for at least 5 minutes (hot potatoes can cook the egg when mixed)
- Prepare the fish
- Take your leftover cooked fish out of the refrigerator
- Place it on a clean cutting board
- Carefully examine the fish and remove any visible skin using your fingers or a fork
- Check thoroughly for any bones and remove them with your fingers or tweezers
- Using a fork, gently press down and pull apart the fish to create small flakes
- Continue flaking until all large pieces are broken down (pieces should be about ¼-inch in size)
- Transfer the flaked fish to a plate and set aside
- BEGINNER TIP: Run your fingers gently over the flaked fish to feel for any hidden bones
- Prepare the aromatics
- Rinse the green onions under cool water
- Pat dry with a paper towel or clean kitchen towel
- Place on a cutting board and trim off the root ends and any wilted green parts
- Using a sharp knife, slice the green onions into very thin rings (about ⅛-inch thick)
- Rinse the parsley under cool water and pat dry
- Remove the stems and finely chop the leaves (pieces should be no larger than ⅛-inch)
- Take your lemon and wash it under warm water, scrubbing gently
- Pat the lemon dry completely (important for easier zesting)
- Hold your microplane or zester in one hand and the lemon in the other
- Gently rub the lemon against the zester, rotating as you go to avoid the bitter white pith
- Continue until you have 1 teaspoon of zest (about 1 lemon’s worth)
- BEGINNER TIP: Zest the lemon over a plate or cutting board to catch all the zest
Assembly Steps
- Mix the base
- Ensure your mashed potatoes have cooled slightly (warm is fine but not hot)
- In a large bowl, combine the mashed potatoes and flaked fish
- Using a rubber spatula or fork, gently fold them together using a lifting motion
- Continue folding until just combined (overmixing can make the cakes tough)
- BEGINNER TIP: The mixture should have visible pieces of both potato and fish
- Add the binding ingredients
- Crack the egg into a small bowl and beat lightly with a fork
- Pour the beaten egg over the fish-potato mixture
- Add the 2 tablespoons mayonnaise to the bowl
- Add the 1 tablespoon Dijon mustard
- Using a rubber spatula or fork, gently fold these wet ingredients into the mixture
- Fold from the bottom to the top using a gentle motion, turning the bowl as you go
- Mix just until no streaks of egg are visible
- BEGINNER TIP: The wet ingredients help hold the cakes together, so distribute them evenly
- Add the flavor boosters
- Add the chopped green onions to the bowl
- Add the chopped parsley
- Add the lemon zest
- Sprinkle in the ½ teaspoon paprika
- Add the ½ teaspoon salt
- Add the ¼ teaspoon black pepper
- Using your rubber spatula or fork, gently fold everything together
- Fold from the bottom up to evenly distribute all seasonings
- Add ½ cup breadcrumbs to the mixture
- Fold again until just combined and all ingredients are evenly distributed
- Check the consistency – the mixture should hold together when pressed but still be slightly soft
- If the mixture seems too wet (it falls apart easily), add 1 tablespoon more breadcrumbs
- Fold again briefly to incorporate
- If needed, add another tablespoon of breadcrumbs
- BEGINNER WARNING: Adding too many breadcrumbs will make dry cakes, so add gradually
- Form the patties
- Place ¼ cup additional breadcrumbs on a plate, spreading them out evenly
- Set a clean plate nearby for your formed patties
- Using a ⅓ cup measuring cup, scoop the mixture
- Tap the filled measuring cup upside down onto your hand to release the mixture
- Very gently shape the mixture into a round patty about ½-inch thick
- Press lightly to compact but don’t squeeze (pressure makes them tough)
- Place the patty onto the plate with breadcrumbs
- Very gently press down so breadcrumbs stick to the bottom
- Carefully flip the patty and press lightly again to coat the other side
- Transfer the breaded patty to your clean plate
- Repeat with remaining mixture, forming about 8 patties total
- Keep patties separate on the plate so they don’t stick together
- OPTIONAL BUT HELPFUL: Place the plate of formed patties in the refrigerator for 10 minutes
- This chilling time helps them firm up and reduces the chance of breaking when cooking
- BEGINNER TIP: If your hands get sticky, rinse and dry them between forming patties
Cooking Phase
- Heat the skillet
- Place a large non-stick skillet on the stove
- Set heat to medium
- Add 2 tablespoons vegetable oil to the skillet
- Let the oil heat for 2-3 minutes
- Test if oil is ready by carefully dropping a few breadcrumbs into the pan
- If they sizzle immediately, the oil is hot enough
- If they don’t sizzle, wait another minute and test again
- If the oil starts smoking, remove from heat briefly, lower temperature, and start again
- BEGINNER WARNING: Hot oil can splatter, so be careful and use a splatter screen if available
- Cook the fish cakes
- Using a spatula, carefully lift one fish cake and place it in the hot oil
- Repeat with 3 more fish cakes, placing them in the pan with at least 1 inch between each
- BEGINNER WARNING: Don’t overcrowd the pan – cook in batches of 4 cakes maximum
- Let the fish cakes cook undisturbed for 3-4 minutes
- Watch for golden brown color around the edges
- Using a thin, flexible spatula, carefully slide under one cake
- Gently but confidently flip the cake in one smooth motion
- Repeat with remaining cakes
- Cook for another 3-4 minutes until the second side is golden brown
- Using your spatula, carefully transfer the cooked cakes to a paper towel-lined plate
- Add the remaining 2 tablespoons oil to the skillet
- Allow oil to heat up again for 1 minute
- Cook the remaining fish cakes following the same process
- BEGINNER TIP: If any cakes break during flipping, simply press the pieces back together in the pan with your spatula
Finishing Steps
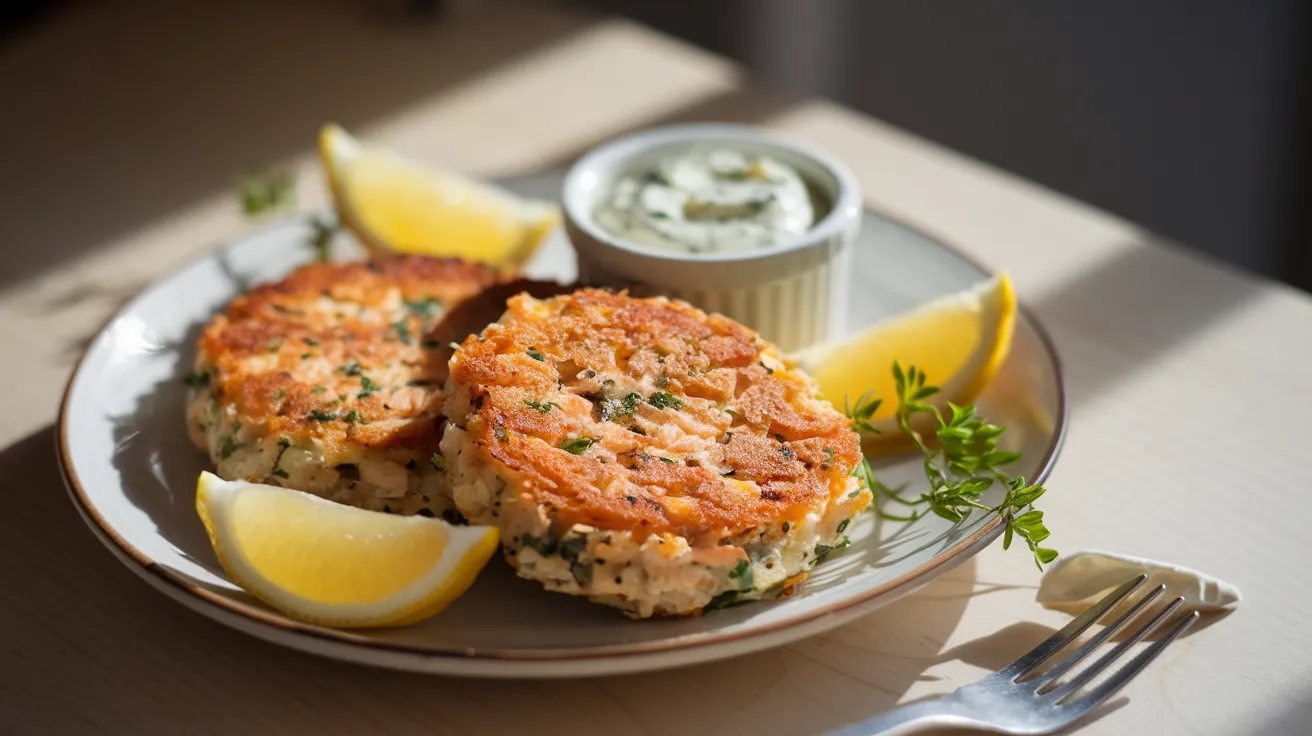
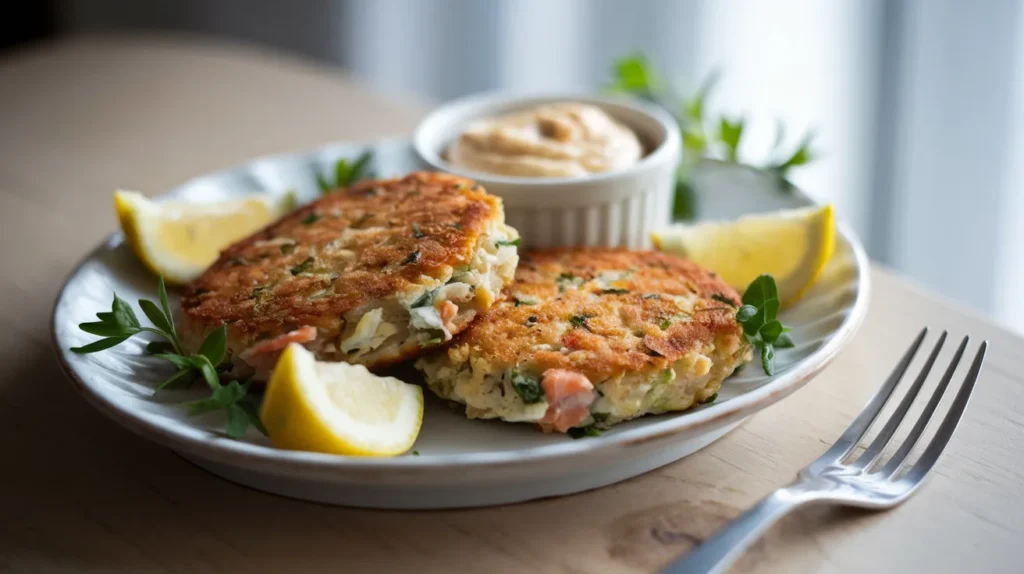
- Serve immediately
- Cut a lemon into 8 wedges (first in half, then each half into quarters)
- Transfer the fish cakes to serving plates (2 per person)
- Place 2 lemon wedges on each plate
- Serve with tartar sauce, remoulade, or aioli in a small bowl on the side if desired
- For a complete meal, add a simple green salad or stir-fried gai lan
- Garnish with additional chopped parsley if desired
- BEGINNER TIP: These are best served hot, right after cooking, when they’re at their crispiest
Troubleshooting Fish Cakes From Leftovers
Problem: Fish cakes fall apart during cooking
Solution:
- Make sure mixture is cool before forming patties
- Add an extra tablespoon of mayonnaise or an additional egg
- Chill formed patties for 15-30 minutes before cooking
- Handle carefully when flipping
- Use a larger, more flexible spatula
- Make sure your pan is properly preheated before adding fish cakes
Problem: Fish cakes are too wet
Solution:
- Add more breadcrumbs, 1 tablespoon at a time
- Make sure potatoes are well-drained and cooled slightly
- Pat fish dry with paper towels before flaking
- Let mixture sit for 5 minutes to allow breadcrumbs to absorb moisture
- Make patties thinner (about ½-inch thick) so they cook more thoroughly
Problem: Fish cakes are too dry
Solution:
- Add 1-2 tablespoons more mayonnaise
- Check cooking time – don’t overcook (3-4 minutes per side is usually enough)
- Use a lower heat setting on your stove
- Add 1-2 tablespoons of milk or cream to the mixture
- Next time, don’t overwork the mixture when combining ingredients
Variations & Substitutions For Fish Cakes From Leftovers
Herb-Packed Fish Cakes
Add ¼ cup mixed fresh herbs like dill, chives, and tarragon for a fresh, aromatic twist
Spicy Fish Cakes
Add 1 teaspoon sriracha or hot sauce and ¼ teaspoon cayenne pepper for a kick of heat
Asian-Inspired Fish Cakes
Replace parsley with cilantro, add 1 teaspoon grated ginger, 1 tablespoon soy sauce, and 1 teaspoon sesame oil for an Eastern flavor profile. These make a great side dish to serve with corn and fish maw soup for a complete Asian-inspired meal.
No-Potato Version
Replace potatoes with 1 cup cooked quinoa or ½ cup additional breadcrumbs if you’re watching your carbs
Mediterranean Fish Cakes
Add 2 tablespoons chopped olives, 1 tablespoon capers, and ½ teaspoon dried oregano for a Mediterranean twist
Storage & Reheating
Refrigerator Storage
- Allow fish cakes to cool completely before storing
- Line an airtight container with paper towels to absorb moisture
- Place fish cakes in a single layer if possible
- If stacking is necessary, place parchment paper between layers to prevent sticking
- Seal container tightly and refrigerate for up to 3 days
Freezer Storage
- Place cooled fish cakes on a baking sheet lined with parchment paper
- Make sure cakes aren’t touching each other
- Freeze until solid (about is 2 hours)
- Transfer frozen cakes to freezer bags or container
- Press out as much air as possible before sealing
- Label with name and date
- Store up to 3 months
Reheating Instructions
- From refrigerated: Preheat oven to 350°F, place fish cakes on a baking sheet, and reheat for 10 minutes or until heated through
- From frozen: Place on a baking sheet and bake at 350°F for 15-20 minutes, flipping halfway through
- Stovetop: Warm in a covered skillet over medium-low heat for 5 minutes per side
- Avoid microwave as it can make fish cakes soggy and rob them of their crispy exterior
- BEGINNER TIP: To check if reheated thoroughly, insert a knife into the center of a cake for 5 seconds, then touch the knife to your lip – it should feel hot
Safety Notes & Tips
Food Safety
- Fish must be properly stored in the refrigerator before making into cakes
- Use leftover fish within 2 days of original cooking
- Internal temperature should reach 145°F when reheating (use a food thermometer if you have one)
- Wash hands thoroughly before and after handling fish
- Use separate cutting boards for fish and vegetables to prevent cross-contamination
Cooking Tips
- Don’t overwork the mixture – this makes tough fish cakes
- Oil should be hot before adding fish cakes for proper browning
- For extra crunch, lightly dust fish cakes with flour before coating in breadcrumbs
- Use a thin, flat spatula for easier flipping
- Be patient during cooking – don’t flip too early or the cakes may fall apart
- If oil starts to smoke, it’s too hot – remove from heat briefly and reduce temperature
Make-Ahead Tips
- Prepare fish cake mixture up to 24 hours ahead and refrigerate
- Form patties and coat in breadcrumbs just before cooking for best texture
- Cooked fish cakes reheat beautifully for quick lunches or dinners
- For a make-ahead meal, prepare a double batch and freeze half for another day