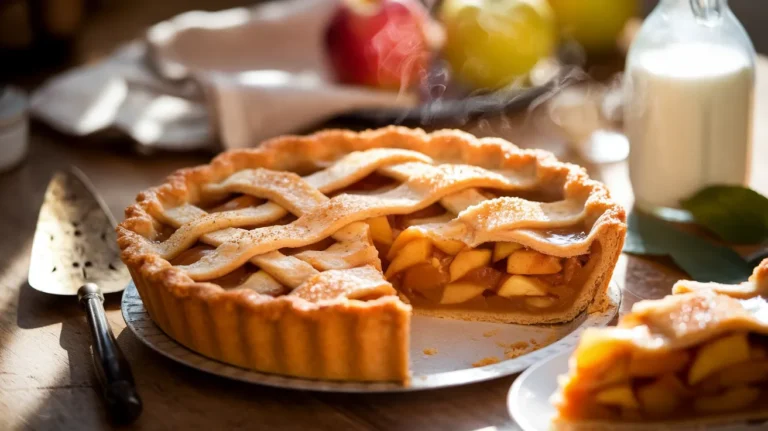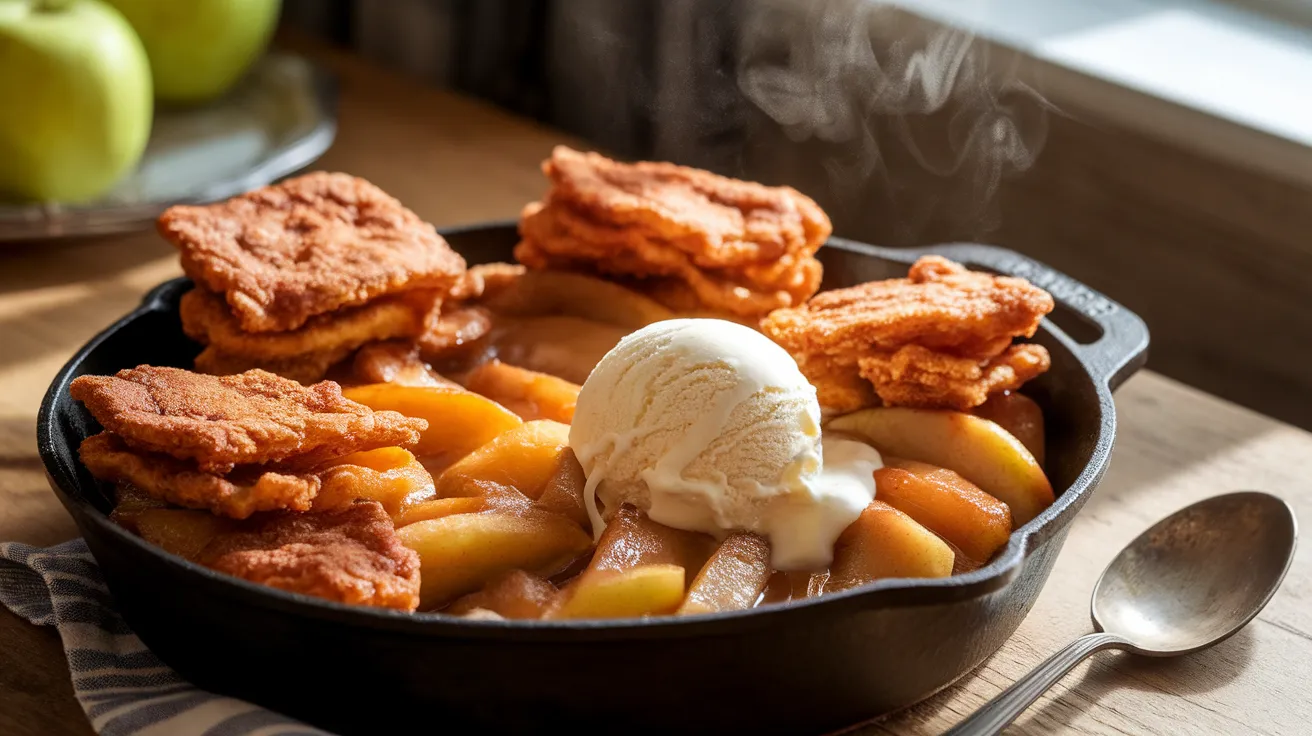
Imagine warm, caramelized apples bubbling beneath a golden, crispy crust that’s been pan-fried to perfection. This fried apple cobbler transforms simple ingredients into a showstopping dessert that tastes like autumn in every bite. Forget the oven—this stovetop version delivers that same comfort-food magic with a unique, crispy texture you can’t get any other way.
SERVES: 4 | PREP: 20 MIN | COOK: 35 MIN | TOTAL: 55 MIN
Why This Fried Apple Cobbler Works
You’re getting the best of both worlds here. The apples cook down into a thick, syrupy filling while the biscuit topping crisps up in butter right on your stovetop. No waiting for ovens to preheat, and cleanup is a breeze with just one skillet.
The secret? Frying the biscuit pieces separately creates those irresistible golden edges that soak up the apple juices without getting soggy.
Ingredients You’ll Need
For the Apple Filling
| Ingredient | Amount | Notes |
|---|---|---|
| Granny Smith apples | 4 medium | Peeled and sliced ¼-inch thick |
| Unsalted butter | 4 tablespoons | Divided |
| Light brown sugar | ⅔ cup | Packed |
| Granulated sugar | 2 tablespoons | For sweetness balance |
| Ground cinnamon | 1½ teaspoons | Fresh is best |
| Ground nutmeg | ¼ teaspoon | Adds warmth |
| Lemon juice | 1 tablespoon | Brightens the flavor |
| Cornstarch | 1 tablespoon | Thickens the filling |
| Vanilla extract | 1 teaspoon | Pure only |
| Salt | ⅛ teaspoon | Enhances sweetness |
For the Fried Topping
| Ingredient | Amount | Notes |
|---|---|---|
| All-purpose flour | 1 cup | Spooned and leveled |
| Granulated sugar | 3 tablespoons | Plus extra for sprinkling |
| Baking powder | 1½ teaspoons | Check freshness date |
| Salt | ¼ teaspoon | |
| Cold unsalted butter | 3 tablespoons | Cut into small cubes |
| Whole milk | ⅓ cup | Cold from fridge |
| Vegetable oil | ¼ cup | For frying |
Step-by-Step Instructions
Phase 1: Preparing the Apple Base (8-10 minutes)
Step 1: Peel your apples using a sharp vegetable peeler, working over a large bowl to catch any juice. Core them completely—any seeds will taste bitter.
Step 2: Slice each apple into ¼-inch thick pieces. Consistent thickness means even cooking. Too thick and they’ll stay crunchy; too thin and they’ll turn mushy.
Step 3: Toss the sliced apples immediately with 1 tablespoon lemon juice in your bowl. This stops them from browning and adds a bright note that balances the sweetness.
Step 4: In a small bowl, whisk together ⅔ cup brown sugar, 2 tablespoons granulated sugar, 1½ teaspoons cinnamon, ¼ teaspoon nutmeg, 1 tablespoon cornstarch, and ⅛ teaspoon salt. The cornstarch needs to be fully blended—no lumps.
Safety tip: Keep your work area dry. Wet surfaces make slicing apples dangerous.
Phase 2: Cooking the Fried Apple Cobbler Filling (12-15 minutes)
Step 5: Heat a 10-inch cast-iron skillet or heavy-bottomed pan over medium heat. Add 2 tablespoons butter and let it melt completely, swirling to coat the bottom.
Step 6: When the butter just starts to foam (but before it browns), add your apple slices in an even layer. You’ll hear a gentle sizzle—that’s perfect.
Step 7: Let the apples cook undisturbed for 3-4 minutes. This initial sear creates caramelization on the bottom. You’re looking for light golden edges when you peek underneath.
Step 8: Sprinkle your sugar-spice mixture evenly over the apples. Use a wooden spoon to gently toss everything together, coating each apple slice.
Step 9: Add 1 teaspoon vanilla extract and 2 tablespoons butter (the remaining amount). Stir gently and reduce heat to medium-low.
Step 10: Cook for 8-10 minutes, stirring every 2 minutes. The apples should be tender when pierced with a fork but still hold their shape. The liquid will thicken into a glossy syrup—if it seems too thin, cook for 2 more minutes.
Visual cue: The filling should coat the back of your spoon and leave a trail when you drag your finger through it.
Troubleshooting: If your filling looks watery, turn heat to medium-high for 2 minutes to evaporate excess moisture. If it’s too thick, add 1 tablespoon water at a time.
Phase 3: Making the Fried Topping (10-12 minutes)
Step 11: While apples simmer, make your biscuit dough. In a medium bowl, whisk together 1 cup flour, 3 tablespoons sugar, 1½ teaspoons baking powder, and ¼ teaspoon salt.
Step 12: Add 3 tablespoons cold butter cubes to the flour mixture. Using your fingertips or a pastry cutter, work the butter into the flour until the mixture looks like coarse sand with pea-sized butter bits. This takes 2-3 minutes of rubbing. Cold butter = flaky texture.
Step 13: Pour in ⅓ cup cold milk all at once. Stir with a fork just until a shaggy dough forms—about 15-20 stirs. Don’t overmix or your topping will be tough. The dough should be slightly sticky.
Step 14: Turn the dough onto a lightly floured surface. Pat (don’t roll) into a ½-inch thick rectangle. Cut into 8-10 rough pieces using a knife or bench scraper—irregular shapes are fine and actually look more rustic.
Phase 4: Frying and Assembly (8-10 minutes)
Step 15: Transfer your cooked apple filling to a heatproof bowl and set aside. Wipe the skillet clean with paper towels.
Step 16: Heat ¼ cup vegetable oil in the same skillet over medium heat for 2 minutes. Test readiness by dropping a tiny piece of dough into the oil—it should sizzle immediately and float.
Step 17: Carefully place dough pieces into the hot oil, leaving space between each piece. Fry for 2-3 minutes per side until deep golden brown and crispy on the outside. Work in batches if needed—don’t crowd the pan.
Temperature tip: If the dough browns in under 2 minutes, your oil is too hot. Reduce heat to medium-low.
Step 18: Remove fried pieces with a slotted spoon to a paper towel-lined plate. Immediately sprinkle with 1-2 tablespoons granulated sugar while they’re still hot—the sugar will stick and create a sweet crust.
Step 19: Return the apple filling to the skillet (no need to wipe it). Warm over low heat for 1 minute.
Step 20: Arrange the fried biscuit pieces on top of the warm apples. Some pieces can be partially submerged—they’ll soak up the delicious juices. Serve immediately while everything’s warm and the contrast between crispy topping and soft apples is at its peak.
Chef’s Notes
Perfecting the fry: The oil temperature is everything for this fried apple cobbler. Too hot and the outside burns before the inside cooks; too cool and you get greasy, soggy dough. Medium heat usually hits that sweet spot between 325-350°F.
Apple selection matters: Granny Smiths hold their shape beautifully and provide tartness. If you prefer sweeter cobbler, use half Honeycrisp and half Granny Smith. Avoid Red Delicious—they turn to mush.
Make-ahead trick: Prepare the apple filling up to 2 hours ahead. Keep it covered at room temperature, then reheat gently before frying your topping. Fresh-fried biscuits are non-negotiable for the best texture.
Flavor boost: Add a pinch of ground cardamom or ginger to your spice mix. Both complement the fried apple cobbler’s warm flavors without overpowering them.
Nutrition Information (Per Serving)
- Calories: 485
- Protein: 4g
- Carbohydrates: 68g
- Fat: 23g
- Fiber: 4g
- Sugar: 45g
- Sodium: 285mg
Creative Variations to Try
Caramel Pecan Version: Drizzle warm caramel sauce over the finished cobbler and sprinkle with toasted pecans. The nutty crunch adds another texture layer that pairs beautifully with the soft apples.
Mixed Berry Twist: Replace 2 apples with 1½ cups mixed berries (fresh or frozen). The berries burst during cooking, creating pockets of jammy sweetness. If you love fruit desserts, try this dutch apple cobbler for an oven-baked alternative.
Bourbon-Spiked: Add 2 tablespoons bourbon to the apple filling during the last 2 minutes of cooking. The alcohol cooks off but leaves a sophisticated depth. Adults only for this version.
Streusel-Topped: Skip the fried biscuits and top with buttery streusel instead. Mix ½ cup flour, ⅓ cup brown sugar, ¼ cup cold butter, and ½ teaspoon cinnamon until crumbly. Sprinkle over apples and broil for 3 minutes. For another streusel option, this apple crisp delivers amazing results.
Storage & Reheating
Refrigerator: Store the apple filling and fried topping separately in airtight containers for up to 3 days. The biscuits will soften when stored together with the filling.
Reheating: Warm the apple filling in a skillet over low heat for 3-4 minutes, stirring occasionally. Re-crisp the biscuit pieces in a 350°F oven for 5 minutes—this revives that fried texture beautifully.
Freezing: The apple filling freezes well for up to 2 months in a freezer-safe container. Thaw overnight in the fridge before reheating. Don’t freeze the fried topping—it becomes soggy and tough.
Best practice: This fried apple cobbler is absolutely best served fresh. If you must make it ahead, prepare components separately and assemble just before serving.

Troubleshooting Common Issues
Problem 1: Watery filling Your apples released too much liquid. Next time, cook the filling 2-3 minutes longer to evaporate excess moisture. You can also add an extra ½ tablespoon cornstarch mixed with 1 tablespoon cold water during cooking.
Problem 2: Greasy fried topping The oil wasn’t hot enough or you added too many pieces at once, lowering the temperature. Always test with one piece first and maintain proper spacing. Drain thoroughly on paper towels and change the paper if it becomes saturated.
Problem 3: Tough, dense biscuits You overmixed the dough. Stir just until combined—some small lumps are fine. Also check that your baking powder isn’t expired, and make sure your butter and milk are actually cold.
Problem 4: Apples turned mushy You either sliced them too thin or cooked them too long. Stick to ¼-inch slices and pull them off heat when they’re fork-tender but not falling apart. Granny Smiths are firmer than other varieties.
Problem 5: Biscuits burned on outside, raw inside Your oil was too hot. Reduce heat to medium or medium-low. The pieces need a full 2-3 minutes per side at a moderate temperature to cook through properly.
Equipment Essentials
- 10-inch cast-iron skillet or heavy-bottomed pan (non-stick works but won’t caramelize as well)
- Vegetable peeler for efficient apple prep
- Sharp chef’s knife and cutting board
- Wooden spoon for stirring (won’t scratch your pan)
- Medium mixing bowl for dough
- Small bowl for spice mixture
- Measuring cups and spoons for accuracy
- Slotted spoon for removing fried pieces
- Paper towels for draining
- Pastry cutter or fork for cutting butter into flour (optional but helpful)
Shopping List by Store Section
Produce
- 4 medium Granny Smith apples
- 1 lemon (for juice)
Dairy
- 7 tablespoons unsalted butter (1 stick minus 1 tablespoon)
- ⅓ cup whole milk
Baking Aisle
- All-purpose flour
- Granulated sugar
- Light brown sugar
- Baking powder
- Cornstarch
- Pure vanilla extract
Spices
- Ground cinnamon
- Ground nutmeg
- Salt
Oils
- Vegetable oil (or canola oil)
5 Success Secrets for Perfect Fried Apple Cobbler
1. Temperature control is everything. Keep your heat at medium when frying. Rushing with high heat gives you burned outsides and raw insides. Patience equals perfection.
2. Don’t skip the lemon juice. That tablespoon brightens the entire dessert and prevents your apples from oxidizing. It’s the secret ingredient that makes people wonder what makes your cobbler taste so fresh.
3. Cut butter into visible pea-sized pieces. Those little butter chunks create steam pockets while frying, giving you flaky layers instead of dense hockey pucks. Stop mixing when you still see distinct butter bits.
4. Fry in batches. Overcrowding drops the oil temperature and results in soggy, greasy topping. Give each piece space to develop that beautiful golden crust.
5. Serve immediately for maximum impact. This fried apple cobbler loses its magic as it sits. The contrast between crispy fried topping and warm, juicy apples is at its absolute best within 15 minutes of assembly. Time your cooking so you can serve it fresh.
A scoop of vanilla ice cream melting into the warm apples transforms this from delicious to absolutely unforgettable. The cold-hot contrast is pure comfort food bliss.