Ready in 30 Minutes | Never Dry | Perfect for Beginners
Key Takeaways
- This garlic butter baked chicken breast recipe creates juicy, tender chicken every time
- Perfect weeknight dinner ready in just 30 minutes
- Simple ingredients create maximum flavor
- Works with any side dish for a complete meal
Why This Garlic Butter Baked Chicken Breast Recipe Works
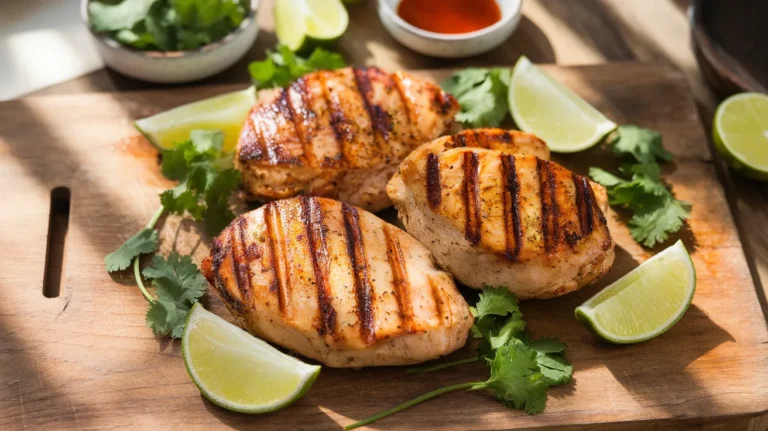
Tired of dry, flavorless chicken breasts? This garlic butter baked chicken breast recipe solves that problem for good.
The secret? A quick garlic butter marinade that locks in moisture while adding rich flavor. No more boring chicken dinners!
This garlic butter baked chicken breast recipe takes just 30 minutes from start to finish, making it perfect for busy weeknights when you need something quick but don’t want to sacrifice flavor.
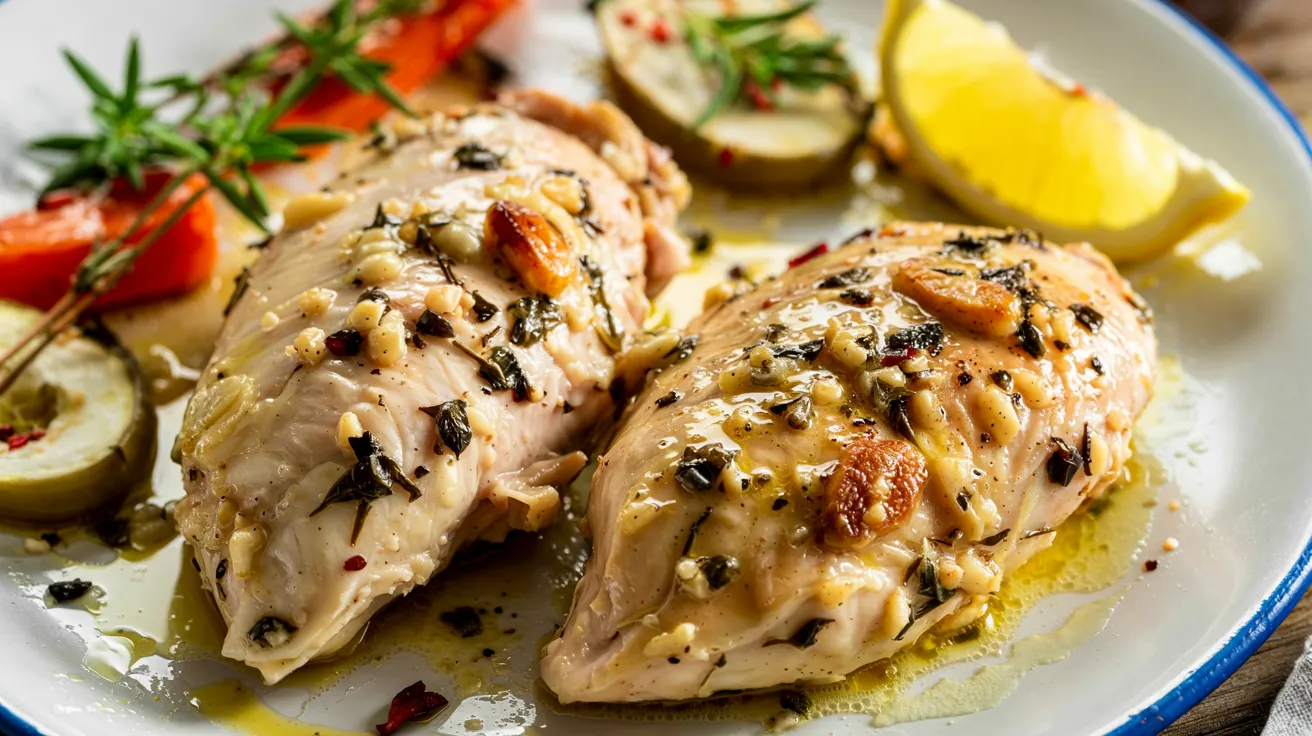
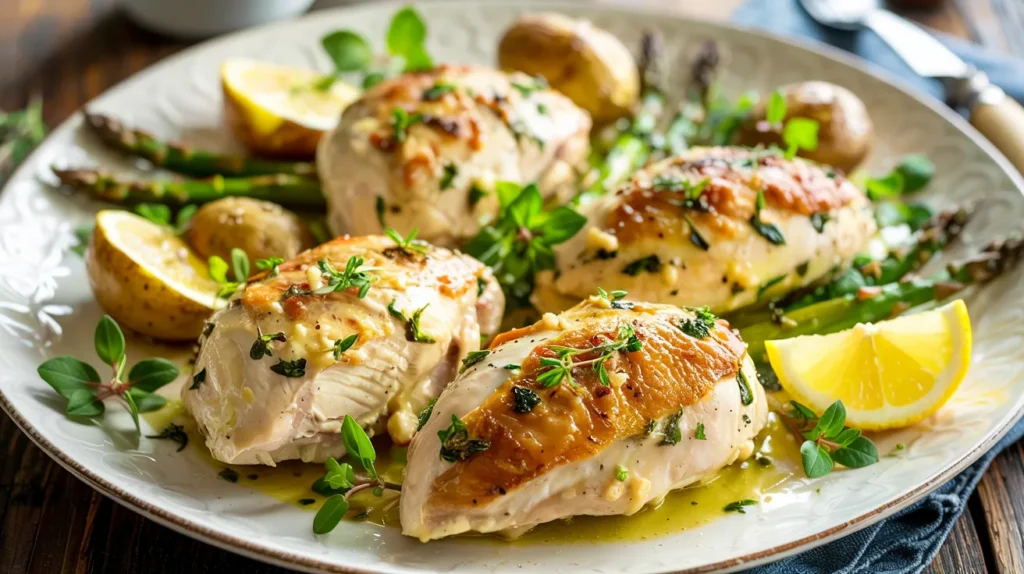
The garlic butter sauce creates a protective layer that keeps the chicken juicy while infusing it with savory garlic goodness. It’s so good you’ll want to make extra sauce just for dipping!
Nutrition Information for Garlic Butter Baked Chicken
| Nutrient | Amount per Serving |
|---|---|
| Calories | 310 |
| Protein | 35g |
| Fat | 18g |
| Carbohydrates | 3g |
| Fiber | 0g |
| Sugar | 0g |
| Sodium | 520mg |
Nutrition values are approximate and based on one chicken breast with sauce
Equipment & Ingredients
Kitchen Tools Needed for Garlic Butter Baked Chicken
| Tool | Purpose |
|---|---|
| Baking dish (9×13 inch) | For cooking the chicken |
| Small saucepan | For making the garlic butter |
| Meat thermometer | To check doneness (essential for beginners) |
| Cutting board | For preparation |
| Sharp knife | For trimming chicken |
| Measuring spoons | For accurate measurements |
| Aluminum foil | Optional for covering while resting |
| Meat mallet/tenderizer | Optional for evening thickness |
| Timer or clock | To track cooking time accurately |
Ingredients List for Garlic Butter Baked Chicken (Serves 4)
| Ingredient | Amount | Notes |
|---|---|---|
| Boneless, skinless chicken breasts | 4 (about 6-8 oz each) | Even thickness for consistent cooking |
| Butter | 6 tablespoons | Unsalted preferred |
| Garlic | 6 cloves | Freshly minced |
| Fresh parsley | 2 tablespoons | Finely chopped |
| Fresh thyme | 1 tablespoon | Leaves only |
| Lemon juice | 1 tablespoon | Freshly squeezed |
| Salt | 1 teaspoon | |
| Black pepper | ½ teaspoon | Freshly ground |
| Paprika | ½ teaspoon | Sweet or smoked |
Possible Substitutions
- Chicken: Boneless thighs work well too (adjust cooking time to 25-30 minutes)
- Butter: Use ghee for a dairy-free option
- Fresh herbs: Substitute 1 teaspoon dried herbs for each tablespoon of fresh
- Garlic: Use 1 teaspoon garlic powder if fresh is unavailable
- Lemon juice: White wine vinegar can work in a pinch
Beginner-Friendly Step-by-Step Instructions for Garlic Butter Baked Chicken
Prep Time: 10 minutes Cook Time: 20 minutes Total Time: 30 minutes Servings: 4
Preparation Phase (10 minutes)
- Preheat your oven to 375°F (190°C).
- Turn on your oven before doing anything else so it has time to reach the proper temperature
- An oven thermometer can verify your oven reaches the correct temperature
- Prepare your workspace:
- Wash your hands thoroughly with soap and warm water for 20 seconds
- Clear and clean your countertop
- Set out all ingredients and tools before starting
- Prepare the chicken breasts:
- Open the package of chicken breasts over the sink to avoid spills
- Place chicken on a clean cutting board designated for raw meat
- Examine each breast and trim any excess fat with kitchen scissors or a sharp knife
- Pat each chicken breast completely dry with paper towels (this helps seasonings stick and promotes browning)
- If breasts are uneven in thickness:
- Place one breast between two sheets of plastic wrap or inside a zip-top bag
- Using a meat mallet or the bottom of a heavy pan, gently pound the thicker parts until the breast is an even 1-inch thickness throughout
- Repeat with each breast
- Season both sides of each breast with a total of ½ teaspoon salt and ¼ teaspoon black pepper, rubbing in gently
Making the Garlic Butter Sauce (5 minutes)
- Prepare the garlic:
- Place garlic cloves on a cutting board
- Place the flat side of a large knife on top of each clove and press firmly to crush it
- Remove the papery skin and discard
- Finely mince the garlic cloves (aim for pieces about the size of a grain of rice)
- Measure 2 tablespoons of minced garlic (about 6 cloves)
- Prepare the herbs:
- Rinse fresh herbs under cold water
- Pat dry with paper towels
- Remove parsley leaves from stems and finely chop to yield 2 tablespoons
- Strip thyme leaves from stems by pinching the stem and pulling backward to yield 1 tablespoon
- Set herbs aside
- Make the garlic butter sauce:
- Place a small saucepan on the stove over medium-low heat
- Add 6 tablespoons of butter to the pan
- Let butter melt completely (about 1-2 minutes)
- Add the minced garlic and stir continuously for exactly 1 minute (use a timer!)
- IMPORTANT: Watch carefully! Garlic burns quickly and will become bitter
- The garlic should become fragrant but not brown
- Remove pan from heat immediately after 1 minute
- Add the chopped parsley, thyme leaves, 1 tablespoon lemon juice, remaining ½ teaspoon salt, ¼ teaspoon black pepper, and ½ teaspoon paprika
- Stir to combine all ingredients thoroughly
- Using a spoon, remove 2 tablespoons of this mixture to a small bowl and set aside for later use
Cooking Phase (20 minutes)
- Prepare the baking dish:
- Choose a baking dish large enough to fit all chicken pieces without touching (a 9×13 inch dish works well)
- You can lightly grease the dish or leave it ungreased (the butter sauce will prevent sticking)
- Arrange the chicken:
- Place each chicken breast in the baking dish, leaving at least 1 inch of space between each piece
- Position the thicker end of the breasts toward the outside of the dish (this helps with even cooking)
- Apply the garlic butter mixture:
- Give the garlic butter mixture a final stir
- Using a spoon, pour the mixture evenly over each chicken breast
- Use the back of the spoon to spread the mixture, ensuring each breast is fully coated
- Make sure some garlic pieces remain on top of each breast
- Bake the chicken:
- Place the baking dish on the center rack of your preheated oven
- Set a timer for 18 minutes
- Do not open the oven door during this time (opening the door lets heat escape)
- Check for doneness:
- After 18 minutes, carefully remove the dish from the oven using oven mitts
- Insert a meat thermometer into the thickest part of the largest chicken breast
- IMPORTANT FOR BEGINNERS: Chicken is safe to eat when it reaches 165°F (74°C)
- If the temperature reads below 165°F, return to oven for 2-minute intervals until it reaches safe temperature
- If the temperature has reached 165°F but you want more color on top, proceed to step 12
- If the chicken is done and has good color, skip to step 13
- For a golden top (optional):
- Turn your oven to broil setting
- Place the chicken back in the oven on the top rack
- Watch carefully! Broil for 2-3 minutes until the tops become golden brown
- Remove immediately when desired color is achieved
Finishing Touches (5 minutes)
- Rest the chicken:
- Remove the baking dish from the oven and place on a heat-safe surface
- Loosely cover with aluminum foil
- Let the chicken rest for 5 minutes (this step is crucial for juicy chicken as it allows the juices to redistribute)
- DO NOT SKIP THIS STEP – cutting immediately will result in dry chicken
- Serve the chicken:
- Remove the foil
- Carefully transfer each chicken breast to a serving plate using tongs or a spatula
- Spoon any sauce from the baking dish over each chicken breast
- Drizzle each piece with the reserved garlic butter sauce you set aside earlier
- Optional: Garnish with additional fresh herbs or a lemon wedge
- Check final temperature (optional but recommended for beginners):
- For peace of mind, you can check the final temperature again
- Insert thermometer in a different spot on the chicken
- Confirm it reads at least 165°F
If you enjoy this simple yet flavorful chicken recipe, you might also want to try my skillet chicken with mushroom wine sauce for another easy weeknight option.
Troubleshooting Common Issues with Garlic Butter Baked Chicken
Problem: Dry Chicken Breasts
Solution:
- Check the temperature earlier than the recipe suggests (around 15-18 minutes)
- Different ovens and chicken breast sizes can affect cooking time
- Remove chicken as soon as it reaches 165°F
- Make sure you’re resting the chicken after cooking
- Consider brining your chicken beforehand in a simple salt water solution
Problem: Garlic Burns in the Oven
Solution:
- Make sure the garlic is fully submerged in butter
- Mix the garlic butter well before pouring over chicken
- If you notice the garlic browning too quickly, cover the dish loosely with foil
- For very sensitive garlic, add the garlic mixture halfway through cooking
Problem: Butter Sauce Separates
Solution:
- Whisk the sauce vigorously just before pouring over the chicken
- Add a teaspoon of flour to stabilize it
- Make sure all ingredients are at similar temperatures
- If it separates in the oven, it will still taste good – just stir before serving
Problem: Chicken Cooking Unevenly
Solution:
- Ensure chicken breasts are even thickness by pounding
- Rotate the baking dish halfway through cooking
- Allow chicken to come to room temperature for 15 minutes before cooking
- Place thicker pieces toward the outer edges of the dish where it’s hotter
Variations & Substitutions for Garlic Butter Baked Chicken
Herb Variations
Try these herb combinations with the basic garlic butter:
- Italian: Basil, oregano, and rosemary
- Mediterranean: Dill, oregano, and lemon zest
- Spicy: Add red pepper flakes or cayenne
- Fall Harvest: Sage, rosemary, and thyme
- Citrus: Add orange or lime zest instead of lemon
Dietary Adaptations
- Low-carb/Keto: This garlic butter baked chicken breast recipe is naturally keto-friendly
- Dairy-free: Use ghee or olive oil instead of butter
- Paleo: Use ghee and ensure all seasonings are paleo-compliant
- Gluten-free: Already gluten-free, just check your spices for additives
For a different but equally delicious Asian-inspired chicken dish, check out my Chicken Nanban recipe.
Storage & Reheating Instructions for Garlic Butter Baked Chicken
Storage Instructions
- Allow to cool: Let chicken cool completely before storing (no longer than 2 hours at room temperature)
- Refrigerator:
- Place in an airtight container
- Store in refrigerator for up to 3 days
- Keep sauce in the same container to maintain moisture
- Freezer:
- Wrap individual portions tightly in plastic wrap, then aluminum foil
- Place wrapped portions in a freezer bag, squeezing out excess air
- Label with date and contents
- Freeze for up to 2 months
Reheating Tips
- Microwave (Quickest method):
- Place chicken on a microwave-safe plate
- Cover with a damp paper towel to keep moisture in
- Heat in 30-second intervals at 70% power
- Check temperature between intervals
- Stop when chicken reaches 165°F internal temperature
- Oven (Best for maintaining quality):
- Preheat oven to 325°F
- Place chicken in an oven-safe dish
- Add 1-2 tablespoons of water or chicken broth to the dish
- Cover tightly with aluminum foil
- Heat for 10-15 minutes until internal temperature reaches 165°F
- Stovetop (Best for adding to other dishes):
- Slice chicken thinly against the grain
- Heat a skillet over medium-low heat
- Add a splash of water or broth to the pan
- Add chicken slices in a single layer
- Cover and warm gently for 2-3 minutes
- Flip slices and warm for another 1-2 minutes
Safety Notes & Tips for Garlic Butter Baked Chicken
Food Safety
- Hand washing: Always wash hands thoroughly before and after handling raw chicken
- Surface cleaning: Clean all surfaces that touched raw chicken with hot, soapy water
- Cross-contamination: Use separate cutting boards for chicken and other ingredients
- Marinades: Never reuse marinades that have touched raw chicken
- Temperature: Always check that chicken reaches 165°F internal temperature in the thickest part
- Storage: Refrigerate leftovers within 2 hours of cooking
Pro Tips for Perfect Garlic Butter Baked Chicken
- For the juiciest chicken, let it come to room temperature for 15-20 minutes before cooking
- Make sure your chicken breasts are similar in size for even cooking
- If using a glass baking dish, reduce the oven temperature by 25°F
- For maximum juiciness, let chicken rest after cooking before slicing
- Always slice against the grain for the most tender texture
- Save any pan juices to drizzle over rice, potatoes, or vegetables
- Double the garlic butter sauce recipe to have extra for dipping or drizzling
- For meal prep, prepare the garlic butter sauce ahead of time and refrigerate
If you’re looking for a spicy twist on chicken, try my Skillet Bang Bang Chicken Thighs for a flavor-packed alternative.
This garlic butter baked chicken breast recipe is sure to become a family favorite. With its simple ingredients, quick preparation, and outstanding flavor, it’s the perfect solution for busy weeknight dinners or special occasions alike. Even total beginners can create a restaurant-quality meal with this foolproof garlic butter baked chicken recipe.