Key Takeaways:
- Ready in just 45 minutes with minimal ingredients
- Naturally sweeter than red tomato sauces with less acidity
- Perfect for pasta, pizza, or as a dipping sauce
- Freezes beautifully for up to 3 months
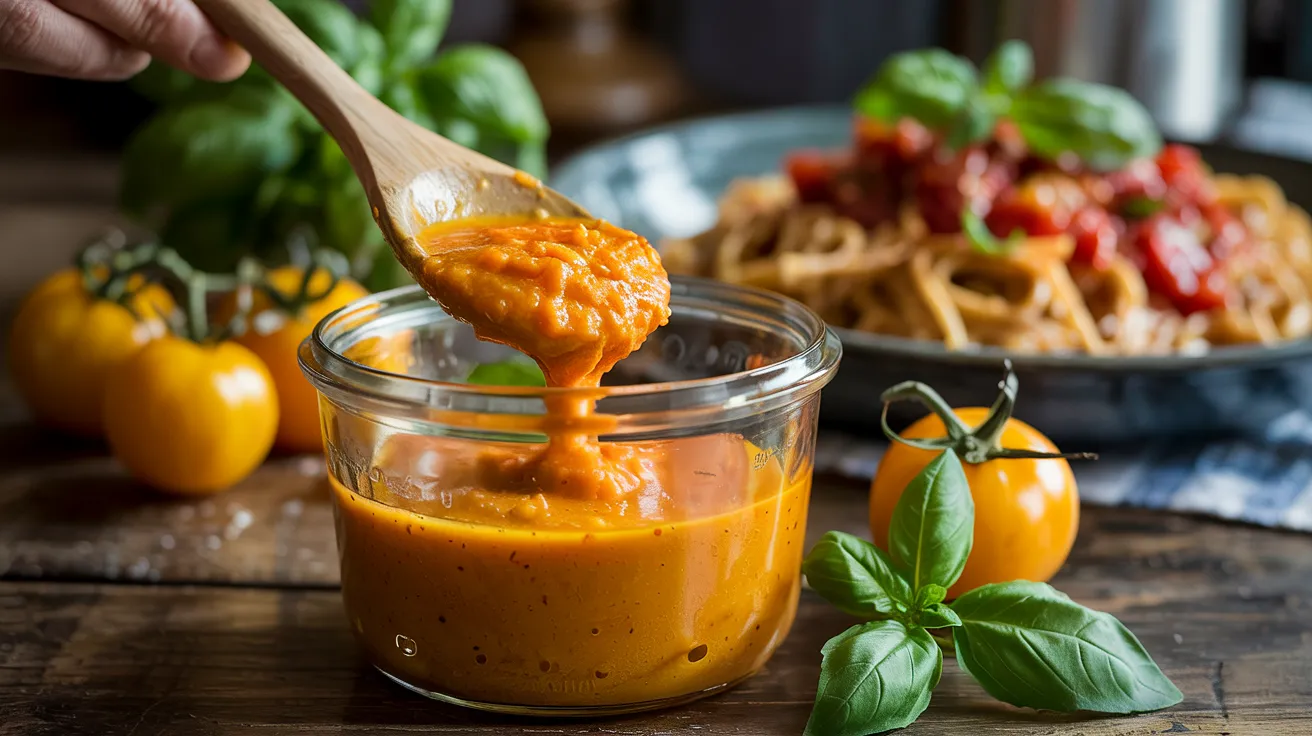
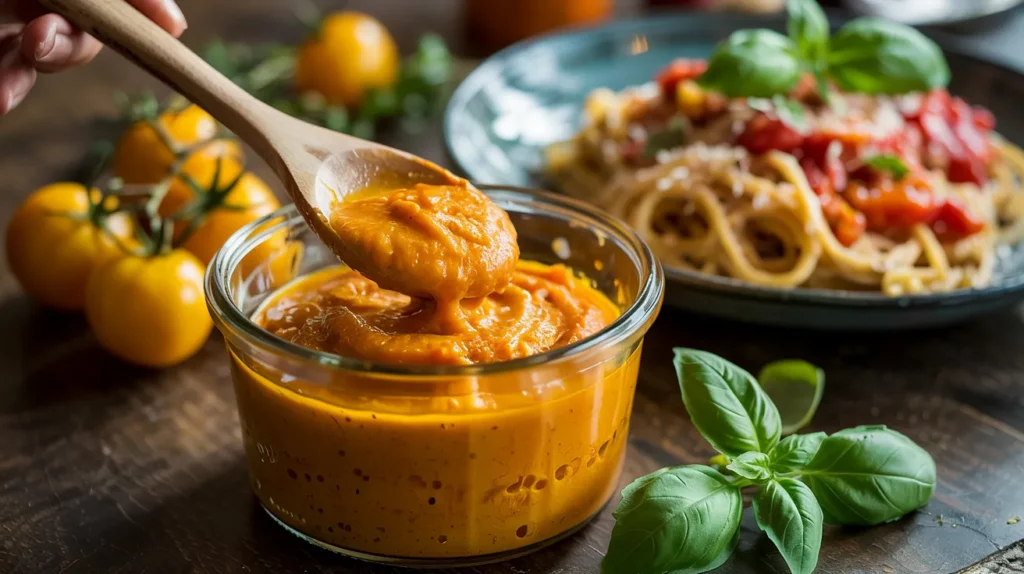
Say Goodbye to Boring Red Sauce
Tired of the same old red tomato sauce? Golden Yellow Tomato Sauce is about to shake up your pasta night routine. This vibrant, sunshine-colored sauce brings a naturally sweet flavor that might just make you forget about its red cousin.
Yellow tomatoes pack all the rich umami flavor you love but with a milder, less acidic bite. This makes our Golden Yellow Tomato Sauce perfect for those with sensitive stomachs or anyone looking to try something new. Best of all, this recipe serves exactly four people—no leftover sauce to store!
If you’ve never cooked with yellow tomatoes before, you’re in for a treat. The magic of this sauce lies in its simplicity—just a few fresh ingredients that let the golden tomatoes shine. Ready to brighten up your dinner table? Let’s get cooking!
Nutrition Comparison: Yellow vs. Red Tomato Sauce
| Nutrient (per 1/2 cup) | Golden Yellow Tomato Sauce | Traditional Red Tomato Sauce |
|---|---|---|
| Calories | 75 | 80 |
| Carbohydrates | 10g | 12g |
| Sugar | 6g | 8g |
| Vitamin C | 35% DV | 20% DV |
| Acidity | Lower | Higher |
| Lycopene | Lower | Higher |
| Beta Carotene | Higher | Lower |
What You’ll Need
Ingredients
| Ingredient | Amount | Notes |
|---|---|---|
| Yellow tomatoes | 2 pounds | Ripe but firm |
| Yellow bell pepper | 1 medium | Seeds removed |
| Sweet onion | 1 medium | Vidalia works best |
| Garlic cloves | 4 large | Freshly minced |
| Extra virgin olive oil | 3 tablespoons | High quality |
| Fresh basil leaves | 1/4 cup | Torn or roughly chopped |
| Fresh thyme | 2 teaspoons | Leaves only |
| White wine | 1/4 cup | Dry variety (optional) |
| Honey | 1 teaspoon | Optional, for extra sweetness |
| Salt | 1 teaspoon | Sea salt preferred |
| Black pepper | 1/4 teaspoon | Freshly ground |
| Red pepper flakes | Pinch | Optional, for heat |
Kitchen Tools
| Tool | Purpose |
|---|---|
| Chef’s knife | For chopping vegetables |
| Cutting board | Prep surface |
| Large pot | For cooking sauce |
| Wooden spoon | For stirring |
| Food processor or blender | For pureeing (optional) |
| Fine mesh strainer | For removing seeds (optional) |
| Glass jars | For storage |
| Measuring cups and spoons | For accurate measurements |
Substitutions
Can’t find some ingredients? Here are some easy swaps:
- Yellow tomatoes: Orange or low-acid red tomatoes can work in a pinch
- Fresh herbs: Use 1 teaspoon dried basil and 1/2 teaspoon dried thyme
- White wine: Substitute with 2 tablespoons white wine vinegar + 2 tablespoons water
- Honey: Substitute with 1 teaspoon sugar or agave syrup
- Yellow bell pepper: Skip it or use a red one (will change color slightly)
Super-Detailed Step-by-Step Instructions for Beginners
Prep Time: 15 minutes
Cook Time: 30 minutes
Total Time: 45 minutes
Servings: 4
Preparation Phase
- Set up your workspace
- Wash your hands with warm water and soap for at least 20 seconds.
- Clear your counter space completely – you’ll need room for cutting boards and bowls.
- Place a small bowl near your cutting board for scraps and vegetable trimmings.
- Read through the entire recipe once before starting so there are no surprises.
- Arrange all ingredients on your counter so you can see everything you’ll be using.
- Gather and prep your tools
- Place your large pot on the stove (don’t turn it on yet).
- Set out your cutting board and secure it with a damp paper towel underneath to prevent sliding.
- Have your chef’s knife ready and make sure it’s sharp (dull knives are more dangerous!).
- Set out measuring cups and spoons.
- If using a food processor or blender, make sure it’s clean and ready to go.
- Prepare the yellow tomatoes
- Gently rinse all tomatoes under cool running water and pat dry with paper towels.
- Place a tomato on the cutting board with the stem side facing up.
- Use your knife to cut around the core in a circular motion, about 1/2 inch deep, then remove and discard the core.
- Cut each tomato in half through the equator (not through the stem end).
- Cut each half into quarters, so each tomato yields 8 pieces.
- Optional step for smoother sauce: Gently squeeze each piece over a bowl to remove seeds, or use a small spoon to scoop them out.
- Place prepared tomato pieces in a large bowl and set aside.
- Beginner tip: Yellow tomatoes can be more delicate than red ones, so handle with care to avoid crushing them.
- Prepare the sweet onion
- Place the onion on your cutting board with the root end intact.
- Cut off the top (non-root) end and discard.
- Peel away the papery outer skin and the first layer if it looks dry.
- Place the onion cut-side down on the board, and cut in half through the root.
- Place each half flat-side down and make vertical cuts from the cut end toward the root, but not all the way through.
- Make horizontal cuts parallel to the board, again not cutting through the root.
- Finally, slice across these cuts to create small, even 1/4-inch dice.
- Beginner tip: If your eyes tear up, refrigerate the onion for 30 minutes before cutting or briefly place it in the freezer for 10 minutes.
- Prepare the yellow bell pepper
- Stand the pepper upright on your cutting board.
- Cut straight down along each side, creating 4 flat panels and avoiding the seeds.
- Discard the center part with the seeds and stem.
- Place each panel skin-side down and cut into 1/4-inch strips.
- Gather the strips together and cut crosswise to create 1/4-inch dice.
- Place diced pepper in a separate small bowl.
- Beginner tip: Yellow pepper seeds are bitter, so be careful not to include any in your diced pieces.
- Prepare the garlic
- Place a clove of garlic on your cutting board.
- Place the flat side of your chef’s knife on top of the garlic clove.
- With your hand, carefully but firmly press down on the knife to crush the clove, which will loosen the skin.
- Remove and discard the papery skin.
- Thinly slice the peeled garlic.
- Hold your knife with both hands and rock it back and forth over the sliced garlic until it’s finely minced.
- Beginner tip: Your fingers should smell like garlic now – rub them on stainless steel (like your sink) under cold water to remove the smell.
- Prepare the herbs
- Fill a bowl with cold water and gently place the basil and thyme sprigs in it.
- Swish them around to remove any dirt or grit.
- Lift the herbs out of the water (don’t pour water over them as the dirt will pour back onto the herbs).
- Pat dry gently with paper towels.
- For basil: Stack 5-6 leaves at a time, roll them tightly like a cigar, then slice across the roll to create thin ribbons. Alternatively, tear the leaves with your fingers.
- For thyme: Hold the top of a sprig with one hand and run your fingers down the stem with your other hand to strip off the leaves. Discard the woody stems.
- Beginner tip: Fresh herbs should be added at the end of cooking for the best flavor.
Cooking Phase
- Start the sauce base
- Place your large pot on the stove and turn the heat to medium.
- Add the 3 tablespoons of olive oil and wait 30-60 seconds for it to warm up (you’ll see the oil shimmer slightly).
- Add your diced onions to the pot and stir with a wooden spoon to coat with oil.
- Sprinkle a small pinch of salt over the onions (this helps draw out moisture).
- Cook for 3-4 minutes, stirring occasionally, until the onions become translucent but not brown.
- Beginner tip: If the onions start to brown, your heat is too high. Turn it down slightly.
- Add the garlic
- Add your minced garlic to the pot with the softened onions.
- Stir continuously for 30 seconds. Garlic burns easily and burnt garlic will ruin your sauce!
- You’ll know it’s ready when you can smell the garlic’s aroma.
- Beginner tip: Keep the wooden spoon moving constantly during this step to prevent burning.
- Add the yellow bell pepper
- Add your diced yellow pepper to the pot.
- Stir to combine with the onions and garlic.
- Cook for 2-3 minutes, stirring occasionally, until the peppers begin to soften.
- The peppers should still have some bite to them – they’ll cook more with the tomatoes.
- Beginner tip: Yellow bell peppers have natural sweetness that complements the yellow tomatoes perfectly.
- Add tomatoes and liquid ingredients
- Add all of your prepared yellow tomato pieces to the pot.
- If using white wine, measure 1/4 cup and add it now.
- Stir everything together gently but thoroughly.
- Beginner tip: Stand back when adding wine as it may create steam when it hits the hot pan.
- Add seasonings
- Measure 1 teaspoon of salt and sprinkle it evenly over the tomato mixture.
- Add 1/4 teaspoon freshly ground black pepper.
- If using red pepper flakes, add just a small pinch (you can always add more later).
- If using honey, drizzle 1 teaspoon evenly over the mixture.
- Stir everything to distribute the seasonings evenly.
- Beginner tip: Season gradually – you can always add more salt later, but you can’t take it away!
- Bring to a simmer and cook
- Turn the heat up slightly to medium-high.
- Wait for the mixture to start bubbling around the edges, which should take 3-5 minutes.
- Once bubbling, immediately reduce the heat to low to maintain a gentle simmer.
- You want to see small bubbles breaking the surface occasionally, not a rolling boil.
- Leave the pot uncovered to allow some liquid to evaporate and the sauce to thicken.
- Set a timer for 20 minutes.
- Stir the sauce every 5 minutes to prevent sticking and to check the consistency.
- Beginner tip: The tomatoes will gradually break down and release their juices. Use the back of your wooden spoon to gently press them against the side of the pot to help this process.
- Monitor the cooking process
- As the sauce simmers, you’ll notice the tomatoes softening and starting to break down.
- The color will intensify to a deeper golden yellow.
- The liquid will gradually reduce and thicken.
- If the sauce starts to stick to the bottom of the pot, lower the heat slightly and stir more frequently.
- Beginner tip: A proper simmer should be quiet with just an occasional bubble popping through the surface. If it’s loudly bubbling, your heat is too high.
- Add the herbs
- After the sauce has simmered for 20 minutes, add your prepared basil and thyme.
- Stir them in gently but thoroughly to distribute throughout the sauce.
- Continue to simmer for another 5 minutes to infuse the herb flavors.
- Beginner tip: Adding herbs too early can make them lose their bright flavor and color, which is why we wait until near the end.
Finishing Steps
- Adjust the texture
- For a chunky sauce: Use your wooden spoon to break up any large tomato pieces by pressing them against the side of the pot.
- For a semi-smooth sauce: Use an immersion blender and pulse it a few times in the pot, being careful not to splatter hot sauce. (If you don’t have an immersion blender, skip to the next bullet point.)
- For a completely smooth sauce: Turn off the heat and let the sauce cool for 15 minutes. Then carefully transfer to a standard blender or food processor in batches, filling no more than halfway. Pulse until you reach desired smoothness.
- Beginner tip: When using any blender with hot liquids, always start on the lowest setting and increase gradually to prevent splattering.
- Check consistency and adjust as needed
- Dip a clean spoon into the sauce and lift it out.
- The sauce should coat the back of the spoon and slowly drip off.
- If the sauce is too watery: Continue simmering uncovered for 5-10 more minutes, checking frequently.
- If the sauce is too thick: Add water, 1 tablespoon at a time, stirring after each addition until you reach the desired consistency.
- Beginner tip: The sauce will thicken slightly as it cools, so it’s better to err on the side of slightly too thin rather than too thick.
- Final seasoning adjustments
- Take a clean spoon and taste a small amount of sauce (make sure it’s cooled enough not to burn your tongue).
- Does it need more salt? Add a small pinch, stir, and taste again.
- Does it need more sweetness? Add a small amount of honey, stir, and taste again.
- Does it need more acidity? Add a tiny splash of white wine vinegar, stir, and taste again.
- Beginner tip: Make these adjustments one at a time in small amounts, tasting after each addition. This helps you learn how each ingredient affects the final flavor.
- Allow to rest
- Turn off the heat.
- Let the sauce rest in the pot for 5 minutes before serving.
- This resting period allows the flavors to settle and meld together.
- Beginner tip: The sauce will be extremely hot right off the heat. Letting it rest not only improves flavor but prevents burns when serving.
- Serve or store properly
- For immediate serving: Ladle the sauce over cooked pasta, use as a pizza sauce, or serve as a dipping sauce with bread.
- For storing: Allow the sauce to cool completely at room temperature (no more than 2 hours total).
- Transfer to airtight glass containers, leaving 1/2 inch of space at the top.
- Refrigerate for up to 5 days or freeze for up to 3 months.
- Beginner tip for freezing: Label your containers with the date and contents. If freezing in glass jars, leave 1 inch of headspace to allow for expansion.
Troubleshooting Your Golden Yellow Tomato Sauce
| Problem | Cause | Solution |
|---|---|---|
| Sauce is too watery | Yellow tomatoes have high water content | Simmer uncovered longer to reduce; add 1/2 tablespoon tomato paste |
| Sauce is too acidic | Tomatoes weren’t ripe enough | Add 1/2 teaspoon more honey or a tiny pinch of baking soda |
| Sauce lacks flavor | Under-seasoned or using out-of-season tomatoes | Add more salt gradually; try a splash of white wine vinegar |
| Sauce is too chunky | Not cooked long enough or not properly blended | Use immersion blender or food processor for desired consistency |
| Seeds in the sauce | Not strained | Pass through a fine-mesh strainer while still warm |
| Sauce turned brownish | Tomatoes were overcooked | Next time, reduce cooking time and monitor color carefully |
| Herbs turned black | Added too early in the cooking process | Always add delicate herbs in the last 5 minutes of cooking |
| Bitter aftertaste | Bell pepper seeds included or garlic burnt | Be more careful with seed removal and watch garlic closely when sautéing |
| Sauce splattered everywhere | Heat too high during simmering | Lower heat and use a splatter guard or partially cover the pot |
| Metallic taste | Acidic sauce reacted with aluminum cookware | Always use stainless steel, enameled cast iron, or non-reactive cookware |
Variations & Substitutions
Spicy Golden Sauce: Add 1 diced jalapeño with seeds removed when cooking the onions. For extra heat, include some of the jalapeño seeds.
Creamy Version: Stir in 1/4 cup heavy cream at the end of cooking for a richer sauce. Reduce heat to low and don’t boil after adding cream.
Roasted Yellow Tomato Sauce: Instead of simmering, halve tomatoes and quarter onions, then roast with whole garlic cloves and bell pepper at 400°F for 25 minutes before blending.
Herb Variations: Try fresh oregano or tarragon instead of thyme for a different flavor profile. Start with small amounts (1 teaspoon) as these herbs can be potent.
Vegan Option: Skip the honey and use maple syrup or agave nectar instead.
Chunky Garden Style: Add 1/2 cup diced yellow zucchini when you add the bell pepper for a heartier texture.
If you enjoy experimenting with different sauce bases, check out our guide to what are the base sauces that can help you understand fundamental sauce techniques.
Storage & Reheating
Refrigeration:
- Transfer cooled sauce to airtight containers and refrigerate for up to 5 days.
- Make sure containers are sealed tightly to preserve flavor.
- Glass containers are best as they won’t absorb the sauce’s color or flavor.
Freezing:
- Pour cooled sauce into freezer-safe containers or ice cube trays, leaving 1/2 inch of headspace for expansion.
- For easy portioning, freeze in 1-cup containers or silicone muffin tins.
- Once frozen solid in muffin tins, pop out and transfer to freezer bags.
- Freeze for up to 3 months.
- Label with date and contents.
Reheating From Refrigerated:
- Pour sauce into a saucepan
- Heat over medium-low heat, stirring occasionally
- Warm until it just begins to bubble around the edges
- Add a splash of water if sauce has thickened too much
Reheating From Frozen:
- Thaw overnight in refrigerator (preferred method)
- For quick use, place frozen container in warm water for 10 minutes to loosen
- Transfer semi-frozen sauce to a saucepan
- Heat over medium-low, stirring frequently to prevent burning
- Add 1-2 tablespoons of water as needed for desired consistency
Beginner Tip: Never reheat sauce multiple times. Only reheat the portion you plan to use immediately.
Safety Notes & Tips
- Food Safety: Yellow tomatoes should be stored at room temperature until fully ripe, then used within 2-3 days.
- Canning Warning: This recipe has not been tested for safe water bath canning. For long-term preservation, freezing is recommended. Yellow tomatoes are generally less acidic than red, making them potentially unsafe for water bath canning without proper pH testing.
- Splatter Alert: Tomato sauce can splatter when simmering. Use a splatter screen or partially cover the pot to prevent burns and mess. Always turn your pot handles inward to prevent accidental knocking.
- Taste As You Go: The natural sweetness of yellow tomatoes varies, so adjust seasonings gradually. Let a small taste cool on a spoon before tasting to avoid burning your tongue.
- Color Preservation: To maintain the beautiful golden color, avoid using utensils that have been used with red tomato products without washing. Even a small amount of red tomato can affect the color.
- Knife Safety: When cutting tomatoes, always use a sharp knife and cut on a stable surface. Place a damp towel under your cutting board to prevent slipping.
- Heat Management: If you need to step away from the stove, turn off the heat. Never leave cooking unattended.
- Blender Safety: When blending hot liquids, fill blender only halfway, remove the center cap from the lid (cover with a folded kitchen towel), and start on the lowest speed to prevent pressure buildup and splatters.
For a traditional Italian flavor profile similar to this sauce, you might also enjoy our homemade Pomodoro sauce recipe, which shares similar cooking techniques but with classic red tomatoes.
Serving Suggestions
Classic Pasta: Toss with 1 pound of cooked pasta for a simple dinner. For the perfect combination:
- Cook pasta 1 minute less than package directions
- Reserve 1/4 cup pasta water before draining
- Combine hot pasta with sauce in the pot
- Add a splash of reserved pasta water if needed to loosen the sauce
- Finish with fresh basil and grated Parmesan
Dipping Sauce: Serve warm with crusty bread or garlic knots. Add a small drizzle of good olive oil on top.
Pizza Base: Spread on homemade or store-bought pizza dough before adding toppings. Use a light hand – too much sauce will make your pizza soggy.
Baked Eggs: Create wells in a pan of heated sauce and crack eggs directly into them. Bake at 375°F until eggs are set, about 8-10 minutes.
Soup Starter: Thin with vegetable broth for a quick tomato soup. Add a splash of cream for richness if desired.
Grain Bowl Base: Spoon over cooked quinoa or farro and top with roasted vegetables for a hearty vegetarian meal.
If you’re looking for a more complex flavor profile, our Silver Palate Pasta Sauce offers another excellent option that complements this golden sauce for when you want variety in your pasta rotation.
Remember, the vibrant color of this Golden Yellow Tomato Sauce makes it not just delicious but also a beautiful addition to your table. The natural sweetness and lower acidity make it perfect for those who find traditional red sauces too sharp or for anyone wanting to add something special to their pasta night!