Prep Time: 15 minutes | Cook Time: 15 minutes | Total Time: 30 minutes | Serves: 4
Key Takeaways:
- Perfect blend of spicy jalapeños, savory ham, and melty cheese
- Beginner-friendly recipe with detailed step-by-step instructions
- Customizable heat level to suit any preference
- Ready in just 30 minutes for a quick family meal
Why This Grilled Cheese with Jalapeños and Ham Recipe Works
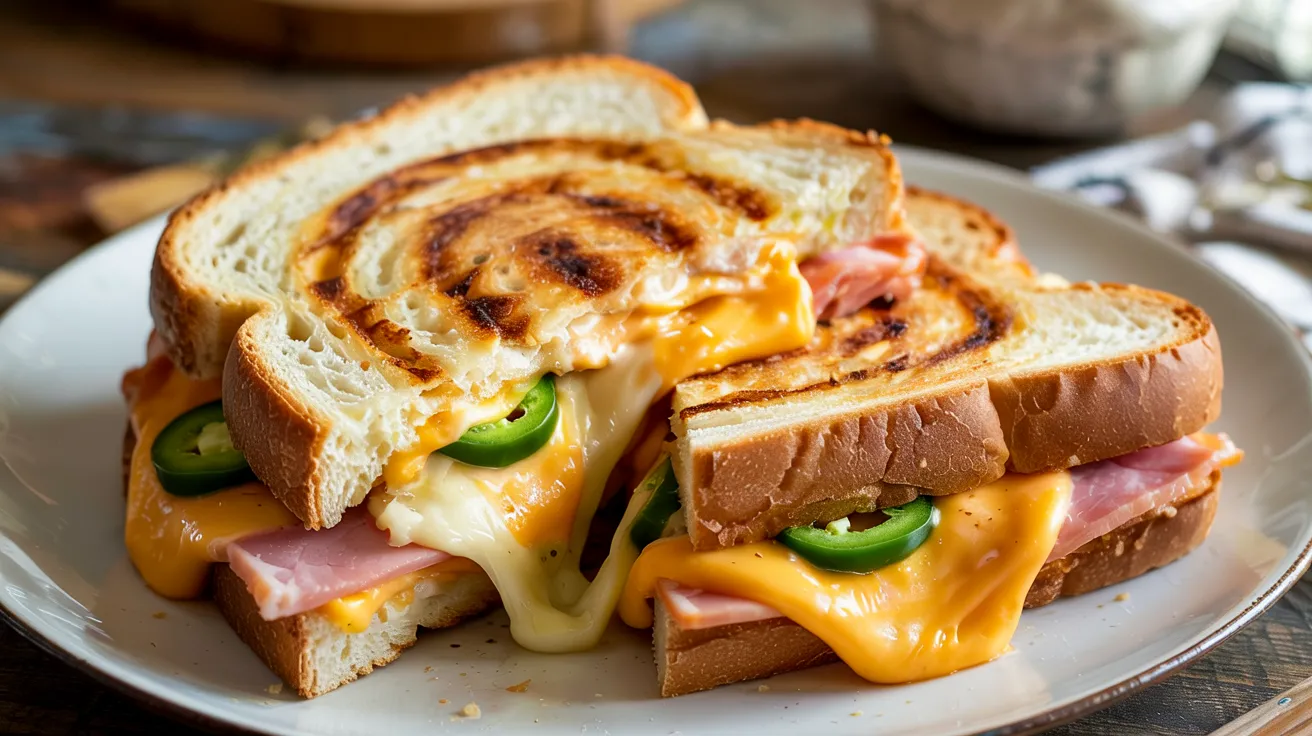
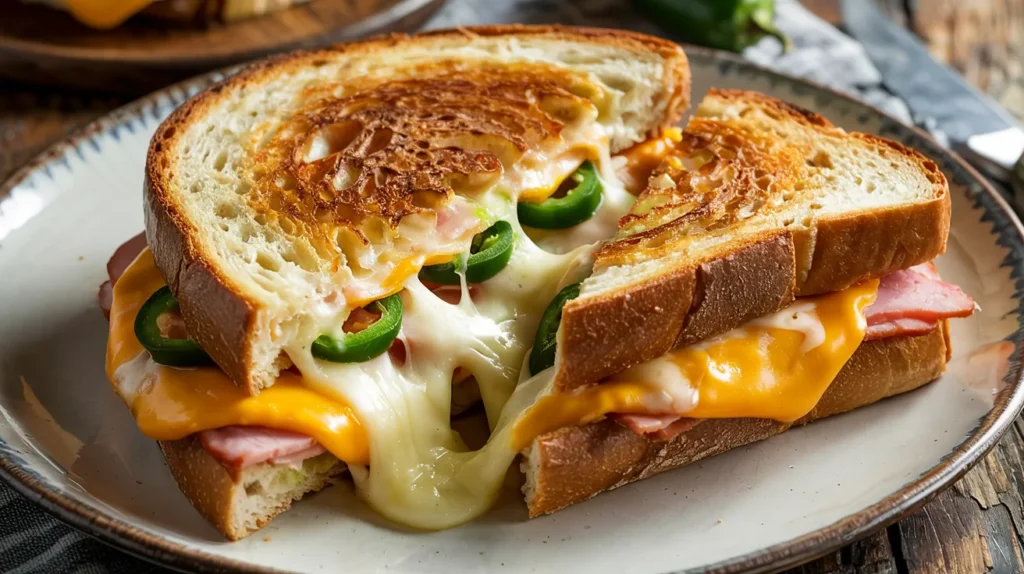
Tired of plain sandwiches that lack excitement? This Grilled Cheese with Jalapeños and Ham transforms an everyday lunch into something spectacular. The combination of gooey cheese, savory ham, and the perfect kick from jalapeños creates a sandwich that’s both comforting and exciting.
I’ve perfected this Grilled Cheese with Jalapeños and Ham recipe through countless tests to get that ideal balance of flavors. The crisp, buttery exterior gives way to layers of melted cheese, smoky ham, and spicy jalapeños. Whether you’re cooking for the family or impressing friends, this elevated grilled cheese delivers restaurant-quality results with minimal effort.
Nutrition Comparison
| Sandwich Type | Calories | Protein | Fat | Carbs |
|---|---|---|---|---|
| Basic Grilled Cheese | 440 | 16g | 29g | 30g |
| Grilled Cheese with Jalapeños and Ham | 520 | 24g | 32g | 32g |
| Restaurant Grilled Cheese | 580 | 18g | 38g | 36g |
What You’ll Need for Perfect Grilled Cheese with Jalapeños and Ham
Ingredients
| Ingredient | Amount (Serves 4) | Notes |
|---|---|---|
| Sourdough bread | 8 slices | Thick-cut (½ inch) works best |
| Cheddar cheese | 8 slices (8 oz) | Medium or sharp |
| Monterey Jack cheese | 8 slices (8 oz) | For melting quality |
| Cream cheese | 4 tablespoons | Softened at room temperature |
| Ham | 8 slices (8 oz) | Medium thickness deli ham |
| Jalapeño peppers | 4 medium | Fresh, not pickled |
| Butter | 8 tablespoons | Unsalted, softened |
| Salt | ½ teaspoon | Kosher preferred |
| Black pepper | ¼ teaspoon | Freshly ground |
Kitchen Tools
| Tool | Purpose | Essential? |
|---|---|---|
| Large skillet or griddle | Cooking surface | Yes |
| Spatula (wide) | Flipping sandwiches | Yes |
| Cutting board | Prep surface | Yes |
| Chef’s knife | Cutting ingredients | Yes |
| Bread knife | Even bread slices | Recommended |
| Measuring spoons | Precise portions | Yes |
| Paper towels | Drying jalapeños | Yes |
| Food-handling gloves | Jalapeño protection | Recommended |
| Timer | Track cooking time | Optional |
| Instant thermometer | Check temperature | Optional |
Possible Substitutions
- Bread: Texas toast, whole grain, or rustic Italian bread
- Cheese: Provolone, Gouda, or Colby Jack
- Meat: Turkey, prosciutto, or Canadian bacon
- Heat Level: Bell peppers (mild) or serrano peppers (hotter)
- Butter Alternative: Mayonnaise for a different crispy texture
Super-Detailed Instructions for the Perfect Grilled Cheese with Jalapeños and Ham
Preparation Phase (15 minutes)
1. Set Up Your Workspace (2 minutes)
- Clear a clean, flat kitchen counter
- You’ll need about 2 feet of space
- Ensure surface is clean and dry
- Place cutting board in center of workspace
- Gather all ingredients
- Remove cheese from refrigerator 20 minutes before starting
- Why? Room temperature cheese melts more evenly
- Keep ingredients in order of use
- Have a clean plate ready for finished sandwiches
- Prepare your tools
- Place skillet on stovetop (don’t heat yet)
- Have spatula nearby
- Set out measuring tools
- Place paper towels within reach
2. Prepare the Jalapeños (5 minutes)
- Put on protective gloves (highly recommended)
- Disposable food gloves work best
- If no gloves, coat hands with cooking oil
- Warning: Jalapeño oils can irritate skin and eyes
- Clean and trim jalapeños
- Rinse all 4 jalapeños under cold water
- Pat dry with paper towel
- Place on cutting board
- Cut off stem ends (about ¼ inch from top)
- Remove seeds and membranes
- Slice each jalapeño lengthwise
- Use tip of spoon to scrape out white membrane
- Remove all seeds
- Heat tip: Leave some membrane for extra spiciness
- Slice jalapeños
- Place jalapeño halves flat-side down
- Slice into thin half-moons (⅛ inch thick)
- Aim for 10-12 slices per jalapeño
- Place slices on paper towel
- Blot with another paper towel to remove moisture
- Safety clean-up
- Discard gloves if using
- Wash hands thoroughly with soap for 20 seconds
- Clean knife and cutting board with hot, soapy water
- Never touch your face while working with peppers
3. Prepare the Bread and Cheese (3 minutes)
- Arrange bread slices
- Lay out all 8 slices of sourdough on clean surface
- Inspect for any imperfections
- Prepare the butter spread
- Ensure butter is soft (if not, microwave 5-10 seconds)
- Using a butter knife, spread 1 tablespoon butter evenly on one side of each bread slice
- Cover entire surface to edges
- Tip: Softened butter should spread easily without tearing bread
- Organize cheese for quick assembly
- Unwrap all cheese slices
- Separate into piles by type
- Have cream cheese and spreading knife ready
4. Prepare the Ham (2 minutes)
- Check ham slices
- Separate slices if stuck together
- Fold each slice in half loosely
- Tip: Folding creates pockets for melted cheese to grab
Assembly Phase (5 minutes)
1. Create Your Sandwich Base (2 minutes)
- Position bread correctly
- Take 4 slices of bread
- Place butter-side DOWN on work surface
- These will be your bottom slices
- Add cream cheese layer
- Spread 1 tablespoon softened cream cheese on each slice
- Cover entire surface of non-buttered side
- Spread all the way to edges
- Sprinkle lightly with salt and pepper
2. Add Filling Layers (3 minutes)
- First cheese layer
- Place 1 slice of cheddar on each bread slice
- Position to cover bread completely
- Add ham layer
- Place 2 folded ham slices on each sandwich
- Arrange to cover cheese completely
- Tip: Create slight folds for texture
- Add jalapeño layer
- Arrange 10-12 jalapeño slices evenly across ham
- Space evenly for consistent heat in every bite
- Beginner tip: Use fewer jalapeños for milder heat
- Final cheese layers
- Add second slice of cheddar
- Top with 2 slices of Monterey Jack
- Ensure cheese covers all jalapeños
- Why? This seals ingredients inside when melted
3. Complete Sandwiches (1 minute)
- Add top bread slices
- Place remaining 4 bread slices on top
- Butter-side UP
- Align edges with bottom slice
- Press gently
- Using palm of hand, press down lightly
- Don’t squeeze too hard
- Goal is to compact slightly, not flatten
Cooking Phase (10 minutes)
1. Preheat Your Cooking Surface (2 minutes)
- Place skillet on stove
- Use heavy-bottomed skillet or griddle
- Medium-sized skillet fits 2 sandwiches
- Set proper temperature
- Turn heat to MEDIUM
- Allow pan to preheat for 2 minutes
- Temperature test: Sprinkle few drops of water – should sizzle gently and evaporate in 2-3 seconds
- If water disappears instantly, pan is too hot
- If water sits without sizzling, pan is too cool
2. First Side Cooking (4 minutes)
- Transfer sandwiches to pan
- Using both hands or spatula
- Place sandwich carefully in center of pan
- If cooking multiple sandwiches, leave 1-inch space between them
- Monitor heat closely
- Listen for gentle sizzling sound
- If loud sizzling or smoking occurs, reduce heat
- If no sizzle, increase heat slightly
- Cook patiently
- Allow to cook undisturbed for 2 minutes
- Resist urge to peek or move sandwich
- Why? This develops proper crust
- Check progress
- After 2 minutes, gently lift edge with spatula
- Look for golden-brown color
- If too light, cook 1 more minute
- If too dark, reduce heat for next side
3. Flipping Technique (1 minute)
- Prepare for the flip
- Slide spatula completely under sandwich
- Lift slightly to ensure not stuck to pan
- Support top of sandwich with fingers of other hand
- Execute perfect flip
- In one confident motion, turn sandwich over
- Flip away from you to avoid splatter
- Lower gently back to pan surface
- Beginner tip: If ingredients shift, use spatula to push back into place
4. Second Side Cooking (3 minutes)
- Continue cooking process
- Second side cooks faster (usually 2-3 minutes)
- Pan is already fully heated
- Check for doneness signs
- Golden-brown color on bread
- Cheese visibly melting at edges
- Slight compression when gently pressed
- Test doneness
- Lift edge to check color
- Press center gently – should feel slightly firm with give
- Perfect doneness: Both sides golden-brown, cheese completely melted
5. Finishing Touches (1 minute)
- Final adjustments
- If bread is perfect but cheese needs more melting, reduce heat and cover pan 30 seconds
- If cheese is melted but bread needs more color, increase heat briefly
- Remove from heat
- Transfer to cutting board using spatula
- Allow to rest 1 minute before cutting
- Why? Resting lets cheese set slightly for cleaner cutting
Serving Phase (5 minutes)
1. Cutting Your Grilled Cheese with Jalapeños and Ham
- Choose proper knife
- Serrated knife works best
- Bread knife is ideal
- Cut technique
- Hold sandwich gently but firmly
- Cut diagonally from corner to corner
- Use sawing motion rather than pressing down
- Cut again for quarter triangles if desired
- Presentation
- Place on warm plates
- Position cut sides up to show layers
- Add small garnish of extra jalapeño slice (optional)
2. Serving Suggestions
- Pair with complementary sides
- Tomato soup for classic pairing
- Pickle spears for extra crunch
- Simple side salad to balance richness
- Temperature recommendations
- Serve immediately while hot
- Cheese should still be stretchy when pulled apart
- Warning: Test temperature before serving to children
Troubleshooting Your Grilled Cheese with Jalapeños and Ham
| Problem | Cause | Solution |
|---|---|---|
| Bread burns before cheese melts | Heat too high | Lower temperature, cover pan briefly with lid |
| Sandwich falls apart when flipped | Too much filling or flipped too early | Use less filling, ensure cheese starts melting before flipping |
| Jalapeños too spicy | Seeds/membrane left in | Remove all seeds and white parts, rinse jalapeños |
| Cheese not melting properly | Cold cheese or cooking too quickly | Bring cheese to room temperature, lower heat, cover pan |
| Soggy bread | Too much butter or pan not hot enough | Use less butter, ensure pan is properly preheated |
| Uneven browning | Uneven butter application | Spread butter to edges, rotate sandwich in pan |
Variations & Substitutions for Grilled Cheese with Jalapeños and Ham
The Breakfast Champion
Transform your Grilled Cheese with Jalapeños and Ham by adding a fried egg and swapping ham for bacon. Cook bacon first, then build sandwich with egg and ham-inspired breakfast creations.
The Triple Cheese Deluxe
Elevate your Grilled Cheese with Jalapeños and Ham by adding provolone as a third cheese. This combination melts beautifully and adds wonderful depth of flavor.
The Mediterranean Twist
Create a new flavor profile by swapping ham for prosciutto in your Grilled Cheese with Jalapeños and Ham, then add fresh basil leaves and use mozzarella instead of Monterey Jack.
Vegetarian Option
Make a meat-free version by skipping the ham and adding extra vegetables like tomato slices, avocado, or sautéed mushrooms to your jalapeño grilled cheese.
Extra-Crispy Version
Give your Grilled Cheese with Jalapeños and Ham an incredible crust by sprinkling grated parmesan on the buttered sides before cooking.
Storage & Reheating Instructions
Proper Storage
- Best enjoyed immediately after cooking
- If needed, wrap each sandwich individually in aluminum foil
- Store in refrigerator up to 2 days
- Label with date if making ahead
Reheating Methods
- Skillet Method (Best):
- Unwrap from foil
- Place in dry skillet over medium-low heat
- Heat 2 minutes per side
- Cover briefly to help cheese remelt
- Oven Method (Good):
- Preheat oven to 350°F
- Keep sandwich wrapped in foil
- Heat for 10 minutes
- Unwrap and heat 2 more minutes for crispiness
- Toaster Oven Method (Good):
- Preheat to 325°F
- Place directly on rack
- Heat 5-7 minutes until warmed through
- Avoid Microwave:
- Makes bread soggy
- Causes cheese to become rubbery
- Drastically changes texture
Safety Notes & Pro Tips for Perfect Grilled Cheese with Jalapeños and Ham
Safety First
- Always handle jalapeños with care – oils can burn skin and eyes
- Wash hands thoroughly after handling peppers
- Keep young children away from hot cooking surfaces
- Test sandwich temperature before serving
- Consider trying smaller versions of these as ham and cheese bites for parties
Pro Tips for Grilled Cheese Mastery
- Cheese Hack: Shredded cheese melts faster than sliced
- Heat Secret: Medium-low heat produces the best results
- Bread Choice: Thicker slices hold up better to multiple fillings
- Butter Technique: Room temperature butter spreads more evenly
- Rest Period: Let sandwich rest 1-2 minutes before cutting
- Flavor Boost: Try adding a thin spread of mustard or mayo
- Texture Play: For extra crunch, try my ham and cheese sticks approach
- Jalapeño Control: More white membrane = more heat
- Family Strategy: Make kids’ versions with fewer or no jalapeños
- Bread Testing: Press bread with finger – when it springs back, it’s perfect
This Grilled Cheese with Jalapeños and Ham recipe transforms a simple sandwich into a memorable meal. The combination of multiple cheeses, premium ham, and fresh jalapeños creates complex flavors that will have everyone requesting this sandwich again and again.