Key Takeaways:
- Quick & elegant – This halibut pasta comes together in just 30 minutes for a restaurant-quality meal
- Perfectly flaky fish – Learn how to cook halibut so it stays tender and doesn’t fall apart in your pasta
- Creamy lemon sauce – A simple white wine and cream sauce that complements the delicate halibut pasta perfectly
- Beginner-friendly – Detailed step-by-step instructions make this impressive halibut pasta dish easy for any home cook
Introduction
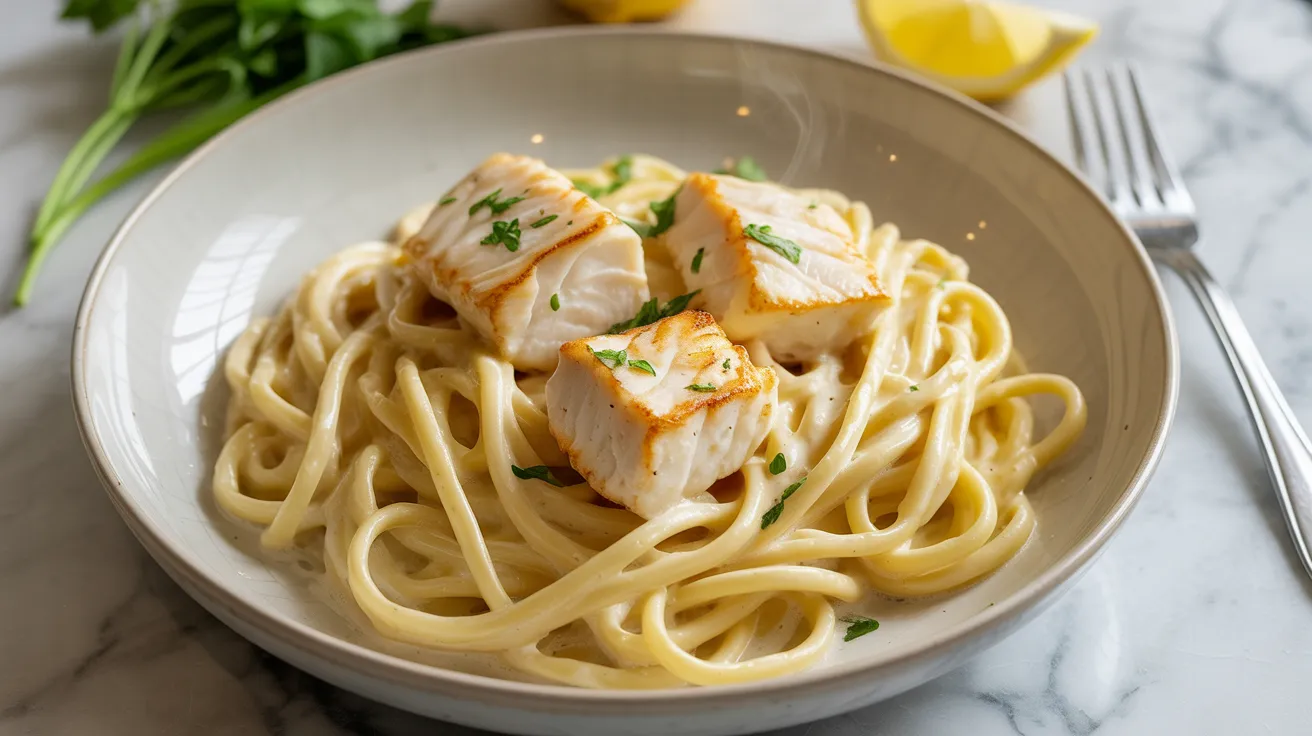
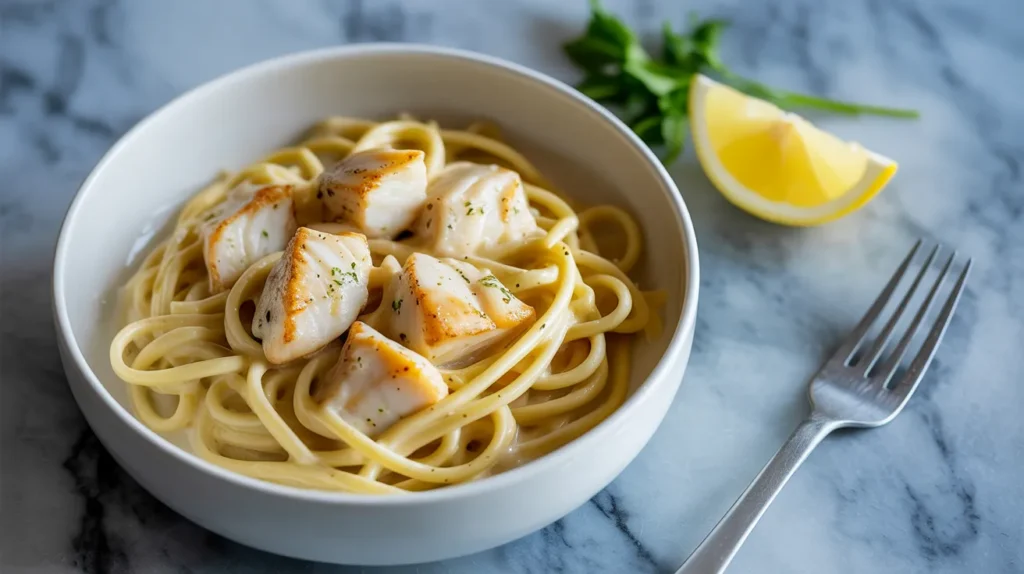
Craving something special but don’t want to spend hours in the kitchen? This halibut pasta recipe solves that problem perfectly.
Halibut pasta can seem intimidating to cook, but it’s actually one of the most forgiving combinations when you know the right technique. The mild, sweet flavor of halibut pairs beautifully with pasta and a light cream sauce. You’ll have an elegant halibut pasta dinner ready in 30 minutes that looks like it came from a fancy restaurant.
This recipe serves four people generously and uses simple ingredients you probably already have on hand. The secret to perfect halibut pasta lies in gentle cooking and not overcomplicating the flavors.
Nutrition Comparison (Per Serving)
| Nutrient | Amount | % Daily Value |
|---|---|---|
| Calories | 485 | 24% |
| Protein | 32g | 64% |
| Carbohydrates | 45g | 15% |
| Fat | 18g | 28% |
| Fiber | 2g | 8% |
| Sodium | 680mg | 30% |
Equipment & Ingredients
Full Ingredients List
| Ingredient | Amount | Notes |
|---|---|---|
| Halibut fillets | 1.5 lbs | Skin removed, cut into 2-inch pieces |
| Linguine pasta | 1 lb | Or fettuccine |
| Heavy cream | 1 cup | Room temperature |
| White wine | 1/2 cup | Dry variety |
| Butter | 4 tablespoons | Divided |
| Olive oil | 2 tablespoons | Extra virgin |
| Garlic cloves | 4 large | Minced |
| Lemon | 1 large | Zested and juiced |
| Fresh parsley | 1/2 cup | Chopped |
| Salt | To taste | Kosher preferred |
| Black pepper | 1/2 teaspoon | Freshly ground |
| Red pepper flakes | 1/4 teaspoon | Optional |
Kitchen Tools Needed
| Tool | Purpose |
|---|---|
| Large pot | Boiling pasta |
| Large skillet | Cooking fish and sauce |
| Colander | Draining pasta |
| Tongs | Handling pasta |
| Fish spatula | Flipping halibut gently |
| Microplane grater | Lemon zest |
| Measuring cups | Accurate portions |
Optional Substitutions
- Fish alternatives: Cod, sea bass, or salmon work well in this pasta dish
- Pasta shapes: Penne, rigatoni, or angel hair
- Dairy-free: Coconut cream instead of heavy cream
- Wine substitute: Extra chicken broth plus 1 tablespoon lemon juice
Detailed Step-by-Step Halibut Pasta Instructions
Preparation Phase (10 minutes)
Step 1: Start Your Pasta Water (5 minutes setup)
Take your largest pot and fill it about 3/4 full with cold water. Add 1 tablespoon of kosher salt to the water. The water should taste like mild seawater – this seasons the pasta from the inside out.
Place the pot on your largest burner and turn the heat to high. Cover with a lid to help it boil faster. This will take 10-15 minutes, so start this first before anything else.
Why this matters for beginners: Starting the water early means everything will be ready at the same time. Cold water actually boils faster than hot water from the tap because it has less dissolved air.
Step 2: Prepare Your Halibut Carefully (3 minutes)
Remove the halibut from the refrigerator and unwrap it completely. Place the fillets on a large cutting board.
Take several paper towels and gently pat each piece of halibut completely dry. Press firmly but gently – you want to remove all surface moisture. Wet fish won’t brown properly and will steam instead of sear.
Using a sharp knife, cut the halibut into 2-inch chunks. Don’t worry about perfect squares – rustic pieces are fine. Run your fingers gently over each piece to check for any small bones and remove them with tweezers or your fingers.
Season both sides of each piece with kosher salt and freshly ground black pepper. Use about 1/4 teaspoon of salt total and a few grinds of pepper.
Let the seasoned halibut sit on the cutting board at room temperature for 5 minutes. This helps it cook more evenly.
Beginner tip: Room temperature fish cooks more evenly than cold fish straight from the fridge. The outside won’t overcook while waiting for the center to warm up.
Step 3: Prepare All Your Aromatics (5 minutes)
Peel 4 large garlic cloves. Using a sharp knife, slice each clove thinly, then rock your knife over the slices to mince them finely. You want tiny pieces that won’t burn.
Wash your lemon under cold water and dry it completely. Using a microplane grater (or the small holes of a box grater), grate just the yellow part of the lemon peel. Avoid the white pith underneath – it’s bitter. You should get about 1 tablespoon of zest.
Cut the lemon in half and squeeze out the juice into a small bowl. Remove any seeds that fall in. You should get about 1/4 cup of juice.
Wash your parsley and shake off excess water. Remove the thick stems and roughly chop the leaves. Don’t worry about perfect pieces – rustic is better for halibut pasta.
Measure your heavy cream and white wine into separate containers. Having everything ready before you start cooking is called “mise en place” – it’s what professional chefs do.
Beginner warning: Once you start cooking the fish, things move quickly. Having everything prepped and measured prevents scrambling and overcooking.
Cooking Phase – The Pasta
Step 4: Cook Your Pasta Perfectly (10-12 minutes)
When your water reaches a rolling boil (big bubbles breaking the surface constantly), remove the lid and add your linguine pasta.
Stir immediately with a long-handled spoon to prevent sticking. The pasta will clump together if you don’t stir right away.
Check your pasta package for cooking time, then set a timer for 2 minutes LESS than what it says. For example, if it says 10 minutes, set your timer for 8 minutes.
Stir the pasta every 2-3 minutes to prevent sticking. The water should maintain a rolling boil throughout cooking.
Why cook it less: The pasta will finish cooking in the cream sauce, so you want it slightly firm (al dente) when you drain it.
Step 5: Reserve Pasta Water (IMPORTANT)
About 1 minute before your timer goes off, use a ladle or measuring cup to scoop out 1 full cup of the starchy pasta cooking water. Set this aside – don’t pour it down the drain.
This starchy water is magic for halibut pasta sauces. It helps bind everything together and adjust consistency.
Step 6: Drain the Pasta
When your timer goes off, immediately drain the pasta in your colander. Don’t rinse it – you want to keep the surface starch.
Give the colander a few shakes to remove excess water, then set it aside. The pasta will continue to soften slightly from residual heat.
Cooking Phase – The Halibut
Step 7: Start Cooking Your Halibut (4 minutes)
While your pasta is cooking, heat your large skillet over medium-high heat for 1 minute. You want it hot but not smoking.
Add 1 tablespoon of olive oil to the hot pan. It should shimmer and move easily around the pan when you swirl it.
Add 1 tablespoon of butter to the oil. The butter will foam and bubble – this is normal. Wait until the foaming subsides (about 30 seconds).
Temperature check: The pan is ready when a drop of water sizzles and evaporates immediately.
Step 8: Sear the Halibut Properly
Gently place each piece of seasoned halibut into the hot pan. You should hear a immediate sizzling sound – if you don’t, the pan isn’t hot enough.
Space the pieces apart so they’re not touching. Don’t overcrowd the pan – work in batches if necessary.
CRUCIAL: Do not move, flip, or touch the halibut for 3-4 minutes. Let it sear undisturbed. This creates the golden crust that adds flavor to your halibut pasta.
Beginner mistake to avoid: Moving the fish too early will tear the flesh and prevent proper browning.
Step 9: Flip the Halibut Once
After 3-4 minutes, gently slide your fish spatula under one piece of halibut. It should release easily from the pan and have a golden-brown crust.
If it sticks, wait another 30 seconds and try again. Properly seared fish releases naturally.
Flip each piece carefully, placing it back in the same spot in the pan. Cook for another 2-3 minutes until the second side is golden brown.
Doneness check: The halibut should flake easily when gently pressed with your spatula, and the internal temperature should reach 145°F if you have a thermometer.
Step 10: Rest the Cooked Halibut
Transfer all the cooked halibut pieces to a clean plate. Cover loosely with aluminum foil to keep warm.
Don’t clean your pan – those brown bits stuck to the bottom are pure flavor for your halibut pasta sauce.
Creating the Perfect Halibut Pasta Sauce
Step 11: Build Your Flavor Base (2 minutes)
Reduce the heat under your skillet to medium. The pan should still be hot but not screaming.
Add the remaining 1 tablespoon of olive oil to the same pan with all those flavorful brown bits.
Add 2 tablespoons of butter. It will melt quickly in the hot pan.
Add your minced garlic to the butter and oil. Stir constantly with a wooden spoon for 30 seconds until fragrant. Don’t let it brown or it will taste bitter.
Beginner tip: Garlic goes from perfect to burnt very quickly. Keep stirring and watch carefully.
Step 12: Deglaze with Wine
Pour the white wine into the pan all at once. It will bubble and steam vigorously – this is normal.
Using your wooden spoon, scrape up all the brown bits from the bottom of the pan. These dissolved bits add incredible flavor to your halibut pasta sauce.
Let the wine simmer for 2 minutes. You’ll see it reduce and smell the alcohol cooking off. The liquid should reduce by about half.
Alcohol note: The alcohol cooks off during this step, leaving only the wine’s flavor behind.
Step 13: Create the Cream Base
Lower your heat to medium-low. This is important – high heat will break the cream sauce.
Slowly pour the room-temperature heavy cream into the pan while stirring constantly with your wooden spoon. Pour in a thin stream, not all at once.
Add the lemon zest and half of the lemon juice (about 2 tablespoons). Stir gently to combine.
Season with 1/2 teaspoon of salt, 1/4 teaspoon of black pepper, and red pepper flakes if using.
Step 14: Thicken the Sauce Gently
Let the cream sauce simmer very gently for 2-3 minutes. You should see tiny bubbles around the edges, not a rolling boil.
The sauce will thicken slightly and coat the back of your spoon. If you draw your finger across the spoon, it should leave a clear line.
Beginner warning: Don’t let the cream boil hard or it may break and look curdled.
Bringing Your Halibut Pasta Together
Step 15: Combine Pasta with Sauce
Add your drained linguine directly to the skillet with the cream sauce. Don’t worry about perfect draining – a little pasta water is actually helpful.
Using tongs, gently lift and turn the pasta to coat every strand with the creamy sauce. This should take about 1 minute of gentle tossing.
If the sauce seems too thick, add the reserved pasta water 1 tablespoon at a time until you reach the right consistency. The sauce should coat the pasta but not be gluey.
Perfect consistency: The halibut pasta should look glossy and creamy, not dry or swimming in sauce.
Step 16: Add the Halibut Back Gently
Remove the foil from your rested halibut. You’ll notice some juices have collected on the plate – pour these into the pasta too for extra flavor.
Gently nestle each piece of halibut into the halibut pasta. Don’t stir vigorously or the delicate fish will break apart into tiny pieces.
Use a spoon to carefully fold the halibut into the pasta, turning the pan gently rather than stirring hard.
Step 17: Final Seasoning and Serving
Add the remaining lemon juice (about 2 tablespoons) and half of the chopped parsley.
Taste the halibut pasta carefully and adjust seasoning. You might need more salt, pepper, or lemon juice depending on your preferences.
Add the final tablespoon of butter for extra richness and glossy finish. Let it melt and stir gently one last time.
Step 18: Serve Immediately
Remove the pan from heat. Using tongs and a large spoon, divide the halibut pasta among four warmed bowls.
Make sure each serving gets an equal amount of halibut pieces. Top each bowl with the remaining fresh parsley.
Serve immediately while hot. Halibut pasta is best enjoyed right away before the fish overcooks from residual heat.
Total Time: 30 minutes (10 min prep + 20 min cooking) Prep Time: 10 minutes Cook Time: 20 minutes Serving Size: 4 generous portions
Troubleshooting Your Halibut Pasta
Fish is overcooked and dry: Next time, check for doneness at 3 minutes per side. Halibut cooks fast and continues cooking from residual heat even after removing from pan.
Halibut pasta sauce is too thin: Add reserved pasta water gradually and let it reduce for an extra minute. The starch will help thicken it naturally.
Cream sauce breaks or looks curdled: Remove from heat immediately and whisk in cold butter one piece at a time to bring it back together. Lower heat next time.
Fish falls apart in the pasta: Use a fish spatula for flipping and fold gently in the final step. Don’t stir vigorously when combining.
Pasta is mushy: Cook it 2 minutes less than package directions since it finishes cooking in the sauce.
Sauce is too salty: Add more cream or a splash of pasta water to dilute. Balance with extra lemon juice.
Variations & Substitutions for Halibut Pasta
Flavor Variations
- Mediterranean halibut pasta: Add sun-dried tomatoes, olives, and capers to the sauce
- Herb-crusted version: Mix breadcrumbs with herbs and press onto halibut before cooking
- Spicy halibut pasta: Double the red pepper flakes and add a pinch of cayenne
- Extra lemony: Add preserved lemon pieces for intense citrus flavor
Dietary Modifications
- Gluten-free halibut pasta: Use rice pasta or zucchini noodles
- Dairy-free: Substitute coconut cream and vegan butter
- Low-carb halibut pasta: Serve over zucchini noodles or spaghetti squash
- Lighter version: Use half-and-half instead of heavy cream
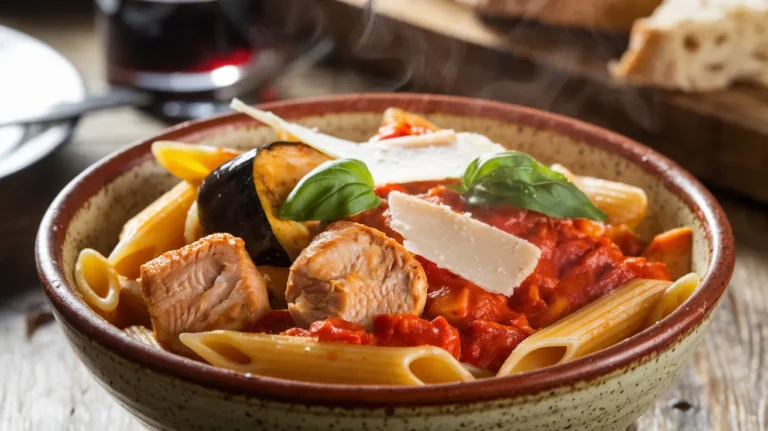
If you enjoy pasta with protein, you might also love this Hatch Chile Chicken Pasta which has a similar creamy sauce with a southwestern twist.
Storage & Reheating Your Halibut Pasta
Refrigerator Storage
Store leftover halibut pasta in the refrigerator for up to 2 days maximum. The fish will continue to cook slightly during storage, so don’t expect the same texture as fresh.
Reheating Instructions
- Stovetop method: Heat gently in a skillet with a splash of cream or pasta water over low heat for 3-4 minutes
- Microwave: Use 50% power in 30-second intervals, stirring gently between each interval
- Oven: Cover with foil and reheat at 300°F for 10-15 minutes
Note: Halibut pasta reheats better than most fish dishes, but the texture won’t be identical to fresh.
Safety Notes & Tips for Perfect Halibut Pasta
Fish Safety
- Buy fresh: Halibut should smell like the ocean, not “fishy” for the best halibut pasta
- Temperature check: Internal temperature should reach 145°F
- Storage: Use halibut within 1-2 days of purchase for optimal halibut pasta
- Thawing: If frozen, thaw in the refrigerator overnight
Cooking Tips for Better Halibut Pasta
- Room temperature fish cooks more evenly than cold fish straight from the fridge
- Don’t overcrowd the pan when searing – work in batches if needed for perfect halibut pasta
- Save pasta water – it’s liquid gold for adjusting sauce consistency
- Taste as you go – seasoning is everything in simple dishes like halibut pasta
Wine Pairing Suggestions
This delicate halibut pasta pairs beautifully with crisp white wines like Sauvignon Blanc, Pinot Grigio, or Chardonnay. The cream sauce can handle a wine with a bit more body.
For those who enjoy international pasta dishes, this Haitian Spaghetti offers a completely different flavor profile that’s equally satisfying.
This halibut pasta recipe proves that elegant doesn’t have to mean complicated. With just a few quality ingredients and proper technique, you’ll create a restaurant-worthy halibut pasta meal that’s perfect for date nights or when you want to impress guests without the stress.
The key to perfect halibut pasta is treating the fish gently and not overthinking the sauce. Sometimes the simplest preparations let the best ingredients shine brightest in your halibut pasta creation.